
Related Manuals for Royal Enfield 500 TWIN 1949


Summary of Contents for Royal Enfield 500 TWIN 1949
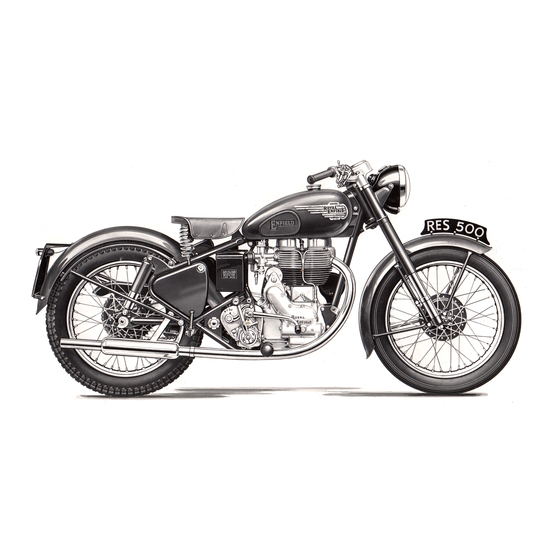
- Page 1 ROYAL ENFIELD WORKSHOP MANUAL WORKSHOP MAINTENANCE MANUAL FOR THE Royal Enfield 500 TWIN 1949—57 700 METEOR 1953—55 MAN 9...
-
Page 2: Table Of Contents
ROYAL ENFIELD WORKSHOP MANUAL Contents 1949-57 500 Twin and 1953-1955 700 Meteor SECTION A1a 700 METEOR TECHNICAL DATA SECTION A1b 500 TWIN TECHNICAL DATA SECTION B1 ENGINE SPECIFICATION SECTION C1 SERVICE OPERATIONS WITH ENGINE IN FRAME SECTION D1 SERVICE OPERATIONS WITH ENGINE REMOVED... - Page 3 ROYAL ENFIELD WORKSHOP MANUAL 500 TWIN 1951 500 TWIN 1956...
- Page 4 ROYAL ENFIELD WORKSHOP MANUAL SECTION Ala Technical Data "Meteor 700 " Engine Cubic Capacity ......692 c.c. Valve Spring Free Length Stroke ..........90 m.m. Inner ........2.1/32 in.
- Page 5 ROYAL ENFIELD WORKSHOP MANUAL 700 METEOR 1953 700 METEOR 1954...
- Page 6 ROYAL ENFIELD WORKSHOP MANUAL SECTION Alb Technical Data "500 Twin " Engine Cubic Capacity ......496 c.c. Valve Spring Free Length Stroke ..........77 m.m. Inner ........2.1/32 in.
- Page 7 ROYAL ENFIELD WORKSHOP MANUAL...
-
Page 8: Section B1
ROYAL ENFIELD WORKSHOP MANUAL SECTION B1 Engine Specification "Meteor 700" and " 500 Twin" 1. Engine the little end can be bored out and fitted with a The engine is an even-firing vertical twin bush, but this is rarely necessary. - Page 9 ROYAL ENFIELD WORKSHOP MANUAL common, endless chain from the timing sprocket 13. Ignition and Lighting System on the crankshaft and the tightness of the chain Lighting and ignition are supplied from a can be adjusted by means of the chain tensioner Lucas magdyno, which consists of a magneto in the timing chest.
- Page 10 ROYAL ENFIELD WORKSHOP MANUAL On earlier engines the ignition is provided by Both pumps are double acting, one side of the a coil energised from the battery and a feed pump supplying the big ends only and the distributor mounted above the dynamo. The other side the rockers and valve gear.
- Page 11 ROYAL ENFIELD WORKSHOP MANUAL The ports in the housing are connected as follows W - delivery to rocker gear. Y - suction from oil tank. X - delivery to big ends. Z - suction from oil tank. Position 1. The plunger A is being drawn out of Position 2.
-
Page 12: Section C1
ROYAL ENFIELD WORKSHOP MANUAL SECTION C1 Service Operations with Engine in Frame " Meteor 700" and " 500 Twin" 1. Removal of Timing Cover to the adjusting screws is obtained by removing First place a tray under the engine to catch the covers of the rocker boxes. - Page 13 ROYAL ENFIELD WORKSHOP MANUAL The 500 c.c. engine has a shorter stroke and breaker points and turning the distributor the timing should therefore be set at 5/16 - 3/8 housing until the paper can just be drawn out. in. before top dead centre.
- Page 14 ROYAL ENFIELD WORKSHOP MANUAL pressing it up and down with the fingers. Adjust the tension so that there is 1/4 in. up and down movement at the tightest spot. Re-tighten the locknut on the adjusting screw, replace the chain cover and replenish with oil.
- Page 15 ROYAL ENFIELD WORKSHOP MANUAL In replacing the head, see that the push rods are the right way up (shallow cups upwards). If steel push rods are fitted, the wide cup should be upwards. Apply a thin coat of jointing compound to both sides of the gasket and place it in position.
- Page 16 ROYAL ENFIELD WORKSHOP MANUAL Remove the oil pipe connection and plug This insert should not normally require from the cylinder head and the rocker spindle renewal but if it does become damaged, for can then generally be withdrawn by means of a instance by a faulty plug, it can be pulled out piece of rod inserted in the central hole.
- Page 17 ROYAL ENFIELD WORKSHOP MANUAL This should be done with the pistons at bottom While the cylinders and pistons are not in dead centre. position on the engine, cover the crankcase with When replacing the cylinder, clean off the a clean cloth to prevent the ingress of dust and joint faces and fit new paper joints, two to each dirt of all kinds.
- Page 18 ROYAL ENFIELD WORKSHOP MANUAL 20. Cleaning the Oil Filters rockers can be observed by removing the rocker The oil filter is in the return oil circuit and is box covers, when oil will be seen flowing down located in the oil tank at the back of the the push rods.
- Page 19 ROYAL ENFIELD WORKSHOP MANUAL When re-assembling the breather, apply remove the sprocket, undo the nut and use a jointing compound sparingly to the back of the Magdyno sprocket extractor-Special Tool No. steel plate taking great care to keep it away 14835.
- Page 20 ROYAL ENFIELD WORKSHOP MANUAL to damage but, if they should become damaged, is prevented from moving by peening over the the same wire insert that is used in the crankcase aluminium into the screwdriver slot with a small can be fitted by cutting a thread with a special centre punch.
- Page 21 ROYAL ENFIELD WORKSHOP MANUAL 500 TWIN 1957 500 TWIN 1950...
-
Page 22: Section D1
ROYAL ENFIELD WORKSHOP MANUAL SECTION D1 Service Operations with Engine Removed " Meteor 700" and "500 Twin" 1. Removal of Engine from Frame Remove the footrest bar. Remove the bottom rear engine bolt. Support the engine on a suitable box or wood Disconnect the battery leads and remove the block. - Page 23 ROYAL ENFIELD WORKSHOP MANUAL White-metalled steel liners are fitted in the (The other studs have already been removed to connecting rods and these are replaceable. take the engine out of the frame.) The two halves of the crankcase can now be separated.
- Page 24 ROYAL ENFIELD WORKSHOP MANUAL temporarily and tightening the nut whilst the If it is necessary to re-fit the nut, assemble crankcase is still hot. the timing sprocket with the pump worm and nut in the crankshaft while out of the crankcase and tighten it up.
- Page 25 ROYAL ENFIELD WORKSHOP MANUAL...
-
Page 26: Section E1
ROYAL ENFIELD WORKSHOP MANUAL SECTION E1 Gearbox and Clutch " Meteor 700" " 500 Twin " " 500 Bullet" " 350 Bullet " 1. Removal of Gearbox This is described in section Cl or D1. The gearbox can, however, be completly dismantled with the engine in the frame except for removal of the inside operator and the bearings in the gearbox shell. - Page 27 ROYAL ENFIELD WORKSHOP MANUAL Section E1 Page 2...
- Page 28 ROYAL ENFIELD WORKSHOP MANUAL (See Section C1 or D1.) The top gear pinion If the main shaft top gear pinion and dog and dog will come away with the mainshaft. have been removed, make sure that the dog is The layshaft can then be removed and the...
- Page 29 ROYAL ENFIELD WORKSHOP MANUAL and turn the central screw. Tighten the locknut after adjustment has been made. The reason for the two points of adjustment is to enable the lever behind the cover to be kept in its proper position whether the need for adjustment is caused by plate wear or cable stretch.
-
Page 30: Section F1
ROYAL ENFIELD WORKSHOP MANUAL AMAL NEEDLE TYPE CARBURETTER CARB CHOKE MAIN NEEDLE THROTTLE N E E D LE MODEL YEAR NUMBER DIAMETER VALVE P O S IT IO N 500 TWIN 1948-55 276DJ/1AT 15/16 500 TWIN 1955-56 276GQ/1AT 15/16 500 TWIN... - Page 31 ROYAL ENFIELD WORKSHOP MANUAL Section F1 Page 2...
- Page 32 ROYAL ENFIELD WORKSHOP MANUAL Section F1 Page 3...
- Page 33 ROYAL ENFIELD WORKSHOP MANUAL Section F1 Page 4...
-
Page 34: Section F4
ROYAL ENFIELD WORKSHOP MANUAL AMAL MONOBLOC CARBURETTER Amal Monobloc Carburetter The supply of air to the engine is controlled by a 1. General Description throttle slide which carries a taper needle operating The Amal Monobloc Carburetter has been in the needle jet. The needle is secured to the... - Page 35 ROYAL ENFIELD WORKSHOP MANUAL then undesirably fast it can be slowed down by any point will have some effect on the setting unscrewing the throttle stop a fraction of a turn. required at other points; for instance, a change of...
- Page 36 ROYAL ENFIELD WORKSHOP MANUAL Section F4 Page 3...
- Page 37 ROYAL ENFIELD WORKSHOP MANUAL dirt is present or, of course, the float is punctured. also controls the fuel supply via a connecting pipe to the right-hand instrument which does not have If it is necessary to remove the jet block note a float chamber in unit with it.
-
Page 38: Section G1A
ROYAL ENFIELD WORKSHOP MANUAL SECTION G1a Lucas Coil Ignition Equipment Used on "Meteor 700 " and " 500 Twin" up to end of 1954 1. General The coil assembly is mounted on a porcelain The coil ignition equipment comprises an... - Page 39 ROYAL ENFIELD WORKSHOP MANUAL sintered iron which will absorb sufficient oil defects in the engine, carburetter, petrol supply, from the oil feed to the helical driving pinion. sparking plug(s), etc. If necessary adjust the Automatic timing control. Unscrew the two sparking plug gaps to .018 - .020 in.
- Page 40 ROYAL ENFIELD WORKSHOP MANUAL Withdraw the driving dogs on the shaft carrying the cam and automatic timing control and lift these off the shaft. The automatic timing control should not be dismantled unnecessarily. If it is desired to dismantle the mechanism, carefully note the position of the various components in order that they may be refitted correctly.
- Page 41 ROYAL ENFIELD WORKSHOP MANUAL Section G1a Page 4...
-
Page 42: Section G1B
ROYAL ENFIELD WORKSHOP MANUAL SECTION G1b Lucas Magdyno Model MN2L for Twin Cylinder Engines used on " 500 Twin " and "Meteor 700 " 1955 Models 1. General Wipe the outside of the Magdyno to remove The magdyno is a base-fixed magneto and... - Page 43 ROYAL ENFIELD WORKSHOP MANUAL the cam lobe; turn the engine until this is so. The Bend back the strands radially and screw the key on the projecting part of the contact breaker nut into the pick-up moulding. base must engage with the keyway in the armature shaft.
- Page 44 ROYAL ENFIELD WORKSHOP MANUAL 2 (f). Contact Breaker Spring This type of fault is not easily detected by The correct contact breaker spring pressure, inspection and a check should be made by measured at the contacts, is 18-24 oz. substitution.
- Page 45 ROYAL ENFIELD WORKSHOP MANUAL Section G1b Page 4...
-
Page 46: Section G2A
ROYAL ENFIELD WORKSHOP MANUAL SECTION G2a Lucas Dynamo Model C35SD Used on " 500 Twin," "Meteor 700 " up to end of 1954 1. General later dynamos. In earlier dynamos a thrust spring was fitted between the commutator and the inner... - Page 47 ROYAL ENFIELD WORKSHOP MANUAL 2 (b). Inspection of Commutator and positions. If the brushes are worn so that they do Brushgear not bear on the commutator or if the brush About once every six months remove the flexible is exposed on the running face, new cover band for inspection of commutator and brushes must be fitted.
- Page 48 ROYAL ENFIELD WORKSHOP MANUAL terminal "D" to dynamo terminal "D" and regulator terminal "F" to dynamo terminal "F" and check the regulator. 4 (b). To Dismantle Remove the dynamo and distributor from the motor cycle. To detach the distributor from the...
- Page 49 ROYAL ENFIELD WORKSHOP MANUAL (ii) Draw the pole shoe and field coil out of the yoke and lift off the coil. (iii) Fit the new field coil over the pole shoe and place it in position inside the yoke. Take care to ensure that the taping of the field coil is not trapped between the pole shoe and the yoke.
- Page 50 (ii) The second field coil lead must be decreased service life of the machine. connected to terminal "F" on the moulded cap. All Royal Enfield "500 Twin" and "Meteor (iii) The unearthed brush flexible lead must 700" motor cycles should have the positive be connected direct to terminal "D"...
- Page 51 ROYAL ENFIELD WORKSHOP MANUAL...
-
Page 52: Section G2B
ROYAL ENFIELD WORKSHOP MANUAL SECTION G2b Lucas Dynamo Model E3LM Used on all Models fitted with Magdyno 1. General 3. Test Data The dynamo is a shunt-wound two-pole machine, arranged to work in conjunction with a Cutting-in speed (Dynamo Cold) 1,050 –... - Page 53 ROYAL ENFIELD WORKSHOP MANUAL (iii) Start the engine and set to run at normal idling speed. (iv) Connect the negative lead of a moving coil voltmeter, calibrated 0-10 volts, to one of the dynamo terminals and connect the positive lead to a good earthing point on the dynamo yoke or engine.
- Page 54 ROYAL ENFIELD WORKSHOP MANUAL To remedy a badly worn commutator, mount the at the commutator end while unscrewing the armature with or without the drive end bracket bolts and take care not to lose the nuts. in a lathe, rotate at high speed and take a light (v) Draw the drive end bracket complete with cut with a very sharp tool.
- Page 55 With a few exceptions, i.e. Miller coil screw provided. ignition sets and rectifier sets on two-stroke (ii) The second field coil lead must be machines, all Royal Enfield machines in current production have the positive terminal earthed. Section G2b Page 4...
-
Page 56: Section G3A
ROYAL ENFIELD WORKSHOP MANUAL SECTION G3a Control Box Used on Models G, J2, "350 Bullet," "500 Bullet," "500 Twin," "Meteor 700," 1950 onwards MODEL RB107 1. General In Model RB107 control box, the regulator and cut-out contacts are positioned, for ease of access, above their respective armatures. - Page 57 ROYAL ENFIELD WORKSHOP MANUAL With the ignition switch in the "OFF" position, heating of the shunt winding will cause false settings start the engine. to be made. Slowly increase the speed of the engine until the Stop the engine. voltmeter needle "flicks" and then steadies. Note this Remake the original connections and replace the value and stop the engine.
-
Page 58: Section G4A
ROYAL ENFIELD WORKSHOP MANUAL Battery Model PUZ7E 1. General The model PUZ7E (see Fig. 1) is a "drycharged" battery and is supplied without electrolyte but with its plates in a charged condition. When the battery is required for service it is only necessary to fill each cell with sulphuric acid of the correct specific gravity. - Page 59 ROYAL ENFIELD WORKSHOP MANUAL The following table shows the state of charge at different values of specific gravities If the battery is discharged, it must be recharged, either on the motor cycle by a period of daytime running or from an external D.C.
-
Page 60: Section G5A
ROYAL ENFIELD WORKSHOP MANUAL SECTION G5a Head and Tail Lamps Used on Models G, J2, " 350 Bullet," " 500 Bullet," " 500 Twin," "Meteor 700," 1950 onwards 1. Headlamp 2. Lucas Light Unit In all the above Models the headlamp incorporates The unit incorporates a combined reflector and the Lucas Light Unit MCF700. - Page 61 ROYAL ENFIELD WORKSHOP MANUAL 3. Replacing the Light Unit and Bulb Slacken the securing screw at the top of the headlamp rim. Remove the front rim and Light Unit assembly. Withdraw the adaptor from the Light Unit by twisting it in an anti-clockwise direction and pulling it off.
- Page 62 ROYAL ENFIELD WORKSHOP MANUAL Recent machines use lamps with red plastic covers, either Type 529 (Fig. 7), which is a tail lamp only; 525 (Fig. 8), which is a combined stop and tail lamp; or 564 (Fig. 9), which is a combined stop and tail lamp and reflector.
- Page 63 ROYAL ENFIELD WORKSHOP MANUAL...
-
Page 64: Section H1
ROYAL ENFIELD WORKSHOP MANUAL SECTION H1 FRAME EXPLODED VIEW OF LATE 1954-1956 500 TWIN AND 1954-1955 700 METEOR FRAME Section H1 Page 1... - Page 65 The rubber bushes in the top and bottom eyes can easily be renewed and the spring can be (b) Royal Enfield Units. Mark 1. Enfield removed by pushing down on the top spring rear suspension units, Part Number 34276 or cover so as to release the split collar above it.
- Page 66 B.P. Energol S.A.E. 20. Wait till the oil has ceased running, then replace the oil filler and level plugs. (c) Royal Enfield Units. Mark II. Enfield rear suspension units, Part No. 38109, are shown in Fig. 4. This type provides positive damping on the rebound stroke and in consequence does not need the spring to be anchored on scrolls.
- Page 67 ROYAL ENFIELD WORKSHOP MANUAL On the rebound stroke the disc valve in the top bearing tube and plunger head from the plunger head closes under pressure in the bottom bearing tube, bottom casting and outer damper chamber, so that the oil is forced past the tube assembly.
- Page 68 ROYAL ENFIELD WORKSHOP MANUAL latter and withdraw the stand complete with its towards the top of the wheels, it will be bearing sleeve after disconnecting one end of the possible to ascertain whether or not the frame is stand spring. Note that the position of the stand...
- Page 69 ROYAL ENFIELD WORKSHOP MANUAL...
-
Page 70: Section J1
ROYAL ENFIELD WORKSHOP MANUAL SECTION J1 Front Fork With Casquette and Aluminium Alloy Bottom Tubes 1. Description The telescopic fork consists of two legs each of which comprises main tube chrome molybdenum alloy steel tubing which is screwed into the Casquette fork head at the upper end and securely clamped to the fork crown. - Page 71 ROYAL ENFIELD WORKSHOP MANUAL Upward movement of the wheel spindle forces oil Dismantling the Fork to Replace Spring, Oil from the lower chamber "A" through the annular Seal or Bearing Bushes space between the spring stud (38067) and the bore of...
- Page 72 ROYAL ENFIELD WORKSHOP MANUAL removal of the main tube bush the bottom tube up sharply against the spring until two or three bush, oil seal housing and oil seal can be threads on the stud project beneath the end of removed.In case of difficulty in removing the main...
- Page 73 ROYAL ENFIELD WORKSHOP MANUAL The leads to the lighting switch and ammeter medium. All that is necessary is to keep sufficient should be disconnected from the battery, oil in the fork to ensure that the top end of the regulator, tail lamp, etc. at their lower ends or by...
-
Page 74: Section J3
ROYAL ENFIELD WORKSHOP MANUAL SECTION J3 Front Fork With Facia Panel and Aluminium Alloy Bottom Tubes Used on " 500 Bullet," 1953 ; "Meteor 700," 1953 1. Description The telescopic fork consists of two legs each of which comprises main... - Page 75 ROYAL ENFIELD WORKSHOP MANUAL The fork is filled with a light oil (S.A.E. 20) to a (E4912). The bottom tube can now be withdrawn point above the lower end of the spring so that the completely from the main tube, leaving the bottom damper chamber "B"...
- Page 76 ROYAL ENFIELD WORKSHOP MANUAL nuts on the fork crown clamp stud, must be loosened 5. Steering Head Races and the sleeves separated (see paragraph 7) thus The steering head bearing consists of two deep permitting the main tubes to slide through the fork groove thrust races each containing nineteen 1/4 in.
- Page 77 ROYAL ENFIELD WORKSHOP MANUAL After removal of the fork head the lamp bracket tubes can be lifted straight off and the springs can be withdrawn from the upper end of the main tubes. 7. Removal of Main Tubes To remove the main tubes first dismantle...
-
Page 78: Section J4
ROYAL ENFIELD WORKSHOP MANUAL SECTION J4 Front Fork With Facia Panel and Steel Bottom Tubes Used on "350 Model G," "500 Model J2," 1951 onward: " 350 Bullet," " 500 Twin," 1950-53 inclusive 1. Description 2. Dismantling Fork to Replace Spring,... - Page 79 ROYAL ENFIELD WORKSHOP MANUAL Section J4 Page 2...
- Page 80 ROYAL ENFIELD WORKSHOP MANUAL tightening the steering stem locknut after After removal of the fork head the lamp loosening the nuts on the three pinch bolts bracket tubes can be lifted straight off and the which secure the fork head to the steering stem springs can be withdrawn from the upper end of and to the two main tubes.
- Page 81 ROYAL ENFIELD WORKSHOP MANUAL...
-
Page 82: Section K1
ROYAL ENFIELD WORKSHOP MANUAL SECTION Kl Front Wheel With Dual 6 in. Brake Fitted to " Meteor 700," 1953 onwards; "500 Twin," "500 Bullet," "350 Bullet," 1955 onwards 2. Removal of Brake Cover Plate 1. Removal from Fork To remove the front wheel from the fork... - Page 83 ROYAL ENFIELD WORKSHOP MANUAL posts in the brake shoes thus allowing the whole having already removed the brake cover plate assembly to fall apart. assemblies, lift out the felt washers, Part No. 4. Replacing Brake Linings 21466, and distance pieces, Part No. 30538.
- Page 84 ROYAL ENFIELD WORKSHOP MANUAL by locknuts, 7916, which are centre punched as bearing is first fitted to one end of the spindle by an additional precaution. means of the hollow drift; the spindle and The leading shoes (i.e. those towards the rear...
- Page 85 ROYAL ENFIELD WORKSHOP MANUAL 13. Spokes the tyre is fitting evenly all the way round The spokes are of the single butted type the rim. A line moulded on the wall of the 8-10 gauge with 90° countersunk heads, tyre indicates whether or not the tyre is angle of bend 95°-100°, length 6.5/8 in.,...
-
Page 86: Section K2
ROYAL ENFIELD WORKSHOP MANUAL SECTION K2 Front Wheel With Single 6 in. Brake Fitted to 250 Clipper, Model S, G, J and J2. Also 350 + 500 Bullet, and 500 Twin up to the end of 1954 1. Removal from Fork... - Page 87 ROYAL ENFIELD WORKSHOP MANUAL 7. Fitting Limits for Bearings The fit of the bearings in the hub barrel is important. The bearings are locked on the spindle between shoulders and the distance pieces, 30538, which in turn are held up by the nuts on the spindle.
- Page 88 ROYAL ENFIELD WORKSHOP MANUAL cam and the two shoes and so making full nuts on the spindle. Tightening the nuts use of the more efficient leading shoe. should not have any effect on the ease with Owing to the servo action the wear on the which the spindle can be turned.
- Page 89 ROYAL ENFIELD WORKSHOP MANUAL With the Palmer rim the spokes from the large taken that they are built the right way round into the flange on the brake drum side go to the more steeply wheel. angled holes in the rim which must be on the left of the centre line when the brake drum is on the left, i.e.
- Page 90 ROYAL ENFIELD WORKSHOP MANUAL 16. Tyre Pressures grease on assembly (which is apt to lead to trouble The load which the tyre will carry at different through grease finding its way past the felt seals on to inflation pressures is shown below :...
- Page 91 ROYAL ENFIELD WORKSHOP MANUAL...
-
Page 92: Section L1
ROYAL ENFIELD WORKSHOP MANUAL SECTION L1 Rear Wheel (Detachable Type) manipulating the tyre. If, however, these are too tight 1. Description a fit in the hub to come out easily they may be left in This wheel is of the "detachable" type which place. - Page 93 ROYAL ENFIELD WORKSHOP MANUAL Removal and Replacement of Complete same position.* Disconnect Wheel for Access to Brake speedometer driving cable and slide the wheel Place the machine on the centre stand and out of the fork ends, tilting it so as to disengage...
- Page 94 ROYAL ENFIELD WORKSHOP MANUAL connecting link in the driving chain make sure that the closed end of the spring link points in the direction of travel of the chain. Replace the chain adjuster cams in their original positions or, if...
- Page 95 ROYAL ENFIELD WORKSHOP MANUAL 8. Removal of Ball Bearings To remove the ball bearings take the complete wheel out of the machine and separate the main portion of the wheel from the sprocket/brake drum cush drive shell assembly as described above. To remove the bearing from...
- Page 96 ROYAL ENFIELD WORKSHOP MANUAL reassembly into the machine. 12. Reassembly of Brake Shoes, Pivot Pin and Operating Cam into Cover Plate 15. Wheel Rim No difficulty should be experienced in The wheel rim is type WM2-19 in. plunged carrying out these operations. Make sure that the and pierced with forty holes for spoke nipples.
- Page 97 ROYAL ENFIELD WORKSHOP MANUAL exceeding 280 lb, 18 lb per square inch for way to grease the bearings is by packing loads up to 320 lb., 20 lb. per square inch for them with grease after dismantling the hub loads up to 350 lb., 24 lb. per square inch for as described above.
-
Page 98: Section L2
ROYAL ENFIELD WORKSHOP MANUAL SECTION L2 Rear Wheel (Non-Detachable Type) Part No. 36788 for " 500 Twin" and " 350 Bullet"; Part No. 37278 for "Meteor 700" and " 500 Bullet." 1. Description to lift the wheel clear of the ground. Remove the dual... - Page 99 ROYAL ENFIELD WORKSHOP MANUAL the wheel out of the fork ends, tilting it so as to already removed the brake cover plate assembly and disengage the end of the brake shoe pivot pin from speedometer drive gearbox, lift out the felt washers the slot in the fork end.
- Page 100 ROYAL ENFIELD WORKSHOP MANUAL entered into one end of the hub barrel which is then 9. Removal of Brake Operating Cam and Brake supported on one of the hollow drifts. The other Shoe Pivot Pin bearing is then threaded over the upper end of the...
- Page 101 ROYAL ENFIELD WORKSHOP MANUAL When reassembling the cush drive the Recommended greases are Castrolease entry of the vanes between the rubbers will (Heavy), Mobilgrease (No. 4), Esso Grease, be facilitated if the latter are fitted into the Energrease C3 or Shell Retinax A. These driving shell first and then tilted.
- Page 102 ROYAL ENFIELD WORKSHOP MANUAL between the fork ends. The rim should be trued If the correct method of fitting and removal as accurately as possible, the maximum of the tyre is adopted it will be found that the permissible run-out both sideways and radially covers can be manipulated quite easily with the being plus or minus 1/32 in.
- Page 103 ROYAL ENFIELD WORKSHOP MANUAL through grease finding its way past the felt being fitted with a grease nipple. This is seals on to the brake linings) this greasing done to prevent excessive greasing by point is of little value and the best way to over-enthusiastic owners.
-
Page 104: Section M1
ROYAL ENFIELD WORKSHOP MANUAL Section M1 Special Tools For 500 Twin and 700 Meteor Section M1 Page 1... - Page 105 ROYAL ENFIELD WORKSHOP MANUAL Section M1 Page 2...
- Page 106 ROYAL ENFIELD WORKSHOP MANUAL Section M1 Page 3...
- Page 107 ROYAL ENFIELD WORKSHOP MANUAL Section M1 Page 4...
- Page 108 ROYAL ENFIELD WORKSHOP MANUAL NOTES...
- Page 109 ROYAL ENFIELD WORKSHOP MANUAL NOTES...
- Page 110 ROYAL ENFIELD WORKSHOP MANUAL SPARES for ROYAL ENFIELD & AMAL HITCHCOCK’S MOTORCYCLES ROSEMARY COURT OLDWICH LANE WEST CHADWICK END SOLIHULL B93 0EY ENGLAND TELEPHONE: 01564 783 192 E-MAIL: info@hitchcocksmotorcycles.com WEB: hitchcocksmotorcycles.com...
Need help?
Do you have a question about the 500 TWIN 1949 and is the answer not in the manual?
Questions and answers