patura P4500 User Manual
Hide thumbs
Also See for P4500:
- User manual (72 pages) ,
- Installation and mounting instructions (60 pages) ,
- User manual (12 pages)
Table of Contents
Advertisement
Available languages
Available languages
Montageanleitung / Instructions de montage
Installation Instructions / Montagehandleiding
Indicaciones de montaje
BEDIENUNGSANLEITUNG
Beachten Sie alle Hinweise vor Inbetriebnahme!
NOTICE D'EMPLOI
À lire avant tout usage !
USER MANUAL
Please make sure to read all instructions before use!
P 4500
P 4600
P 6000
Ref. 145410
Ref. 145450
Ref. 145602
Advertisement
Table of Contents

Related Manuals for patura P4500


Summary of Contents for patura P4500
- Page 1 Montageanleitung / Instructions de montage Installation Instructions / Montagehandleiding Indicaciones de montaje BEDIENUNGSANLEITUNG Beachten Sie alle Hinweise vor Inbetriebnahme! NOTICE D’EMPLOI À lire avant tout usage ! USER MANUAL Please make sure to read all instructions before use! P 4500 Ref.
-
Page 2: Table Of Contents
Batterieauswahl und Umgang mit der Batterie Gebrauch der Fernbedienung Errichtung eines Elektrozaunes Sicherheitshinweise Häufige Fragen/Problemlösungen Wartung Technische Daten FRANÇAIS Les clôtures électriques et votre nouvel électrificateur PATURA Installation Utilisation Utilisation de la télécommande Montage d’une clôture électrique Conseils de sécurité Questions fréquemment posées/Réponses Maintenance... -
Page 3: Deutsch
DEUTSCH Elektrozäune und Ihr neues PATURA Elektrozaungerät Herzlichen Glückwunsch zum Kauf eines Elektrozaungeräts der Marke PATURA. Dieses Produkt wurde mit Hilfe neuester Technologien und Konstruktionstechniken entwickelt. Es ist auf maximale Leistung und eine lange Lebensdauer ausgerichtet. Es ist wichtig, dass Sie die vorliegende Anleitung gründlich lesen. - Page 4 Montageanleitung / Instructions de montage Installation Instructions / Montagehandleiding Indicaciones de montaje Wie funktioniert ein Elektrozaun? Ein Elektrozaun besteht aus einem Elektrozaungerät und einem isolierten Zaun. Das Elektrozaun- gerät versorgt die Zaunleitung mit kurzen Stromimpulsen. Diese Impulse sind gekennzeichnet von einer hohen Spannung und sehr kurzer Dauer (weniger als 3/10000 Sekunden).
-
Page 5: Installation
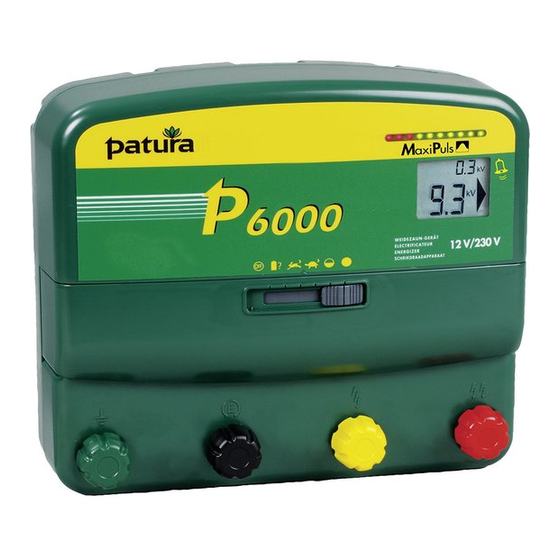
Installation Instructions / Montagehandleiding Indicaciones de montaje Teile Ihres Elektrozaungerätes P6000/P4600 P4500 Installation Lesen Sie bitte alle Sicherheitshinweise in dieser Anleitung sorgfältig vor der Installation des Gerätes. Wählen Sie einen geeigneten Platz zur Installation des Gerätes Befolgen Sie diese Hinweise, wenn Sie einen Platz zur Installation des Gerätes auswählen! Wählen Sie einen Ort,... - Page 6 Montageanleitung / Instructions de montage Installation Instructions / Montagehandleiding Indicaciones de montaje Gebrauch des Netzteiles und der Batterieanschlusskabel Das Gerät wird mit einem externen Netzteil (zum Anschluss an das Stromnetz) und einem Batterieanschlusskabelssatz (zum Anschluss an eine Batterie) geliefert. Vor Anschluss des Netzteils oder Batteriekabels vergewissern Sie sich, dass der Schalter am Gerät auf "...
- Page 7 Montageanleitung / Instructions de montage Installation Instructions / Montagehandleiding Indicaciones de montaje 2. Montieren Sie das Gerät an einer Wand. Wenn erforderlich, benutzen Sie die beigefügte Bohrschablone. 3. Verbinden Sie den Erdungsanschluss (grün) mit Ihrem Erdungssystem. 4. Nur P4600/P6000: Wenn gewünscht, verbinden Sie den Erdungskontrollanschluss (schwarz) mit einem separaten Erdstab.
-
Page 8: Bedienung
Adresseinstellung für die Fernbedienung an. Danach beginnt das Gerät normal zu arbeiten. Bei schlechten Lichtverhältnissen leuchtet das LCD-Display jedesmal für 20 Sekunden auf, wenn der Schalter betätigt wird. P4500: Wenn Sie das Gerät einschalten, beginnt es nach ca. 6 Sekunden zu arbeiten. Einstellung Beschreibung Das Gerät ist ausgeschaltet und arbeitet nicht. - Page 9 Das Gerät arbeitet mit halber Leistung (schnelle Impulsfolge) (schnelle Impulsfolge) und schneller Impulsfolge und schneller Impulsfolge (ca. 1,5 Sekunden zwischen 2 Impulsen). Nur P4500/P4600: Halbe Leistung Das Gerät arbeitet mit halber Leistung Alarmfunktion deaktiviert und schneller Impulsfolge (schnelle Impulsfolge) (ca. 1,5 Sekunden zwischen 2 Impulsen).
- Page 10 Montageanleitung / Instructions de montage Installation Instructions / Montagehandleiding Indicaciones de montaje Ablesen der Spannung Die Kontrolllampen zeigen die Spannung am Ausgangsanschluss für volle Spannung des Elektrozaungerätes an. Jede Lampe entspricht ca. 1 kV (1000 Volt) Ausgangsspannung. Leuchten z.B. bei jedem Impuls die ersten 8 Lampen auf, beträgt die Ausgangsspannung ca.
- Page 11 Montageanleitung / Instructions de montage Installation Instructions / Montagehandleiding Indicaciones de montaje Hinweis: Auf Schalterstelllung wird kein Alarm ausgelöst und die Ausgangsleistung wird nicht erhöht - unabhängig davon, wie die Zaunverhältnisse sind. Erdungskontrolle (nur P4600 und P6000) Die Qualität der Erdung hat entscheidenten Einfluss auf die Zaunspannung.
- Page 12 Montageanleitung / Instructions de montage Installation Instructions / Montagehandleiding Indicaciones de montaje Batterietest-Einstellung Ist das Elektrozaungerät mit einer Batterie verbunden und der Schalter steht auf Stellung Batterietest , zeigen die Kontrolllampen den Ladezustand der Batterie an. Die Batterietest- Einstellung ist nur relevant, wenn das Gerät mit einer Nassbatterie verbunden ist. Hinweis: Steht der Schalter auf der Position Batterietest , gibt das Gerät mit langsamer Impulsfolge weiterhin Strom ab.
-
Page 13: Batterieauswahl Und Umgang Mit Der Batterie
Batterie führen. Für höchste Zuverlässigkeit und Lebensdauer der Batterie verwenden Sie möglichst tiefentladefeste Bleisäurebatterien und laden diese möglichst nach, wenn sie zur Hälfte entladen sind. Für weitere Informationen siehe "Batterietest-Einstellungen" Seite 12. Schalterstellung Stromverbrauch Batteriekapazität P4500/P4600 P6000 P4500/P4600 P6000 Batterietest 410 mA... -
Page 14: Gebrauch Der Fernbedienung
• Vermeiden Sie, dass die Batterie offenen Flammen oder Funken ausgesetzt ist. Gebrauch einer Fernbedienung (nur P4600 und P6000) Hinweis: Das P4500 kann nicht mit einer Fernbedienung ausgeschaltet werden. Das P4600/P6000 ist vorbereitet für den Empfang von Signalen einer Fernbedienung. - Page 15 Montageanleitung / Instructions de montage Installation Instructions / Montagehandleiding Indicaciones de montaje Für detaillierte Hinweise zum Gebrauch der Fernbedienung lesen Sie bitte die Bedienungsanleitung, die jeder Fernbedienung beiliegt. Warnhinweis: Das Gerät beginnt nach einer Unterbrechung der Stromversorgung automatisch wieder zu arbeiten. Dies passiert auch, wenn das Gerät vor der Stromunterbrechung mit der Fernbedienung ausgeschaltet war.
- Page 16 Montageanleitung / Instructions de montage Installation Instructions / Montagehandleiding Indicaciones de montaje Ändern der Adresseinstellungen Es kann sein, dass Sie die Adresseinstellungen des Gerätes ändern wollen. Bei neuen Geräten ist die Voreinstellung für die Adresse auf 1 (eins) eingestellt. Der Gebrauch unterschiedlicher Adressen für jedes Gerät verhindert das unbeabsichtigte Ein- bzw.
-
Page 17: Errichtung Eines Elektrozaunes
Zaunvarianten Zäune können auf die Tierart und auf das verfügbare Material abgestimmt werden. Besprechen Sie mit Ihrem PATURA-Händler, welche Lösung für Sie am Besten geeignet ist. Elektro-Festzäune PATURA bietet eine Reihe von Produkten für die Errichtung von fest installierten Elektrozäunen. - Page 18 300 mm tief in den Boden versenkt werden. 3. Schalten Sie das Elektrozaungerät wieder ein. 4. Vergewissern Sie sich mit einem PATURA Digital-Voltmeter (DVM), dass die Zaunspannung unter 2 kV liegt. 5. Überprüfen Sie Ihr Erdungssystem. Stecken Sie den Erdstab des Voltmeters in gewissem Abstand (soweit es die Kabellänge...
-
Page 19: Sicherheitshinweise
Montageanleitung / Instructions de montage Installation Instructions / Montagehandleiding Indicaciones de montaje Sicherheitshinweise Sicherheitshinweise gemäß dem europäischen Sicherheitsstandard EN 60335 -2-76 Definition verwendeter Fachbegriffe Elektrozaungerät Ein Gerät, das in regelmäßigen Abständen Spannungs- impulse an den angeschlossenen Zaun schickt. Zaun Eine Absperrung für Tiere oder zu Sicherheitszwecken, bestehend aus einem oder mehreren Leitern wie beispiels- weise Metalldrähten, Stangen oder Schienen. - Page 20 Montageanleitung / Instructions de montage Installation Instructions / Montagehandleiding Indicaciones de montaje Ein elektrischer Weidezaun darf nicht an zwei oder mehr verschiedene Elektrozaungeräte ange- schlossen werden. Der Abstand zwischen den Drähten zweier elektrischer Weidezäune, die von getrennten, unabhängig getakteten Elektrozaungeräten gespeist werden, muss mindestens 2,5 m betragen.
- Page 21 Montageanleitung / Instructions de montage Installation Instructions / Montagehandleiding Indicaciones de montaje Werden Anschlussleitungen und elektrische Weidezaundrähte in der Nähe einer Freileitung installiert, darf ihre Höhe über dem Boden nicht mehr als 3 m betragen. Dies gilt für Elektrozäune zu beiden Seiten der orthogonalen Projektion des äußersten Leiters der Stromleitung auf dem Boden in einem Abstand bis zu: ·...
-
Page 22: Häufige Fragen/Problemlösungen
Sind der Zaun, die Erdung und das Elektrozaungerät in einem guten Zustand und die Spannung ist dennoch unter 4 kV, wenden Sie sich an Ihren PATURA Händler. Er wird Ihnen behilflich sein, herauszufinden, ob kürzlich durchgeführte Erweiterungen Ihres Zauns oder der Zustand des Bodens die Ursache für die unzureichende Spannung sein könnten. - Page 23 Wenn nicht, lassen Sie die Funktion von Ihrem Fachhändler deaktivieren. Das Gerät schaltet sich manchmal unerwartet ab. · Eine nahegelegene Zaunanlage wird mit einem Elektrozaungerät mit der gleichen Adresseinstellung betrieben. Siehe "Ändern der Adresse für die Fernbedienung", Seite 16. Wenn das Problem weiterhin besteht kontaktieren Sie Ihren PATURA Fachhändler.
- Page 24 Montageanleitung / Instructions de montage Installation Instructions / Montagehandleiding Indicaciones de montaje Fehlersuche Wenn ... Dann ... Das Gerät arbeitet nicht und Die Verbindung mit der Batterie erscheint fehlerhaft. das erste rote Licht blinkt Überprüfen Sie alle Batterieverbindungen. Überprüfen Sie sofort die Batteriespannung mit der Batterietest-Funktion.
-
Page 25: Wartung
Montageanleitung / Instructions de montage Installation Instructions / Montagehandleiding Indicaciones de montaje Wartung Das Elektrozaungerät ist schutzisoliert, d.h. anstelle einer Erdung werden zwei Isolationssysteme verwendet. Im Stromkabel eines schutzisolierten Elektrozaungeräts ist keine Geräteerdung vorge- sehen; es sollte auch keine andere Vorkehrung zur Geräteerdung an das Elektrozaungerät ange- schlossen werden. - Page 26 Montageanleitung / Instructions de montage Installation Instructions / Montagehandleiding Indicaciones de montaje Produkt Spezifikationen P4500/P4600 P6000 12 V DC (Batterie) Stromversorgung 220 - 240 V AC, 50 Hz (Netzteil) Stromverbrauch bei 12 V Betrieb: • Batterietest 410 mA 750 mA •...
-
Page 27: Français
FRANÇAIS Les clôtures électriques et votre électrificateur PATURA Félicitations pour l'acquisition de cet électrificateur PATURA. Cet appareil est construit selon la technologie et les techniques de construction les plus récentes. Il est conçu pour offrir une performance et une longévité maximales. Il est essentiel de lire attentivement ces instructions. - Page 28 Borne pleine tension. Connectez la borne avec votre clôture Afin d’éviter tout risque de choc électrique, l’électrificateur ne pourra être ouvert et réparé que par un personnel qualifié et agréé PATURA. Lire attentivement le mode d’emploi avant utilisation. Assurez le recyclage du produit selon la réglementation nationale en vigueur.
-
Page 29: Installation
Montageanleitung / Instructions de montage Installation Instructions / Montagehandleiding Indicaciones de montaje Description des électrificateurs P6000/P4600 P4500 Installation Veuillez lire attentivement toutes les instructions de sécurité du présent manuel avant d’installer l’électrificateur. Choisir un endroit d’installation Suivez ces instructions pour choisir un endroit d'installation. Sélectionnez un endroit : ·... - Page 30 Montageanleitung / Instructions de montage Installation Instructions / Montagehandleiding Indicaciones de montaje Utilisation de l’adaptateur secteur et du câble de connexion batterie Dans la livraison sont inclus un adaptateur secteur et un câble de connexion pour le branchement sur batterie. Avant de connecter l’adaptateur ou le câble, assurez vous que le poste soit bien éteint.
- Page 31 Montageanleitung / Instructions de montage Installation Instructions / Montagehandleiding Indicaciones de montaje 3. Reliez la borne de la clôture (verte) au système de mise à la terre. 4. Pour le P4600/P6000: si souhaité, vous pouvez brancher la borne contrôle de prise de terre (noire) avec un piquet de terre séparé.
-
Page 32: Utilisation
Ensuite, l’appareil commencera à fonctionner normalement. Si les conditions de luminosité sont mauvaises, l’écran LCD s’allumera toutes les 20 secondes lorsque vous actionnerez l’interrupteur. P4500: si vous allumez l’appareil, celui-ci commencera à fonctionner dans les 6 prochaines secondes. Réglage... - Page 33 (rapide) (rapide) rapide (environ 1,5 secondes entre deux impulsions) rapide (environ 1,5 secondes entre deux impulsions) Sur cette position, l’alarme est désactivée. P4500/P4600 seulement P4500/P4600 seulement Demi-puissance Demi-puissance L’électrificateur fonctionne en demi-puissance en mode L’électrificateur fonctionne en demi-puissance en mode Alarme désactivée...
- Page 34 Montageanleitung / Instructions de montage Installation Instructions / Montagehandleiding Indicaciones de montaje Contrôler la tension de la clôture Après avoir branché l’électrificateur à la batterie ou au secteur, il se met en route après 3 secondes. Les lampes de contrôles montrent la tension de sortie en pleine puissance. Chaque lampe correspond à...
- Page 35 Montageanleitung / Instructions de montage Installation Instructions / Montagehandleiding Indicaciones de montaje Note : sur cette position l'alarme ne sera pas déclenchée et la puissance de sortie n'augmentera pas – indépendamment de l'état de la clôture. Contrôle de la prise de terre (P4600 et P6000) La qualité...
- Page 36 Montageanleitung / Instructions de montage Installation Instructions / Montagehandleiding Indicaciones de montaje Contrôle de la batterie Lorsque l'électrificateur est connecté à une batterie et que le bouton de réglage est mis sur les indicateurs lumineux montrent le niveau de charge de la batterie. Le contrôle de la batterie fonctionne uniquement si une batterie acide-plomb est utilisée.
- Page 37 à un niveau de charge moyen. Pour plus d'informations sur le contrôle du niveau de charge de la batterie, voir "Contrôle de la batterie" en page 34. Mode de fonctionnement Consommation Capacité P4500/P4600 P6000 P4500/P4600 P6000 Contrôle de batterie...
- Page 38 Montageanleitung / Instructions de montage Installation Instructions / Montagehandleiding Indicaciones de montaje Chargement de la batterie Attention ! · Ne jamais charger une batterie non rechargeable. · Pendant le chargement de la batterie, assurer une ventilation adéquate pour permettre au gaz de se dissiper. Il est important de charger la batterie régulièrement.
-
Page 39: Utilisation De La Télécommande
Indicaciones de montaje Utilisation de la télécommande (seulement P4600 et P6000) Attention : le P4500 ne peut pas être éteint avec une télécommande Le P4600/P6000 est prévu pour recevoir les signaux de la télécommande. Aucune préparation est nécessaire. L’électrificateur et la télécommande sont programmés pour «... - Page 40 Montageanleitung / Instructions de montage Installation Instructions / Montagehandleiding Indicaciones de montaje Pour activer la fonction La fonction peut être activée seulement dans les 10 premières minutes après la mise en fonction du poste. 1. Assurez-vous que le code de la télécommande est sur 1 (plus de détails dans le manuel de la télécommande).
-
Page 41: Montage D'une Clôture Électrique
Les différents types de clôture Vous pouvez choisir vos clôtures en fonction de l’espèce animale et du matériel dont vous dispo- sez. Consultez votre distributeur PATURA pour trouver la solution la mieux adaptée à vos besoins. Clôtures électriques permanentes PATURA vous propose toute une gamme de produits pour aménager des clôtures électriques permanen- tes. - Page 42 : P4500 /P4600: 3 piquets de terre minimum (à installer à 1m de distance les uns des autres) P6000 : 3 piquets de terre minimum (à installer à 2 m de distance les uns des autres) Vous pourrez vérifier votre prise de terre en procédant comme suit:...
-
Page 43: Conseils De Sécurité
Montageanleitung / Instructions de montage Installation Instructions / Montagehandleiding Indicaciones de montaje Conseils de sécurité Ces conseils sont conformes aux normes européennes de sécurité EN 60335 - 2 - 76. Définition des termes techniques utilisés Électrificateur de clôture un appareil qui envoie à la clôture à laquelle il est relié des impulsions de tension à... - Page 44 Montageanleitung / Instructions de montage Installation Instructions / Montagehandleiding Indicaciones de montaje La distance entre les fils de deux clôtures électriques alimentées par deux électrificateurs différents et sur des fréquences indépendantes doit comporter au moins 2,5 mètres. Si on souhaite fermer cet espace, il faudra utiliser des matériaux non-conducteurs ou une barrière métallique isolée.Il est interdit de connecter des fils barbelés à...
- Page 45 Montageanleitung / Instructions de montage Installation Instructions / Montagehandleiding Indicaciones de montaje conducteur de courant placé le plus à l’extérieur, ce sur une distance d’au moins: · 2 m pour les lignes électrifiées avec une tensión nominale inférieure ou égale à 1.000 V ·...
-
Page 46: Questions Fréquemment Posées/Réponses
Verifiez la mise à la terre de votre électrificateur. Pour un P4600/P6000, vérifiez que la tension de la terre sur l’écran digital soit en dessous de 0,8 kV (voir aussi page 33). Pour le P4500 suivez les instructions des chapitres « Installation et vérification de la prise de terre » à la page 40. - Page 47 Indicaciones de montaje L'électrificateur ne réagit pas à la télécommande · Assurez vous que vous possédez un P4600/P6000 et non un P4500. Le P4500 ne réagit pas à la télécommande. · Assurez-vous que le contact soit établi entre la télécommande et le fil de la clôture avant d’appuyer sur les touches...
- Page 48 Montageanleitung / Instructions de montage Installation Instructions / Montagehandleiding Indicaciones de montaje Recherche de pertes Si ... Alors ... Le poste ne fonctionne pas Il pourrait y avoir un disfonctionnement avec la connexion à la et la première diode rouge batterie.
-
Page 49: Maintenance
être absolument identiques à celles qu’elles remplacent. Un électrificateur de ce type porte la mention DOUBLE INSULATED (double isolation) ainsi que le symbole ci-dessous, qui peut également apparaître sans mention. L’appareil en fin de vie ainsi que ses composants doivent être rapportés à un revendeur Patura. -
Page 50: Fiche Technique
Montageanleitung / Instructions de montage Installation Instructions / Montagehandleiding Indicaciones de montaje Fiche technique P4500/P4600 P6000 12 V DC (batterie) Alimentation électrique 220 - 240 V AC, 50 Hz (secteur) Consommation 12 V: • Test batterie 410 mA 750 mA •... -
Page 51: English
ENGLISH Electric fencing and your PATURA energiser Congratulations on the purchase of your energiser from PATURA. This product has been constructed using the latest technology and construction techniques. It has been engineered to give superior performance and many years of service. It is important to read these instructions carefully and thoroughly. - Page 52 Montageanleitung / Instructions de montage Installation Instructions / Montagehandleiding Indicaciones de montaje How does an electric fence work? An electric fence system comprises an energiser and an insulated fence. The energiser puts very short pulses of electricity onto the fence line. These pulses have a high voltage, but are of very short duration (less than 3/10,000ths of a second).
-
Page 53: Installation
Installation Instructions / Montagehandleiding Indicaciones de montaje Parts of the energiser P6000/P4600 P4500 Installation Read all of the safety instructions in this manual carefully before installing the energiser. Selecting a site for the installation of the energiser Follow these guidelines when selecting a site for your installation. - Page 54 Montageanleitung / Instructions de montage Installation Instructions / Montagehandleiding Indicaciones de montaje Using the power adaptor and battery leads The energiser is supplied with a power adaptor (for connection to mains/line power) and a set of battery leads (for connection to a battery). Before connecting a power adaptor or battery leads, ensure the energiser selector switch is set to "...
- Page 55 Montageanleitung / Instructions de montage Installation Instructions / Montagehandleiding Indicaciones de montaje 3. Connect the Fence earth terminal (green) to the ener giser earth system. 4. P4600/P6000 only: If earth monitoring is desired, connect the Fence earth monitor terminal (black) to a separate earth stake. For more information, see "Earth monitoring" on page 56. 5.
-
Page 56: Operation
After this, the energiser resumes normal operation. In poor light conditions, when the selector switch position is changed, the LCD display illuminates for 20 seconds. P4500 only: The energiser begins normal operation within 6 seconds of being switched on. Setting Description The energiser is off and is not operating. - Page 57 (approximately 1.5 seconds between pulses). speed (approximately 1.5 seconds between pulses). At this position the alarm feature is inactive. At this position the alarm feature is inactive. P4500/P4600 only P4500/P4600 only Low power Low power The energiser operates at half power and fast...
- Page 58 Montageanleitung / Instructions de montage Installation Instructions / Montagehandleiding Indicaciones de montaje Reading fence voltage The Indicator lights show the voltage at the energiser's Fence full voltage terminal. Each Indicator light segment represents an increment of approximately 1 kV (1,000 V) of output voltage.
- Page 59 Montageanleitung / Instructions de montage Installation Instructions / Montagehandleiding Indicaciones de montaje Earth monitoring (P4600 and P6000 only) The quality of the earth affects the fence voltage. The earth monitoring feature allows you to keep an eye on the earth quality to make the most of your electric fence. A low voltage on the earth monitor indicates a good earth connection.
- Page 60 Montageanleitung / Instructions de montage Installation Instructions / Montagehandleiding Indicaciones de montaje Lights Input supply voltage Battery charge level Above 17,0 V Battery overcharged or wrong type of battery 12,6 - 17, 0 V Full battery charge voltage (80–100%): · No action required 12,3 - 12,6 V Medium battery charge voltage (50–80%):...
- Page 61 For more information see "Battery Test setting" on page 57. Current required Battery capacity Selector switch position P4500/P4600 P6000 P4500/P4600 P6000 Battery test 410 mA...
-
Page 62: Using A Remote Control Handset
• Ensure the battery is not exposed to naked flame or sparks. Using a remote control handset (P4600 and P6000 only) Note: The P4500 energiser cannot be used with a remote control handset. The P4600/P6000 will accept commands from a remote control handset. No configuration is required. - Page 63 Montageanleitung / Instructions de montage Installation Instructions / Montagehandleiding Indicaciones de montaje Warning! The energiser will reactivate following a power failure, even if it was switched off via remote control handset prior to the power failure. Therefore, for your safety, we recommend that you deactivate the isolated section with a cut-out switch or disconnect the energiser from its power source while doing lengthy maintenance work on the fence.
- Page 64 Montageanleitung / Instructions de montage Installation Instructions / Montagehandleiding Indicaciones de montaje Changing the Address setting You may want to change the address setting of your energiser: · If you are using more than one remote-controlled energiser on your property and you want each remote control handset to operate one energiser only or in reverse when you want one remote control handset to operate more than one energiser.
-
Page 65: Building An Electric Fence
Fences can be constructed to suit the type of livestock and materials available. Discuss with your PATURA distributor which design best suits your needs. Permanent electric fencing PATURA offers a range of products that allow the farmer to install permanent electric fences. A professional permanent electric fence allows the farmer to: ·... -
Page 66: Safety Considerations
3. Turn the energiser back on. 4. Using a PATURA Digital Voltmeter (DVM), ensure that the fence voltage is below 2 kV. 5. Check your earth system. Insert the voltmeter’s earth probe into the ground at the full extent of the lead, and hold the other lead against the last earth stake. - Page 67 Montageanleitung / Instructions de montage Installation Instructions / Montagehandleiding Indicaciones de montaje Definition of special terms Energiser An appliance that is intended to periodically deliver voltage impulses to a fence connected to it. Fence A barrier for animals or for the purpose of security, comprising one or more conductors such as metal wires, rods or rails.
- Page 68 Montageanleitung / Instructions de montage Montageanleitung / Instructions de montage Installation Instructions / Montagehandleiding Installation Instructions / Montagehandleiding Indicaciones de montaje Indicaciones de montaje Barbed wire or razor wire shall not be electrified by an energiser. A non-electrified fence incorpo- rating barbed wire or razor wire may be used to support one or more offset electrified wires of an electric animal fence.
- Page 69 Montageanleitung / Instructions de montage Montageanleitung / Instructions de montage Installation Instructions / Montagehandleiding Installation Instructions / Montagehandleiding Indicaciones de montaje Indicaciones de montaje fences intended for deterring birds, household pet containment or training animals such as cows need only be supplied from low output energisers to obtain satisfactory and safe performance. In electric fences intended for deterring birds from roosting on buildings, no electric fence wire shall be connected to the energiser earth stake.
-
Page 70: Frequently Asked Questions/Troubleshooting
Check the energiser earthing. For P4600 /P6000 energiser, check that the earth monitor voltage on the LCD display is below 0.8 kV, see "Earth monitoring" on page 56. For the P4500 use the procedure described in “Installing and testing an earth system” on page 63. - Page 71 The energiser does not respond to commands from the Remote Control Handset. · Ensure you have a P4600 or P6000. The P4500 does not respond to commands from a remote control handset. · Ensure that the remote contact on the Remote Control Handset is in contact with the fence wire...
- Page 72 Montageanleitung / Instructions de montage Installation Instructions / Montagehandleiding Indicaciones de montaje Troubleshooting If ... This means that ... The energiser is not pulsing The battery connections may be faulty. Check all battery and the first red Indicator connections. Check the battery voltage immediately using the light is flashing battery test setting.
-
Page 73: Servicing
Montageanleitung / Instructions de montage Installation Instructions / Montagehandleiding Indicaciones de montaje Servicing This energiser uses Double Insulation, where two systems of insulation are provided instead of grounding. No equipment grounding means is provided in the supply cord of a double-insulated energiser, nor should a means for equipment grounding be added to the energiser. -
Page 74: Product Specifications
Montageanleitung / Instructions de montage Installation Instructions / Montagehandleiding Indicaciones de montaje Product Specifications P4500/P4600 P6000 12 V DC (average) Power supply 220 - 240 V AC, 50 Hz (Mains power adaptor) Current Consumption - 12 V battery operation ·... - Page 75 Montageanleitung / Instructions de montage Installation Instructions / Montagehandleiding Indicaciones de montaje...
- Page 76 Montageanleitung / Instructions de montage Installation Instructions / Montagehandleiding Indicaciones de montaje PATURA KG • Germany Tel. 00 49 93 72 94 74 – 0 www.patura.com Mainblick 1 • 63925 Laudenbach Fax 00 49 93 72 94 74 – 29...
Need help?
Do you have a question about the P4500 and is the answer not in the manual?
Questions and answers