
Related Manuals for DV Power RMO40TD


Summary of Contents for DV Power RMO40TD
- Page 1 RMO40TD T A P C H A N G E R A N A L Y Z E R & W I N D I N G O H M M E T E R Manual...
-
Page 2: Table Of Contents
Technical Data ..........................48 Accessories ............................ 49 Manufacturer Contact Information ......................49 Manual Version: RMO40TD. MV.RT4D-6.22 This Manual refers to the firmware version RT4D-6.22 IBEKO Power AB 2011 This Manual is a publication of IBEKO Power AB, 181 33 Lidingö, Sweden. -
Page 3: Introduction
Safety Instructions Before operating RMO40TD, please read carefully the following safety instructions. It is not recommended that the RMO40TD is used (or even turned on) without the understanding of this Manual. RMO40TD should only be operated by trained and authorized personnel. -
Page 4: Designated Use
RMO40TD Designated Use, Functionality Safe Operation Procedures • Hazardous voltages of up to 400 V can occur inside RMO40TD. Therefore, it is not permitted to open RMO40TD. • Do not insert objects (e.g., screwdrivers, etc.) into the ventilation slots. • Before putting RMO40TD into operation, check the test set for any visible damage. - Page 5 The test is started by pressing START. The RMO40TD injects current with a voltage as high as 60 V. This ensures the test to be as short as possible and that the desired test current is reached faster.
- Page 6 The TapC menu offers a user friendly way of measuring winding resistance in tap changers. The RMO40TD test set measures the winding resistance of individual taps of a power transformer‟s tap changer, and checks whether the On-Load Tap Changer (OLTC) switches without a discontinuity. In the moment the tap is changed from tap to tap, the device detects the sudden, very short drop of the current flow.
-
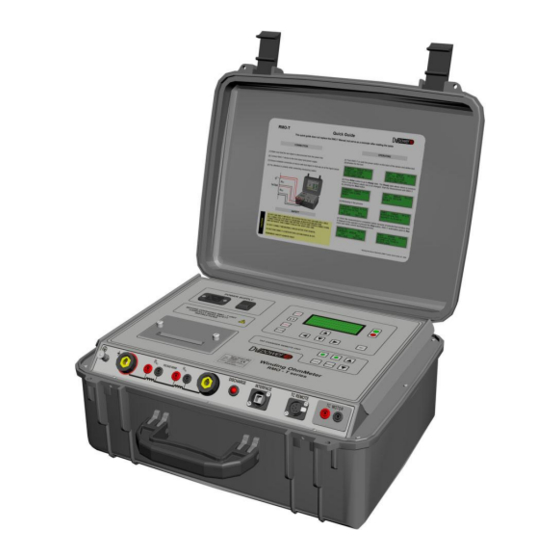
Page 7: Description
Press to measure the resistance current value. Press to measure the resistance value in TapC mode Green LED • Lights continuously when RMO40TD is turned on. • Flashes when a test can be started. • Flashes alternately with the red LED during a test. - Page 8 Description Mains power and ground connectors Connector for mains power supply Power switch I In this position, RMO40TD is connected to the mains power supply. 0 In this position, RMO40TD is separated from the mains power supply with both poles.
- Page 9 RMO40TD Description Setting RMO40TD’s Time and Date To set RMO40TD‟s internal time and date, use , and then to select the Set Time and Date RIGHT ENTER menu. Figure 5-3: The Time menu showing RMO40TD‟s internal time and date Move the cursor to the position of your choice using...
-
Page 10: Getting Started
• The test object is disconnected or separated from its circuit in accordance with the national safety regulations and is properly grounded to protective earth. • RMO40TD itself is properly grounded. To do so, connect the grounding screw to PE using a grounding cable. - Page 11 Connect the earth/ground lead first before doing any connections to the test object. Connect the mains lead to a mains outlet 100 V – 240 V AC and turn on RMO40TD with the power switch on the back of the test set. The first shown on the display is the name of the product followed by...
- Page 12 The Ready state displays the selected test current and its duration is defined. If one of these values has to be changed, press STOP to return to the Current menu. The flashing green LED indicates that RMO40TD is now ready to start the test. Press to run START a test.
- Page 13 (000-499 memory locations). Discharge Current The voltage at the RMO40TD output generation is immediately stopped, but current still flows, because of the inductivity of test objects. Because of the enormous amount of energy that can be stored in a magnetic field, precautions should be taken before disconnecting the test leads from the transformer that is under test.
- Page 14 Accuracy Typical accuracy of RMO40TD is ± (0,2 % rdg + 0,2 % FS). This accuracy is valid if the maximum possible current is used. Always try to use as high current as possible, but to avoid the risk of heating the winding, it is recommended not to exceed from 10 % to 15 % of the nominal current of transformer.
- Page 15 RMO40TD and DV-Win Setting the Measurement Parameters Turn on RMO40TD with the power switch on the back of the test set. The display shows the Current menu and the green LED lights up. Press button and using button go to the LEFT TapC menu.
- Page 16 (here ). At the 4,7 % moment the test current shown on the display is stable, the RMO40TD shows the resistance value in 569,8 mΩ). P Ω...
- Page 17 LED will light and buzzer will beep continuously. Discharging process starts. Figure 6-18: Message "Discontinuity" Discharge Current The voltage at the RMO40TD output generation is immediately stopped, but current still flows, because of the inductivity of test objects.
- Page 18 RMO40TD Getting Started Because of the enormous amount of energy that can be stored in a magnetic field, precautions should be taken before disconnecting the test leads from the transformer that is under test. Never remove the leads during the testing process and always allow enough time for the transformer being tested to completely discharge.
- Page 19 The external Tap Changer Remote cable is used for convenient tap changer testing. After the RMO40TD has measured a tap it stands by waiting for the operator to move the transformer tap changer to the next tap position and continue the measurement by pressing on the unit.
- Page 20 LOCAL changer from the tap changer operation box. Viewing Results of Previous Tests RMO40TD stores up to 500 test results. They can be viewed using the Memory menu at memory positions from 000 to 499. Go to Memory menu using button.
- Page 21 Memory menu showing no results Printing the Test Results RMO40TD stores up to 500 test results. They can be printed using the Print menu at memory positions 000 ... 499. Go to Print menu by pressing repeatedly from Current menu as well as from TapC menu. Select...
- Page 22 Settings of the printer as well as look of the RMO40TD Test Report are given at figure above. 6.7 Duty Cycles During tests, RMO40TD generates a high DC current that heats up the test set. For the test performed at ambient temperature (25 C), maximal test duration times are unlimited for each test current.
-
Page 23: Dv-Win Software
Transfer of test parameters from internal RMO40TD memory to the PC. Note: While using DV-Win software, RMO40TD can only be operated from DV-Win. All buttons on the front panel of RMO40TD device are locked, except the STOP button. Data transferred from RMO40TD can be:... - Page 24 The look of the DV-Win main menu is shown in the following illustration. Now the RMO40TD can be controlled from the PC. The test is started by pressing icon “Start new test” or selecting the “Test” button and then selecting “New” test.
- Page 25 7.5 Current Mode The way to measure the winding resistance is described in detail in the RMO40TD Manual. The winding resistance measurement can be performed using DV-Win software. If you want to analyze these results later, you should save them on the hard disk. The table can be saved in various formats, including XLS, so it can be later used with all Excel functions.
- Page 26 Resistance compensation is a feature which enables displaying of measured resistance compensated to reference temperature. This feature is available when controlling RMO40TD from the PC. Two additional columns of resistance results are displayed in the data table (grid), denoting the compensated resistance values.
- Page 27 Interval Its purpose is selection of time interval for reading results from RMO40TD to PC. At the expiration of this interval, DV-Win reads the last measured result from RMO40TD, and this process repeats at the expiration of the next period.
- Page 28 RMO40TD DV-Win Software It is possible to follow stability of resistance results during the measurement since DV-Win displays R1 and/or R2 values. Once the measurement is completed click on the save button to save results. Save DV-Win enables the user to create Test Reports which contain all the necessary testing information.
- Page 29 Documents or some other user created directory. 7.6 Tap Changer Mode Using a PC together with RMO40TD device in the Tap Changer mode it is possible to assess the tap changer condition by analyzing a graph which represents dynamic resistance during tap changes.
- Page 30 RMO40TD DV-Win Software Set the measurement parameters such as: - Connections - marking of the windings of the transformer under test - Test current Test current is described in the Current mode. Resistance Compensation is described in the Current mode.
- Page 31 RMO40TD DV-Win Software Drive Motor drive or manual cranking - means of changing the tap changer positions. Current clamp offset This value needs to match the offset value on the current clamp (for example, the clamp is set to 200 A offset, it is necessary to set this value in DV-Win).
- Page 32 RMO40TD DV-Win Software Continuous recording Selecting continuous recording option enables recording of all transitions without pressing OMEGA in each tap position. After initial resistance measurement is done and a message is shown, it is necessary to change the tap positions. The graph is displayed after the first measurement is done and it can be refreshed at any time during the measurement by pressing the Refresh button in the graph toolbar.
- Page 33 RMO40TD DV-Win Software Test current adjustment Selecting “Enable current adjustment” option enables resetting of test current to selected value. In that way it is possible to test desired tap changer position with specified test current. This is useful when the stabilization process settles at the current value different from the selected.
- Page 34 RMO40TD DV-Win Software Measurement to start the test current. When the test current is stabilized, R (resistance change) value is Press START displayed. At the moment when R has a value close to zero, it means that measured resistance has stabilized.
- Page 35 Tap Changer Motor Current Measurement RMO40TD has a feature for measuring the current in the tap changer motor drive unit. This feature can be used only during those tests when the RMO40TD unit is controlled by the DV-Win software.
- Page 36 At the end of the test you have to stop the test by pressing . The RMO40TD will go to the STOP “discharging” mode. There will be a question to save the graph.
- Page 37 RMO40TD DV-Win Software Print Prints the graph to the local printer. Zoom In To zoom in the graph, each click will zoom in the graph for 20 % related to the center of the graph. Zoom Out To zoom out the graph, each click will zoom out the graph for 20 % related to the center of the graph.
- Page 38 RMO40TD DV-Win Software Merge files In the case when the operator wants to merge two .tcp files into one master file (one diagram) it is possible by using the Merge files button. Firstly open one .tcp file (if it is not already open), then press Merge files button and browse and select the second file from your PC.
- Page 39 7.7 Demagnetization Note: Before using the demagnetization feature, you must unplug the voltage sense cables from the device. The process of the demagnetization with the RMO40TD could be controlled with the DV-Win software.
- Page 40 RMO40TD DV-Win Software The Demagnetization function is selected by choosing the “Demagnetization” tab. Selection of the starting current is carried out in the drop-down list “Test current”. We recommended that the starting current is the same as what was used for the measurement of the transformer under test.
- Page 41 RMO40TD DV-Win Software Attention: When the demagnetization process is manually stopped by pressing , it is highly recommended to STOP follow the discharging LED and the buzzer on the RMO60TD device and to be aware of the danger during the discharging process.
- Page 42 With this command the results from the internal RMO40TD memory can be transferred to the PC. The transfer is possible only if the serial port RMO40TD is connected with the appropriate cable to the PC. Note: OLTC graph or dynamic resistance cannot be downloaded from internal memory of the RMO40TD since they are not saved in the instrument, but on a PC hard drive.
- Page 43 RMO40TD DV-Win Software Date The results that are obtained on the chosen date are going to be transferred to the PC. Date range After choosing this option, a new window appears. It provides a choice to select a time interval when the measurements were done.
- Page 44 The results table The results from internal memory of RMO40TD are transferred to the PC in the data table; the following layout will be displayed:...
-
Page 45: Error Messages
RMO40TD Error Messages Error Messages Any operational error is indicated by a red LED and accompanied by an alarm. Furthermore, the display indicates an error status message. To stop the alarm buzzer, remove the status message on the display, and return to the Current or TapC... - Page 46 „Overcurrent“ is shown on the display. Red LED will light continuously. Figure 8-3: Error message "Overcurrent" Error Message "Overheat" This message is displayed when RMO40TD‟s operating temperature rises too high. Figure 8-4: Error message "Overheat" In this case, wait for the test set to cool down and repeat the test.
- Page 47 RMO40TD Error Messages Error Message "Mains Voltage < 90V" This message is displayed when RMO40TD‟s mains voltage is below 90 V. Figure 8-5: Error message "Mains Voltage < 90V" In this case, to reset the status message you must restart RMO40TD.
-
Page 48: Technical Data
RMO40TD Accessories Technical Data Mains Power Supply 110 – 230 V AC - Voltage 50 – 60 Hz - Frequency - Input power 2250 VA - Fuse 15 A / 250 V, type F Output data 5 mA – 40 A DC... -
Page 49: Accessories
RMO40TD Error Messages USB Interface RMO40TD is equipped with an USB serial interface to connect to an external computer. Accessories Article No Recommended Current cables 2 x 10 m, 10 mm with battery clips C2-10-10LMB1 Sense cables 2 x 2 x 10 m with alligator clips...
Need help?
Do you have a question about the RMO40TD and is the answer not in the manual?
Questions and answers