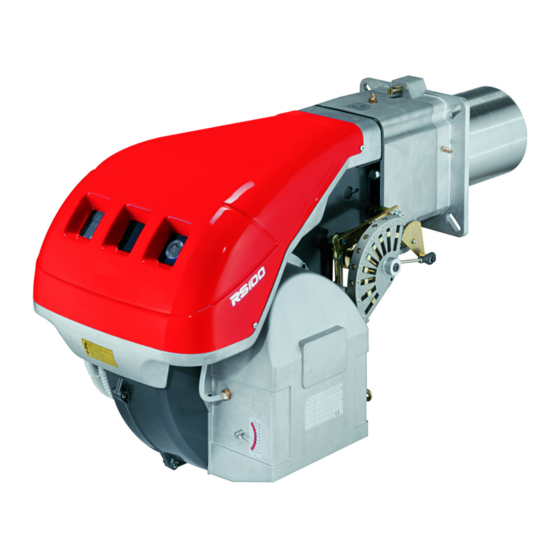
Riello RS 70/M Installation, Use And Maintenance Instructions
Forced draught gas burners
Hide thumbs
Also See for RS 70/M:
Table of Contents
Advertisement
Available languages
Available languages
Quick Links
Istruzioni per installazione, uso e manutenzione
Installation, use and maintenance instructions
Bruciatori di gas ad aria soffiata
I
Forced draught gas burners
GB
Funzionamento bistadio progressivo o modulante
Progressive two-stage or modulating operation
CODICE - CODE
CÓDIGO
20027680
20051347
MODELLO - MODEL - MODELE
MODELL - MODELO
RS 70/M
RS 70/M
TIPO - TYPE - TYP
27680X
51347X
20028163 (3) - 04/2012
Advertisement
Chapters
Table of Contents

Related Manuals for Riello RS 70/M


Summary of Contents for Riello RS 70/M
- Page 1 Forced draught gas burners Funzionamento bistadio progressivo o modulante Progressive two-stage or modulating operation CODICE - CODE MODELLO - MODEL - MODELE TIPO - TYPE - TYP CÓDIGO MODELL - MODELO 20027680 RS 70/M 27680X 20051347 RS 70/M 51347X 20028163 (3) - 04/2012...
- Page 3 Dichiarazione di conformità secondo ISO / IEC 17050-1 Costruttore: RIELLO S.p.A. Indirizzo: Via Pilade Riello, 7 37045 Legnago (VR) Prodotto: Bruciatore di gas ad aria soffiata Modello: RS 70/M Questi prodotti sono conformi alle seguenti Norme Tecniche: EN 676 EN 12100...
-
Page 4: Table Of Contents
Indice Sezione Pag. Informazioni ed avvertenze generali Informazioni sul manuale di istruzione Garanzia e responsabilità Sicurezza e prevenzione Premessa Addestramento del personale Descrizione tecnica del bruciatore Designazione bruciatori Modelli disponibili Categorie del bruciatore - paesi di destinazione Dati tecnici Peso bruciatore Dimensioni di ingombro Campi di lavoro Componenti del bruciatore... -
Page 5: Informazioni Ed Avvertenze Generali
Informazioni ed avvertenze generali Informazioni sul manuale di istruzione Introduzione PERICOLO COMPONENTI IN TENSIONE Il manuale di istruzione dato a corredo del bruciatore: Questo simbolo contraddistingue operazioni costituisce parte integrante ed essenziale del prodotto e che, se non correttamente eseguite, com- non va da esso separato;... -
Page 6: Sicurezza E Prevenzione
Sicurezza e prevenzione Premessa I bruciatori sono stati progettati e costruiti in conformi- In particolare: tà alle norme e direttive vigenti, applicando le regole tecniche può essere applicato a caldaie ad acqua, a vapore, ad olio di sicurezza conosciute e prevedendo tutte le potenziali situa- diatermico, e su altre utenze espressamente previste dal zioni di pericolo. -
Page 7: Descrizione Tecnica Del Bruciatore
230/50/60 DESIGNAZIONE BASE DESIGNAZIONE ESTESA Modelli disponibili Designazione Tensione Codice RS 70/M 3 ~ 415 / 240V - 50/60Hz 20027680 RS 70/M 3 ~ 415 / 240V - 50/60Hz 20051347 Catagorie del bruciatore - paesi di destinazione Paese di destinazione... -
Page 8: Dati Tecnici
Descrizione tecnica del bruciatore Dati tecnici Modello RS 70/M Tipo 27680X 51347X 470 - 930 massima Mcal/h 404 - 800 Potenza minima Mcal/h Combustibile Gas naturale: G20 - G23 - G25 Pressione gas alla potenza max. mbar 12,9 - 17,9... -
Page 9: Campi Di Lavoro
Descrizione tecnica del bruciatore Campi di lavoro D10580 Fig. 3 La potenza massima va scelta entro l’area A del diagramma. La potenza minima non deve essere inferiore al limite minimo del diagramma. Attenzione Il campo di lavoro è stato ricavato alla temperatura ambiente di 20 °C, alla pressione barometrica di 1013 mbar (circa 0 m s.l.m.) e con la testa di combustione regolata come indicato in Cap. -
Page 10: Componenti Del Bruciatore
Descrizione tecnica del bruciatore Componenti del bruciatore D881 Fig. 5 Testa di combustione 19 Serranda aria Elettrodo di accensione 20 Ingresso aria nel ventilatore Vite per regolazione testa di combustione 21 Viti per il fissaggio ventilatore al manicotto Pressostato gas di massima 22 Condotto arrivo gas Servomotore, comanda la farfalla del gas e, tramite una 23 Valvola farfalla gas... -
Page 11: Materiale A Corredo
Descrizione tecnica del bruciatore Materiale a corredo Il bruciatore viene fornito completo di: N° 4 viti per fissare la flangia del bruciatore alla caldaia Flangia per rampa gas M12x35 Guarnizione per flangia Raccordo M20 x 1.5 N° 4 viti per fissare la flangia M10x35 Manuale di istruzione Schermo termico Catalogo ricambi... -
Page 12: Installazione
GAS-KAASU GAZ-AEPIO il modello (vedi A in Fig. 8) ed il tipo del bruciatore (B); RIELLO S.p.A. l’anno di costruzione criptografato (C); I-37045 Legnago (VR) il numero di matricola (D); i dati di alimentazione elettrica e il grado di protezione (E);... -
Page 13: Posizione Di Funzionamento
Foratura della piastra caldaia Forare la piastra di chiusura della camera di combustione come in Fig. 10. La posizione dei fori filettati può essere tracciata utilizzando lo schermo ter- mico a corredo del bruciatore. RS 70/M 275 - 325 M 12 Fig. 10... - Page 14 Installazione Fissaggio del bruciatore alla caldaia Sonda Elettrodo Prima di fissare il bruciatore alla caldaia, verificare dall’apertura del boccaglio se la sonda e l’elettrodo sono correttamente posizionati come in Fig. 12. Se nel controllo precedente il posizionamento della sonda o dell’elettrodo non è risultato corretto, togliere la vite 1)(Fig.
-
Page 15: Regolazione Della Testa Di Combustione
Bloccare le 3 viti 4). Fig. 15 D8690 Esempio RS 70/M, potenza bruciatore = 600 kW. Dal diagramma di Fig. 16 risulta che per questa potenzialità le regolazioni del gas e dell’aria vanno effettuate sulla tacca 4. D10581 Potenza massima bruciatore Fig. - Page 16 Installazione Terminata la regolazione della testa di combustione: fissare il bruciatore al manicotto con le viti 1). riagganciare lo snodo 7) al settore graduato 6). rimontare il bruciatore sulle guide 3) a circa 100 mm dal manicotto 4) - bruciatore nella posizione illustrata dalla All’atto della chiusura del bruciatore sulle due Fig.
-
Page 17: Montaggio Della Rampa Gas
Installazione Montaggio della rampa gas La rampa può arrivare da destra o da sinistra, secondo comodità, vedi Fig. 18. La rampa del gas va collegata all’attacco del gas 1)(Fig. 18), tramite la flangia 2), la guarnizione 3) e le viti 4) date a corredo del bruciatore. Le elettrovalvole del gas devono essere il più... -
Page 18: Collegamenti Elettrici
Non invertire il neutro con la fase nella linea di alimentazione elettrica. L’eventuale inversione comporterebbe un arresto in blocco per mancata accensione. I bruciatori RS 70/M sono stati omologati per funzionamento intermittente. Ciò significa che devono fermarsi "per Norma" almeno 1 volta ogni 24 ore per permettere all'apparecchiatura di effettuare un controllo della propria effi- cienza all'avviamento. -
Page 19: Taratura Del Relè Termico
Installazione Taratura del relè termico Il relè termico serve ad evitare il danneggiamento del motore per un forte aumento dell’assorbimento o alla mancanza di una fase. Per la taratura, fare riferimento alla tabella riportata nello schema elettrico n° 5 in Appendice A. Se il valore minimo della scala del relè... -
Page 20: Messa In Funzione, Taratura E Funzionamento Del Bruciatore
Messa in funzione, taratura e funzionamento del bruciatore Note sulla sicurezza per la prima messa in funzione La prima messa in funzione del bruciatore deve es- Verificare la corretta funzionalità dei dispositivi di re- sere effettuata da personale abilitato, secondo golazione, comando e sicurezza. -
Page 21: Avviamento Bruciatore
Messa in funzione, taratura e funzionamento del bruciatore Avviamento del bruciatore Potenza all’accensione Alimentare elettricamente il bruciatore attraverso il seziona- Secondo norma EN 676. tore sul quadro caldaia. Bruciatori con potenza MAX fino a 120 kW Chiudere i termostati/pressostati e mettere l’interruttore di L’accensione può... - Page 22 Messa in funzione, taratura e funzionamento del bruciatore Regolazione del gas Vincolare nuovamente la camma 4) al servomotore spostando Misurare la portata del gas al contatore. verso sinistra il pulsante 2). A titolo orientativo può essere ricavata dalla tabella di pag. 38, Per quanto possibile, fare attenzione di non spostare le viti alle basta leggere la pressione del gas sul manometro, vedi Fig.
- Page 23 Messa in funzione, taratura e funzionamento del bruciatore Pressostato aria Pressostato gas di massima Eseguire la regolazione del pressostato aria dopo aver effet- Eseguire la regolazione del pressostato gas di massima dopo tuato tutte le altre regolazioni del bruciatore con il pressostato aver effettuato tutte le altre regolazioni del bruciatore con il aria regolato a inizio scala (Fig.
-
Page 24: Sequenza Di Funzionamento Del Bruciatore
Messa in funzione, taratura e funzionamento del bruciatore Sequenza di funzionamento del bruciatore Avviamento bruciatore • L’arresto del bruciatore avviene quando la richiesta di calore è minore di quella fornita dal bruciatore alla potenza MIN, tratto • 0s: Chiusura telecomando TL. G-H. -
Page 25: Misurazione Della Corrente Di Ionizzazione
Messa in funzione, taratura e funzionamento del bruciatore Misurazione della corrente di ionizzazione 5.11 Controlli finali (con bruciatore funzionante) Il bruciatore è dotato del sistema ad ionizzazione per control- Aprire il termostato/pressostato TL: lare la presenza della fiamma. La corrente minima per far fun- Aprire il termostato/pressostato TS: zionare l’apparecchiatura è... -
Page 26: Inconvenienti - Cause - Rimedi
Inconvenienti - Cause - Rimedi SIMBOLO INCONVENIENTE CAUSA PROBABILE RIMEDIO CONSIGLIATO Il bruciatore non si avvia - Manca l'energia elettrica ......Chiudere interruttori - Controllare collegamenti - Un telecomando di limite TL aperto . -
Page 27: Manutenzione
Manutenzione Note sulla sicurezza per la manutenzione L a m a n u t e n z i o n e p e r i o d i c a è e s s e n z i a l e p e r i l b u o n Prima di effettuare qualsiasi operazione di manutenzione, pu- funzionamento, la sicurezza, il rendimento e la durata del lizia o controllo:... -
Page 28: Apertura Bruciatore
Manutenzione Apertura bruciatore Chiusura bruciatore Togliere l’alimentazione elettrica al bruciatore. Spingere il bruciatore fino a circa 100 mm dal manicotto. Allentare le viti 1) e togliere il cofano 2). Reinserire i cavi e far scorrere il bruciatore fino a battuta. Sganciare lo snodo 7) dal settore graduato 8). -
Page 29: A Appendice - Schema Quadro Elettrico
Appendice - Schema quadro elettrico Indice schemi Indicazione riferimenti Schema funzionale LFL Schema funzionale LFL Collegamenti elettrici a cura dell’installatore Schema funzionale RWF40... Indicazione riferimenti / 1 . A 1 N. foglio Coordinate Legenda schemi elettrici - Apparecchiatura elettrica - Motore ventilatore - Filtro contro radiodisturbi - Pressostato aria - Regolatore di potenza RWF40... - Page 30 Appendice - Schema quadro elettrico 20028163...
- Page 31 Appendice - Schema quadro elettrico 20028163...
- Page 32 Appendice - Schema quadro elettrico 20028163...
- Page 33 Appendice - Schema quadro elettrico 20028163...
-
Page 34: B Appendice - Accessori (Su Richiesta)
I componenti da ordinare sono due: • il convertitore di segnale analogico; • il potenziometro. Bruciatore Potenziometro Convertitore di segnale analogico Tipo Codice Tipo Codice RS 70/M ASZ... 3010416 E5202 3010415 Kit potenziometro per indicazione posizione di carico Bruciatore Codice Kit RS 70/M 3010416... -
Page 35: Appendice - Campo Di Lavoro In Funzione Della Densità Dell'aria
Appendice - Campo di lavoro in funzione della densità dell’aria Il campo di lavoro del bruciatore riportato nel manuale è va- Se H3 è maggiore di H1, come in Fig. 40, il bruciatore può ero- lido per la temperatura ambiente di 20 °C e l’altitudine di 0 m gare la portata richiesta. - Page 37 Declaration of conformity in accordance with ISO / IEC 17050-1 Manufacturer: RIELLO S.p.A. Address: Via Pilade Riello, 7 37045 Legnago (VR) Product: Forced draught gas burner Model: RS 70/M These products are in compliance with the following Technical Standards: EN 676...
- Page 38 Contents Section Page Information and general warnings Information about the instruction manual Guarantee and responsibility Safety and prevention Introduction Personnel training Technical description of the burner Burner designation Models available Burner categories - Countries of destination Technical data Burner weight Overall dimensions Firing rates Burner components...
-
Page 39: Information And General Warnings
Information and general warnings Information about the instruction manual Introduction DANGER: LIVE COMPONENTS The instruction manual supplied with the burner: This symbol indicates operations which, if is an integral and essential part of the product and must not not carried out correctly, lead to electric be separated from it;... -
Page 40: Safety And Prevention
Safety and prevention Introduction burners have been designed and built in compli- In particular: ance with current regulations and directives, applying the it can be applied to boilers operating with water, steam, known technical rules of safety and envisaging all the poten- diathermic oil, and to other users expressly named by the tial danger situations. -
Page 41: Technical Description Of The Burner
3/400/50 230/50/60 BASIC DESIGNATION EXTENDED DESIGNATION Models available Designation Voltage Diagnostic RS 70/M 3 ~ 415 / 240V - 50/60Hz 20027680 RS 70/M 3 ~ 415 / 240V - 50/60Hz 20051347 Burner categories - Countries of destination Country of destination... -
Page 42: Technical Data
Technical description of the burner Technical data Model RS 70/M Type 27680X 51347X 470 - 930 maximum Mcal/h 404 - 800 Output minimum Mcal/h Fuel Natural gas: G20 - G23 - G25 Gas pressure at max. output mbar 12.9 - 17,9... -
Page 43: Firing Rates
Technical description of the burner Firing rates Fig. 3 D10580 The maximum output is chosen within area A of the diagram. The minimum output must not be lower than the minimum limit of the diagram. Warning The firing rate was obtained considering an ambient temperature of 20°C and an atmospheric pressure of 1013 mbar (approx. 0 m above sea level), with the combustion head adjusted as shown in Ch. -
Page 44: Burner Components
Technical description of the burner Burner components D881 Fig. 5 Combustion head 16 Gas pressure test point and head fixing screw Ignition electrode 17 Air pressure test point Screw for combustion head adjustment 18 Flame sensor probe Max. gas pressure switch 19 Air gate valve Servomotor controlling the gas butterfly valve and the air gate 20 Air inlet to fan... -
Page 45: Burner Equipment
Technical description of the burner Burner equipment The burner is supplied complete with: Gas train flange 4 screws to fix the M12x35 burner flange to the boiler Flange gasket Fitting M20 x 1.5 4 screws to fix the M10x35 flange Instruction manual Thermal insulation screen Spare parts list... -
Page 46: Installation
(see A in Fig. 8) and type of burner ( B ); GAS-KAASU GAZ-AEPIO the year of manufacture, in cryptographic form ( C ); RIELLO S.p.A. the serial number ( D ); I-37045 Legnago (VR) the data for electrical supply and the protection level ( E );... -
Page 47: Operating Position
Make holes in the plate shutting off the combustion chamber, as illustrated in Fig. 10. The position of the threaded holes can be marked using the thermal insulation screen supplied with the burner. Fig. 10 RS 70/M 275 - 325 M 12 D455... - Page 48 Installation Securing the burner to the boiler Probe Electrode Before fixing the burner to the boiler, check from the open- ing of the blast tube that the probe and the electrode are correctly positioned, as in Fig. 12. If, in the previous check, the position of the probe or elec- trode was not correct, remove the screw 1)(Fig.
-
Page 49: Combustion Head Adjustment
Block the 3 screws 4). Fig. 15 D8690 Example RS 70/M, burner output = 600 kW. According to diagram Fig. 16 the gas and air adjustments for this output are carried out on notch 5. D10581 Fig. 16 Maximum burner output NOTE The diagram indicates the optimum adjustment for a type of boiler according to Fig. - Page 50 Installation fix the burner to the pipe coupling with the screws 1). Once the combustion head adjustment is completed: re-couple the articulated coupling 7) to the graduated reassemble the burner on the guides 3) at about 100 mm sector 6). from the pipe coupling 4) - burner in the position shown in Fig.
-
Page 51: Assembly Of The Gas Train
Installation Assembly of the gas train The gas train can enter the burner from the right or left side, depend- ing on which is the most convenient, see Fig. 18. The gas train must be connected to the gas attachment 1)(Fig. 18) with the flange 2), the gasket 3) and the screws 4) supplied with the burner. -
Page 52: Electrical Wiring
Do not invert the neutral with the phase in the electrical supply line. Any inversion would cause a lockout due to fir- ing failure. The burners RS 70/M have been type-approved for intermittent operation. This means they should compulsorily be stopped at least once every 24 hours to enable the control box to perform checks of its own start-up efficiency. Nor- mally, burner stopping is guaranteed by the boiler's thermostat/pressure switch. -
Page 53: Calibration Of The Thermal Relay
Installation Calibration of the thermal relay The thermal relay serves to avoid damage to the motor due to an excessive absorption increase or if a phase is missing. Refer to the table in wiring diagram No. 5 of Appendix A for the calibration. -
Page 54: Start-Up, Calibration And Operation Of The Burner
Start-up, calibration and operation of the burner Notes on safety for the first start-up The first start-up of the burner must be carried out by Check the correct working of the adjustment, com- qualified personnel, as indicated in this manual and mand and safety devices. -
Page 55: Burner Start-Up
Start-up, calibration and operation of the burner Burner start-up Ignition output Feed electricity to the burner via the disconnecting switch on According to EN 676 standard: the boiler panel. Burners with MAX output up to 120 kW Close the thermostats/pressure switches and turn the switch Ignition can occur at the maximum operation output level. - Page 56 Start-up, calibration and operation of the burner Adjustment of gas delivery As far as is possible, try not to move those screws at the ends of Measure the gas delivery on the meter. the cam that were previously adjusted for the opening of the air A guideline indication can be calculated from the table on page damper to MAX and MIN output.
- Page 57 Start-up, calibration and operation of the burner Air pressure switch Maximum gas pressure switch Adjust the air pressure switch after having performed all other Adjust the maximum gas pressure switch after having per- burner adjustments with the air pressure switch set to the formed all other burner adjustments with the maximum gas start of the scale (Fig.
-
Page 58: Operation Sequence Of The Burner
Start-up, calibration and operation of the burner Operation sequence of the burner Burner start-up • The burner locks out when the heat request is less than the heat supplied by the burner at MIN. output, (section G-H. The • 0s: Load control TL closes. -
Page 59: Measuring The Ionisation Current
Start-up, calibration and operation of the burner Measuring the ionisation current 5.11 Final checks (with burner operating) The burner is fitted with an ionisation system to check that a Open the thermostat/pressure switch TL: flame is present. The minimum current for control box opera- Open the thermostat/pressure switch TS: tion is 6 µA. -
Page 60: Faults - Probable Causes - Solutions
Faults - Probable causes - Solutions SYMBOL FAULT PROBABLE CAUSE SUGGESTED REMEDY The burner does not start - No electrical power supply ......Close all switches - Check connections - A limiter control device is open. -
Page 61: Maintenance
Maintenance Notes on safety for the maintenance The periodic maintenance is essential for the good operation, Before carrying out any maintenance, cleaning or checking op- safety, yield and duration of the burner. erations: It allows you to reduce consumption and polluting emissions and to keep the product in a reliable state over time. -
Page 62: Opening The Burner
Maintenance Opening the burner Closing the burner Disconnect the electrical supply from the burner . Push the burner up to approximately 100 mm from the Loosen the screws 1) and remove the hood 2). pipe coupling. Disengage the articulated coupling 7) from the graduated Reconnect the cables and slide the burner as far as the sector 8). -
Page 63: A Appendix - Electrical Panel Layout
Appendix - Electrical panel layout Index of layouts Indication of references Functional layout LFL Functional layout LFL Electrical wiring that the installer is responsible Functional layout RWF40... Indication of references / 1 . A 1 Sheet no. Co-ordinates Wiring layout key - Electrical control box - Air pressure switch - Filter to protect against radio disturbance... - Page 64 Appendix - Electrical panel layout 20028163...
- Page 65 Appendix - Electrical panel layout 20028163...
- Page 66 Appendix - Electrical panel layout 20028163...
- Page 67 Appendix - Electrical panel layout 20028163...
-
Page 68: B Appendix - Accessories (On Request)
4...20mA 3010214 Output power regulator with signal 4-20 mA, 0-10V Two components should be ordered: • the analogue signal converter; • the potentiometer. Burner Potentiometer Analogue Signal Converter RS 70/M Type Code Type Code ASZ... 3010416 E5202 3010415 Potentiometer kit for the indication of load position... -
Page 69: C Appendix - Firing Rate On Basis Of Air Density
Appendix - Firing rate on basis of air density The firing rate of the burner shown in the manual is valid for a If H3 is greater than H1, as in Fig. 40, the burner can produce room temperature of 20°C and an altitude of 0m above sea lev- the delivery requested. - Page 72 RIELLO S.p.A. I-37045 Legnago (VR) Tel.: +39.0442.630111 http:// www.riello.it http:// www.rielloburners.com Con riserva di modifiche - Subject to modifications...
Need help?
Do you have a question about the RS 70/M and is the answer not in the manual?
Questions and answers