Advertisement
Quick Links
RODIX INC.
RODIX INC.
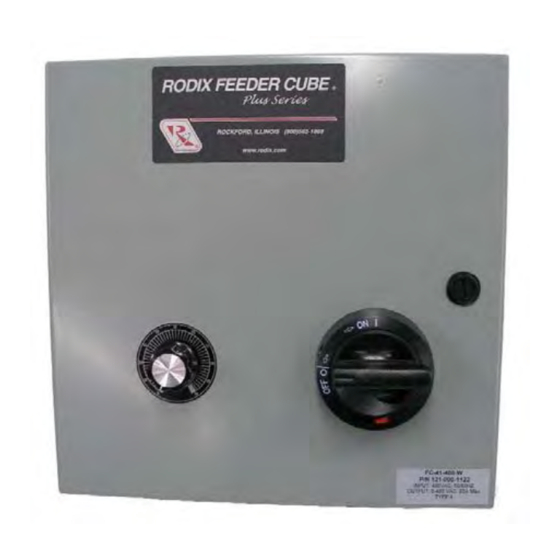
FEEDER CUBE
FEEDER CUBE
Plus Series
FC-41-480 Series
FC-90
Washdown
GENERAL PURPOSE
File No. E183233
Model FC-41-480-W
P/N 121-000-1122
Circuit Board P/N 24-212
Input: 480 VAC, 50/60 HZ.
(Operating range 270-500 VAC)
Single Unit Fuse Size: 30 AMPS Maximum
Output: 0-480 VAC, 0.1 - 20 AMPS
NEMA 4 enclosure
© 2013, 2016 RODIX
ADJUSTMENTS & SET UP
1. SELECT THE PULSE SETTING
Match the control's pulse mode to the feeder's tuning:
A. For 60 pulse output - Set DIP switch (S1) to 60
on the circuit card.
B. For 30 pulse settings, see the "S1 Programming
Chart."
The MAX output trimpot can be adjusted to limit the
maximum vibration level of the vibratory feeder when
the Main Control Dial is fully turned up. When setting
up the MAX output of the feeder control, the output
wiring to feeder must be connected. The Run Jumper
must be connected as shown on the wiring diagram or
on the ON/OFF Control Guide.
A. Power input should be OFF or disconnected.
B. Open cover to allow access to circuit card.
C. Adjust the MAX Output trimpot counter-clockwise
to its minimum setting.
D. Close the cover. Turn power ON (no output
should be present).
E. Rotate the MAIN CONTROL DIAL on front cover
clockwise to its highest setting.
F. Turn power OFF and adjust the MAX Output
trimpot up about 1/8 to a 1/4 turn. Close cover
and reapply power.
output to the feeder reaches its desired maximum
level.
OUTPUT LEVEL OF CONTROL
When the vibratory feeder is nearly empty, turn the
MAIN CONTROL DIAL to "1" and adjust the MIN
trimpot to just below the slowest speed that provides
the proper vibration. The MIN trimpot should only be
adjusted while the disconnect switch is OFF. The
MIN trimpot also serves as the "low speed" trimpot for
2-speed operation. See "S1 Programming Chart" for
feature selection details.
The output power is controlled by the MAIN
CONTROL DIAL. It is a logarithmic-tapered power
out curve (non-linear) that spreads the power broadly
across the MAIN CONTROL DIAL The logarithmic
.
taper power curve helps to give maximum "Fine
INC
2. LIMITING THE MAXIMUM
OUTPUT OF CONTROL
Repeat step F until the
3. SETTING THE MINIMUM
4. MAIN CONTROL DIAL
Control" over the output speed of the vibratory
feeder.
When very precise adjustment of the
MAIN CONTROL DIAL is needed, increase the
MIN trimpot setting and/or decrease the MAX
trimpot setting.
5. SETTING THE SOFT-START
The start-up rate of the control output can be
adjusted to ramp up to the desired output level
instead of starting abruptly. Soft-start keeps parts
from falling off the tooling, reduces spring shock,
and hammering when the control turns ON. Turn
the SOFT Start trimpot clockwise for the gentlest
start (about a 6 sec. ramp up to full output). Turn
the trimpot fully counter-clockwise for no soft start.
6. REMOTE OFF/ON CONTROL
A Run Jumper has been installed at the factory as
shown on the enclosed wiring diagram.
Remote OFF/ON operation of the control can be
configured to operate in one of the following ways.
A. A low current switch such as a paddle switch
can replace the factory-installed Run Jumper
"J1." The "Run Contact" connects to terminals
6 and 7. The contact must be able to switch
5VDC and 2mA. The control will run only
when the contact is closed. Refer to Section
A of the OFF/ON CONTROL GUIDE.
B . Low Voltage DC can be used to turn the
control ON and OFF. Move jumper "J1" from
terminal 7, to terminal 5, (6 remains the
same). Then connect the positive signal (+10
to 30VDC @ 10mA) to terminal 12 and the
negative to terminal 11 of TB2. The control
will now turn ON when the DC signal is
present at terminals 11 and 12 of TB2. This
input is optically isolated. Refer to Section B of
the OFF/ON CONTROL GUIDE.
7. STATUS LEDs
When any of the inputs are active, the associated
LED will turn ON. When the RUN input conditions
are met, the RUN LED will turn ON. See section 6
and the wiring diagram's ON/OFF Control Guide
for more information on how to satisfy the RUN
conditions.
FC-41-480-W 121-000-1122.doc 5/6/2015
Page 1
Advertisement

Related Manuals for Rodix FEEDER CUBE FC-41-480 Series


Summary of Contents for Rodix FEEDER CUBE FC-41-480 Series
- Page 1 CONTROL DIAL. It is a logarithmic-tapered power conditions. out curve (non-linear) that spreads the power broadly NEMA 4 enclosure across the MAIN CONTROL DIAL The logarithmic FC-41-480-W 121-000-1122.doc 5/6/2015 © 2013, 2016 RODIX taper power curve helps to give maximum "Fine Page 1...
-
Page 2: Troubleshooting
Rodix Inc., ATTN: Repair Department 10. SUPPLEMENTARY FEATURES E-mail custserve@rodix.com If under warranty, Rodix will repair or replace your control at Special supplementary software features can be www.rodix.com no charge; If out of warranty, we will repair it and you will be enabled on the 24-212 circuit boards. - Page 3 Bu #20 AWG RODIX INC. Bu #20 AWG FEEDER CUBE Bu #20 AWG FC-41-480 Series WIRING DIAGRAM Bu #20 AWG Bu #20 AWG AUX FEATURE TERM. STRIP OFF/ON CONTROL GUIDE External 4 - 2 0 mA Interlock Direct...
- Page 4 RODIX INCORPORATED 2316 23 Ave., ROCKFORD IL 61104 TOLL FREE (800) 562-1868, FAX (815) 316-4701 E-mail custserve@rodix.com www.rodix.com FEEDER CUBE FC-41-480-W ALL PURPOSE WASH DOWN MODEL IMPORTANT: APPLICATION NOTE...
- Page 5 Rodix controls have been designed with a AUX output. The shield “drain” wire high degree of immunity to electrical RECTIFIER should be tied to the chassis in the Rodix noise; however, depending on the control RELAY DIODE control. The drain wire should be kept...
Need help?
Do you have a question about the FEEDER CUBE FC-41-480 Series and is the answer not in the manual?
Questions and answers