Franklin Chef FIM400 User Manual
Automatic commercial ice cube machine
Hide thumbs
Also See for FIM400:
- Specifications (2 pages) ,
- User manual (24 pages) ,
- User manual (72 pages)
Table of Contents
Advertisement
Advertisement
Table of Contents

Related Manuals for Franklin Chef FIM400


Summary of Contents for Franklin Chef FIM400
- Page 1 ® Automatic Commercial Ice Cube Machine User’ s Manual Be sure ice maker has been standing upright for at least 24 hours prior to plug-in. Franklin Industries, LLC Model FIM400 4100 First Avenue Brooklyn, NY 11232-3321 Tel.: 1-888-424-8278 E-mail: customerservice@franklinchef.com...
-
Page 2: Table Of Contents
We reserve the right to make changes in specifications and design without prior notice. NOTICE: Model FIM400 is an ice-making unit and does not include an ice storage bin. If you order a bin, please follow this manual and the manual accompanying the bin regarding installation, adjustment of storage bin feet, cleaning, water drainage, etc. -
Page 3: Ice Maker Safety
ICE MAKER SAFETY Your safety and the safety of others are very important. We have provided many important safety messages in this manual and on your appliance. Always read and obey all safety messages. This is the Safety Alert Symbol. This symbol alerts you to potential hazards that can injure or kill you and others. - Page 4 It is recommended that a separate circuit, serving only your ice maker, be provided. Use receptacles that cannot be turned off by a switch or pull chain. Do not connect or disconnect the electric plug when your hands are wet. Never unplug the ice maker by pulling on the power cord.
-
Page 5: Major Features
Turn on the water supply tap before switching on the ice maker. Never turn off the water supply tap when the ice maker is working. Except to take ice from the storage bin, keep the bin door closed in order to reduce ice melting and to promote proper ice formation. -
Page 6: Technical Information
400 lbs per day. This user’ s manual is intended as a resource for persons installing, using and servicing model FIM400. It contains valuable information on safety and maintenance. Franklin Chef® strongly recommends that this manual be kept in a place where it can be accessed when needed. -
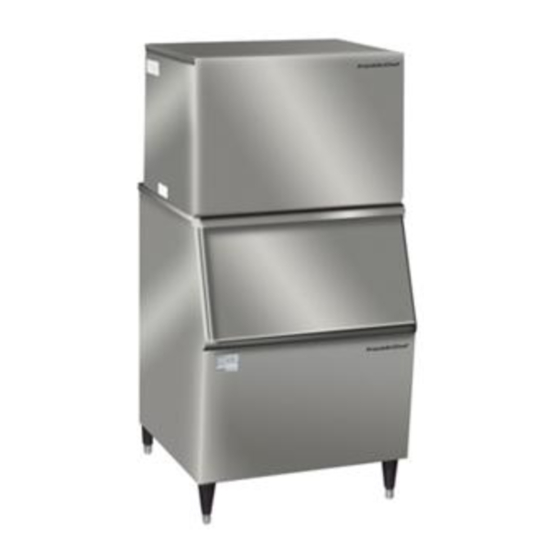
Page 7: Component Locations
Component Locations Top panel Water distribution tube Evaporator Water pump Floater valve Water tank Ice-full probe Ice storage bin (available separately) Adjustable feet Control panel Junction box Power switch Water inlet Connectors Ice storage bin Drain outlet Water supply hose Ice scoop... -
Page 8: Ice Maker Installation
Ice Maker Installation Unpacking This unit is an ice maker only. It requires a separate ice storage bin Remove packaging materials IMPORTANT: Do not remove any permanent instruction labels or the data labels on your ice maker. Remove tape and glue from your ice maker before using: To remove any remaining tape or glue, rub the area briskly with your thumb. -
Page 9: Typical Installation Of Ice Storage Bin
7/16” 16.3” The two holes are for attachment to the ice storage bin. See drawings below. Typical installation of ice storage bin Two connecting brackets are attached to the upper rear edge of the ice storage bin. Turn the brackets up (180 ) and use two screws to connect the main machine and ice storage bin. -
Page 10: Electrical Requirements
(38ºC). This unit MUST be installed in an area protected from the elements, such as wind, rain, water spray or drips. The unit should not be located next to ovens, grills or other sources of high heat. Installation of the ice maker requires a cold water supply inlet of 1/4? (6,35 mm) soft copper tubing with a shut-off valve. -
Page 11: Connecting The Power Supply Line
ordinances, is required. The ice maker should always be plugged into its own individual electrical outlet. It is recommended that a separate circuit, serving only your ice maker, be provided. Use receptacles that cannot be turned off by a switch or pull chain. The fuse (or circuit breaker) size should be 20 amperes. -
Page 12: Water Supply
You will find a strain relief bracket in the accessory package. Fix the power supply cord below the bracket, as shown in the previous illustration. The other end of the power supply cord should be connected to an outlet that is in accordance with the local electrical code. -
Page 13: Operation
Final Check List before Operation Have all packing materials and tape been removed from the interior and exterior of the ice maker? Did you clean the ice storage bin? Have the installation instructions been followed, including connecting the machine to water and electricity? Has the machine been leveled? Is the ice maker in a site where the ambient temperature is between 50º... -
Page 14: How The Machine Makes Ice
Ice-making stage IMPORTANT: Although the unit has been tested and cleaned at the factory, due to long-term transit and storage, the first batch of cubes must be discarded. Never turn off the water supply tap when the ice maker is working. Never touch the evaporator when the machine is running. -
Page 15: Normal Sounds
Evaporator Water inlet Water tank Hot gas valve Condenser Normal Sounds Your new ice maker may make sounds that are unfamiliar to you. Most of the new sounds are normal. Hard surfaces like the floor and walls can amplify the sounds. The following describes the kinds of sounds that might be new to you and what may be causing them. -
Page 16: Cleaning And Maintenance
Cleaning and Maintenance Periodic cleaning and proper maintenance will ensure efficiency, top performance, and long life. The maintenance intervals listed are based on normal conditions. You may want to shorten the intervals if you have pets or there are other special considerations. What shouldn’... -
Page 17: Interior Cleaning
Disconnect power to the unit. Remove the front panel of the ice maker. Unscrew the water tank screw nut and drain water completely into the ice storage bin. The water drains out through the drain hole in the bin. (NOTE: Don’ t forget to screw the nut back into the water tank hole again.) Using a sanitizing solution made of 1 ounce of household bleach and 2 gallons of hot water (95º... -
Page 18: Ice-Making System Cleaning
Maker Cleaner Solution into the water tank. 4. Turn on the power switch. Within 3 minutes press the Clean button. The machine will go into the cleaning mode automatically. 5. The ice-making system cleaning cycle will continue for 30 minutes unless you press the power switch (you can press the power switch to stop the cleaning cycle any time during the 30 minutes). -
Page 19: Control Panel
Remove the condenser air filter with a screwdriver. Use a brush to wipe up and down the filter surface with a mild detergent solution such as 1 oz. of dishwashing liquid mixed with 2 gallons of warm water. Do not use solvent-based or abrasive cleaners. - Page 20 When you want to clean the machine, turn off the power switch first, then turn it on again. Press the Clean button within 3 minutes and the ice maker will start the cleaning mode, with harvest and ice-making indicators blinking. After 30 minutes, the cleaning mode stops and the harvest indicator and ice-making indicators are on steady.
-
Page 21: Troubleshooting
Before Calling for Service If the unit appears to be malfunctioning, read through the OPERATION section of this manual first. If the problem persists, check the Troubleshooting Guide below and on the following page. The problem could be something very simple that can be solved without a service call. -
Page 23: Limited Warranty
Franklin Industries, L.L.C., warrants this product to be free from defects in materials and workmanship for a period of one year from the date of the original purchase. Franklin also warrants the compressor for 5 years with a Parts-only warranty from the date of purchase. - Page 24 Tested and certified to NSF standard 12 by NSF International FIM400 OM-E-2 Printed in China...
Need help?
Do you have a question about the FIM400 and is the answer not in the manual?
Questions and answers