Table of Contents
Advertisement
Quick Links
Advertisement
Table of Contents

Related Manuals for Bosch HB 56S 1 Series


Summary of Contents for Bosch HB 56S 1 Series
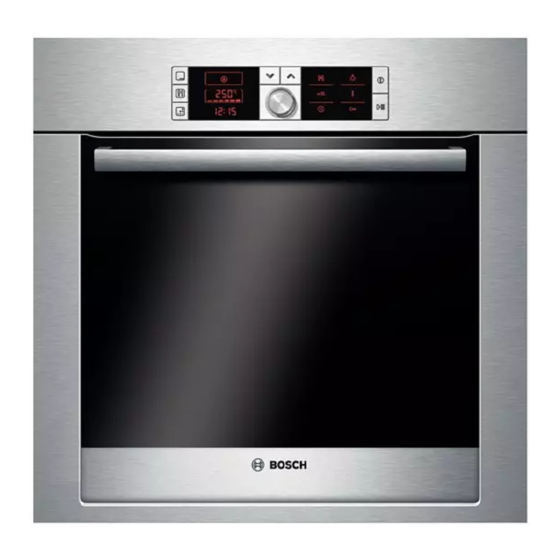
- Page 1 Built-in oven HB.56S..1. [en] Instruction manual...
-
Page 2: Table Of Contents
Baking ....................33 Cleaning function..............13 Grilling....................33 Before cleaning ................13 Setting the cleaning level ............... 14 After cleaning..................14 Produktinfo Additional information on products, accessories, replacement parts and services can be found at www.bosch-home.com and in the online shop www.bosch-eshop.com... -
Page 3: Important Safety Information
: Important safety information Read these instructions carefully. Only then A draught is created when the appliance ■ will you be able to operate your appliance door is opened. Greaseproof paper may safely and correctly. Retain the instruction come into contact with the heating manual and installation instructions for element and catch fire. -
Page 4: Causes Of Damage
Risk of electric shock! Fruit juice: when baking particularly juicy fruit pies, do not ■ pack the baking tray too generously. Fruit juice dripping from Incorrect repairs are dangerous. Repairs ■ the baking tray leaves stains that cannot be removed. If may only be carried out by one of our possible, use the deeper universal pan. -
Page 5: Your New Oven
Your new oven We will now describe your new oven. This chapter explains the functions of the control panel and its individual elements. Information is also provided about the oven's accessories and internal components. Control panel Below is a general overview of the control panel. The display panel cannot show all the symbols at the same time. -
Page 6: Temperature Control
Temperature control Residual heat After switching off the appliance, the temperature control will The bars on the temperature control indicate the heating indicate the residual heat inside the oven. If all of the bars are phases or the residual heat inside the oven. full, it means that the oven has reached a temperature of approx. -
Page 7: Special Accessories
Special accessories Accessories may be purchased from the Technical Assistance Service or from specialist retailers. There is a wide range of accessories available for the oven in our catalogues and on the Internet. Ordering online and the availability of special accessories changes from country to country. -
Page 8: Switching The Oven On And Off
Switching the oven on and off You can switch the oven on and off with the button. This configuration can be started directly or it is possible to program a different type of heating and temperature ■ Switching on to select an automatic program with the button ■... -
Page 9: Setting The Rapid Heating Function
Setting the rapid heating function Change the recommended temperature using the control knob. The rapid heating is not compatible with all types of heating. Compatible types of heating < 3D hot air Top and bottom heating Pizza function When the programmed heating type is not compatible with rapid heating, a warning signal is emitted. -
Page 10: Programming The Timer
Programming the timer The duration has finished ‹‹ ‹‹ A beep will sound. The oven will stop heating. The cooking time The timer works independently of the oven. It can be used as a . The signal can be switched off using the button. -
Page 11: Setting The Clock
Correcting the end time Set the current time using the control knob. This is only possible as long as the oven is in [ ] standby. Confirm with the button. Press the button to open the menu. Move to the end time The display panel shows the time. -
Page 12: Childproof Lock
Childproof lock The oven is equipped with a childproof lock to prevent it being Switching the locking system off turned on or reset accidentally. Press the button until the symbol switches off. You can now reprogram. Activating the childproof lock Hold in the button until the symbol is displayed. -
Page 13: Changing The Basic Settings
Changing the basic settings Press the button. Change the basic setting using the control knob. Prerequisite: The oven must be switched off. Read the basic settings table to understand each setting. Example in the picture: modifying the basic settings of the operation of the short half-fan. -
Page 14: Setting The Cleaning Level
Setting the cleaning level Adjusting the cleaning level Once cleaning starts, the cleaning level can no longer be Press the button. changed. The cleaning level 3 is displayed. Cleaning can be started directly with the button. Cleaning must take place at night If you wish to change the cleaning level: Cleaning can be programmed at night so the oven is available Select the cleaning level with the control knob. -
Page 15: Removing The Grill Heating Element
Removing the grill heating element Unhooking and hanging the oven door The grill heating element can be removed in some ovens to The front panel can be unhooked to help remove the oven door facilitate cleaning. and clean the glass panels. The oven door hinges are fitted with a locking lever. -
Page 16: Removing And Installing The Door Panels
Reclose the attachment levers (picture C). Close the oven Installing door. Follow steps 2 to 4 with doors that have two glass panels. When installing, ensure that the "right above" inscription on the & lower left part is inverted. Insert the glass panel by tilting it backwards (Figure A). Insert the upper glass panel on both mounts by tilting it backwards. -
Page 17: Troubleshooting
Troubleshooting Quite often, when there is a malfunction, it is usually a small irregularity which is easy to rectify. Before contacting the Technical Assistance Service, try to determine the cause of the fault using the following table. Troubleshooting table Fault Possible cause Solution/advice The oven does not work. -
Page 18: After-Sales Service
After-sales service Our after-sales service is there for you if your appliance needs After-sales service to be repaired. We will always find the right solution in order to avoid unnecessary visits from a service technician. E number and FD number Please note that there will be a fee for a visit by a service technician in the event of a malfunction, even during the When calling us, please give the product number (E no.) and... - Page 19 Accessory Level Temperature Cooking time, in °C minutes Traditional Spanish sponge cake, 3 eggs wire shelf + black enamel baking tin 160-170 45-55 Apple tart universal deep tray 170-180 65-75 Pastries and biscuits flat oven tray 130-140 20-30 Nut triangles flat oven tray 185-195 35-45...
-
Page 20: Automatic Programme
Automatic programme The automatic program is perfect for easily cooking special Size of the ovenware recipes, refined stews and juicy roasts. There is no need to turn The meat should cover about two thirds of the ovenware base. and add water to meat and this also keeps the oven clean. This will ensure that you get good meat juices. - Page 21 Poultry Example: For 3 chicken drumsticks of 300 g, 320 g and 400 g, set 400 g. Place poultry in the roasting dish, breast side up. The programme is not suitable for stuffed poultry. Just as with drumsticks, if you want to prepare two chickens of similar size in one roasting dish, make settings according to the When cooking several drumsticks, set the weight of the weight of the heavier chicken.
-
Page 22: Select And Set The Program
Programmes Programme number Weight range in kg Add liquid Weight setting Joint with crust, fresh 0.5-3.0 Weight of meat e. g. shoulder Lamb When roasting joints of meat and drumsticks, set the weight of the meat. When roasting meat loaf, set the total weight. Programmes Programme number Weight range in kg... -
Page 23: Advice On Using The Automatic Program
Adjust the weight of the food with the control knob. The programme has ended A signal sounds. The oven stops heating. You can cancel the signal earlier by pressing the button. Changing the duration of the program The cooking time cannot be changed Changing the programme Once a programme has been started, it can no longer be changed. - Page 24 In these tables you will find numerous tips for your dishes. If you wish to use silicone baking tins, use the information and recipes provided by the manufacturer as a guide. Silicone If 3 rectangular cakes tins are used at the same time, place on baking tins are often smaller than normal tins.
- Page 25 Cakes prepared on the tray Accessories Level Heating Temperature Time type in °C in minutes Bread roll made with 500 g of flour Universal tray 160-180 60-70 Bread roll made with 1 kg of flour Universal tray 150-170 90-100 Puff pastry, sweet Universal tray 190-210 55-65...
-
Page 26: Suggestions And Practical Advice For Baking
Suggestions and practical advice for baking If you want to use your own recipe. You can use a similar product to the one listed in the cooking table as a guide. How to check whether your sponge cake is 10 minutes before the end of the cooking time indicated in the recipe, test the ready. - Page 27 Meat After cooking, wrap sirloin in aluminium foil and leave it to rest for 10 minutes in the oven. Turn pieces of meat halfway through the cooking time. For roast pork with a rind, score the rind in a crossways pattern, When the roast is ready, turn off the oven and allow it to rest for then lay the roast in the dish with the rind at the bottom.
-
Page 28: Tips For Roasting And Grilling
Poultry If cooking duck or goose, prick the skin below the wings to release the fat. The weights of the table are for unstuffed birds ready to roast. The birds can be made brown and crunchy if they are smeared Place whole birds on the wire shelf initially with the breast side with butter, brine or orange juice more or less at the end of down. -
Page 29: Slow Cooking
Slow cooking In order to check whether the meat is cooked, use a meat ■ thermometer. A core temperature of 60 °C should be Slow cooking, also known as low-temperature cooking, is the maintained for at least 30 minutes. ideal cooking method for tender pieces of meat that are to be cooked medium rare or à... -
Page 30: Au Gratin, Soufflés, Toast
Au gratin, soufflés, toast Place the cookware on the wire shelf. To roast directly on the wire shelf without containers, insert the enamelled tray at level 1. This will keep the oven cleaner. The result of a gratin depends on the size of the dish and gratin height. -
Page 31: Special Dishes
Dish Accessories Level Heating Temperature Time type in °C in minutes Bakery products, pre-baked Bread rolls and baguettes Universal tray 190-210 10-20 < Universal tray + wire shelf 160-180 20-25 Fried foods, deep frozen Fish fingers Universal tray 220-240 10-20 Chicken fingers, nuggets Universal tray 200-220... -
Page 32: Jam Making
Jam making Close the jars with clamps. Do not place more than six jars in the oven at the same time. For cooking, the jars and the elastic bands must be clean and in perfect condition. Whenever possible, use jars of equal sizes. Making settings The values in the tables are given for round 1-Litre jars. -
Page 33: Test Dishes
Test dishes These tables have been produced for test institutes to facilitate Covered apple pie on level 1: the inspection and testing of the various appliances. Place dark springform tins with some space between them. Covered apple pie on 2 levels: In accordance with EN 50304/EN 60350 (2009) and IEC Place dark springform tins on top of one another. - Page 36 Robert Bosch Hausgeräte GmbH Carl-Wery-Straße 34 81739 München Germany www.bosch-home.com *9000753105* 920517 9000753105...
Need help?
Do you have a question about the HB 56S 1 Series and is the answer not in the manual?
Questions and answers