Table of Contents
Advertisement
Quick Links
Advertisement
Table of Contents

Related Manuals for Nibe SMO 20 UK


Summary of Contents for Nibe SMO 20 UK
- Page 1 IHB EN 1918-8 INSTALLER MANUAL 231762 Control module NIBE SMO 20...
- Page 2 Quick guide Navigation Ok button (confirm/select) Back button (back/undo/exit) Control knob (move/increase/reduce) A detailed explanation of the button functions can be found on page How to scroll through menus and make different settings is described on page Set the indoor climate temperature1.1 INDOOR CLIMATE HOT WATER...
-
Page 3: Table Of Contents
Component positions Service actions Electrical components 10 Disturbances in comfort 4 Pipe connections Info-menu General Manage alarm Compatible NIBE air/water heat pumps Additional heating only Symbol key Temperature sensor installation on pipe 11 Accessories Fixed condensing Docking alternatives 12 Technical data... -
Page 4: Important Information
The cable area has to be dimensioned Danger to person or machine. based on the fuse rating used. If the supply cable is damaged, only NIBE, Read the User Manual. its service representative or similar author- ised person may replace it to prevent any danger and damage. -
Page 5: Serial Number
Warranty and insurance information waste stations. Thank you for installing a new NIBE heat pump in your Do not dispose of used products with normal home. household waste. It must be disposed of at a... -
Page 6: Inspection Of The Installation
Shuttle valve AUX1 AUX2 AUX3 AUX4 AUX5 AUX6 AA2-X4 Miscellaneous Checking additional heater Checking the function of the reversing valve Checking charge pump function Completed installation check of heat pump and associated equipment Chapter 1 | Important information NIBE SMO 20... -
Page 7: System Solutions
F2040 – 12 VST 11 F2120 – 12 VPAS 300/450 UKV 500 F2120 – 16 AMS 10-16 / VPB 500 HBS 05-16 VST 20 VPB 750-2 F2040 – 16 VPB 1000 F2120 – 20 NIBE SMO 20 Chapter 1 | Important information... - Page 8 Part no. 064 092 Part no. 064 108 F2120 F2120-8 1x230V F2120-12 1x230V Part no. 064 134 Part no. 064 136 Check the software version of compatible older NIBE air/water heat pumps, see page 12. Chapter 1 | Important information NIBE SMO 20...
-
Page 9: Delivery And Handling
Leave at least 100 mm free space around the control module to facilitate access and cable routing on installa- tion and service. Caution Screws for removing the front cover are reached from underneath. NIBE SMO 20 Chapter 2 | Delivery and handling... -
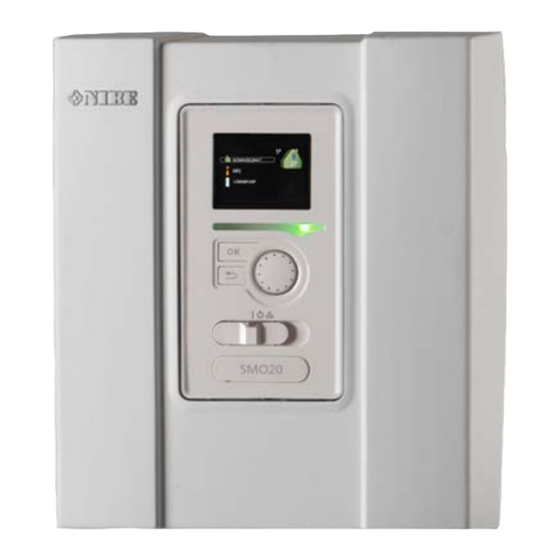
Page 10: The Control Module Design
Switch AA4-XJ3 Serial number plate Cable grommet, incoming supply electricity, power AA4-XJ4 for accessories Cable gland, signal Designations in component locations according to standard IEC 81346- 1 and EN 81346-2. Chapter 3 | The Control Module Design NIBE SMO 20... -
Page 11: Pipe Connections General
Pipe installation must be carried out in accordance with (100% pump sion (DN) sion (mm) applicable regulations. See manual for compatible NIBE speed (l/s) air/water heat pump for installation of the heat pump. HBS 05-6/ 0.19 The pipe dimension should not be less than the recom- AMS 10-6 mended pipe diameter according to the table below. -
Page 12: Compatible Nibe Air/Water Heat Pumps
Symbol Meaning Shut-off valve Compatible NIBE air/water heat pump has to be equipped with a control board that, as a minimum, has Tapping valve the software version given in the following list. The control board’s version is shown in the heat pump’s Trim valve display (if applicable) at start-up. -
Page 13: Temperature Sensor Installation On Pipe
Docking alternatives installation on pipe SMO 20 can be connected with other products from NIBE in several different ways, some of which are shown below (accessories may be required). Further option information is available at www.nibe.co.uk and in the respective assembly instruction for the ac- cessory used. - Page 14 Trim valve 1) Included in and supplied SMO 20 2) Included in and supplied accessory 3) Included in and supplied NIBE heat pump (can vary depending on heat pump). Designations according to standard IEC 61346 and EN81346-2. Chapter 4 | Pipe connections...
- Page 15 COMPATIBLE NIBE AIR/WATER HEAT PUMP TOGETHER WITH SMO 20 – DOCKING STEP-CONTROLLED ADDITIONAL HEAT BEFORE THE REVERSING VALVE FOR HOT WATER AS WELL AS COOLING FUNCTION (4-PIPE SYSTEM) -EQ1 -AA25 -RN10 -CP6 -AA25-QN10 -EB1 -EB1 -FL2 -KA1 -BT63 -CM1 -GP13...
- Page 16 Caution pump), the reversing valve (EQ1-QN12) switches to the cooling system (EQ1). If several demands occur while NIBE does not supply all components in this there is a cooling demand, the installation reacts differ- outline diagram. ently. In event of a hot water demand, the reversing...
-
Page 17: Electrical Connections General
Electrical installation and wiring must be carried out in accordance with the applicable provisions. When installing SMO 20, NIBE’s air/water heat pump and any additional heat must be disconnected from the power supply. -
Page 18: Accessibility, Electrical Connection
Torx 25 screwdriver. Lift the display unit from its mountings. Align the two lower mountings on the reverse of the display unit with the two upper holes in the panel as illustrated. Chapter 5 | Electrical connections NIBE SMO 20... -
Page 19: Cable Lock
When the electrical connection is ready the display must be reinstalled with three mounting points again, otherwise the front cover cannot be installed. TERMINAL BLOCK 3,5 mm 1 mm 3,5 mm 1 mm NIBE SMO 20 Chapter 5 | Electrical connections... -
Page 20: Connections
If there is a loss of voltage to the compressor in the heat EB101-GP12 pump for a certain period, simultaneous blocking of this must take place via a software-controlled input (AUX input) in order to avoid alarms, see page 26. Chapter 5 | Electrical connections NIBE SMO 20... - Page 21 Connect the heat pump (EB101) with a screened three core cable to terminal block X2:19 (A), X2:20 (B) and X2:21 (GND) as illustrated. Connecting to the heat pump AA23-X4 F2030 F2030 F2016/F2026 F2016/F2026 F2015/F2020/F2025/F2300 F2015/F2020/F2025/F2300 AA21-J2 F2120 F2120 SMO 20 NIBE SMO 20 Chapter 5 | Electrical connections...
- Page 22 SMO Externt External BT50 Caution Changes of temperature in accommodation take time. For example, short time periods in combination with underfloor heating will not give a noticeable difference in room temperat- ure. Chapter 5 | Electrical connections NIBE SMO 20...
- Page 23 (BT25) (required for additional heat after reversing valve (QN10), to terminal block X2:8 and X2:10. Use a twin core cable with a cable area of at least 0.5 mm². SMO Externt SMO 20 External BT25 NIBE SMO 20 Chapter 5 | Electrical connections...
-
Page 24: Optional Connections
If the relay is to be used for control voltage, bridge the supply from terminal block X1:1 to X1:2 and connect AA7-X2 neutral and control voltage from the external additional heat to X1:0 (N) and X1:4 (L). SMO 20 Externt External Chapter 5 | Electrical connections NIBE SMO 20... - Page 25 Possible selection for AUX inputs Temperature sensor Temperature sensor can be connected to SMO 20. Use a 2-core cable of at least 0.5 mm² cable area. NIBE SMO 20 Chapter 5 | Electrical connections...
- Page 26 (max. 2 A) on the base board (AA2), terminal block In cases where this function is wanted it must be X4:15-17. The function must be activated in menu 5.4. connected to terminal block X2. Chapter 5 | Electrical connections NIBE SMO 20...
- Page 27 EME 20 is activated.) Activation • activation of away mode for "smart home" (comple- ment to the functions in menu 4.1.7) NOTE The relevant distribution box must be marked with a warning about external voltage. NIBE SMO 20 Chapter 5 | Electrical connections...
-
Page 28: Connecting Accessories
Connecting accessories Instructions for connecting other accessories are in the installation instructions provided. See page 51 for a list of those accessories that can be used for SMO 20. Chapter 5 | Electrical connections NIBE SMO 20... -
Page 29: Commissioning And Adjusting
Deactivate "AA2-X4" in menu 5.6. Commissioning with Cooling mode additional heating only If the installation contains a NIBE air/water heat pump At first start follow the start guide, otherwise follow the that can produce cooling (NIBE F2040 or F2120) cooling list below. -
Page 30: Start-Up And Inspection
SMO 20, until it is deselected on the last page. Operation in the start guide Page Name and menu number language 4.6 If the start guide is left on this page it closes automatically in 60 min Option / setting Chapter 6 | Commissioning and adjusting NIBE SMO 20... - Page 31 ** Underfloor heating can be dimensioned in many different ways. The above example refers to a system where the supply temperature needs to be approximately 35 – 40 °C or 45 – 50 °C on the coldest day. NIBE SMO 20 Chapter 6 | Commissioning and adjusting...
-
Page 32: Control - Introduction
• confirm selections of sub menus/options/set val- ues/page in the start guide. BACK BUTTON The back button is used to: • go back to the previous menu. • change a setting that has not been confirmed. Chapter 7 | Control - Introduction NIBE SMO 20... -
Page 33: Menu System
This symbol indicates whether SMO 20 has MENU 3 - INFO contact with NIBE Uplink. Display of temperature and other operating information This symbol is visible in installations with and access to the alarm log. See information in the help active solar accessories. - Page 34 Back button. Mark the applicable option. One of the options is pre-selected (white). Press the OK button to confirm the selected option. The selected option has a green tick. Chapter 7 | Control - Introduction NIBE SMO 20...
- Page 35 (at the page number) has been marked. Press the OK button to skip between the steps in the start guide. If the start guide is left on this page it closes automatically in 60 min NIBE SMO 20 Chapter 7 | Control - Introduction...
-
Page 36: Control
1.9.3.2 - cooling * 1.9.4 - room sensor settings 1.9.5 - cooling settings * 1.9.7 - own curve 1.9.7.1 - heating 1.9.7.2 - cooling * 1.9.8 - point offset * Heat pump with cooling function required. Chapter 8 | Control NIBE SMO 20... -
Page 37: Menu 2 - Hot Water
Menu 3 - INFO 3 - INFO 3.1 - service info 3.2 - compressor info 3.3 - add. heat info 3.4 - alarm log 3.5 - indoor temp. log * Accessories are needed. NIBE SMO 20 Chapter 8 | Control... -
Page 38: Menu 4 - My System
Menu 4 - MY SYSTEM 4 - MY SYSTEM 4.1 - plus functions 4.1.3 - internet 4.1.3.1 - NIBE Uplink 4.1.3.8 - tcp/ip settings 4.1.3.9 - proxy settings 4.1.5 - SG Ready 4.1.6 - smart price adaption™ 4.1.7 - smart home 4.1.8 - smart energy source™... -
Page 39: Menu 5 - Service
Manual start of the start guide which is run the first time when the control module is started. quick start Quick starting the compressor. NOTE Incorrect settings in the service menus can damage the installation. NIBE SMO 20 Chapter 8 | Control... - Page 40 (QN10). Step controlled additional Check the max floor temperature with your heat is for example an external electric boiler. floor supplier. Chapter 8 | Control NIBE SMO 20...
- Page 41 MENU 5.6 - FORCED CONTROL This menu contains several sub-menus, one for each You can force control the different components in the standard. control module and any connected accessories here. NIBE SMO 20 Chapter 8 | Control...
- Page 42 Mark the active window to activate the underfloor drying function. A counter at the bottom shows the number of days the function has been active. If operating mode "add. heat only" is to be used, select it in menu 4.2. Chapter 8 | Control NIBE SMO 20...
- Page 43 Speed in wait mode (only used if "auto" has been selec- ted for "Operating mode") means the charge pump oper- ates at the set speed during the time when neither compressor operation nor additional heat are required. NIBE SMO 20 Chapter 8 | Control...
-
Page 44: Service
The compressor in the heat pump can be damaged. When replacing components on SMO 20 only replacement parts from NIBE may be used. Emergency mode is used in event of operational inter- ference and in conjunction with service. Hot water is NOTE not produced in emergency mode. - Page 45 2.399 10.00 2.245 8.045 2.083 6.514 1.916 5.306 1.752 4.348 1.587 3.583 1.426 2.968 1.278 2.467 1.136 2.068 1.007 1.739 0.891 1.469 0.785 1.246 0.691 1.061 0.607 0.908 0.533 0.779 0.469 0.672 0.414 NIBE SMO 20 Chapter 9 | Service...
- Page 46 For the following functions to work the USB memory must contain files with software for SMO 20 from NIBE. The fact box at the top of the display shows information (always in English) of the most probable update that the update software has selected form the USB memory.
- Page 47 Logging continues until "logging floor drying activated" is deselected or until "floor drying function" is stopped. Caution Deselect "logging floor drying activated" before you remove the USB memory. NIBE SMO 20 Chapter 9 | Service...
-
Page 48: Disturbances In Comfort
“reset alarm”, the alarm has been remedied. If the red light is still on, and a menu called “alarm” is visible in the display, the problem causing the alarm still remains. Chapter 10 | Disturbances in comfort NIBE SMO 20... - Page 49 – Enter menu 1.1 "temperature" and adjust the offset heating curve up. If the room temperature is only – Follow the display instructions. low in cold weather the curve slope in menu 1.9.1 "heating curve" needs adjusting up. NIBE SMO 20 Chapter 10 | Disturbances in comfort...
-
Page 50: Additional Heating Only
OK button. Return to the main menus by pressing the Back button. Caution When commissioning without NIBE air/water heat pump, the "communication error" alarm may appear in the display. The alarm is reset if the relevant air/water heat pump is deactivated in menu 5.2.2 ("installed... -
Page 51: Accessories
Reversing valve, Cu pipe Ø35 mm EME 20 is used to enable communication and control between (Max. recommended capacity, 40 kW) inverters for solar cells from NIBE and SMO 20. Part no 089 388 Part no. 057 188 IMMERSION HEATER IU... - Page 52 Art. no G1100002 HA-WH 5030-2 F Titanium Megacoil, 300 litre Art. no G1100003 HA-WH 5020-2 FS Titanium Megacoil, Solar 200 litre Art. no G1100004 HA-WH 5030-2 FS Titanium Megacoil, Solar 300 litre Art. no G1100005 Chapter 11 | Accessories NIBE SMO 20...
-
Page 53: Technical Data
12 Technical data Dimensions NIBE SMO 20 Chapter 12 | Technical data... -
Page 54: Technical Specifications
Program cycles, hours 1, 24 Program cycles, days 1, 2, 5, 7 Resolution, program min. Dimensions and weight Width Depth Height Weight, (without packaging and enclosed components) Miscellaneous Part no. SMO 20 067 224 Chapter 12 | Technical data NIBE SMO 20... -
Page 55: Energy Labelling
Energy labelling Supplier NIBE Model SMO 20 + F2040 / F2120 Controller, class Controller, contribution to efficiency NIBE SMO 20 Chapter 12 | Technical data... -
Page 56: Electrical Circuit Diagram
Electrical circuit diagram Chapter 12 | Technical data NIBE SMO 20... - Page 57 NIBE SMO 20 Chapter 12 | Technical data...
- Page 58 Chapter 12 | Technical data NIBE SMO 20...
- Page 59 NIBE SMO 20 Chapter 12 | Technical data...
- Page 60 Chapter 12 | Technical data NIBE SMO 20...
- Page 61 NIBE SMO 20 Chapter 12 | Technical data...
-
Page 62: Item Register
Electrical connections, 17 Commissioning and adjusting, 29 Accessibility, electrical connection, 18 Commissioning with additional heating only, 29 Cable lock, 19 Commissioning with NIBE air/water heat pump, 29 Communication with heat pump, 21 Cooling mode, 29 Connecting accessories, 28 Preparations, 29... - Page 63 Dimensions and setting-out coordinates, 53 Mounting, 9 Electrical circuit diagram, 56 Temperature sensor, external flow line, 23 Temperature sensor, external supply line after electric NIBE Uplink, 25 heater, 23 Temperature sensor, hot water charging, 23 OK button, 32 Temperature sensor, hot water top, 23...
- Page 64 WS release date: 2019-03-21 09:55 Publish date: 2019-05-27 14:10 This manual is a publication from NIBE Energy Systems. All product illustrations, facts and data are based on the available information at the time of the publication’s approval. NIBE Energy Systems makes reservations for any factual or printing errors in this manual.
Need help?
Do you have a question about the SMO 20 UK and is the answer not in the manual?
Questions and answers