Table of Contents
Advertisement
Advertisement
Table of Contents

Related Manuals for Daum electronic 8008 TRS


Summary of Contents for Daum electronic 8008 TRS
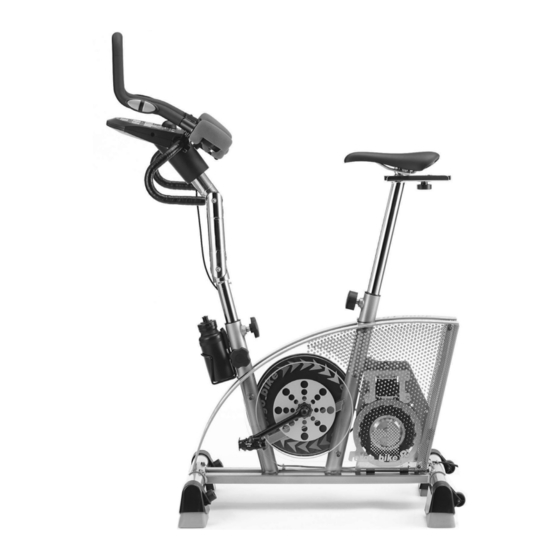
- Page 1 8008 TRS...
- Page 2 The Dashboard 1 8 8 (Underneath) 8 8 . . 8 8 8 . . 8 8 8 . 8 8 8 . 8 watt (Underneath the dashboard) 1. LCD-Display 2. LCD-Display 16. LCD Graphic Display Kilojoule burned User User number Training time Program selection Pulse rate...
-
Page 3: Table Of Contents
Table of contents Page Page Fold out page The dashboard/ Overview of the control Competition circuits elements Tour de France (21 stages) 43 - 45 46 - 50 Conconi Test Table of contents Conconi Test protocol Copy models IL / IP / Ir Programs 51 - 53 A. - Page 4 ergo bike Notes about Software Update The heart of the dashboard consists of a modern Flash ROM Processor It allows upgrading all the software related functions, training programs and fitness tests to the latest release, even years from now. The latest software is available for download at the ergo_bike homepage on Internet and can be transfered to the dashboard with the ergo_win 2002 PC program You will find the instructions for this operation in the...
-
Page 5: What Is An Ergometer
An ergometer bike must provide the possibility to enter the required braking power, in 5 watts increments. With the ergo_bike 8008 TRS the load is then maintened independently of the pedal speed, in revolution per minute, within the RPM ranges shown in the graph on page 9, which means the user has possibility to train with a load that is considerably independent of the pedal RPM. -
Page 6: Setting Up
Setting up General information Switching On / Off Please read the Notes on Safety (page 19) before switching the ergo_bike on, and follow the installation and assembly instructions On / Off (pages M1 - M15). The On/Off switch (power switch) is located at the back in a rectangular plastic frame on the rear perforated plate cover. -
Page 7: The Dashboard
The Dashboard Control Button No. 6 Usage Control button no. 6 is the central control element of the ergo_bike. Two functions in one button! 1 8 8 Turning the control button: 8 8 . . 8 8 8 . . 8 Changes the value displayed in the active display window 8 8 . -
Page 8: Function Keys / Input Connectors
The Dashboard Displays / Function keys / Input connectors Control elements of the dashboard (below) 1. - 5. LCD Displays Display windows no. 1 to 5 Window no. 1 (see pages 5, 6, 8-10) 6. Control button see page Window no. 2 Window no. - Page 9 The Dashboard Window No. 1 User instruction 1. Selecting the user identification number 1 8 8 The ergo_bike computer will record, store and evaluate the training data of up to four users separately. Window 1 Before using the equipment, you must assign a user number to every user.
-
Page 10: Window No. 1 / Pulse Rate
The Dashboard Heart pulse rate Window No. 1 Displaying the pulse rate The pulse rate or pulse status is only displayed if the pulse sensor 1 2 0 (ear clip) or the cardio chest band is connected or when both hand are holding the pulse sensors (on the handle). -
Page 11: Aerobic Pulse Zone
Heart rate frequencies / aerobic zone Table of target heart rate zone / aerobic zone Target zone of heat rate frequency to the maximum heart rate Danger Zone Aerobic Zone Alarm Zone 86%-100% Beep sound up to 59% 60%-75% 76%-85% 40 - 119 120 - 150 151 - 170... - Page 12 The Dashboard Window No. 2 Training time and kJoule Displays : the actual training time 8 8 . . 8 the preselected alarm time the reaching of a time limit (time limit arrow) the actual kjoule burned Window 2 the preselected kjoule limit the actual clock time Display example Training duration of 30 minutes...
- Page 13 The Dashboard Watt Relax Windows No. 3 & No. 4 RPM / km/h and km total Displays: (Pedals revolutions per minute) ergo_bike is independent of the RPM in the RPM ranges shown in the diagram to the right. This means that the user will have to provide an effort corresponding to the displayed Watt-power , within the actual RPM range...
- Page 14 The Dashboard Window No. 4 and Window No. 5 Distance/Watt & Relax Distance and reaching of a distance limit Switching between the km/h and distance display using button no. 6 km/h Distance Distance km/h Distance When the selection arrow is pointing to the km/dist: the distance in km covered during the present training session is displayed.
-
Page 15: Pulse Sensor / Cardio Sensor Chest Band
The Dashboard Pulse sensors / Cardio sensor chest band The pulse sensor (ear clip) included in the package is an important accessory to the ergo_bike. You should not start any training session without it, or without the Cardio sensor chest band available as an option ! The pulse sensors built into the handle can be used to control or monitor the heart rate over short periods of time. -
Page 16: Pc-Interface
PC Interface Description ergo_win 2002 (PC-Software for the communication with the ergo_bike 2002 pc) The training support provided by the ergo_win 2002 software was specially developed for the daum electronic ergometers of the 2002 pc series. Comprises: CD-Rom Interface cable Connector... -
Page 17: Manual Setting "0
The Dashboard Display windows Basic set up Manual setting “0” Window no. 1 Window no. 2 Window no. 4 When the ergo_bike is switched on (using the power switch), or when the “SLP” state Window no. 5 Window no. 3 (sleep mode) is canceled using control Window no. -
Page 18: Preparing For Training
Preparing for training Personal settings Training 1. User identification allocation 1 Selection of the user ID number User (1 to 4) + Guest The computer of the ergo_bike records, saves and evaluates, separately the training data of up to four users (user identification number 1 to 4). Additionally, guests or other users, whose training data should not be stored, can train under user identification number “0”. - Page 19 Preparing for training Setting up the personal data and alarm levels About the sex and height This data completes the profile stored by the computer for each user. And even the minimal difference in capacities due to the sex has an important impact. About the weight The weight has an important impact in the training for fitness improvement, and in the global physical activities.
- Page 20 Preparing for training Personal settings Training Window no. 6 Entry procedure tor the personal data and alarm values data user 1 Window no. 4 reset press repeatedly, until the km total arrow is displayed in window no. 4 Arrow press window no.
- Page 21 Preparing for training Personal settings Training 2.3 Height entry Window no. 6 Turn, until the actual either accept the DF value 180 height or change the height value is correctly displayed data user 1 Window no. 6 hight data user 1 press The setting is confirmed and saved...
-
Page 22: Training
Training ergo bike Introduction The ergo_bike makes it possible to define and control the exercise sequence yourself. It is thus possible to adapt constantly the training plan to the capacities of the user. This device is suitable for therapeutic use. It does not meet the requirements of medical and diagnostic usage (in medical clinics). - Page 23 You will find more information about training for sport and health in the pocket book “Training with the bike ergometer” Improvement of health and fitness as training target with the ergo_bike. Order from: daum electronic GmbH, Flugplatzstr. 100 D-90768 Fürth Fax ++49 (0) 911 75 37 14 Training conditions You should pay attention to providing good training conditions, this includes choosing the training room and installation place.
-
Page 24: Manual Training
Training ergo bike Manual training Miscellaneous about manual training Under training program “0” (manual) you can adjust the pedaling effort (braking power) between 25 and 800 Watts by turning the control button No. 6, and also change it during the training in 5 Watt increment to adjust the load to your personal requirements. - Page 25 Training Fitness mark / fitness evaluation Fitness mark ergo_bike can carry out an evaluation your fitness. The measurement principle is based on the fact that the pulse rate falls faster within the first minute following the training session for healthy, well- trained users than for healthy, less trained users.
-
Page 26: Training Programs
Training programs Recalling Fitness and Training Value Window no. 4 reset press repeatedly until the arrow 3 0 5 4 pointing to km total Window no. 1 is displayed in Window no. 4 Arrow press fitness Display windows no. 1 to 5 are blanked except for e.g. - Page 27 Training Relaxing The relaxation function The relaxation function is a Biofeedback-process that is carried out by measuring the electrical resistance of the skin. The measured values are indicated by means of optical and audio signals. Biofeedback is thus the translation into perceptible signals of physiological processes occurring in our body, which our senses can barely, or not at all, perceive.
- Page 28 Training Programs Programs Overview The following table lists the programs installed in the 8008 TRS. 8008 TRS ergo_bike Programs Manual Program Manual / 0 Cardio Program Cardio / C Individual / P ( IL 60 ) Watt Individual / P...
- Page 29 Training Programs Programs Overview The training programs are identified on the display windows of the dashboard by the figures, letters or symbols shown below. Display Setting Display Setting Overview / program types Nr. 2 No. 2 Nr. 4 No. 4 prog Manual Program / (watt controlled...
- Page 30 Training Programs Programs selection hint Training Program selection to quit the selection menu Several training programs are stored in the ergo_bike that help automate training sessions. When running a program, the load will be adjusted, increased or decreased, depending on the distance, pulse rate or even velocity, according to the watt values prescribed by that particular program.
-
Page 31: Cardio Program / C
Training Programs Cardio - Program / C This program is specially developed for efficient heart and blood circulation training. The braking power (Watt) is automatically regulated, so that the pulse rate set by the user remains constant during the whole training session. Select the program (see page 26) “Standard selection steps”... -
Page 32: Individual Program P
This program allows the setting of pulse-load profiles individually suited to the user with maximum duration as follows: You can enter a heart rate value, between 60 Model 8008 TRS and 199 pulses per minute, for every single User 1 60 minutes training minute. -
Page 33: Watt Individual Program / Il
Individual Program P The Watt Individual Program / IL This program allows the design of watt loading profiles individually suited to the user with maximum duration as follows: Model 8008 TRS User 1 60 minutes User 2 60 minutes A braking power between 25 and 800 watt... - Page 34 Training Programs Individual Program P Selection and programing of the Individual Programs IL / IP, Ir vita 2002 pc de luxe” The ergo_bike “ is equipped with individual training programs IL / IP / Ir. The table below shows you how to call and program these programs. The following table shows how to call and program the specific programs.
-
Page 35: Intensification Program /L
Training Programs Intensification prog. / L, Constant RPM prog. / A and Strength prog. / H Training with the intensification prog. / L, The selection of the training program and the program flow are supported by the the constant program / A, graphic display (window no. - Page 36 Training Programs 1 - 5 Watt Controlled Fixed Programs See page 26 for the procedure to select the training program ! Program 1 Performance Test WHO Standard WATT Performance test 25 Watt / WHO-Standard 32 Min. / max 400 Watt Run this program under test conditions.
- Page 37 Training Programs Watt Controlled Fixed Programs 6 - 11 See page 26 for the procedure to select the training program! These programs apply a strongly rising load at start, and then reduce it after a short recuperation period. This simulates riding up a hill with a flat top. Program 6 Pyramide "Low"...
- Page 38 Training Programs 12 - 15 Watt Controlled Fixed Programs See page 26 for the procedure to select the training program! These programs apply a gently rising load with easy recuperation periods where the required effort is slightly reduced. Programm 12 Active Profi Lady WATT Active Profi Lady...
- Page 39 Training Programs 16 - 19 Watt Controlled Fixed Programs See page 26 for the procedure to select the training program! The following programs are designed for strong-willed women, who are willing to lose weight while undergoing a bearable load. Program 16 Body Watching 1 WATT Body Watching 1...
- Page 40 Training Programs 29 - 33 Pulse Controlled Fixed Programs Window No. 2 Window No. 1 Select the training program (see page 26) ! Prog The program No. is displayed in window No. 2! In pulse-controlled programs, the program regulates Program-No. 29 - 38 and controls the pulse rate of the user.
- Page 41 Training Programs 34 - 38 Pulse Controlled Fixed Programs Window No. 1 Window No. 2 Select the training program (see page 26) ! Prog The program No is displayed in window No. 2! In pulse-controlled programs, the program regulates Program No. 29 - 38 and controls the pulse rate of the user.
-
Page 42: Cool-Down Programs
Training Programs Cool-Down Programs Physical trainings should not be terminated abruptly, instead they should end gradually, because the so called active regeneration process guarantees the best recovery possibilities. The Cool-Down programs of the ergo_bike were specially designed to provide this active regeneration. - Page 43 Training Programs Cool-Down Programs 42 - 44 Window No. 1 Window No. 2 Select the training program (see page 26) ! The program name is displayed in window No. 2! Prog Proceed with the setting of the cool-down program in Window No.
- Page 44 Training Programs Watt Controlled Fixed Programs / 800 Watt 20 - 25 Window No. 1 Window No. 2 Select the training program (see page 26)! Limit Cal Prog.-Nr. The program No. is displayed in window No. 2! Zeit Do not exceed your personal load limits! Kcal Zeit Program No.
- Page 45 Training Programs Watt Controlled Fixed Programs / 800 Watt 26 - 28 Window No. 2 Window No. 1 Select the training program (see page 26)! Limit Cal The program No. is displayed in window No. 2! Prog.-Nr. Zeit Kcal Zeit Program No.
- Page 46 Training Programs 39 - 41 International Triathlon Circuits Select the training program (see page 26) ! Window No. 1 Window No. 2 The program name is displayed in window No. 2! Prog Window number 4 displays - Ironman international circuit “Hawaii” - European Triathlon circuit “Roth”...
-
Page 47: Tour De France (21 Stages)
(21 days or competition stages) All the 21 stages of the “Tour de France 97” are stored in the ergo_bike 8008 TRS, and can be run to simulated the tour according to the performance diagrams or used as training model. - Page 48 Training Programs Tour de France 97 Stages No. 2 to 11 Tour de France Tour de France Height Stage No. Height Stage No. 240 280 240 280 Distance Distance Tour de France Tour de France Stage No. Stage No. Height Height Distance Distance...
- Page 49 Training Programs Tour de France 97 Stages No. 12 to 21 Tour de France Tour de France Height Stage No. Height Stage No. 2500 2500 2000 2000 1500 1500 1000 1000 240 280 240 280 Distance Distance Tour de France Tour de France Stage No.
-
Page 50: Conconi Test
Training Programs Conconi Test Description Conconi Test / E The Conconi test was originally developed for running to control the training intensity and to determine the performance ability. This test uses the fact that the heart pulse rate increases linearly with the load. This is true only up to a certain pulse rate and load. -
Page 51: Conconi Test Protocol
Training Programs Conconi Test Test Programs Conconi Test Program 45 Watt 12,28 12,58 11,63 10,92 11,97 11,28 10,08 10,52 9,12 9,62 7,97 8,57 7,30 6,55 5,70 4,70 3,50 Conconi Test Program 46 Watt 16,40 15,88 16,15 15,35 15,62 14,77 15,07 14,15 14,47 13,48... - Page 52 Training Programs Conconi Test Test Protocols ergo_bike 8008 TRS TEST PROTOCOL / Conconi Test Name..........Date......Time....Heart pulse rates in pulses / min Notes about the test Load in Watt Pulse rate at rest....... Program E 45 (60 to 400 watts)
- Page 53 Training Programs Conconi Test Description Auswertung des Conconi-Tests After the achieved heart rates have been properly recorded in the protocol, you can proceed with the graphical evaluation of the Conconi Test. Therefore construct a coordinate system as shown in figure 3 below.
- Page 54 Training Programs Conconi Test Description Compensation training The compensation domain lies underneath 70 percent. In our example this represents the region below 127 pulses per minute. Training in this domain is for active recovery. GA 1 - Training The GA 1 domain lies between 70 and 80 percent. In our example this corresponds to 127 to 145 pulses per minute.
- Page 55 Training Programs Supplement to the Individual Program / IL Copy samples The Watt Individual Program / IL (page 29) allows the creation and programming of special and personal training profiles in one minute steps and 5 watts levels. Use the blank diagrams below as original to make copies. Then use the copies to draw the performance curves for the individual training profiles.
- Page 56 Training Programs Supplement to the Individual Program / IP Copy samples The Pulse Individual Program / IP (page 28) allows the creation and programming of special and personal training profiles based on various pulse rate steps (in pulses per minute) or on prescribing a constant pulse rate for a given period of time.
- Page 57 Training Programs Supplement to the Individual Program / Ir Copy samples The speed Individual Program / Ir (page 29) allows the creation and programming of special and personal training profiles in various speed levels (in 1 km/h steps). Use the blank diagrams below as original to make copies. Then use the copies to draw the performance curves for the individual training profiles.
-
Page 58: Gear Shift
Training Programs Gear Shift Description The gear shift of the ergo_bike 8008 TRS de luxe ergo_bike 8008 TRS is equipped with an electronic gear shift (derailleur) that provides committed athletes with a more realistic biking experience on the preprogrammed circuits. 28 speeds enable a linear shifting over the whole performance domain of the bike in road, off-road and triathlon biking. - Page 59 Manipulating the gear shift (derailleur) The gear shift (derailleur) of the ergo_bike 8008 TRS is build realistically and is nevertheless functional. Shifting to a higher gear (a longer distance is traveled per revolution of the pedal,...
- Page 60 Training Programs Information about the programs Starting a training program at a later point reset Press repeatedly 3 0 5 4 until the arrow pointing to km total Window no. 4 displays appears in window no. 4 (right side) Users / km total prog window no.
- Page 61 Team Award the heading der “Team Award” (the simplest possibility) or send us an email to “TeamAward@daum-electronic.de”, or send us a fax to +49 911 753714 or write to us at daum electronic GmbH, Team Award department Flugplatzstr. 100, D-90678 Fürth...
-
Page 62: Coaching
Coaching Introduction Heart / circulation training Fitness training Muscle buildup Weight / fat reduction The “Coaching” concept introduces an intelligent training program offering the user four different training objectives to choose from (see illustration above). The computer takes charge of the supervision and control of the training. Users have various interests. -
Page 63: Coaching
Coaching Preparing for training The user must take a performance test at the start of the Coaching program, and then once every 4 weeks (see pages H6 / H12). The computer uses this test to determine the load prescriptions (e.g. the maximum load in watt and the maximum heart pulse rate during the training) for the start of the Coaching program and then for every successive period of 4 weeks. - Page 64 Coaching Personal data entry The following basic prerequisites must be satisfied, and the important settings must be done on the dashboard before the coaching program can be started. A user should train with the coaching program only with the pulse sensor (ear clip), or the cardio sensor chest band (see pages 11 and T1), on.
- Page 65 Coaching A / First Time Training 1. Start the Program Users / km total Press repeatedly 3 0 5 4 Window No. 4 displays until the arrow pointing to km total appears in window no. 4 (right side) e. g. km total 3054 1.
-
Page 66: Displaying The Training Plan And Units
Coaching Displaying the Training Plan and Training Units Display the training plan / display performance test & starting week When the required training objective is confirmed, the system displays the training plan when starting a new Coaching program bloc. The week corresponding to the actual day date (real calendar date) will always be highlighted (in our example week 37). - Page 67 Coaching Performance test 4. Taking the performance test Window No. 6 (program 1) When you start the training the system displays the diagram of the first program selected by the computer for “training unit 1”. Do not exceed your personal load limit! (the load increases by 25 watt every 2 minutes) watt Interrupt the training immediately if the...
-
Page 68: Training After The Performance Test
Coaching B / Training after the Performance Test 5. Completing the training units Users / km total reset Press repeatedly 3 0 5 4 Window No.4 displays until the arrow pointing to km total appears in window no. 4 (right side) e. - Page 69 Coaching Training Training control The control of the training is coupled with the clock module in the dashboard and follows the real date. Generally speaking, the user should have the possibility to decide when and how often he wants to train in the week, instead of being only directed by the program. If it should become clear during the training that the user does not have the time and endurance, or even the physical fitness, that the Coaching program requires, there is a possibility to modify the program course so that the particular user can run it.
- Page 70 Coaching Deviation from the Training Plan Training deviation / Catching up the incomplete training unit In the case of training interruption, you have the possibility to downgrade the training plan using control button no. 6. It is allowed to select one or several previous weeks (backward scrolling); on the other hand, it is not allowed to select a higher week.
- Page 71 Coaching Downgrading Downgrading the Coaching program further than recommended (downgrading further than recommended) Anzeige Nr. 6 press (confirm) press This message is displayed automatically (confirm) Inquiry about downgrading scroll If, following an interruption, a downgrade is done to a week with partially completed training back units (e.
- Page 72 Coaching Downgrading The user is on vacation and does not train for one or several complete weeks: The next time the coaching function is called the message shown here will be displayed after the training type is selected and before ..
- Page 73 Coaching Performance Test / Fitness Evaluation Aptitude or Performance Test / following WHO-Standard (program 1) The fitness test is taken at the very beginning of the Coaching and before the first training unit, to establish your personal aptitude to physical effort. Afterwards, the test is taken once every 4 weeks, and will be requested by the program menu.
-
Page 74: Training Samples
Coaching Training Samples Training profile / pace After the first training units are completed, the user should take a personal pace to be able to run the following training units as prescribed by the program, in a comfortable schedule and without hurry. Otherwise, this would have a negative impact on the whole Coaching training, since it will cause many irregularities, interruptions, and general frustration. - Page 75 Coaching Training Samples In the program about weight and fat reduction training units are composed very carefully, so that they are run with a low heart pulse rate but for extended training duration (up to 70 minutes). These units require endurance and motivation from you, but they help you achieve a stable weight reduction.
-
Page 76: Initialization
Initialization Menu control Training Setting the language, time, and date Setting the time and date is needed to support the execution of the intelligent training programs, particularly the Coaching program. Therefore, the control software of the computer-controlled dashboard of the new ergo_bike has a special menu for all the setting and basic functions needed to support the automation process and must be set as a background for the ergometers programs. - Page 77 Initialization Menu control Training Window No. 6 Initialize date language Turn the control button No. 6 hour to select the next item to set, date e.g. Date version If you want to change the date setting To set the date follow the same sequence as for setting the time (1 to 3) Initialize Turn the control button No.
-
Page 78: Lcd Graphic Display
25 to 400 watts. When the load exceedds the value of 400 watts on the 8008 TRS the graphic display switches automatically to a compressed display mode. In this mode, the display shows one pixel per 10 watts, instead of one pixel for 5 watts. Consequently, the height of the curve is reduced to one half. - Page 79 LCD Graphic Display Description e.g. Program 10 Below is an example for the representation of Watt display the diagram of one of the fixed programs of the ergometer. Matterhorn WATT 50 min Program 10 Matterhorn watt 30 Min. / max 270 Watt for trained users e.g.
-
Page 80: Assembly
Assembly Installation Hints Miscellaneous Install the ergo_bike on a level floor. The manufacturer will not be held responsible for any damage done to the floor. We thus recommend installing the device on a protective base. The ergo_bike is not intended for use in damp rooms. Rust could develop, which would damage parts of the device and impair both the operating functions and the safety features. - Page 81 When unpacking the parts, make sure you remove them carefully from the cardboard box, not only to avoid personal injuries, but also to avoid any damage or loss of parts. The package contains: 1 ergo_bike 8008 TRS base device (with mounted pedal arms)
- Page 82 Assembly Installation hints Short Description Assembling instructions / Installing the feet Required hardware: 4 x recessed head screws A SF = “swing feet” 4 x spacer sleeves (see pages M4 to M7) Required tool: Included SW6 Allen wrench Pull the main device from the package and put it down in an upright position. Please take the type of foot into consideration! Foot with - Install the foot with roller casters at the rear...
-
Page 83: Accessory / "Swing-Feet
Assembly Description Accessory / “swing feet” The oscillating movements occurring naturally with real bikes cannot normally be reproduced when training on an ergometer. These movements include balancing movements or back and forth oscillations. The rigid construction, and the fixed feet used to support the device prevent any dynamic movement. - Page 84 All ergo_bike ergometers come equipped with the new “swing feet” technology. The device can also be used without the “swing effect”. For this you must remove the installed “swing feet” (see the description on the back of this page). “Swing effect” Benefits and features Comfortable suspension Prevention of muscular tension Soft swing movements in all directions...
- Page 85 Assembly “swing feet” Operation and mounting of the “swing feet” Lateral oscillations Foot support 3 / 3a "swing feet" Plastic foot left / right "swing feet" Elastic micro-cellular rubber pads Standard foot / front Standard foot / rear (with adjusting screw) (with roller caster) "swing feet"...
- Page 86 Assembly Description ergo_bike swing effect feet / Assembly The swing feet (right SF and left SF/Fig. C) are attached to the feet from underneath. The pins of the plastic feet (3/3a) must engage in the corresponding holes (1a) of the support 2 / 2a feet (1) below the standard feet (2/2a).
- Page 87 Assembly Mounting the handle column Inserting the adjustable handle column in the frame Required tools: Allen key SW6 The adjustable handle column (2) consists of 3 main segments connected by articulated joints. This allows to freely adjust the height, the distance to the saddle, and the inclination of the dashboard (3) with the handle (7).
- Page 88 Assembly Mounting the Triathlon Add-On Set Triathlon support Mounting the triathlon add-on set (parts) Required tool: Allen wrench SW6 7e-1 Spacer sleeves Fig. 1 7b-R 7b-L Handle tube Racing handle Fig. 2 The supplied spacer sleeves (7e-1) are used to compensate for the handle thickness when mounting 7e-1 the triathlon-set holder (7e).
- Page 89 Assembly Arm Rests / Wrapping the Handlebar Tape Arm rests (cushioned pads) Fastening screws with washers and nuts Special cushioned armrests (7c) are supplied to ensure a comfortable arm rest when using the triathlon handle add-on (7b). These pads are designed to fit on the corner curvature of the handle add-on (7b). The elastic tongues (LS1/LS2) of the cushioned pads must be fastened with the special screws (7d).
-
Page 90: Triathlon Handle Add-On
Assembly Mounting the dashboard Assembly guide / Mounting the dashboard Fig. 1 Parts needed: Dashboard with the racing handle (7), Triathlon handle add-on (7b), protective plate (5) and clamp (8.1) pre-assembled Dashboard support (6) with inner ring (6x) tensing lever (6a) and appropriate washer (E) dashboard unit 2 recessed head screws with washers ( C/D ) 2 fastening screws with washers ( H/J ) - Page 91 Assembly Description After plugging the cable connectors in the rear side of the dashboard, raise the dashboard holder (6) Fig. 1 all the way up. Align carefully the dashboard cable (3) and the cables(HK1 & HK2) very closely along the clamp (8.1) in the area of the inner ridge of the holder end (6).
- Page 92 The position of the saddle is very important to ensure a correct seating position and body posture during the training with the ergometer bike. The saddle of the ergo_bike 8008 TRS can take many various position with its height adjustable saddle column (12), and to its sliding rail (12e) .
- Page 93 The 8008 TRS can then be individually adjusted to fit the body height of the users and to their training habits (straight seating or leaning down as in racing position), or to reproduce the geometrical properties of any “outdoor”...
-
Page 94: Fine Tuning M
Frame Geometry / Fine Tuning Fine Tuning Training with the ergo_bike 8008 TRS is often intended to maintain and improve the physical condition achieved using a road or a racing bike. To do this, it is required to assume a sitting posture on the ergo_bike, that is as much as possible, identical to that on the racing or road bike. -
Page 95: Mounting The Bottle & Pedals M
Assembly Mounting the Drinking Bottle & the Pedals Mounting the drinking bottle Needed tool: Phillips screwdriver The front frame tube has two threaded holes intended for the screws used to mount the drinking bottle holder (18a). Use the supplied phillips screws to mount the bottle holder (18a). -
Page 96: Maintenance
Maintenance Cleaning / Care Cleaning outside surface Wet a soft cloth with water and use it to clean the ergo_bike. A light soap solution may also be used to wet the cloth. Wipe the surface applying light pressure. While wiping the dashboard or the perforated plate cover, be careful not to apply too much pressure to prevent water from entering the dashboard or the device. -
Page 97: Simple Maintenance And Service W
Take care not to damage the inner parts of your while you are working. The manufacturer, daum electronic gmbh, will not be liable for any damages arising as a result of negligence while changing the V-belt! Remove the protective cap (1) of the axle center. -
Page 98: Spare Parts List W
Maintenance Spare parts list SF = swing feet left right Drive Back Front... - Page 99 Maintenance Spare parts list 8008 TRS Listing No. Spare part blackline Order No. silverline ergo_bike complete body M60 90 635 M60 90 636 Handle column 00 17 299 A Tensing screw for the lateral fastening of the handle column 80 90 194...
- Page 100 Maintenance Exchanging the Dashboard / Replacing the Battery It is possible to replace or disassemble the complete top part of the dashboard, for all ergo_bike models, in the case that the display windows, the membrane switch, the control button, or the circuit board located underneath it malfunctions or simply to replace the battery.
-
Page 101: Technical Information
1 Skin-friendly Cardio Sensor chest band with integrated pulse sensor and transmitter 1 Adjustable elastic band to attach it to your chest The chest band is available from daum electronic gmbh;Order no. 90 91 015. Putting on and using the Cardio Sensor chest band Remove your upper body clothing or pull your shirt up to uncover the area of the heart. - Page 102 Technical Information Specifications Specifications Braking system: Computer-controlled, full electronic eddy current brake Festprogramme / pulsgesteuert operating in the speed ranges shown in the diagram on page 9. Load range: 25 to 800 Watt Speed range: 0 to 199 RPM Load precision: +/- 10%, see page 9 Loading levels: In 5-Watt increments, manually adjustable...
-
Page 103: Safety Requirements / Conformity T
Technical Information Safety Requirements Conformity To The Technical Plant And Equipment Act hereby declares that this product complies with the following provisions regarding electromagnetic compatibility and electrical safety: 89 / 336 / EWG of May 3, 1989 including subsequent changes (Recommendation 92 / 31 / EWG of April 28, 1992 and recommendation 93 /68 / EWG of July 22, 1993) 73 / 23 / EWG of February 19, 1973 including subsequent changes (Recommendation 93 / 68 / EWG of August 30, 1993 ) -
Page 104: Index
Index A - K Dashboard, FO, 3-6, 8-13, M1-M2, M11-M14, W3-W5 Accessory / Cardio sensor chest band, 11, T1 Dashboard cable, M1-M2, M8-M9, M11-M12, W3-W5 Aching muscles, G1 Festprogramme / pulsgesteuert Dashboard support, M1-M3, M8, M10, W3, W4 Aerobic pulse zone, 6 Dashboard replacement, W 5 Aerobic zone, 7 Dat key, FO, 4, H4... - Page 105 Index L - Z Lactic acid, G 1 Saddle, M1, M2, M13-M15 Language, i2 Saddle height, M13-M15 Lateral connector, 11, 23 Saddle holder, adjusting, M1, M13 LCD displays, FO, 4-6, 8-10, H4-H12, i1-i2, L1-L2 Saddle tilt, M13 LED, G1 Safety notes, 19, 20, M1 Limit arrow, 8, 10 Selection arrow, 8, 9, 10...
-
Page 106: Glossary G1
Glossary Aching muscles Painful phenomenon of the muscles tissues, occurring when the aerobic zone is exceeded leading to an overproduction of lactic acid. In order to avoid it, the ergo_bike compares measured data, input parameters and statistical values and displays the resulting aerobic zone status. Body-Mass-Index The training phase during which the load on the muscles is enough to keep them supplied Aerobic zone... -
Page 107: What To Do If
General Recommendations What to do, if ...? In the case of a failure ....what to do if...? All ergo_bike ergometers undergo a detailed test before they are shipped. Should you, in spite of this, face a functional failure, the following recommendations should tell you what to do . General procedure to identify the cause of a failure The ergo_bike ergometers consist essentially of two functional units - the dashboard and the drive unit. - Page 108 You can order an exchange unit from daum electronic GmbH. The defective unit can then be relatively easily replaced with the new one, without requiring any adjustment, by your dealer or a bike mechanic.
-
Page 109: Warranty Conditions
You can also call us on our repair hotline (telephone number 0190 / 770 383 - a fee of 1.48 Euro per min. applies). daum electronic gmbh, D-90768 Fürth... - Page 110 Flugplatzstr. 100 D - 90768 Fürth (Hotline - a fee of 1.48 Euro per min. is charged) Tel. ++49 / (0) 190 / 770 383 Fax. ++49 / (0) 911 / 75 37 14 www.daum-electronic.de ergo bike daum electronic;...
Need help?
Do you have a question about the 8008 TRS and is the answer not in the manual?
Questions and answers
Daumelectonic8008trs3 loses resistance power when speed up
The Daum 8008 TRS does not mention losing resistance power when speeding up in the provided context. Therefore, the reason for this behavior cannot be determined from the given information.
This answer is automatically generated