Advertisement
Quick Links
Table of Contents
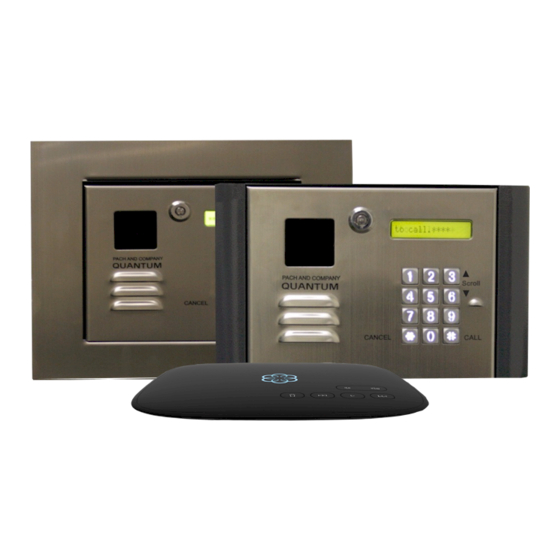
QUANTUM QVOIP SERIES MANUAL
Table of Contents Limitation of Liability
Products Limited Warranty
Limited Warranty Limits and Exclusions
CHAPTER 1 GETTING STARTED
CHAPTER 2 INSTALLATION AND WIRING
DIAGRAM
General Wiring Diagram
Power Wiring Diagram
VOIP Diagram
file:///C|/PACH-CO.COM-2022-B/online_manual/qvoip_manual.htm[3/24/2022 1:59:26 PM]
V.03152022
TABLE OF CONTENTS
Function Code 15: Initializing Event Recording
Function Code 16: Auto Unlock Schedule (AUS)
Function Code 17: Time Zone (TMZ)
Function Code 18: Holiday Zone (HLD)
Function Code 19: Directory Digit
Function Code 20: AUXIN1
Function Code 21: AUXIN2
Function Code 22: Do Not Disturb
Function Code 23: Lock-out Count
Function Code 24: Alarm
Function Code 25: Keypad Beep
Function Code26: Door Beep
Function Code 27: Talk Time
Function Code 28: Unlock Relay 1 Time
Function Code 29: Unlock Relay 2 Time
Function Code 33: Temporary Code
Function Code 34: Special Code
Advertisement

Related Manuals for PACH & COMPANY QUANTUM QVOiP SERIES


Summary of Contents for PACH & COMPANY QUANTUM QVOiP SERIES
- Page 1 Table of Contents QUANTUM QVOIP SERIES MANUAL V.03152022 TABLE OF CONTENTS Table of Contents Limitation of Liability Function Code 15: Initializing Event Recording Function Code 16: Auto Unlock Schedule (AUS) Products Limited Warranty Function Code 17: Time Zone (TMZ) Function Code 18: Holiday Zone (HLD)
- Page 2 Pach and Company does not assume any liability for any damages, which may arise in installation or use of the Quantum QVOIP Series Pach and Company does not assume liability for any incompatibility between the Quantum QVOIP Series and users devices.
- Page 3 Table of Contents PRODUCTS LIMITED WARRANTY If your product does not work properly because of a defect in materials or workmanship, Pach and Company (referred to as the warrantor) will, for the length of the period indicated on the chart below, which starts with the date of original purchase (Limited Warranty Period), at its option either (a) repair your product with new or refurbished parts or (b) advance replacement with new or refurbished product.
- Page 4 Pach & Company thanks and congratulates you on the purchase of your Quantum QVOIP Series Telephone Entry Access Control Systems. The manual is designed to guide you through the proper programming and use of the Quantum QVOIP Series It is important for you to read and follow the manual completely.
- Page 5 Table of Contents have any difficulties during the installation. Click the selection below for different applications General Wiring Diagram Power Wiring Diagram VOIP Telephone Diagram Door Strike Wiring Diagram Input Devices and Door Sensor Wiring Diagram Satellite System Wiring Diagram 2.1 General Wiring Diagram file:///C|/PACH-CO.COM-2022-B/online_manual/qvoip_manual.htm[3/24/2022 1:59:26 PM]...
- Page 6 Table of Contents 1. Input Power 12VAC 40VA (supplied) 2. Battery Back-up 12VDC 4Ahr 3. Relay 2 dry contact (door strike, gate operator) 4. Relay 1 dry contact (door strike, gate operator) 5. Telephone Out (connect to next system) 6. Telephone input connect to No.15 on AATA2 7.
- Page 7 Table of Contents 2.2 Power Wiring Diagram Figure 2.2 Power Wiring Diagram 2.3 VOIP Telephone Wiring Diagram See Figure 2.1 file:///C|/PACH-CO.COM-2022-B/online_manual/qvoip_manual.htm[3/24/2022 1:59:26 PM]...
- Page 8 Table of Contents Figure 2.3 VOIP Wiring Diagram 2.4 Door Strike Wiring Diagram Figure 2.4 Door Strike Wiring Diagram 2.5 Input Device and Door Sensor Wiring Diagram file:///C|/PACH-CO.COM-2022-B/online_manual/qvoip_manual.htm[3/24/2022 1:59:26 PM]...
- Page 9 Table of Contents Figure 2.5 Input Device and Door Sensor Wiring Diagram 2.6 Satellite System Wiring Diagram Figure 2.6 Satellite System Wiring Diagram Assuming all wiring has been done properly according to chapter 2 then turn the system s power on as shown on figure 2.1 number 10.
- Page 10 Table of Contents LCD Display OK --- Flash OK --- RTC OK --- DTMF OK --- INIT START --- INIT COMPLTE --- SCROLLING CHAPTER 3 Keypad Correlation Table The QR5 buttons are lighted. Below are the correlation table for each key. = 1 _ .
- Page 11 Table of Contents 3. Enter new master code then press # Function code 01 - Add New Tenant Directory A tenant directory consists of directory code (0-9), tenant's name and phone number. Up to 10 tenant directories can be programmed. Log-in to programming Enter 01 then # Enter directory number 0-9...
- Page 12 Table of Contents Enter tenant directory number to be edited then # Enter new name up to 16 characters then press # or press without entering anything to keep the existing name Chapter 3 for keypad layout Enter the a new tenant phone number up to 16-digit then press # or press without entering anything to keep the existing...
- Page 13 Table of Contents Log-in to programming Enter 04 then # Do the following: - Press 1 (to clear all directories) then press # - Press * to cancel Function Code 05 - Call Forwarding Enable or disable call. Default setting= 1 (enable). If 1 (disable) is selected, the system can't make calls Log-in to programming 2.
- Page 14 Table of Contents Chapter 3 for keypad layout Enter name up to 16 characters, then press # Enter door 1 or 2, or 3 for both, then press # Enter time zone 1-3 then press # Enter 00 hours) - 20 see function code 17 then press # Enter satellite system ID 0-7...
- Page 15 3. Enter 4, 5, 6, 7 or 8 (default setting is 4 digit) then press # Function Code 10 - Add New Card or Transmitter A maximum of 100 cards or transmitters can be programmed into the Quantum QVOIP Series file:///C|/PACH-CO.COM-2022-B/online_manual/qvoip_manual.htm[3/24/2022 1:59:26 PM]...
- Page 16 Table of Contents Log-in to programming Enter 10 then # Present the card in front of the card reader black window, the number will register automatically (or enter the last 8 digits of the number on the card) then press #or press the transmitter button (the number will automatically register) then press # Chapter 3 for keypad layout...
- Page 17 Table of Contents Log-in to programming Enter 11 then # Present the card in front of the card reader black window, the number will register automatically (or enter the last 8- digits of the number on the card) then press # if card exists if card does not exist Repeat this step to delete another code...
- Page 18 Table of Contents Enter 13 then # Enter HH= in military time MM= minute the press # Function Code 14 - Set Date Log-in to programming Enter 14 then # Enter YYYY/MM/DD YYYY= year MM= Month DD= Date then press # Enter 0= Sunday, 1= Monday, 2= Tuesday, 3= Wednesday, 4= Thursday, 5= Friday, 6= Saturday then press #...
- Page 19 Table of Contents Enter 1 then # to clear event buffer * to cancel deletion Function Code 16 - Auto Unlock Schedule (AUS) Unlocking and locking the door as program automatically. if the open time is 06:00 and close time 18:00, door 1,2 or both will unlock at 06:00 am and close at 06:00 pm.
- Page 20 Table of Contents Enter 0= Sunday, 1= Monday, 2= Tuesday, 3= Wednesday, 4= Thursday, 5= Friday, 6= Saturday then press # 8. Enter 1= Relay 1 (door 1) 2= Relay 2 (door 2) 3= Both relay 1 and 2 then press # Return to step 3 to enter another AUS Function Code 17 - Time Zone (TMZ) A maximum of 20 Time Zone can be programmed and up to three time zone can be assigned to each access code or card to...
- Page 21 Table of Contents Enter start time in military then press # Enter end time in military then press # Enter 0= Sunday, 1= Monday, 2= Tuesday, 3= Wednesday, 4= Thursday, 5= Friday, 6= Saturday then press # Return to step 3 to program more time zone Function Code 18 - Holiday Zone (HLD) HLD is to ever ride Time Zone (TMZ) and Auto Unlock Schedule (AUS) during the holidays.
- Page 22 Table of Contents 5. Enter month and date (i.e. 0704 for U.S.A Independence Day) then press # Return to step 3 to add more holiday zones. Function Code 19 - Directory Digit Directory digit is a unique number that must be assigned for each tenant. Directory digit can be an apartment number. By default is set to 3 but it can be changed to 2,3 or 4 digit.
- Page 23 Table of Contents 3. Enter 0= disable (default setting) 1= Enable control by relay 2 open door interval, see function code 29 2= relay 2 control by AUXIN2 then press # Function Code 22 - Do Not Disturb If the Do Not Disturb is enabled visitors can't call from the system Log-in to programming 2.
- Page 24 Table of Contents 2. Enter 24 then # 3. Enter 0= disable, 1=disable system for 60 seconds and local beep (default setting), 2= disable system for 60 seconds with no beep 3= call directory (0-9) then press # Function Code 25 Keypad Beep Turn the keypad press beep On or Off Log-in to programming 2.
- Page 25 Table of Contents 3. Enter 10-240 seconds then press # Function Code 28 Unlock Relay 1 Time The amount of time for relay 1 to trigger. Log-in to programming Enter 28 then # 3. Enter 01-99 (second) then press # Function Code 29 Unlock Relay 2 Time The amount of time for relay 2 to trigger.
- Page 26 Table of Contents Log-in to programming 2. Enter 33 then # 3. Enter 0= delete existing temporary code or 1= add temporary code then press # 4. Enter code number 01-10 then press # Enter 4-8 digit code, see digit setting on function code 09 Chapter 3 for keypad layout...
- Page 27 Table of Contents * = exit programming Function Code 34 Special Code The code can be use to unlock hold (open hold) and use same code again to lock (close) door or gate. Up to 10 special codes can be programmed. Log-in to programming 2.
- Page 28 Table of Contents 9. Enter 00 hours) - 20 see function code 17 then press # 10. Enter Sat ID 0-7 then press # (enter 0 if no satellite connected to the QR5) 11. Enter 0= no more additional time zone then press # and return to step 3 to program another temporary code 1= add additional time zone then press # and return to...
- Page 29 Table of Contents Chapter 3 for keypad layout 6. Enter name and press # 7. Enter 1= relay 1(door 1), 2= relay 2 (door 2) or 3= both relay then press # 8. Enter time zone 1-3 then press # 9.
- Page 30 Table of Contents 3. Enter 0= delete 1= add then press # 4. Enter code 01-10 then press # 5. Enter 4-8 digit code, see digit setting on function code 09 Chapter 3 for keypad layout 6. Present the card or fob in front of the black window, the system will register the card or fob 8-digit number printed then press # 7.
- Page 31 Table of Contents Function Code 38 System Acknowledge The system will answer incoming outside call after the number of rings set. If the line associated with the system is connected to fax machine, alarm panel or any answering device. Disable this function. Log-in to programming 2.
- Page 32 Table of Contents Log-in to programming 2. Enter 40 then # 3. Press 1-9 (9 is default setting) then press # Function Code 41 DTMF Relay 2 By default the DTMF remote opening relay 2 (door 2) key number is set to 8 means pressing 8 will remotely trigger relay 2 (door 2).
- Page 33 Table of Contents programmed. Log-in to programming 2. Enter 43 then # 3. Enter 0-9 then press # 4. Enter 0= delete, 1= add then press # 5. Enter start time (military time) the press # 6. Enter end time then press # (military time, end time must be later than start time, if start time: 22:00 hour and end time: 06:00, two time zone must be created (22:00 hour - 24:00 hour, 00:01 hour 06:00 hour) 7.
- Page 34 Table of Contents 3. Enter 0-9 then pres # Enter 0= Delete the existing time zone then press # 1= add new time zone then press # Enter start time in military then press # Enter end time in military then press # Enter 0= Sunday, 1= Monday, 2= Tuesday, 3= Wednesday, 4= Thursday, 5= Friday, 6= Saturday then press #...
- Page 35 Table of Contents 3. Enter relay 1 (door 1) then press # then press # or relay 2 (door 2) then press #, then press # Function Code 46 Firmware Version To check the system's firmware version Log-in to programming 2.
- Page 36 Table of Contents Function Code 49 Edit Existing Access Code, Temporary Code and Special Code Log-in to programming 2. Enter 49 then # 3. Editing an Access Code click here Editing a Temporary Code, click here Editing a Special code, then click here Function Code 50 Erase Memory to Factory Default Warning: This function code will erase the memory to factory default, no way to restore them unless the database has...
- Page 37 5.4 Opening Door Using Card, Temporary Card, and Special Card The Quantum QVOIP Series has built-in card reader. The door can be access using UFOB, UCLAM or UISO. Card Standard Operation is used to open the door and door will be closed automatically, see...
- Page 38 Table of Contents Swipe the card as shown below. The card reader antenna is mounted behind the black square window. 5.5 Opening Door Using Transmitter, Temporary Code Transmitter, and Special Code Transmitter Not applicable for new generation. 5.6 Extending Talk Time The talk time timer is set on function code 27.
- Page 39 Table of Contents QWCM Internet IP Module The QWCM is only applicable for QR5IP. Click here for complete manual for QWCM QR5IP DEFAULT SETTING IP: 192.168.1.230 SUBNET: 255.255.255.0 GATEWAY: 192.168.1.1 DNS: 192.168.1.1 USERNAME: Administrator PASSWORD: pach or 8888 file:///C|/PACH-CO.COM-2022-B/online_manual/qvoip_manual.htm[3/24/2022 1:59:26 PM]...
Need help?
Do you have a question about the QUANTUM QVOiP SERIES and is the answer not in the manual?
Questions and answers