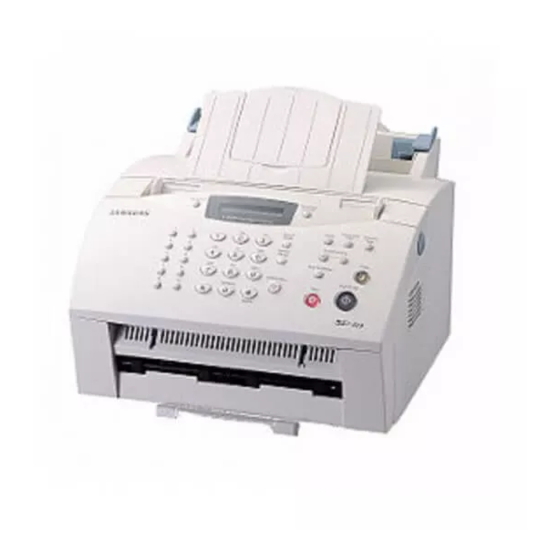
Samsung SF-515 Service Manual
Hide thumbs
Also See for SF-515:
- Reference manual (52 pages) ,
- User manual (52 pages) ,
- Product manual (12 pages)

Related Manuals for Samsung SF-515


Summary of Contents for Samsung SF-515
-
Page 1: Table Of Contents
SAMSUNG FACSIMILE SF-515 SERVICE Manual SAMSUNG FACSIMILE CONTENTS 1. Precautions 2. Specifications 3. Disassembly and Reassembly 4. Troubleshooting 5. Exploded Views and Parts List 6. Block Diagram 7. Connection Diagram... - Page 2 ITSELF system Samsung Electronics Co., Ltd. Printed in Korea. “http://itself.sec.samsung.co.kr” VERSION NO. : 1.00 CODE : JC-0071A - This Service Manual is a property of Samsung Electronics Co.,Ltd. Any unauthorized use of Manual can be punished under applicable International and/or domestic law. -...
- Page 3 Copyright Act. Specifications are subject to change without prior notice. Samsung Electronics Digital Printing CS Group Copyright (c) 2002. 5.
-
Page 4: Precautions
5. Do not force to open or fasten plastic material compo- away from the part to which nents. it is latched. 6. Be careful that small parts such as screws should not get in the printer. Samsung Electronics... - Page 5 ESD. 3. Use only a grounded tip soldering iron to solder or desol- der ESDs. Samsung Electronics...
- Page 6 Software(Driver) installation CD ROM Standard: "-" type, "+" type (M3 long, M3 short, M2 long, M2 short) Mind your hands not to be touched when you disassemble and reassemble PBA ASS'Y, such as the main board, SMPS, HVPS. Note Samsung Electronics...
-
Page 7: Specifications
DESCRIPTION REMARKS Scan Method Sheet-Fed CIS Quick Scan Speed Approx. 6 sec Resolution Up to 200 x 200 DPI effective output Scan Width 216 mm (8.5 inches) Effective 210 mm (8.3 inches) Scan Length 1000 mm (39.4 inches) Samsung Electronics... - Page 8 ITEMS DESCRIPTION REMARKS Power Button Input Voltage 110V~120V, 220V~240V Power Sleep Mode less than 10 W Consumption Stand by less than 70 W less than 490 W Power Save Mode OFF, 5, 10, 15, 30, 45, 60 Min Samsung Electronics...
- Page 9 ADF Rubber Up to 10K Pages Scan Paper Feeding Roller Up to 50K Pages Printer Transfer Roller Up to 60K Pages Print Fuser Unit Up to 50K Pages Print * Based On ITU-T No.1 Chart Using Standard Resolution. Samsung Electronics...
-
Page 10: Disassembly And Reassembly
Then lift, the Roller out. White Roller White Roller Control Panel Note : Check the Roller for any dirt. If dirty, wipe it off with soft cloth dampened with water. If the Roller is heavily worn, replace it with a new one. Samsung Electronics... - Page 11 7. Remove the stopper holding the OPE Cover. 3. Pull the bottom left end of the Cover downward to unlatch the Front Cover unit and remove the Cover from the Main Frame. 8. Unlatch the bottom ends, then remove the OPE Cover. Samsung Electronics...
- Page 12 (Isopropyl Alcohol). After wiping it, be sure to dry it. Check the rubber wear. If the wear reaches 1/2 its original thickness, replace it with a new one. Safely Precautions : Do not force to open or fasten plastic material components. Pinset or Screw Driver Samsung Electronics...
- Page 13 1. Unlatch the Lever Sensor Doc from the Scan Upper Frame and take it out. 3-7 Lever Sensor Scan 1. Push the both Sides of Lever Sensor Scan inward, then unlatch and take out the Sensor Scan from the Scan Upper Frame. Samsung Electronics...
- Page 14 – OPE Cover (see page 3-3) – Bracket Scan Board (see page 3-3) 5. Remove two screws and remove the Motor. 2. Unplug one connector from the Scan Board. 3. Remove three screws, then remove the Motor Ass’y from the Main Frame. Samsung Electronics...
- Page 15 2. Remove two screws securing the Guide Paper and remove the Guide Paper. Guide Paper 3-11 CIS 1. Remove one screw and push the CIS as shown 2. Separate the Dummy CIS from CIS. below and lift it. Guide CIS Samsung Electronics...
- Page 16 Guides fully inward. Then spread the bottom of the Top Cover and lift the Cover to remove. – OPE Cover (see page 3-3) – Rear Cover (see above) Paper guides 2. Remove two screws securing the Top Cover from the back side of the machine. Samsung Electronics...
- Page 17 2. Take out the Tray from the Main Frame. 3-15 LSU 1. Before you remove the LSU, you should remove: 3. Unplug two connectors from the LSU and remove the – All Covers (see page 3-3, 3-9) LSU. 2. Remove three screws (Black) securing the LSU. Samsung Electronics...
- Page 18 3-17 Engine Board 1. Before you remove the Engine Board, you should remove: – All Covers (see page 3-3, 3-9) – LSU (see page 3-10) 2. Unplug five connectors and remove one screw(Black) from the Engine Board, then remove it. Samsung Electronics...
- Page 19 Note : When you reassemble the Pick-up Roller, make sure that the right end of the Pick-up Roller fits into the Pick-up Gear shaft. 3. Remove four screws (Black)securing the Plate Upper and remove the Plate Upper as below. Pick-up gear shaft 3-10 Samsung Electronics...
- Page 20 1. Before you remove the Cap-pad, you should remove: 2. Take out the Cap-pad from the Main Frame. – All Covers (see page 3-3, 3-5) – LSU (see page 3-10) – Plate Upper (see page 3-12) – Knock-up Ass’y (see above) Samsung Electronics 3-11...
- Page 21 – All Covers (see page 3-3, 3-9) fastened properly. 2. Remove three screws(Sliver) securing the Motor Ass’y and remove the Dummy Side, then remove the Motor Ass’y. Boss 3. Unplug one connector from the Motor Ass’y. Dummy Side 3-12 Samsung Electronics...
- Page 22 1. Before you remove the Gear Pick-up Ass’y, you 2. Release two snap-fits and remove the Gear Pick-up should remove: Ass’y from the Main Frame. – All Covers (see page 3-3, 3-9) Note: When reassembling, make sure that the direction of the Gear is correct. Samsung Electronics 3-13...
- Page 23 1. Before you remove the HVPS Board, you should remove: – All Covers (see page 3-3, 3-9) 2. Remove three screws and one connector from the HVPS Board, then remove it. Note : when reassembling, make sure that the terminal is five. 3-14 Samsung Electronics...
- Page 24 3. Remove two screws and unlatch the Fuser Ass’y remove: using a proper tool. – All Covers (see page 3-3, 3-9) 2. Remove two wires after remove two screws from the Main Frame and one connector from the inter connec- tor. Samsung Electronics 3-15...
- Page 25 3. Remove the Halogen Lamp from the Heat Roller. remove: – All Covers (see page 3-3, 3-9) – Fuser Ass’y (see page 3-17) 2. On the Fuser Ass’y, remove the two screws, then remove the Heat Roller. 3-16 Samsung Electronics...
- Page 26 2. Lift and remove the Pressure Roller from the Main Frame. 3-31 Actuator-Exit 1. Before you remove the Actuator-Exit, you should remove: – All Covers (see page 3-3, 3-9) – Fuser Ass’y (see page 3-17) 2. Lift and remove the Actuator-Exit from the Main Frame. Samsung Electronics 3-17...
- Page 27 1. Before you remove the SMPS Board, you should remove: – Rear Cover (see page 3-9) – Shield Engine Ass’y (see page 3-19) 2. Remove four screws (golden) and two connectors, then remove the SMPS Board from the Main Frame. 3-18 Samsung Electronics...
- Page 28 1. Before you remove the LIU Board, you should remove: – Rear Cover (see page 3-9) – Shield Engine Ass’y (see page 3-19) 2. Remove three screws and three connectors from the LIU Board, then remove it from the Main Frame. Samsung Electronics 3-19...
- Page 29 1. Before you remove the Sensor Board, you should remove: – Rear Cover (see page 3-9) – Shield Engine Ass’y (see page 3-19) 2. Release four snap-fits securing the Sensor Board and unplug one connector from the Main Board, then remove it. 3-20 Samsung Electronics...
- Page 30 – Rear Cover (see page 3-9) Feed Sensor – Shield Engine Ass’y (see page 3-19) 2. Remove one connector from the Main Board and two screws securing the Holder Feed Ass’y, then remove Empty Sensor Samsung Electronics 3-21...
- Page 31 – All Covers (see page 3-0) – Motor Ass’y (see page 3-15) 2. Release two snap-fits and remove the Gear-Feed, Clutch-Feed, and the Spring-Clutch. Spring-clutch Gear-feed 4. Separate the Roller Feeder from the Holder Feeder Ass’y. Clutch-feed Roller Feed Holder Feed 3-22 Samsung Electronics...
-
Page 32: Troubleshooting
The technical options you have set in TECH mode are not changed unless you clear the machine’s memory in TECH mode. To communicate via direct connection with another fax machine, press OHD/V.REQ followed by Start/Enter. • Caution : When you finish operating in Tech Mode, you must turn the power Off/On. Samsung Electronics... - Page 33 CLEANING DRUM ADJUST SHADING REMOTE TEST OFF/ON NOTIFY TONER LOW OFF/ON ROM TEST ROM OK! (VERSION) CIS TEST DRAM TEST DRAM OK SWITCH TEST DTMF TEST TONER COUNT PRINTING INFO OFF/ON PROGRAM DOWNLOAD LOCAL/REMOTE : Only Tech Mode Samsung Electronics...
- Page 34 • You can select the rate between 5% and 10%. IGNORE TONER EMP • You can set this function ON if desiring to drive the engine continuously even though the life of toner is run out and it becomes Toner Empty status. Samsung Electronics...
- Page 35 You may be instructed by a service repre- sentative to enable this feature. • Caution : After replacing Main board to new one, you should update the information to the new board. Samsung Electronics...
- Page 36 • THV ON DUTY: prints ADC value of transfer voltage. • THERMISTOR: prints ADC value of fusing temperature. • P: prints the page number. PROGRAM DOWNLOAD • Use this feature to download a new upgraded ROM (See 4-2-7). Adjust Shading Sample Pattern Samsung Electronics...
- Page 37 SENDING CONFIRM SHADING PRINT • It shows the result of the last send operation. • With this print, you can check the scanning elements of the CIS (Contact Image Sensor). Samsung Electronics...
- Page 38 2. Keep pushing the STOP button till the MEMORY CLEAR- ING is shown up at the LCD panel. 3. Turn on the power. 4. Select your country. 5. Push the Enter button then it will be all memory clear. Samsung Electronics...
- Page 39 PC by connecting a PC to a This is a function that a fax with the latest firmware sends machine in parallel with parallel cable. But the SF-515 model files to a fax in long distance through telephone line.
- Page 40 NO ANSWER the redial attempts. is operational. The one-touch or speed dial location you tried Dial the number manually with the key- NO. NOT ASSIGNED to use has no number assigned to it. pad, or assign a number. Samsung Electronics...
- Page 41 The toner is almost empty. Take out the toner cartridge and gently shake it. Using this way, you can tem- porarily re-establish the print quality. WARMING UP The printer is warming up and is off-line. Wait until the printer is on-line. 4-10 Samsung Electronics...
- Page 42 • A toner cartridge bought by user: 2,500 10. Confirm the entering value by printing the System Data List at Tech Mode. 11. Operate the Adjust Shading. (Referred to the page 4-4 for method of adjust shading) Samsung Electronics 4-11...
- Page 43 OK after removing the obstacles? OK after Remove part on the paper replacing the LSU? path causing the trouble Any obstacles ON mirror lens of LSU and Replace the LSU laser path? Remove the obstacles. 4-12 Samsung Electronics...
- Page 44 LSU transit to High/Low the defective component when printing? or board The mirror in LSU might be misplaced so the light path to the OPC deviates ->Repair or replace LSU or remove any deffective matters in the machine Samsung Electronics 4-13...
- Page 45 This could occurrs when he power of LSU is low or the toner’s guarranty the density is low due to the obstacles on the window life -> Replace LSU or clean the window Replace the toner cartridge 4-14 Samsung Electronics...
- Page 46 HVPS works OK? Any obstacles on the gab between high voltage Remove the obstacles terminal and developer? Clean transfer roller Transfer roller and gear holder works OK? OK after replacing Replace the LSU LSU? Replace the developer Samsung Electronics 4-15...
- Page 47 -> Repair or replace printing? the boards Replace LSU Is transfer voltage supplied Repair or replace HVPS (-1.55 KV)? Is the Hsync/ signal received Replace LSU in LSU? Transfer part’s contact is bad -> Repair or replace toner cartridge 4-16 Samsung Electronics...
- Page 48 Toner material might be stuck to blade in the developer inside and it prevents toner supply -> Replace the toner cartridge Check both if the toner cartridge’s counter is over its guaranty and amount of the toner material -> Replace the toner cartridge Samsung Electronics 4-17...
- Page 49 Toner over supply due to the Works adjustment fault of metering correctly after blade in developer replaced LSU? -> Replace developer The power of LSU is set high or internal problem -> Replace LSU or adjust voluem 4-18 Samsung Electronics...
- Page 50 (10-32 degree Centigrade) /terminal after check Check Terminals or contacts and ’Guide-Deve Spring’ are misplaced Work OK? -> Repair or replace transfer roller etc. Internal blade or suppying part of the developer is defective -> Replace the toner cartridge Samsung Electronics 4-19...
- Page 51 HVPS Operating/storage There may be a problem in toner temperature is too low or layer control in toner cartridge not recommended -> Replace the developer paper used? Use the machine with recommended paper and at condition 4-20 Samsung Electronics...
- Page 52 P/R or H/R in fuser the paper -> Replace the -> Clean it or replace developer The problem occured Does the same since the obstacles problesm stuck to charge roller persist? -> Replace toner cartridge Samsung Electronics 4-21...
- Page 53 (37.7mm) -> Repair/replace HVPS, developer The OPC is damaged due to Heat roller is ruined the irregular transfer voltage -> Replace the roller of HVPS -> Repair/replace HVPS -> If the same problem persists, replace the developer 4-22 Samsung Electronics...
- Page 54 Troubleshooting Toner Contaminations on Back of Paper Transfer roller Clean the transfer roller is clear ? Paper path is Clean the paper path clear ? Clean the pressure roller Samsung Electronics 4-23...
- Page 55 Clean the TR holder, the TR gear, works properly? OPC roller gear and the transfer roller - Clean the contact point of transfer roller - Check the output of high voltage terminal and adjust or replace if required 4-24 Samsung Electronics...
- Page 56 - Check the output of high voltage terminal and adjust or replace if required. Is it regular interval of 75.4mm, 31.6mm Replace the toner cartidge or 37.7mm? Replace the fuser (50.2mm, 45.2mm or exit roller Samsung Electronics 4-25...
- Page 57 (Check the counter replace terminals, HVPS and replace it) Irregualrity of toner Bad images suppy from developer aroung the no image -> Repalce developer area? Light distortion due to the mirror ruined or LSU’s diffused reflection -> Replace LSU 4-26 Samsung Electronics...
- Page 58 Obstacles stuck on OPC’s D/R in developing unit has surface the defect -> Clean the OPC and -> Replace the developer machine or replace developer When putting in/out the developer, scratch is made -> Replace the developer Samsung Electronics 4-27...
- Page 59 1.2~ 3.0mm? Replace the contol The paper used is too component on engine thick or contains too board much cotton in it -> Re-test with the Check any contact recommended paper problem in thermistor and repair 4-28 Samsung Electronics...
- Page 60 -> Replace the boards Detect failure due to the Repair/replace the Remove the shortage board board which detects top or replace the board cover open or switch error -> Replace the board or switch Samsung Electronics 4-29...
- Page 61 -> Replace the component or replace the SMPS The voltage of pin #208 of U5 Thermistor, connecting point or engine (CPU) on the Main board board defect -> Repair/replace the is about 2.3V when component/board printing? 4-30 Samsung Electronics...
- Page 62 Switch them Does the Pull out the Paper end curled? extender pulled out? extender <Recommendation> Use the recommended Use the MPF for the thick and quality paper paper such as envelope and cardstock Samsung Electronics 4-31...
- Page 63 Adjust the paper guides to fit the or sensitive paper to is grounded Check paper width static electricity? the shutter prevents feeding The force of springs pressing the developer is weak -> Check guide-DEVE Use the recommended paper 4-32 Samsung Electronics...
- Page 64 B’D) Replace connector Check MAIN B’D CN9-3, Replace MAIN B’D P_MOTOR Signal Check MAIN B’D CN9-4, Replace LSU LREDADY Signal Check MAIN B’D CN9-9, Replace MAIN B’D LDON Signal Check MAIN B’D CN9-6, Replace LSU HSYNC Signal Samsung Electronics 4-33...
- Page 65 Exploded Views and Parts List Appendix information The following list shows different materials by model. The material codes mentioned in the manual are subject to change without prior notice. For the lat- est exact information, see ITSELF System. (http://itself.sec.samsung.co.kr) SF-515/XAA SF-515/XET DESCRIPTION SEC.CODE...
-
Page 66: Exploded Views And Parts List
5-10 RX Drive Unit Assembly ....... . page(5-18) Samsung Electronics... -
Page 67: Main Assembly
Exploded Views and Parts List 5-1 Main Assembly 18-2 16-2 16-1 18-1 14-2 14-1 10 &12 17-2 17-1 Samsung Electronics... - Page 68 PBA MAIN-LIU PBA Refer to Info. MEC-STACKER JC97-01663A PMO-STACKER TX(APOLLO) JC72-00223A PMO-STACKER TX(B) ELA-UNIT DEV APO6 E ELA HOU-ENGINE ASS’Y ELA HOU-SHIELD ENGINE(SF-515) ELA HOU-FRAME LOWER Refer to Info. ELA HOU-RX DRIVE JC96-01755A MEA HOU-OPE FRONT Refer to Info. 14-1 PBA MAIN-SCAN...
-
Page 69: Shield Engine Unit Assembly
Exploded Views and Parts List 5-2 Shield Engine Unit Assembly LIU B’d Samsung Electronics... - Page 70 Exploded Views and Parts List Shield Engine Unit Assembly Parts List O : Service available X : Service not available Description SEC.Code Q’ty Remark ELA HOU-SHIELD ENGINE(SF-515) CABLE-FLAT 3809-001161 CBF HARNESS-LSU JC39-00043A CBF HARNESS-MAIN-HVPS JC39-00193A CBF HARNESS-LIU/HOOK 2 JC39-00174A CBF HARNESS-MODULA 2...
-
Page 71: Engine Assembly
Exploded Views and Parts List 5-3 Engine Assembly 13-1 13-2 21-1 21-2 S-10 21-3 17-2 17-3 17-4 17-1 22-3 22-1 22-2 Frame Lawer Ass’y Bushing-Shaft Samsung Electronics... - Page 72 17-4 RPR-PAD FRICTION MEC-TERMINAL JC75-00049A MEC-SIDE PAD(L) JC75-00050B MEC-SIDE PAD(R) JC75-00051B MEC-KNOCKUP ASS’Y JC75-00053A 21-1 IPR-BAR_KNOCKUP 21-2 PMO-PLATE-KNOCKUP 21-3 PMO-CAM-KNOCKUP MEC-GEAR PICK UP JC75-00056A 22-1 SPRING-PICK UP GEAR 22-2 PMO-GEAR_PICKUP,1 22-3 PMO-GEAR_PICKUP,2 SCREW-TAPTITE 6003-000196 SCREW-TAPTITE 6003-000266 SCREW-TAPTITE 6003-000119 Samsung Electronics...
-
Page 73: Frame Lower Assembly
Exploded Views and Parts List 5-4 Frame Lower Assembly 29-4 29-1 Transfer Roller 29-3 29-2 30-3 30-1 30-2 34-1 34-2 27-1 27-2 28-3 28-3 28-4 28-1 28-2 Samsung Electronics... - Page 74 Exploded Views and Parts List Frame Lower Assembly Parts List O : Service available X : Service not available Description SEC.Code Q’ty Remark ELA HOU-FRAME LOWER(SF-515) Refer to Info. CBF HARNESS-OPE GND CBF HARNESS-FUSER JC39-00042A SPRING-P/R (APOLLO) SPRING-GUIDE DEVE BEARING-PRESSURE R...
-
Page 75: Fuser Assembly
Exploded Views and Parts List 5-5 Fuser Assembly 14-2 14-1 5-10 Samsung Electronics... - Page 76 NPR-ROLLER HEAT JC71-00012B IPR-ELECTRODE_PLATE IPR-GROUND_FU IPR-PIN ROLLER EXIT IPR-ELECTRODE WIRE1 IPR-ELECTRODE WIRE,S MEA ETC-SHAFT EXIT 14-1 PMO-SHAFT_EXIT(Z15) JC72-00150A 14-2 RMO-RUBBER_EXIT PMO-ROLLER_IDLE EXIT JC72-00567A SPRING-EXIT JC61-00017A PMO-GEAR_EXIT_DRV16 PMO-GEAR_EXIT_IDLE GEAR-FUSER 1210 JC66-00037B LABEL(R)-CAU_HOT_FU SPRING-CLAW PMO-GUIDE CLAW SCREW-TAPTITE 6003-000119 SCREW-TAPTITE 6003-000196 Samsung Electronics 5-11...
-
Page 77: Plate-Upper Unit Assembly
Exploded Views and Parts List 5-6 Plate-Upper Unit Assembly 5-12 Samsung Electronics... - Page 78 Remark MEC-PLATE UPPER JC75-00057A IPR-UPPER-PLATE IPR-PLATE SPRING DEV JC70-10223A ELA UNIT-FUSE DEVE MEA ETC-ROLLER PICK UP PMO-HOUSING_PICKUP JC72-00109A RMO-ROLLER_PICKUP PMO-IDLE_PICKUP MEA ETC-IDLE FEED PMO-HOLDER_PICKUP SPRING-FEED PMO-HOLDER_IDLE,FEED CABLE CLAMP 6502-000130 ICT-ROLLER IDEL FEED SCREW-TAPTITE SCREW-TAPTITE 6003-000266 SCREW-TAPTITE 6003-000266 Samsung Electronics 5-13...
-
Page 79: Ope Unit
O : Service available X : Service not available Description SEC.Code Q’ty Remark ELA HOU OPE ASSY Refer to Info. COVER OPE PMO-WINDOW_LCD KEY-START KEY-COPY JB72-00102A KEY-STOP JB72-00108A KEY-ONE TOUCH JC72-00409A KEY-RESOLUTION KEY-TEL JB72-00100A KEY-FUNCTION JC72-00410A RPR-CONTACT-RUBBER A RPR-CONTACT-RUBBER B PBA-MAIN OPE JC92-01156A SCREW-TAPTITE 5-14 Samsung Electronics... -
Page 80: Scan Upper Assembly
SEC.Code Q’ty Remark ELA HOU SCAN UPPER PMO-SCAN UPPER FRAME RUBBER-ADF JC73-00032A SUPPORT-ADF JG72-40043A HOLDER-RUBBER JG72-40044A LEVER-SENSOR DOC JB72-41247A LEVER-SENSOR SCAN SPRING-COIL JG70-40514A ANTISTATIC-BRUSH JB75-00051A SPRING-ETC SENSOR CBF-HARNESS SCAN GND IRP-PLATE PINCH ROLL PMO-ROLLER PINCH STACKER SCREW-TAPTITE Samsung Electronics 5-15... -
Page 81: Front Assembly
Exploded Views and Parts List 5-9 Front Assembly 21-2 21-1 21-5 21-3 21-4 15-1 15-2 5-16 Samsung Electronics... - Page 82 IPR-PLATE_GROUND PMO-COVER-GEAR ELA ETC GUIDE PAPER 21-1 PMO-GUIDE PAPER 21-2 PMO-GUIDE DOC L 21-3 PMO-GUIDE DOC R 21-4 PMO-GEAR PINION JG66-40003A 21-5 MPR-RING CHARGE PMO-BUSHING SHAFT(EXIT) MEC-ANTSTATIC BRUSH STOPPER-EXIT JC72-41396B SCREW TAPTITE SCREW MACHINE SCREW TAPTITE SCREW-TAPTITE Samsung Electronics 5-17...
-
Page 83: Rx Drive Unit Assembly
5-10 RX Drive Unit Assembly RX Drive Assembly Parts List O : Service available X : Service not available Description SEC.Code Q’ty Remark ELA HOU-RX DRIVE JC96-01755A MOTOR-STEP JC31-00005A PMO-GEAR_71/28 PMO-GEAR_73/22 PMO-GEAR_132/19 IPR-BRKT_MOTOR IPR-BRKT_GEAR JC70-00129A CBF-HARNESS_MOTOR JC39-00110A SCREW-MACHINE 6001-000131 YELLOW 5-18 Samsung Electronics... -
Page 84: Block Diagram
6. Block Diagram Samsung Electronics... -
Page 85: Connection Diagram
LI NE _2 9 1 0 1 1 1 2 13 14 LI NE _3 LI NE _4 M J1 C N3 LI NE _5 LI NE _6 C N1 EX T_3 E XT_4 M J2 L IU E XT_5 Samsung Electronics...
Need help?
Do you have a question about the SF-515 and is the answer not in the manual?
Questions and answers