Table of Contents
Advertisement
Advertisement
Table of Contents

Subscribe to Our Youtube Channel
Related Manuals for EverSewn sparrow 15


Summary of Contents for EverSewn sparrow 15
- Page 3 IMPORTANT SAFETY INSTRUCTIONS IMPORTANT When using an electrical machine, basic safety precautions should always be followed, including the following: Please read the instruction manual carefully before using this machine. Keep the instruction manual at a suitable place with the machine and hand it over if you give the machine to a third party.
- Page 4 sensory or mental capabilities or if there is a lack of experience and knowledge how to operate the machine. Unless they have been given instruction concerning the use of the machine and the involved risks by a person who is responsible for their safety. 2.
- Page 5 12. Always unplug the machine when performing cleaning or maintenance work such as replacing the sewing light or when making any other user maintenance adjustments mentioned in the instruction manual (disconnect the power plug). Cleaning and maintenance work must not be carried out by children without supervision. 13.
- Page 6 SERVICING OF DOUBLEINSULATED PRODUCTS In a double-insulated product, two systems of insulation are provided instead of grounding. No grounding means is provided on a double-insulated product nor should a means for grounding be added to the product. Servicing a doubleinsulated product requires extreme care and knowledge of the system and should only be done by qualified service personnel.
- Page 7 All rights reserved For technical and product improvement reasons, the machine's features, parts and accessory are subject to unannounced changes and alterations at any time. The accessory included can differ from country to country. Environmental protection Ever Sewn is committed to the protection of the environment. We strive to minimize the environmental impact of our products by continuously improving product Design and our technology of manufacturing.
-
Page 8: Table Of Contents
Contents Machine overview................7 Blind hem / lingerie stitch ..........27 Accessories ...................9 Overlock stitches ..............28 Machine preparation ..............10 Sewing on buttons ............29 Sewing table ..............10 Sew 1-step buttonholes ............30 Connecting machine to power source.......11 Buttonhole on stretch fabrics ..........31 Adjusting presser foot pressure ........12 Zippers ................32 Presser foot lifter...............13 Sewing with the hemmer foot ...........33... -
Page 9: Machine Overview
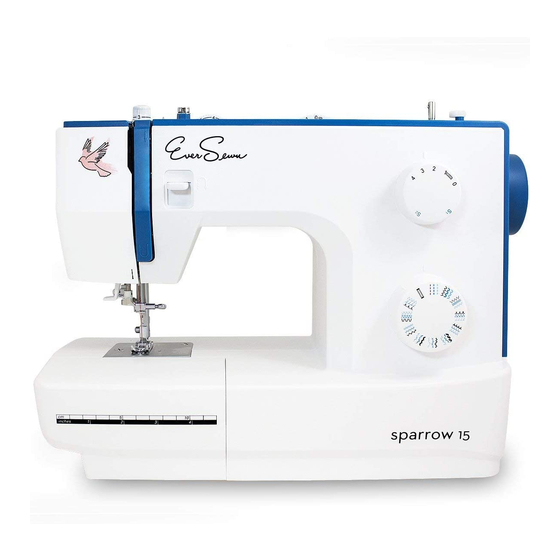
15 Machine overview Thread tension dial Thread take-up lever Presser foot pressure adjustment Thread cutter Presser foot Stitch plate Sewing table and accessory box Reverse sewing lever Bobbin winder stopper 10. Stitch width dial Stitch length dial Stitch selector dial 13. - Page 10 15 Overview 15. Horizontal spool pin 16. Bobbin winder spindle Hole for second spool pin Handwheel Power switch Main plug socket Bobbin thread guide Upper thread guide Face plate Handle Presser foot lifter 26. Foot control 27. Power cord...
-
Page 11: Accessories
15 Accessories Accessories are stored inside the accessory box. Standard 1. Zig zag foot 2. Zipper foot 3. Buttonhole foot with slide 4. Button-sew-on foot 5. Brush & seam ripper 6. Right seam guide 7. Needle set 8. Spool holder small & large 9. -
Page 12: Machine Preparation
15 Sewing table 1. Keep the snap-in sewing table horizontal, and push it in the direction of the arrow. 2. The inside of the snap-in sewing table can be utilized as an accessory box. -
Page 13: Connecting Machine To Power Source
15 Connecting machine to power source Attention: Unplug power cord when machine is not in use. Consult a qualified electrician if in doubt of how to connect machine to power source. Connect the machine to a power source as illustrated. -
Page 14: Adjusting Presser Foot Pressure
15 Adjusting presser foot pressure Standard presser foot pressure set at "2". The presser foot pressure of the machine has been pre-set and no need for change is required unless sewing particular type of fabric (light-or-heavy weight). If you do need to adjust the presser foot pressure, turn the presser adjusting screw by ones finger. -
Page 15: Presser Foot Lifter
15 Presser foot lifter The presser foot lifter raises and lowers your presser foot. (A) When sewing several layers or thick fabrics, the presser foot can be raised a second stage for easy positioning of the work. (B) Darning plate For certain types of work, (e.g. -
Page 16: Changing The Presser Foot
15 Changing the presser foot Attention: Turn power switch to off ("O")! 1. Removing the presser foot Raise the presser foot using the presser foot lifter. Raise the lever (e) and the foot disengages. 2. Attaching the presser foot... -
Page 17: Winding The Bobbin
15 Winding the bobbin 1/2. Place thread and corresponding spool holder onto spool pin. 3. Snap thread into thread guide. 4. Wind thread clockwise around bobbin winder tension discs. 5. Thread bobbin as illustrated and place on spindle. 6. Push bobbin winder spindle to right. -
Page 18: Inserting Bobbin
15 Inserting bobbin Attention: Turn power switch to off ("O") before inserting or removing the bobbin. When inserting or removing the bobbin, the needle must be fully raised. 1. Remove the sewing table, then open the hinged cover. 2. Pull the bobbin case by the hinged latch (a). -
Page 19: Inserting The Needle
15 Inserting the needle Attention: Turn power switch to off ("O") before inserting or removing the needle. 1. Change the needle regularly, especially if it is showing signs of wear and causing problems. Insert the needle as illustrated as follows: A. -
Page 20: Threading The Upper Thread
15 Threading the upper thread This is a simple operation but it is important to carry out correctly as by not doing so several sewing problems could result. 1. Start by raising the needle to its highest point, and continue turning the handwheel counterclockwise until the needle just slightly begins to descend. -
Page 21: Automatic Needle Threader
15 Automatic needle threader Attention: Turn power switch to off ("O")! - Raise the needle to its highest position. - Press lever (A) down as far as it will go. - The threader automatically swings to the threading position (B). -
Page 22: Thread Tension
15 Thread tension Upper thread tension Basic upper thread tension setting: "4". To increase the tension, turn the dial to the next higher number. To reduce the tension, turn the dial to the next lower number. A. Normal thread tension B. -
Page 23: Raising The Bobbin Thread
15 Raising the bobbin thread 1. Hold the upper thread with the left hand. Turn the handwheel towards you (counterclockwise) lowering, and then raising the needle. Note: If it is difficult to raise the bobbin thread, check to make sure the thread is not trapped by the hinged cover or the sewing table. -
Page 24: Matching Needle/Fabric/Thread
Matching needle/ fabric/ thread NEEDLE, FABRIC, THREAD SELECTION GUIDE Needle size Fabrics Thread 9-11(65-75) Lightweight fabrics-thin cottons, voile, serge, silk, muslin, Qiana, interlocks, Light-duty thread in cotton, nylon or polyester. cotton knits, tricot, jerseys, crepes, woven polyester, shirt & blouse fabrics. 12(80) Medium weight fabrics-cotton, satin, kettleclote, sailcloth, double knits, Most threads sold are medium size and suitable for... -
Page 25: Stitch Selection
15 Stitch selection Raise the needle to its highest position. Then turn the stitch selector dial to set the desired stitch pattern at the setting mark. straight stitch , select pattern " " or " " with the stitch selector dial. Adjust the stitch length with the stitch length dial. -
Page 26: Stitch Width Dial & Stitch Length Dial
15 Stitch width dial & stitch length dial 1. Function of stitch width dial Stitch width dial The maximum zigzag stitch width for zigzag stitching is 5mm; however, the width can be reduced on any patterns. The width increases as you move stitch width dial from "0"... -
Page 27: Sewing Straight Stitch
15 Sewing straight stitch 1. To begin sewing, set the machine for straight stitch. 2. Place the fabric under the presser foot with the fabric edge lined up with the desired seam guide line on the stitch plate. 3. Lower the presser foot lifter, and then step on... -
Page 28: Securing A Seam (Beginning And Ending The Seam)
15 Securing a seam (beginning and ending the seam) Beginning the seam Place fabric approximately 1cm (1/2") inward from the outer edge under the presser foot. Press the reverse sewing lever (A) while sewing backwards up to the fabric edge. -
Page 29: Blind Hem/ Lingerie Stitch
15 Blind hem/ lingerie stitch * The blindstitch foot is an optional accessory Stitch width dial Stitch length dial and is not supplied with your machine. For hems, curtains, trousers, skirts, etc. Blind hem for stretch fabrics. Blind hem/ lingerie for firm fabrics. -
Page 30: Overlock Stitches
15 Overlock stitches * The overlock foot is an optional accessory Stitch width dial Stitch length dial and is not supplied with your machine. Seams, neatening, visible hems. Turn stitch length dial to "S1". The stitch width can be adjusted to suit the fabric. -
Page 31: Sewing On Buttons
15 Sewing on buttons 1. Install the darning plate. Stitch width dial Stitch length dial Change presser foot to button-sew-on foot. Position the work under the foot. Place the button on the marked position and lower the foot. - Set the stitch selector dial on "... -
Page 32: Sew 1-Step Buttonholes
15 Sew 1-step buttonholes It is suggested that you always sew a test Stitch width dial Stitch length dial buttonhole on a sample of your fabric. The fabric should be stabilized especially when sewing thin and stretch fabrics. Making a Buttonhole Using tailor's chalk, mark the position of the buttonhole on the fabric. -
Page 33: Buttonhole On Stretch Fabrics
15 Buttonhole on stretch fabrics When sewing buttonholes on stretch fabric, hook heavy thread or cord under the buttonhole foot as shown. 1. Attach the buttonhole foot and hook the gimp thread onto the back of the presser foot. -
Page 34: Zippers
15 Zippers Set the machine as illustrated. Stitch width dial Stitch length dial 1. Place the right sides of the fabric together. Sew a seam in the width of the seam allowance from the right edge to the zipper bottom stop position. -
Page 35: Sewing With The Hemmer Foot
15 Sewing with the hemmer foot * The hemmer foot is an optional accessory and Stitch width dial Stitch length dial is not supplied with your machine. For hems in fine or sheer fabrics. Set the machine as illustrated. -
Page 36: 3-Step Zig-Zag
15 3-step zig-zag Sewing on lace and elastic, darning, mending, Stitch width dial Stitch length dial reinforcing edges. Set the machine as illustrated. Place patch in position. 1. The stitch length can be shortened to produce very close stitches. -
Page 37: Triple Straight / Zigzag
15 Triple straight / zigzag 1. Triple straight stitch For hardwearing seams. Stitch width dial Stitch length dial Turn the stitch length dial to "S1" or "S2". The machine sews two stitches forwards and one stitch backwards. This gives triple reinforcement. -
Page 38: Smocking Stitch
15 Smocking stitch Seams, hems, T-shirts, underwear, etc. Stitch width dial Stitch length dial Set the machine as illustrated. This stitch can be used for all types of jersey as well as for woven fabrics. (1) Sew at 1cm (1/4") from the fabric edge and trim... -
Page 39: Darning
15 Darning * The darning- / embroidery foot is an optional Stitch width dial Stitch length dial accessory and is not supplied with your machine. Set the machine as illustrated. 1. Install the darning plate. 2. Remove the presser foot clamp. -
Page 40: Practical Stitches
15 Practical stitches Set the machine as illustrated. Stitch width dial Stitch length dial 1. Shell hem For decorative edges. Suitable for edges on sheer, fine and stretch fabrics. The larger stitch should go just over the edge of the fabric to create the shell effect. -
Page 41: Quilting
15 Quilting * The quilting foot is an optional accessory and Stitch width dial Stitch length dial is not supplied with your machine. Set the machine as illustrated. Insert the seam guide right in presser foot holder and set the space as you desired. -
Page 42: Patch Work
15 Patch work These stitches are used to join two pieces of Stitch width dial Stitch length dial fabric while leaving a space between their edges. - Fold over the edges of the two pieces of fabric for the hem and baste the edges to a thin piece of paper leaving a small space between them. -
Page 43: Applique
15 Applique - Turn stitch length dial to the desired length. Stitch width dial Stitch length dial - Turn stitch selector dial to small zig zag width. - Cut out the applique design and baste it to the fabric. -
Page 44: Twin Needle
15 Twin needle * The twin needle is an optional accessory and Stitch width dial Stitch length dial is not supplied with your machine. - Turn stitch length dial to the desired stitch length. - Pattern selector on "... -
Page 45: Monogramming And Embroidery
Monogramming and sparrow 15 embroidery - Set the machine as illustrated. Stitch width dial Stitch length dial - Remove the presser foot and the presser foot holder. - Attach the darning plate. - Lower presser foot lever before starting to sew. - Page 46 Monogramming and sparrow 15 embroidery Monogramming 1. Sew, moving the hoop slowly along the lettering at a constant speed. 2. Secure with a few straight stitches at the end of the last letter. Embroidering 3. Stitch the outline of the design by moving the embroidery hoop.
-
Page 47: Maintenance
15 Maintenance Attention: Disconnect the machine from the electricity supply by removing the plug from the mains socket. When cleaning the machine, it must always be disconnected from the electricity supply. Remove the needle plate: Turn the handwheel until the needle is fully raised. -
Page 48: Trouble Shooting Guide
Trouble shooting quide Before calling for service, check the following items. If the problem still persists, call our Ever Sewn support Hotline or contact the place of purchase. Problem Cause Correction Upper thread 1. The machine is not threaded correctly. 1. - Page 49 Memo...
- Page 50 Memo...
Need help?
Do you have a question about the sparrow 15 and is the answer not in the manual?
Questions and answers