
Related Manuals for EverSewn Sparrow X


Summary of Contents for EverSewn Sparrow X
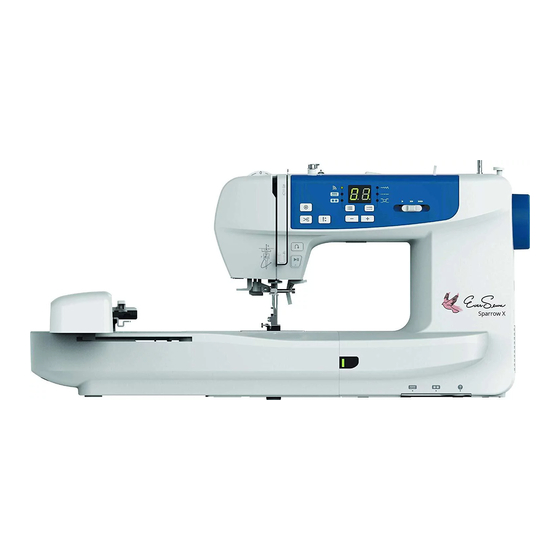
- Page 1 Instruction Manual SEWING+EMBROIDERY Start your embroidery design ! Complete instruction manual can be found on DVD/APP...
-
Page 2: Table Of Contents
Contents Machine Introduction Principal parts of the machine ....................2 Accessories ..........................3 Standard ..............................3 Optional ..............................3 Connecting machine to power source ................... 4 Polarized plug information ........................4 Foot control (In sewing mode) ........................ 4 Display instruction........................5 Screen .............................. - Page 3 Embroidery Preparation Embroidery quick guide ......................26 Important embroidery information ..................28 Embroidery threads ..........................28 Bobbin threads ............................. 28 Stabilizer .............................. 29 Adhesive Spray ............................ 30 Iron-on interfacing ..........................31 Embroidery unit overview ..................... 32 Embroidery hoop overview....................33 Preparing the embroidery hoop ...................
-
Page 4: Machine Introduction
Machine Introduction Principal parts of the machine 1. Take-up lever 2. Presser foot pressure dial 3. Auto-lock button 4. Thread cutter button 5. Reverse button 6. Start/stop button 7. Thread cutter 8. Sewing table and accessory box 9. Drop feed lever 10. -
Page 5: Accessories
Accessories Accessories are stored inside the accessory box. v Standard 1. All purpose foot 2. Zipper foot 3. Buttonhole foot 4. Satin stitch foot 5. Button sewing foot 6. Blind hem foot 7. Overcasting foot 8. Darning/embroidery foot 9. Bobbin (3x) 10. -
Page 6: Connecting Machine To Power Source
Connecting machine to power source n Attention Always make sure that the machine is unplugged from power source and the main switch is off ("O"), when the machine is not in use and before inserting or removing parts. Before connecting the power supply, make sure that the voltage shown on the rating plate is conforming with your main power. -
Page 7: Display Instruction
Display instruction v Screen Operation mode Screen In general Embroidery mode Page Winding the bobbin Bobbin winder spindle is on the right for bobbin winding. Push the 8-10 spindle to the left for sewing. Please refer to "Winding the bobbin" chapter for more information. - Page 8 Error messages Screen In general Embroidery mode Page Upper thread error The upper thread is broken or running out soon. Please change 11-13 and re-threading the upper thread. Please refer to "Threading the upper thread" chapter for more information. Lower thread error The lower thread is broken or almost running out, please change 8-10...
-
Page 9: Status Lndicator
v Status lndicator Display In general Sewing mode Embroidery mode When the upper thread Constantly bright: Constantly bright: breaks, the motor will Machine is ready to Machine is ready to stop. Green light will sew; press the start/stop embroider ; press the flash 3 times then back button to start sewing start/stop button to... -
Page 10: Machine Setup
Machine Setup Winding the bobbin Please following the number order and see the corresponding illustrations below. 1. Place the thread and spool holder onto the spool pin. For better sewing quality, choose a proper size of the spool holder for the thread and attach it next to the spool. - Page 11 6. Hold the thread tail securely in one hand. 7. Step on the foot control (only in the sewing mode) or long press the start/stop button to start winding the bobbin. 8. After the bobbin has wound a few rounds, stop the machine and cut the thread near the hole of the bobbin.
-
Page 12: Inserting The Bobbin
Inserting the bobbin n Attention Turn the power switch to off ("O"). When inserting or removing the bobbin, the needle and the presser foot must be fully raised. Open the bobbin cover by pushing the release button to the right. Release button Insert the bobbin in the bobbin case with the thread running in a counter-clockwise... -
Page 13: Threading The Upper Thread
Threading the upper thread Please following the number order and see the corresponding illustrations below. It is important to carry out the threading correctly to get a quality sewing. Otherwise several problems will occur. 11-14 1. Turn the power switch to on ("I"). Raise the presser foot lifter. - Page 14 4. Draw the thread from the spool and place the thread in between the upper thread guide. 5. Guide the thread ahead and pull the thread through the pre-tension spring as illustrated. 6. Continue to guide the thread into the silver discs to keep the thread in proper tension.
- Page 15 10. Lower the presser foot lifter. 11. Pull down the lever to the very bottom. When heard a "click" sound, it will be on the right position to do the needle threading and the hook pin passes through the needle eye. Lever Hook pin Needle...
-
Page 16: Replacing The Needle
Replacing the needle Change the needle regularly, especially when it shows signs of wear or if it causes problems. n Attention Turn the power switch to off ("O") when carrying out below operations! Turn the handwheel toward you to raise the needle then loosen the needle clamp screw to remove the needle. -
Page 17: Matching Needle/Fabric/Thread
Matching needle/fabric/thread NEEDLE SIZE FABRICS THREAD 9-11 (70-80) Lightweight fabrics- Light-duty thread in cotton, nylon, polyester or cotton wrapped thin cottons, voile, serge, silk, muslin, polyester. Qiana, interlocks, cotton knits, tricot, jerseys, crepes, woven polyester, shirt & blouse fabrics. 11-14 (80-90) Medium weight fabrics- Most threads sold are medium size and suitable for these fabrics... -
Page 18: Changing The Presser Foot
Changing the presser foot n Attention Turn the power switch to off ("O") when carrying out any of the operations below! v Remove the presser foot Raise the presser foot lifter. Press the back lever to release the presser foot. Lever v Attach the presser foot Lower the presser foot lifter until the cut-out... -
Page 19: Replacing The Needle Plate
Replacing the needle plate n Attention Turn the power switch to off ("O"). Only specific straight stitches are applicable while using straight stitch needle plate. (stitch pattern 01 & 03 & 05) The straight stitch plate is recommended for embroidery mode for better embroidery quality. -
Page 20: To Raise Or Drop The Feed Dogs
To raise or drop the feed dogs The drop feed lever can be seen on the base at the front side of the sewing machine. Sliding the drop feed lever to lower or raise the feed dogs. When lever is in raised position, the feed dog will arise automatically when you are sewing. -
Page 21: Thread Tension
Thread tension Proper tension setting is important for sewing. There is no single tension setting appropriate for all the stitch functions and fabrics. Basic thread tension setting: "4". 1. Press the stitch adjustment button to change to the thread tension mode. 2. -
Page 22: Instruction
Instruction Operation buttons 1. Start/stop button Long press the start/stop button to start machine running. Press the start/stop button again to stop machine. The machine rotates slowly at the beginning of the sewing. The sewing speed can be controlled by the speed adjustment slider. - Page 23 4. Tread cutter button Press this button after finishing sewing and the machine will trim the thread. 5. Auto-lock button When machine is not sewing: Press the auto lock button, machine will sew 3 stitches in the same position then stop. During machine is sewing: When A group patterns 01-06 are selected and the auto- lock button is pressed, the machine will...
-
Page 24: Selecting Stitch
7. Stitch adjustment button Press the stitch adjustment button to change to the stitch length, stitch width or thread tension mode. 8. Value setting buttons The +/- button can modify the values for sewing. (stitch number/ stitch length/ stitch width/ thread tension) 9. -
Page 25: Altering The Stitch Length & Width
Altering the stitch length & width v Altering the stitch length When you select a stitch, the machine will automatically set the recommended stitch length values which will be shown on the LED screen. 1. Press the stitch adjustment button to change to the stitch length mode. -
Page 26: Starting To Sew
Starting to sew Make sure you follow the needle/fabric/thread combinations and use the suggested presser foot before sewing. 1. Turn the power switch to on ("I"). 2. Press the needle up/down button to bring the needle to highest position. 3. Raise the presser foot lifter. Select a stitch. - Page 27 7. Slowly press down the foot control or press the start/stop button to start sewing. Release the foot control or press the start/ stop button again to stop the machine. Note You can use reverse sewing for back tacking and reinforcing seams by pressing the reverse button.
-
Page 28: Embroidery Preparation
Embroidery Preparation Embroidery quick guide 75/11* * Please refer to page "Matching needle/fabric/thread" and "Replacing the needle" for more information. -
Page 30: Important Embroidery Information
Important embroidery information v Embroidery threads A good quality thread is essential for embroidery to avoid poor stitch formation, needle break, etc. Good embroidery performance will be effective by using 40wt glossy rayon or polyester embroidery threads as upper threads. They are available in a wide range of colors for beautiful embroidery. -
Page 31: Stabilizer
Darning and embroidery thread Fine mercerized cotton thread which is suitable for embroidering on cotton. Note In most cases, bobbin thread for embroidery is either white or black. Some special cases require the same for upper and bobbin thread. v Stabilizer Tear-away stabilizers The excess is easily to tear away. -
Page 32: Adhesive Spray
v Adhesive Spray Avoid using spray adhesive next to your embroidery machine. Keep about 25-30 cm distance while using the spray. Use the spray carefully. Spray the stabilizer and adhere to back side of material carefully and iron to prevent wrinkles. Application: Keep stretch and knitted material in shape. -
Page 33: Iron-On Interfacing
v Iron-on interfacing Iron-on interfacings are available in a variety of weights. Iron-on interfacings should be selected to suit the material being used. Use an iron-on interfacing which is easily removable from the material. Fuse the iron-on interfacing to the wrong side of material and press. Application: Please use an appropriate stabilizer and cut it in a bigger shape than your embroidery pattern. -
Page 34: Embroidery Unit Overview
Embroidery unit overview 1. Embroidery carriage 2. Embroidery unit release button 3. Hoop-securing lever 4. Embroidery hoop holder 5. Embroidery unit detection device Note Do not touch the embroidery unit detection device. The connector could be damaged, and it may cause malfunctions. -
Page 35: Embroidery Hoop Overview
Embroidery hoop overview 1. Inner hoop 2. Center marks 3. Triangular mark 4. Outer hoop 5. Embroidery hoop connector 6. Hoop size marks 7. Fastening screw 8. Quick release device Preparing the embroidery hoop v Attaching a stabilizer to the fabric n Attention Always use stabilizer material when... -
Page 36: Hopping The Fabric
If you are using adhesive stabilizers, place the adhesive surface of the stabilizer material against the wrong side of the fabric, and iron. Wrong side Stabilizer Adhesive surface v Hopping the fabric n Attention Thick layers of fabric and stabilizer may cause skipped stitches, or broken threads, needles and damage on embroidery hoops. -
Page 37: Use The Quick Release Device
Place the inner hoop on the fabric and press firmly until them are securely fit to outer hoop perfectly. If the inner hoop cannot fit properly, loosen the outer hoop's fastening screw and adjust until fitted. When the fabric and inner hoop are completely fit into the outer hoop, pull the fabric from the four sides marked with the arrows so that the fabric is stretched drum-... -
Page 38: Using Embroidery Sheet
v Using embroidery sheet Make a mark with a chalk at the center of the position for the pattern to be embroidered. Loosen the fastening screw or open the quick release device (if same type of fabric is used for embroidery). Separate the inner hoop and outer hoop. - Page 39 Place the inner hoop on the fabric and press firmly until them are securely fit to outer hoop perfectly. If the inner hoop cannot fit properly, loosen the outer hoop's fastening screw and adjust until fitted. When the fabric and inner hoop are completely fit into the outer hoop, pull the fabric from the four sides marked with the arrows so that the fabric is stretched drum-...
-
Page 40: Embroidery Process
Embroidery Process Step 1. Preparation for embroidery Turn the power switch to off ("O"). Raise the presser foot lifter. Loosen the screw counter-clockwise to remove the presser foot holder. Screw Presser foot holder Turn the handwheel toward you to raise the needle then loosen the needle clamp screw to remove the needle. - Page 41 Make the embroidery foot lever upwards. Tilt the embroidery foot and insert it from left to right so that the notch fits into the presser foot bar, and then push the embroidery foot upwards until it is aligned with the screw. Embroidery foot Presser foot bar The embroidery foot lever will be against the...
-
Page 42: Step 2. Starting The Connection
Step 2. Starting the connection v Embroidery software installation Search "EverSewn Pro" on Google Play/Apple Store to download and install the application in order to perform the following setting steps. To reach the best user experience, we recommend you to use the tablet to connect with the machine for further operation. - Page 43 Once it has successfully connected to the APP, the WiFi light will change to become constantly on, which means that the embroidery function can now be normally executed. Note Point-to-point mode is recommended for performing embroidery when there is a lot of wireless signal interference environment, this will reduce the interference among different devices.
-
Page 44: Connection Mode B: Station (The First Time To Set Up)
v Connection Mode B: Station (the first time to set up) Before setting up, please confirm that the environment is equipped with the WiFi router and make sure it is connected to the internet in order to starting the connection. Please set the SSID of your WiFi access station in English letters or digital numbers then re-connect again. -
Page 45: Connection Mode B: Station
v Connection Mode B: Station Please confirm that the "The first time to set up station mode connection" process has already been completed in order to enable the general connection mode successfully. Press the group switch button and turn on the power at the same time. -
Page 46: Step 3. Import/Edit Embroidery Pattern
Importing files on Andriod After physically connecting to a mobile phone, use the file manager software and locate the EverSewn/MyDesign folder on the internal storage, and place the files there. v Location of imported files on Open the app and locate the MY DESIGN... -
Page 47: Step 4. Install The Embroidery Hoop
Step 4. Install the embroidery hoop After editing the embroidery image file, place the embroidery hoop with the corresponding size to perform the preparations for embroidering. The embroidery hoop has two built-in sizes which are 120x80mm and 50x70mm, respectively. Select the corresponding size according to the image design. -
Page 48: Step 5. Begin To Embroider
Step 5. Begin to embroider Once preparation is completed, the embroidery file can be transmitted to the embroidery machine through the APP to start embroidering. After the embroidery app has successfully transmitted the embroidery file to the embroidery machine, lower the presser foot and the status light will change from yellow to green, which means that everything is ready. -
Page 49: Load A Design After Interruption
Note When the thread needs to be changed, press start/stop button to stop embroidering, and press the thread cutter button to cut the thread. Different colored threads will need tobe changed several times according to the embroidery design, please place the corresponding colored threads in sequence. -
Page 50: Adjust The Thread Tension
v Adjust the thread tension Proper setting of tension is important for good sewing. There is no single tension setting appropriate for all the stitch functions and fabrics. Basic thread tension setting: "4" Press the stitch adjustment button is set on stitch length/ stitch width/ thread tension mode. -
Page 51: Step 6. Back To Sewing Mode
Step 6. Back to sewing mode v Remove embroidery hoop Raise the presser foot and confirm the needle is at the highest position. And then press the hoop-securing lever to pull the embroidery hoop backward to remove the embroidery hoop. Hoop-securing lever v Remove embroidery unit Hold the embroidery unit and press the... - Page 52 SEWING+EMBROIDERY 021CHA0104(EN)
Need help?
Do you have a question about the Sparrow X and is the answer not in the manual?
Questions and answers