Advertisement
Quick Links
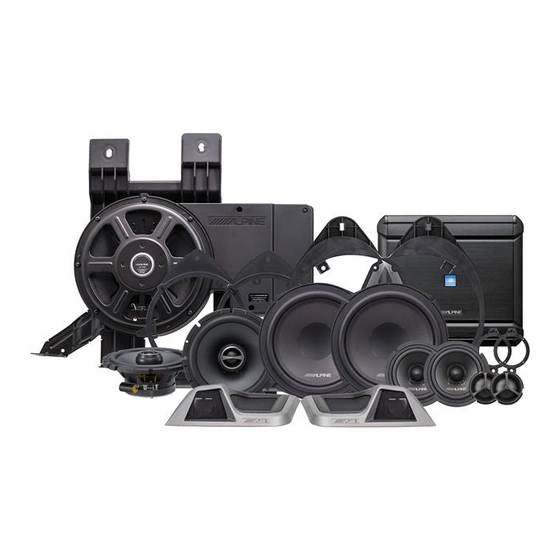
PSS-31GM
Speaker System for
Chevrolet/GMC
Installation Manual
˜ Model: Select GM Trucks and SUVs
˜ Model Year: 2014-up Trucks
(Not compatible with BOSE® Sound System)
Compatible Vehicles*
Year
Chevrolet
2014-up
GMC
2014-up
* The specified vehicles have been tested and have met compatibility specifications at the time of testing.
Compatibility is not guaranteed if the manufacturer has made production changes to the vehicles listed above.
Factory systems equipped with Bose are not compatible with this system.
* Zero space subwoofer has been developed based on Blueprint Acoustics fresh air speaker technology.
Warning: Before you begin wiring, remove the ground wire from the negative
terminal of the battery. Failing to do so could lead to electric shock, injury or
improper product operation.
Introduction
˜ Design and specifications are subject to change without notice for improvement.
To Ensure Safe Use, Always Follow These Precautions
˜ The installation of this product requires specialized skills and experience. We recommend that you have the
product installed by an authorized Alpine dealer.
˜ Before you use this product, be sure to carefully read this installation manual and the separate user's manual
so that you can use the product correctly. Alpine Electronics bears no responsibility for problems that arise as
a result of failure to follow the instructions in the manuals.
˜ This manual includes a number of symbols that are intended to help you use the product safely, to prevent
harm to you and others, and to protect against damage to property. These symbols and their meanings are
listed below. Make sure you fully understand these symbols before you begin reading the main text.
Explanations of Injury and Damage That May Result from Incorrect Use
Ignoring the content marked by this indication and using the product incorrectly is
Warning
expected to lead to death or serious injury.
Ignoring the content marked by this indication and using the product incorrectly is only
Caution
expected to lead to injury or property damage.
Model
Configuration
Crew Cab
Silverado 1500
Silverado 2500HD
Crew Cab
Silverado 3500HD
Crew Cab
Sierra 1500
Crew Cab
Sierra 2500HD
Crew Cab
Sierra 3500HD
Crew Cab
Chevrolet/GMC
FULL SIZE TRUCK
Trim
WT, LS, LT, LT Z71, LTZ, LTZ Z71
WT, LT, LTZ
WT, LT, LTZ
Sierra, SLE, SLT
Sierra, SLE, SLT
Sierra, SLE, SLT
˜ 1/31
Advertisement

Related Manuals for Alpine PSS-31GM


Summary of Contents for Alpine PSS-31GM
- Page 1 ˜ Before you use this product, be sure to carefully read this installation manual and the separate user's manual so that you can use the product correctly. Alpine Electronics bears no responsibility for problems that arise as a result of failure to follow the instructions in the manuals.
- Page 2 Chevrolet/GMC FULL SIZE TRUCK ˜ 2/31 Types of Precautions Indicates actions that are forbidden Indicates actions that are (must not be performed) mandatory (must be performed) Forbidden Mandatory Indicates that disassembly is Marks content that should receive forbidden. your full attention. Forbidden Warning Do not disassemble or modify the product.
- Page 3 Do not install the product where it may be exposed to water or in a place with high levels of humidity or dust. Doing so could lead to fire or damage equipment. Forbidden The installation and wiring of this product requires specialized skills and experience. Have the product installed and wired by an authorized Alpine dealer.
-
Page 4: Accessory List
Chevrolet/GMC FULL SIZE TRUCK ˜ 4/31 Accessory List SPT-10T (Front Speaker Kit) 1” Tweeter (2 pcs) SPT-30M (Front Speaker Kit) 3” Midrange (2 pcs) SPT-80W (Front Speaker Kit) 8” Woofer (2 pcs) Foam Gasket (2 pcs) SPT-70 (Rear Speaker Kit) 6-1/2”... - Page 5 Chevrolet/GMC FULL SIZE TRUCK ˜ 5/31 ALP-31GM-MBKT (Front Dashboard Speaker Bracket Kit) Midrange Speaker Adapters (2 pcs) #4 x ½” Screws (8 pcs) ALP-31GM-SB-SP (Speaker Wire Harness Adapters and Rear Door Speaker Bracket Kit) Rear Speaker Adapters (2 pcs) Harness Adapters (6 pcs) Cable Ties (8 pcs) ALP-31GM-WBKT (Front Door Speaker Bracket Kit) Woofer Speaker Adapters (2 pcs)
- Page 6 Chevrolet/GMC FULL SIZE TRUCK ˜ 6/31 Accessory List (Subwoofer and Amplifier) ALP-2131GM-ZSS Zero Space Subwoofer Screw Kit-A Screw Kit-B Upper Mounting Kit Additional Upper Mounting Kit for ’14-Up Screw Kit-C Screw Kit-D Foam Duct Gasket (2 pcs) Lower Mounting Kit Amplifier/Power Cable Strip Caulk (4 pcs) Mounting Kit...
- Page 7 Chevrolet/GMC FULL SIZE TRUCK ˜ 7/31 ALP-2131GM-ABKT Amplifier Bracket Installation Manual Installation Manual Warranty Card Warranty Card ALP-4GA-AMP-KIT Amplifier Power Harness 8” Cable Ties (10 pcs)
- Page 8 Chevrolet/GMC FULL SIZE TRUCK ˜ 8/31 Tools Required Panel Removing Tool Pliers T15, T47 Torx #2 Phillips Screwdriver 25/64” (10mm), 5/32” ( 4mm) Wire Cutters Drill Bits 7mm, 10mm, 11mm, 1/2” Socket Extension Ratchet Sockets 18mm Deep Socket M6 Rivet Nut Tool Drill Torque Wrench...
- Page 9 Chevrolet/GMC FULL SIZE TRUCK ˜ 9/31 Component Locations Tweeter (SPT-10T) Midrange (SPT-30M) Subwoofer (ALP-2131GM-ZSS) Woofer (SPT-80W) Coaxial Speaker (SPT-70)
- Page 10 Chevrolet/GMC FULL SIZE TRUCK ˜ 10/31 Front Door Panel Removal Remove the door handle cover and extract 1 x 7mm Press the clip and pull to release the cable ball from bolt. the door panel. Remove the door trim and extract 1 x 7mm bolt. Remove the arm rest cover and extract 2 x 7mm bolts.
- Page 11 Chevrolet/GMC FULL SIZE TRUCK ˜ 11/31 Factory Speaker Removal (Front Door) Front Speaker Installation Remove the factory speaker held by 1 x 7mm screw. Connect the door speaker wire harness adapter to Retain the original screw for the new speaker replacement. WF network.
- Page 12 Chevrolet/GMC FULL SIZE TRUCK ˜ 12/31 Rear Door Panel Removal Remove the door handle cover and extract Connect the door speaker wire harness adapter to 1 x 7mm bolt. factory speaker plug. Remove the arm rest cover and extract 2 x 7mm Mount the factory speaker plug to the upper bolts.
- Page 13 Chevrolet/GMC FULL SIZE TRUCK ˜ 13/31 Factory Speaker Removal (Rear) Remove the factory speaker held by 1 x 7mm Press the clip and pull to release the cable ball from screw. the door panel. Retain the original screw for the new speaker replacement. Unplug the window switch from the back of the door panel.
- Page 14 Chevrolet/GMC FULL SIZE TRUCK ˜ 14/31 Rear Speaker Installation Factory A-Pillar Panel Connect the door speaker harness adapter to the Remove the A-Pillar cover. There are slight differences between model year vehicles and factory speaker plug. options. Factory Door Speaker Speaker Plug Harness Adapter Bundle the cable up and secure using a cable tie.
- Page 15 Chevrolet/GMC FULL SIZE TRUCK ˜ 15/31 Upper Dashboard Removal Use a panel removal tool to disengage the clips of Install the SPT-10T into the tweeter pod assembly. the upper dashboard trim panel. Remove the panel. Align the tweeter pod with the holes and mount Some models may have a sensor attached.
- Page 16 Chevrolet/GMC FULL SIZE TRUCK ˜ 16/31 Midrange Speaker Installation Secure the MID network and wires with included Remove the factory speaker 2 x 7mm screws then zip ties. Set aside the tw network cable to connect unplug the factory harness. later.
- Page 17 Chevrolet/GMC FULL SIZE TRUCK ˜ 17/31 Upper Dashboard Panel Installation Connect the TW network output wires to the SPT-10T speaker leads. Ensure you do not pinch the excess wire under the upper dashboard panel. Secure the TW network and wires with included zip ties.
-
Page 18: Vehicle Preparation
Chevrolet/GMC FULL SIZE TRUCK ˜ 18/31 Please locate one green plug and one black plug. VEhICLE PREPARATIon This will be used to connect T-harness in line. Battery Caution while performing this step do not make contact with the battery terminals. Disconnect the ground wire from the negative terminal of the battery. - Page 19 Chevrolet/GMC FULL SIZE TRUCK ˜ 19/31 Removing Rear Seat bench (2-sections) Remove both the driver and passenger side running board panels by disengaging all clips. Some model year vehicles are slightly different mounting points. Fold the rear seats up and use a 18mm deep socket to removed the rear seatbelt anchor.
- Page 20 Chevrolet/GMC FULL SIZE TRUCK ˜ 20/31 Removing the Child Seat Restraint Cable Loops and Rear Using a 18mm socket, remove the bolts under the rear Window Panels seat bench. The number of bolts vary on some vehicles. Remove the three (3) Child seat restraint cable loop by using a T-47 Torx wrench on the Torx bolts.
- Page 21 Chevrolet/GMC FULL SIZE TRUCK ˜ 21/31 Removing C-Pillar Side Panel Removing and Cut the Insulator Pad Remove the bolt covers [#1] at the top of the panels Locate the window cable assembly, unbolt using a and using a 7mm deep socket, unbolt [#2]. 10mm socket so the insulator pad can be removed.
-
Page 22: Amplifier Installation
Chevrolet/GMC FULL SIZE TRUCK ˜ 22/31 Installing Amplifier AMPLIFIER InSTALLATIon Hang the amplifier to the bracket tabs as shown. Installing Amplifier Bracket A rivet nut tool is required for this installation (not included). Position the amplifier bracket to the rectangular opening below the center child seat restraint anchor as shown. - Page 23 Chevrolet/GMC FULL SIZE TRUCK ˜ 23/31 T-hARnESS And RCA CAbLE InSTALLATIon Routing the T-Harness Battery MRV-V500 Amplifier RCA and T-harness Ground cable and Amplifier Bracket Radio Zero Space Subwoofer Power cable For Aftermarket: Amp turn on from radio Locate the main head unit harness and install the For OEM: to +12v positive trigger T-harness to the factory connectors.
- Page 24 Chevrolet/GMC FULL SIZE TRUCK ˜ 24/31 Routing Interior Cab AMPLIFIER PowER hARnESS Ensure that the cable routing does not interfere Installing and Routing Engine Bay with any moving parts or vehicle safety equipment. Do not attach cable ties to any moving parts or Confirm the Negative terminal is disconnected.
- Page 25 Chevrolet/GMC FULL SIZE TRUCK ˜ 25/31 Installing Ground Wire Start by measuring the position from the hump in the cab (6”) and remove the paint until you have bare metal. Attach the ground cable. Removing the paint is crucial for a proper ground point. 6”...
- Page 26 Chevrolet/GMC FULL SIZE TRUCK ˜ 26/31 ZERo SPACE SUbwooFER InSTALLATIon Reinstall the modified pressure vent by pushing it in from the outside in. Remove the driver’s side rear cab pressure vent from the vehicle by pressing the tab from the bottom and push the vent through the back.
- Page 27 Chevrolet/GMC FULL SIZE TRUCK ˜ 27/31 Installing the Rivet Nuts SUbwooFER PREPARATIon A rivet nut tool is required for this installation Vent (not included) Vehicle Cab Wall Strip Caulk (1 pc) Please install Screw Kit B (Additional Upper 10mm Foam Gasket Mounting Kit for ‘14-Up) before proceeding.
- Page 28 Chevrolet/GMC FULL SIZE TRUCK ˜ 28/31 Apply one piece of the strip caulk around the vent Gently apply pressure on the upper brackets to of the Zero Space Subwoofer ½” from the edge as position the Zero Space Subwoofer over the rivet shown.
- Page 29 Chevrolet/GMC FULL SIZE TRUCK ˜ 29/31 On the left side bottom bracket, install the washer, then the serrated flange nut from Screw Kit C (Lower Mounting Kit). The bottom right side bracket will be secured when the rear seat bench is reinstalled. During installation process, torque the seat bench to 50Nm (33ft/lb).
-
Page 30: Connecting Amplifier
Chevrolet/GMC FULL SIZE TRUCK ˜ 30/31 d. Connect the Subwoofer wire. wIRE hooKUP Amplifier Positive Negative Sub-W = Printing Non-Print Connecting the Subwoofer Cable Ensure the correct wires and polarities are installed correctly. Connect the subwoofer cable to the Zero Space e. - Page 31 Final Clean-Up Set the gain controls and Bass EQ setting on the amplifier to match the head unit output. Alpine Clean up the interior of the vehicle so there are no recommends setting crossover and gain settings as...
Need help?
Do you have a question about the PSS-31GM and is the answer not in the manual?
Questions and answers