
Related Manuals for Aritech ADVISOR CD 7203


Summary of Contents for Aritech ADVISOR CD 7203
- Page 1 ® ADVISOR CD 7203 CD95/15003 Installation Manual Software from Version: V6.0 142359999-2...
- Page 2 COPYRIGHT © SLC BV 1996. All rights reserved. No part of this publication may be reproduced, transmitted, stored in a retrieval system, or transmitted in any form, or by any means - electronic, photocopying, recording, or otherwise - without the prior written permission of SLC BV. DISCLAIMER SLC BV makes no representations or warranties with respect to the contents hereof and specifically disclaim any implied warranties of merchantability or fitness for any particular purpose.
- Page 3 Everybody involved in installing or maintaining this panel should have access to a copy of this manual. The 'Programming Manual’ is available from your ARITECH national office. The ‘Programming Map’ for the various systems can be found at the end of this manual.
-
Page 4: Table Of Contents
ONTENTS ...................... 7 NSTALLATION GUIDELINES Before switching on the power ....................8 Figure 1. Separate alarm and tamper connection............8 Figure 2. Joint connection of the alarm & tamper ............8 Figure 3. Overview of the dipswitches on remotes ............9 ...................... - Page 5 Connection of a fire detector ..................... 25 Figure 20. Connection of a fire detector ................ 25 Outputs ............................. 26 Connection of a relay or an LED ....................26 Figure 21. Connection of a relay or an LED on the output ..........26 Connection of an AS256 and AS294/394 sounder ..............
-
Page 7: Installation Guidelines
NSTALLATION GUIDELINES The CD7203, CD9503/15003 control panels have been designed, assembled and tested to meet current standards of stability and resistance to electrical interference from the environment. If the following guidelines are followed, the system should give many years of reliable service. Ensure that there is a good earth for the alarm system. -
Page 8: Before Switching On The Power
EFORE SWITCHING ON THE POWER Detectors (or key switches) can be connected in two ways: Conventional: One zone each is required for both tamper and the alarm. Both zones should be closed with an end-loop resistor (4.7 kOhm). Program the ‘zones’ menu as ‘Alarm’... - Page 9 Set the DIP switches of all the remote keypads and expanders. Remote 1 must be a keypad. CD7203, remotes 2 to 4 must be keypads and remotes 5 and 6 expanders. CD9503/15003, remotes 2 to 8 can be keypads or expanders but remotes 9 to 16 must be expanders.
- Page 10 Supply only mains power to the control panel. The system will power up in the ARMED state. Any zones that may be open will initiate a full alarm condition and the sounders will activate. Do not use a battery to power the system when installing or changing the installation. If there is a short circuit in the 12 volt power supply, the voltage regulators in the supply (together with the fuses) will prevent serious damage to the system The 12 volt power supply will decrease sharply in the event of a short circuit.
-
Page 11: Rogramming Guide
ROGRAMMING GUIDE Take some time to become familiar with the overview of the programming maps which can be found at the end of this manual. Any programming changes made may not take effect until you exit programming mode. If while programming an option the message “No Privilege” is displayed, the configuration is “Split System”... -
Page 12: Returning To Default Settings
ETURNING TO DEFAULT SETTINGS There are two methods of returning the system (not the dialler) to default settings, these are: The removal of JP1 (CD7203) or LK1 (CD9503/15003). Subject to the ‘Engineers Lock’ not being programmed, this method will return the panel to default settings without the use of an engineer’s code. -
Page 13: Leaving Programming Mode
EAVING PROGRAMMING MODE Before leaving programming mode use the ‘Show Open Zones’ facility under the ‘Maintenance’ menu (menu 1.3). If any zones shown are 24Hr zones (e.g. tamper or fire) the alarm will activate on leaving the engineers’ programming mode. If dual loop is programmed, the letter T will appear next to the zone number to indicate the tamper section of the loop is open. -
Page 14: Installation Guide
NSTALLATION GUIDE CD7203 IRING DIAGRAMS Power supply Fixing hole adjustment (DO NOT ADJUST) Printer connector Main PCB Cable entries Transformer 230V connection BATTERY Fixing hole Fixing hole Main PCB RD6203 Dialler To hold lid in place while servicing the panel Figure 5. - Page 15 See section specifications To RD6203 Outputs CD7203 to keypads and expanders Eprom Line Fault external tampering Ext. Siren Tamper Tamper switch Processor EEprom Zones See section specifications External siren (O/put 19) − Internal siren (O/put 18) − RS232 printer ∼ ∼ − + Aux.
-
Page 16: Wiring Diagrams Cd9503/15003
CD9503/15003 IRING DIAGRAMS Power supply adjustment “power on” Printer connector (DO NOT ADJUST) RS232 Fixing hole Fixing hole Memory card connector Main PCB Dialler connector Output expander Fold lid down socket (CD95) Input expander socket Cable entries Transformer Mains cable entry RD6203 Dialler BATTERY... - Page 17 Power External siren O/put 50 output Internal siren O/put 49 18VAC Battery to keypads and remotes Printer RS232 ∼ ∼ Outputs CD9005 Output Expander FTC/Reset (in) line fault (in) Output 41 to 48 external tampering See section Specifications tamper siren Tamper Switch (CD95 only)
-
Page 18: Opening Cd3008 / Cd3048 Keypad
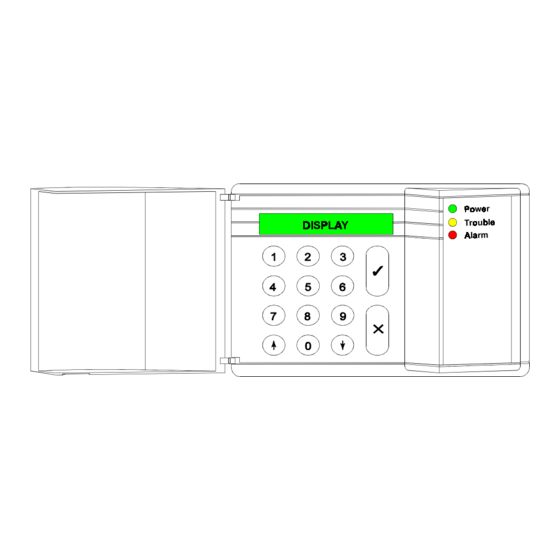
CD3008 / CD3048 PENING KEYPAD Figure 10. Opening the CD3008 / CD3048 keypad CD3009 / CD3049 PENING KEYPAD Lift up Push Push clip in with screwdriver and lift up cover Remove screw if installed Figure 11. Opening the CD3009 / CD3049 keypad Page 18 Installation manual for the CD72/95/15003... -
Page 19: Cd3008 / Cd3009 Keypad
CD3008 / CD3009 KEYPAD Display contrast Keypad address adjustment setting switches Cable entry from Fixing hole Push the side clip to remove PCB Cable entry from Fixing hole back Extra screw to 4-wire bus secure lid connection Fixing hole Cable entry from Buzzer volume adjustment bottom Figure 12. -
Page 20: Cd9031 Expander
CD9031 EXPANDER Cable entry from Fixing hole Fixing hole Outputs Four-wire bus connection Cable entry from back Processor Zones Cover tampering Reverse tampering Fixing hole Fixing hole Cable entry from Lid tamper bottom Expander Address with lid tamper = Link 1-2 setting switches without lid tamper = Link 2-3 Figure 14. -
Page 21: Keypad Back Tamper
EYPAD BACK TAMPER •. • CD30xx base ‚ • When the keypad lid is not used, remove the hinge-slot blanking pieces from the base and place them „. in the hinge-slot openings ƒ • For back tamper protection fix the screw through the hole into the wall Installation manual for the CD72/95/15003 Page 21... -
Page 22: Connection Of An Extra Power Supply
ONNECTION OF AN EXTRA POWER SUPPLY An auxiliary power supply will be required if the voltage is too low as a result of large cable runs or the current demand is in excess of the panels current supply rating. To connect an extra power supply the ‘+’ of the panel must not be connected to the ‘+’ of the auxiliary power supply. -
Page 23: Connection Of A Detector Without Memory
ONNECTION OF A DETECTOR WITHOUT MEMORY Input zone Power supply Figure 16. Dual loop connection of a detector without memory ONNECTION OF A DETECTOR WITH ATCH Output Output “Walk Input zone “Latch” test” Power supply Figure 17. Dual loop connection of a detector with latch Note: Before connecting, the cable between terminal 2 and terminal 10 should be removed! Installation manual for the CD72/95/15003 Page 23... -
Page 24: Connection Of A Key Switch
ONNECTION OF A KEY SWITCH Input zone Key switch “key” Tamper +12V Output “Arm/Disarm” Output “System Clear” “Programme outputs for negative applied” Figure 18. Connection of a key switch with LED's “ ” ONNECTION OF A NITEWATCH SYSTEM CP 4005 Input Light zone 1 / zone... -
Page 25: Connection Of A Fire Detector
ONNECTION OF A FIRE DETECTOR CD72/95/15003 This extra connection is only necessary O1 = “Fire reset -” continuous signal from O2 = “External siren” the external siren is O3 = “Fire -” required RC213 RC213 To terminal To “+” “5” of the terminal of RC213 relay. -
Page 26: Outputs
UTPUTS panel Internal siren External siren Output expander 1..5 CD7203 CD9503/15003 1..8 41..48 Keypad 1 Remote 2 Remote 3 Remote 4 Remote 5 Remote 6 Remote 7 Remote 8 OA OB OA OB OA OB OA OB OA OB OA OB OA OB OA OB CD7203 CD95/150 Remote 9 Remote10 Remote11 Remote12 Remote13 Remote14 Remote15 Remote16... -
Page 27: Connection Of An As256 And As294/394 Sounder
AS256 AS294/394 ONNECTION OF AN SOUNDER CD7203 CD95/15003 AS294 / AS394 AS256 Figure 22. Connection of the AS294/394 + internal siren AS256 Programming CD7203 CD9503/15003 01 Int Sir Sy + 01 Int Sir Sy + Beacon control 18 Int Sir Sy - 49 Int Sir Sy - internal siren control external siren control... -
Page 28: Printer Output
RINTER OUTPUT PL1 (CD72) PL4 (CD95/150) DB25 RS232 PL1 (CD72) PL4 (CD95/150) RS232 Figure 24. Printer connection Page 28 Installation manual for the CD72/95/15003... -
Page 29: Pecifications
PECIFICATIONS FUSES CD7203 CD9503/15003 230 V fuse 315 mA 20x5 230 V fuse 315 mA 20x5 Battery 20x5 Dialler 800 mA 20x5 Auxiliary power 20x5 Output 8 800 mA 20x5 Internal siren 20x5 Auxiliary power 20x5 External siren 20x5 Battery 3,15 A 20x5 Dialler... - Page 30 Dimensions (l x b x h) 160 x 120 x 35 (3 mm ABS) CD 3008/3048 160 x 120 x 35 (3 mm ABS) CD 3009/3049 175 x 125 x 37 (3 mm polycarbonate) CD 9031 315 x 385 x 88 (1,25 mm steel plate) CD 7203/9503 475 x 460 x 160 (1,25 mm steel plate) CD 15003...
-
Page 31: Programming Map Cd7203
CD7203 ROGRAMMING MAP Installation manual for the CD72/95/15003 Page 31... - Page 32 Page 32 Installation manual for the CD72/95/15003...
- Page 33 Installation manual for the CD72/95/15003 Page 33...
- Page 34 Page 34 Installation manual for the CD72/95/15003...
-
Page 35: Programming Map Cd9503/15003
CD9503/15003 ROGRAMMING MAP Installation manual for the CD72/95/15003 Page 35... - Page 36 Page 36 Installation manual for the CD72/95/15003...
- Page 37 Installation manual for the CD72/95/15003 Page 37...
- Page 38 Page 38 Installation manual for the CD72/95/15003...
- Page 39 Installation manual for the CD72/95/15003 Page 39...
- Page 40 Page 40 Installation manual for the CD72/95/15003...
Need help?
Do you have a question about the ADVISOR CD 7203 and is the answer not in the manual?
Questions and answers