
Related Manuals for AOR AR-3000A


Summary of Contents for AOR AR-3000A
- Page 1 Downloaded by Amateur Radio Directory www.hamdirectory.info PROFESSIONAL MONITOR RECEIVER AR-SOOOA...
- Page 2 - BLANK -...
- Page 3 This manual copyright AOR 1 992 . N o i nformation may b e cooled or transfe rr ed bY any mea n s contained in this m a nua l without t h e orior written c o nsent of A O R Ltd .
-
Page 4: Table Of Contents
INDEX: M aJor features ··· ....................4 ( 2 l Precautions . - Page 5 F r eque n cy pa ss k ey ..................3 7 E n t e r i ng pass f r eque nc i es ................3 7 E- 1 E - 2 C o n f i rmi ng t h e e n t r y of pa ss f r e q ue n c i es ..
-
Page 6: Major Features
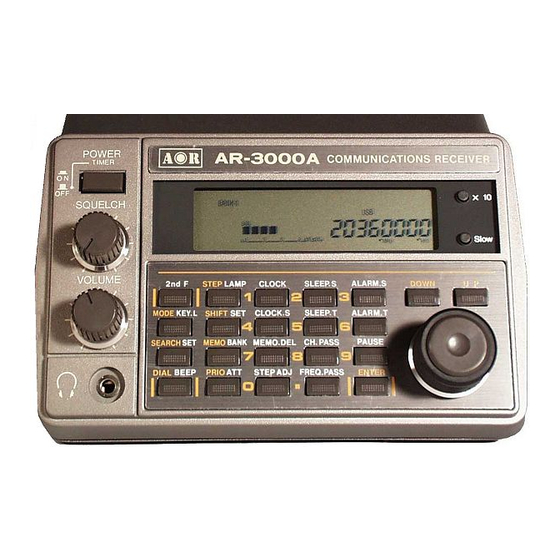
( 1 l MaJor featu res. ) MaJor features. Your listening horizons are tru ly extended by the AR3 ODA . The frequ ency coverage is extr e m e l y board ranging from lOO kHz a l l the way UP to 2036 M H z without a n y gaps in t h e range . - Page 7 400 memory channels are provided in 4 banks x100 channels. Each memory channel will retain Mode. FrequencY. attenuator setting, Lockout status and Step size. The first channel of each memory bank may be used as a priority channel. thus providing four channels in total. All memory and search programmed information is retained by an internally fitted lithium battery.
-
Page 8: Precautions
P recaut io ns . ( 2 l P recautions. ( 2) Power req u ireme nts. The AR3000A is designed fo r o p e ration only f ro m a no m i n a l 12 V DC SUPPlY. A lways us e t h e correct power s UPPlY o r cable ( p ro v i ded). -
Page 9: Installation And Connections
( 3 l Installation and connections. ( 3 l Installation and connections. 3-1 When used with DC power source. Use the SUPPlied DC lead to connect the receiver to a 12V DC power source. The utmost care must be taken to ensure the correct polarity of positive negative connections. - Page 10 C 3 ) Installation and connections. Using an indoor aerial Indoor aerials cannot perform as well as external aerials mounted in clear space. GenerallY speaking, loft mounted aerials Produce disappointing results. The optional LA320 desk-top active loop aerial will enhance the receive Performance over the longwave to shortwave bands.
- Page 11 ( 4 ) If you are unfamiliar with modern circuit layout consult your dealer. Do not touch and other part of the receiver. this will invalidate any warranty and could course serious damage. Legends on the LCD. • ., n 2ndF SLEEP BANK2 RMT A...
- Page 12 ( 4 ) Front panel control functions. P o wer s witch TEN key Squelch control P27 1 key (CLOCK keY P39) Vol u me control 1 9 2 key (SLEEP k e y P41l Headphones (earphone) Jack 20 3 key ( A LARM key P43) LCD unit 4 key (CLOCK key P3Bl Step frequency X10mode key P12...
- Page 13 Front Panel control functions. [2nd F) Second function keY Press this key and the (2nd F} indicator appears on the LCD. The second function facilitY is activated when this key is pressed. 10 - [KEY U Key lock key This key is used to disable the oPeration of the keypad (to prevent accidental changes in operation such as frequency).
- Page 14 ( 4) Ten keys [OJ to [9] and [ ) keys · The ten keys are use d to enter numeric info rmation . i.e. receiving frequencY. memorY channe l . frequ ency increment etc . The [ ·] key represents a decimal Point at the MHz when entering a f re q uency and a k H z when entering a f requency step i nc rement.
-
Page 15: Controls A N D Functions
Rear panel 4-3 Rear panel controls and functions. [ANT] Antenna (aerial) socket Connect an appropriate aerial (antenna) to this 50 OHM standard BNC socket. The telescopic whiP aerial may be used for monitoring strong signals. 2 - [00 12Vl DO power input socket The AR3000A is designed to operate only from a nominai 12V DO SUPPlY. -
Page 16: Basic Operations
( 5 l Operating the receiver. ( 5 l Operating the receiver. Basic operation Connect an appropriate aerial to the rear panel BNC aerial socket. selection aerial depends upon your location specific requirements. If in doubt Please consult your dealer. Connect the AR3000A to an aPProPriate DC power source using either the supplied AC adaptor or DC lead. - Page 17 ( 5 ) OPerating the receiver. 5-2 Operating modes . (A) Dial mode. In dial mode you maY s e l e ct frequencies for i mmed iate l iste n i n g . frequency en trY is performed after pressing the [DIAL] key . S e l ection of receive frequ ency may be made bY numeric entry via t h e 'Ten-keys'.
- Page 18 ( 5) Operati ng the re ceive r . Exa m p l e 2: S e l ect a com me rcial a irband frequency 1 33 .7MHz AM. P ress [DIAL] P ress [MODEl Press [UP/DOWN] o r rotate the m a i n tuning knob u nt i l (AM) a ppears on the LCD.
- Page 19 ( 5 ) Operating the receiver. Example 4: Select the 2m Amateur Band FM mobile calling frequency 145.5MHz NFM. Press [DIAL] 2 Press [MODE] Press [UP/DOWN] or rotate the main tuning knob until (NFM) appears on the LCD. To accept the selection press [ENTER] . Press [1 J [4] [5] [ ·...
- Page 20 ( 5 l OPeratin g the receiver. A-2 Manual tun ing by the use of th e m a in tuning kno b. This method o f frequen cy s e l ection is the most tradition al a p pro a c h to locating s i gn a ls .
- Page 21 ( 5 l O Perating the receiver. ExamPle 2 : Tuning around the VHF comm ercial WFM b a n d (88-lOBMHzl WFM . Press [DIAL] 2 Press [MODE] Press [UP/DOWN] or rotate the m a i n tuning knob u ntil (WFM) appears on the LCD.
- Page 22 < 5 J OPerating the receiver. (B)Oial search mode. In dial mode. the receiver will automatically start searching for signals when the [UP/DOWN] key is pressed and held for more than one second. The frequency increments are selectable in 50Hz steps between 50Hz and 995.95kHz.
- Page 23 ( 5 ) Operating the receiver. Example 2: Search on the 7Dcm (433MHz) Amateur band with a 25kHz increment in NFM mode. Press [DIAL] Press [MODE] Press [UP/DOWN] or rotate the main tuning knob until (NFM} appears on the LCD. To accept the selection press [ENTER].
-
Page 24: (C)Program Search Mode
( 5 J Operating the receiver. (C)Program search mode. There are four programmab l e searc h ranges i n tota l . one i n each of the fou r memory banks . Each search range m a y b e programmed w i t h start frequ ency, end frequency . - Page 25 ( 5 ) Operating the receiver. Example 2: Program search on UHF 7Dcm Amateur band 433-434MHz using a 25kHz increment and NFM mode. Press [2nd Fl [SEARCH SET] in sequence. The (SEARCH) indicator will appear and start flashing on the LCD. Press the [UP/DOWN] key until (NFM>...
-
Page 26: Memory Channel Mode
{ 5 l Operati n g the rece iver. {0) Memory c h a n n el mode The AR3000A has 4 00 memorY channels { 4 banks of channels) w h i ch can store such i nformation as recei v i n g fr e q u ency . rece i v i n g mode . RF attenuator sett i n g a n d lockout status. - Page 27 ( 5 ) Operating the receiver. Example 1: Store a frequency Picked up in search mode l29. 7MHz AM directly into memorY channel 05 of the current memory bank. For information regarding search mode see Example 1 on page 22 items 1 to 4. Assuming the search has stopped at 129.
- Page 28 ( 5) Operating the receiver. 0-2 Memory c h a n nel recall The i d e a of a m e m ory channel is to e n a b l e you to q uicklY S81ect a nd l i sten to a s pecific freq u e ncy previouslY stored .
-
Page 29: (E) Memory Scan M O D E
Operating modes. (El Memory channel scan mode. The memory channels may be automaticallY scanned in order to quicklY check for activity of known ore-programmed specific frequencies. OnlY one of the four memory banks can be scanned at a time (maximum of lOO memory channels). Memory channels which do not contain data will be skiPPed as will those which have been 'locked out'. - Page 30 ( 5 ) Operating the receiver. E- 3 MemorY channel pass ( = locko ut') . T h i s faci l ity a llows you to tem Porar i l Y remove a memory channel from th e scan l ist without actu a l lY having to remove the data from the m e morY b a n k . Thi s can be u s e f u l f o r temoorariiY removi n g conti n u a l l Y active cha n n e l s w h e n y o u d o not w i s h t o monitor them .
- Page 31 Operating modes. E-4 Erasure of memory contents. The stored data erased from memory using following procedure: First recall the memory channel onto the LCD then press [2nd F] followed bY [MEMO. DELJ Example: Erase the memory content of channel 01 of bank 2. Press [2nd Fl [ BANK] in sequence.
- Page 32 ( 5 ) O perating the recei ver . ( F ) P r iority channel Memory channel number 00 of each memory bank i s s p e c i a l l Y designated a s PrioritY channe l . A s there a re four memory b a n k s .
- Page 33 5-2 Operating modes. Press [ENTER] [0] [0] [ENTER] in sequence. This completes the entrY of 1 45. 5MHz NFM into memory channel DD. Press [PRIOJ . This selects Priority operation. the (PRIO) indicator appears on the LCD to confirm that prioritY operation has been activated. To cancel the priority channel mode.
-
Page 34: Function Key
( 5 ) Operatims the receiver. 5-3 Function keY (STEP] k e y . The AR3000A Prov i de s s e l e cta b l e frequency in crements for t u n i n g and search ing in 50Hz steps i n the range of 50Hz to 999 . - Page 35 5- 3 Function key (8) [STEP ADJJ Step a d J u st key . In search or d i a l m o d e . this fac i l itY e n a b l e s the receiver to step in ·rou n d increments·...
-
Page 36: S H I Ft Set K Ey
( 5 J OPerating the receiver . (Cl [SHIFT) Shift keY . [SHIFT SET] shift set keY . T h i s faci l itY i s espec i a l lY useful for monitoring d u plex fre q uenc ies . this means two stations w h o c o m m u n i cate by s i multaneous tra n s m i s s i o n o n two d i fferent frequencies often u s i n g repeater statio n s . -
Page 37: Setting P A U Se Tim E
Function key [PAUSE] Pause key . This facilitY allows the receiver to resume search and scan using a pre -determined time delaY (pause time) even if a receive signal is still present. This aPPlies to the dial search mode. program search mode and memorY channel scan mode. - Page 38 ( 5 J O p e rating the receiver. 0-2 Activating the Pause sca n . Pause s c a n Cas described o n page 35) c a n b e activated b y p ressing the [2nd FJ a nd [PAUS E] keys in sequ e n c e . The {PAUSE) i n d icator a ppears on the L C O accompanied bY the d e c i m a l p o ints at both the MHz and kHz alternative l y fl a s hi n g to confirm o perati o n .
- Page 39 5-3 Funct io n key (EJ [FREQ P'ASSJ Frequency pass key . This facil ity a l l ows t h e receiver to bypass specific unwanted frequencies while i n search mode . These may i nclude c o ntinuously occupied channe l s . interference o r spurn etc .
- Page 40 ( 5 ) Operating the receiver. Deleting pass frequencies . Frequencies may be deleted from the pass list one channel at a time. To delete a pass channel: Press [2nd Fl then press and hold the [FREQ PASS] key for more than one second.
- Page 41 F u n ction keY (F) Clock facil ity A 24-hour real time has been b u i l t i nt o the AR3000A . This enables accurate l o g keePing a n d provides t i m i n g for t h e automatic t i m e r switch-on a n d s l e e p fac i l ities. The LCD shows the t i m e when selected a n d defa u l ts t o disPla Ying t h e cl ock w h e n t h e p o w e r switch i s o f f but t h e P o w e r suPPlY sti l l con nected and Powere d .
- Page 42 Operating the receiver. ( 5 l [CLOCK] Clock d is play keY . T h i s k ey is u s e d to c a l l the present time to the LCD w h i l e receiving s i gn a l s . Press [2 n d F J [CLOCK] i n s e q u e nc e .
- Page 43 5- 3 F unction key [SLEEP SJ S l eep set key . This key is used to activate the s l e e p time facil ity. Press (2nd F] [SLEEP SJ in s equence . The <SLEEP} i nd i cator a p p ears o n t h e L C D to c o nfi r m o p e ratio n .
- Page 44 ( 5 l Opera t i n g the rece i v e r . facility. (H) Alarm The a l a rm facil ity enables you to switch o n the AR3000A at a preset t i m e . To activate t h i s facil itY first program the t i m e a t w h i c h .the receiver i s t o switch o n .
- Page 45 5- 3 Function k eY A l a rm set k e y . [ALARM 8] Th i s k eY is used t o activate the a l arm fa c i l itY . W h e n the p r e s e t time h a s arrive d .
- Page 46 ( 6 ) Useful tips for operating the AR300DA. ( 6 ) Useful tips for operating the AR3DOOA . The AR30DOA is equipped with useful sockets both on the front and rear panels to provide the maxi um flexibility of operation. Opti onal accessories are also available to complement the AR3DDOA and further add to it"s versatilitY.
- Page 47 6-3 Automatic taPe recording. 6-3 Automatic tape record i n g . The r e a r panel A U X socket i s o f a n B P i n round D I N type a n d i s provided for connection to a tape recorder.
- Page 48 P ro b l e m . Connect a special ist facs i m i l e decoder/printer (such as t h e AOR WX-f'OOOl t o the s p e a k e r output of the AR3000A and i ncrease the v o l u m e control to the 1 1 o'clock p o s ition .
- Page 49 AOR DA1 000. A low noise amplifier will almost certainlY be required in order to achieve satisfactory results (AOR LA3000l . A suitable facsimile decoder/ printer will also be required such as the AOR WX-2000.
- Page 50 ( 6 ) Useful tiPS for o perating the AR3000A . Comouter contro l . The AR3000A has a b u i l t i n RS232C c o mputer contro l port a l l owing two way commun ication o f data between the AR3000A a nd c o mputer. As a m i n i mu m reo u i rement.
- Page 51 C o m puter contro l . Starting R S 232C mode . After the i n i t i a l sett i n g has been carried out. switch the AR3000A remote switch On. An o p e n i n g ·we lcome· message w i l l appear on the c o m puter screen and at the same t i m e the <...
- Page 52 ( 6 l Useful tiPs for operating the AR3000A. Entering data via the computer. Data s h o u l d be entered in the following sequen ce: [M-CH J • [STEP frequencyJ� [ATT O n /Offl-. [Receiving frequencyJ � [M O D E] Input examples.
- Page 53 Automatic tape recording. (El Output data. You may display various receiving status on the computer screen bY using the following commands. Al ways use a carriage return after entering each command. ie. always press the [CR] [RETURN] key of your computer after each command.
- Page 54 ( 7 ) S P ecification s . { 6 ) SPecificat i o n s . 1 OOkHz-20 3 6MHz Receiver coverage Receiver mode U S B . L S B . C W . A M . N F M . WFM Frequency sel ection Dial mode/ D ia l s e a rc h mode/Program sea rch mode/ Mem ory...
- Page 55 ( B ) Referenc es . SU PPl ied ac ces s or ies . A C adap t or . D C lead . Telescopic w hi P aerial . Operat ing manual . ( 8 l References . T h e receiver's internal sp urii s ignals .
- Page 56 ( 8 ) Re f e r e n ces . Re s ettin g the micro p roce ss or. CAJ R e s et the m icro p ro c e ss or c l ock whi l e ret a i n i ng the m emor y co n tent s . T u r n th e p o w e r s wit c h Off .
- Page 57 ( 9 J Troubleshooting. ( 9 J Troubl e s h o oting . Before return ing your receiver for rePa i r P l e a s e check the f o l l o wing: N o Power. AC P l u g is firmly conne cted to the mains s o cket and the fuse has not b l own.
- Page 58 ( l Ol Optional accessori e s . ( l O l OPtiona l acces sori e s . OA3000 wide band discone aerial 25-2000M H z . WA5000 active w i de band com pact a e r i a l 30kHz-2000MHz . MA500 mobile w h i P a e ria l .
- Page 59 DAlOOO Parabolic aeri a l . LA3000 low noise amPlifier. WX-2000 rad i o facsi mile decoder with built-In printer. CR400 tape recording lead . ACEPAC-3A PC compatible computer control softwa re . Downloaded by Amateur Radio Directory www.hamdirectory.info...
- Page 60 Downloaded by Amateur Radio Directory www.hamdirectory.info A O R , .LT D . 2-6-4 Misuji, Taito-ku, Tokyo I I I Tel. 03-3865- 1 68 1 ©AOR, L TO. 1 992 92 01...
Need help?
Do you have a question about the AR-3000A and is the answer not in the manual?
Questions and answers