Table of Contents
Advertisement
Quick Links
CP1395E
CP1395EST
Microwave oven
user manual
This manual is made with 100% recycled paper.
imagine
the possibilities
ENGLISH
Thank you for purchasing this Samsung product.
To receive more complete service, please register
your product at
www.samsung.com/register
CP1395EST_XFA_EN_DE68-03885G.indb 1
2011-08-22
10:49:06
Advertisement
Table of Contents

Related Manuals for Samsung CP1395E


Summary of Contents for Samsung CP1395E
- Page 1 CP1395E CP1395EST Microwave oven user manual This manual is made with 100% recycled paper. imagine the possibilities ENGLISH Thank you for purchasing this Samsung product. To receive more complete service, please register your product at www.samsung.com/register CP1395EST_XFA_EN_DE68-03885G.indb 1 2011-08-22 10:49:06...
- Page 2 Thank you for purchasing a SAMSUNG microwave oven. Your Owner’s Manual contains important safety instructions and essential information on using and caring for your new microwave oven. Before using your oven, important safety instructions read carefully and keep it for future reference.
- Page 3 Do NOT attempt. Do NOT disassemble. Do NOT touch. Follow directions explicitly. Unplug the power plug from the wall socket. Make sure the machine is grounded to prevent electric shock. Call the service center for help. Note Important Severe warning signs for installation WARNING The installation of this appliance must be performed by a qualified microwave service technician trained by the manufacturer.
- Page 4 Caution signs for installation CAUTION This appliance should be positioned in such a way that it is accessible to the power plug. - Failure to do so may result in electric shock or fire due to electric leakage. Install your appliance on a level and hard floor that can support its weight. - Failure to do so may result in abnormal vibrations, noise, or problems with the product.
- Page 5 During use the appliance becomes hot. Care should be taken to avoid touching heating elements inside the oven. When moving heating elements, make sure to use the equipment designed to move heating element while wearing safety gloves provided with the product, and see if temperature drops sufficiently (at least 10 minutes after grill or combination cooking operation) after operation.
- Page 6 This appliance is not intended for use by persons (including children) with reduced physical, sensory or mental capabilities, or lack of experience and knowledge, unless they have been given supervision or instruction concerning use of the appliance by a person responsible for their safety.
- Page 7 DO NOT operate the microwave oven when it is empty. The power will be cut off automatically for safety. You can operate normally after letting it stand for over 30 minutes. It is best to leave a glass of water inside the oven at all times. The water will absorb the microwaves energy if the oven accidently started.
- Page 8 Take care when heating liquids such as water or other beverages. - Make sure to stir during or after cooking. - Avoid using a slippery container with a narrow neck. - Remove the container at least 30 seconds after heating. - Failing to do so may result in an abrupt overflow of the contents and cause burns.
- Page 9 Do not abruptly cool the door, the inside of the appliance, or the dish by pouring water over it during or just after cooking. - This may result in damage to the appliance. The steam or water spray may result in burns or injury.
- Page 10 PRECAUTIONS TO AVOID POSSIBLE EXPOSURE TO EXCESSIVE MICROWAVE ENERGY Failure to observe the following safety precautions may result in harmful exposure to microwave energy. (a) Under no circumstances should any attempt be made to operate the oven with the door open or to tamper with the safety interlocks (door latches) or to insert anything into the safety interlock holes.
-
Page 11: Table Of Contents
contents INstAllING youR Installing your oven mIcRoWAve oveN oveN feAtuRes Checking the product and parts Checking the control panel Accessories befoRe you beGIN Setting your oven oveN use Using convection mode Using grill mode Using grill combi mode Using convection combi mode Using sensor cook mode Using the sensor steam cook mode Using the manual steam cook mode... -
Page 12: Installing Your Microwave Oven
installing your microwave oven INSTALLING YOUR OVEN Place the oven on a flat level surface 85 cm above the floor. The surface should be strong enough to safety bear the weight of the oven. • When you install your oven, make sure there is 20 cm 10 cm above... -
Page 13: Oven Features
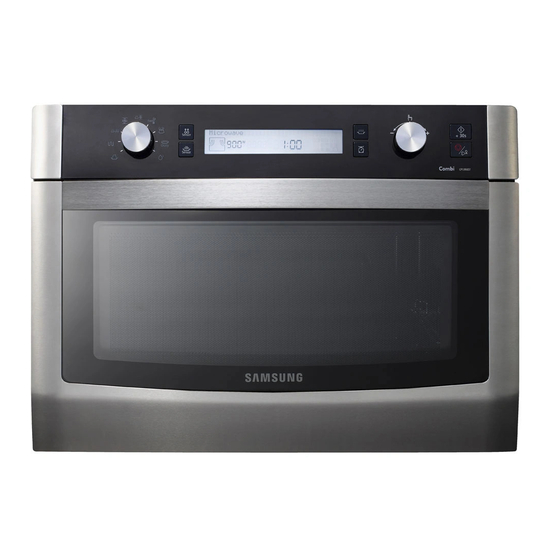
oven features ChECkING ThE PRODUCT AND PARTS Control Panel Oven Light Top Heating Elements Support Guide Support Tray Safety Door Lock Door Door Handle The Support Guide are mainly used for convection function. ChECkING ThE CONTROL PANEL 4 5 6 7 1. -
Page 14: Accessories
ACCESSORIES The following accessories are provided with your microwave oven: 1. Support tray, to be placed correctly over the weight sensor in the base of the oven. • Support tray rotates the turntable. 2. Turntable, to be placed on the center of support tray. - Page 15 caution!! • Never use this Pro Steamer with a different product or model. It may cause a fire or fatal damage to the product. • Do not use the Pro Steamer without water or food inside. When you use this Pro Steamer, pour at least 500 ml of water before use. If the amount of water is less than 500 ml, it may cause incomplete cooking, or may cause a fire or fatal damage to the product.
-
Page 16: Before You Begin
before you begin Plug in the oven. Nothing will appear in the display at this time. Open the door, the display will flash on and show “0”. The oven is now ready for use. The oven has an Energy save mode, for details The oven will default to Energy save mode after 5 minutes if not used. - Page 17 (English -> Français -> Italiano -> Nederlands -> Español -> Deutsch -> Polski-> Русский) 4. Press the selector button to setting language. If it is successful, you will see the “Welcome to Samsung” on the display for 2 seconds. before you begin _17 CP1395EST_XFA_EN_DE68-03885G.indb 17 2011-08-22...
-
Page 18: Oven Use
oven use USING CONVECTION MODE Food is heated by two heating elements on top of cavity and one convection heating element, while the fan from side distributes the hot air evenly. Low rack or Low rack+Crusty plate are placed on the turntable. -
Page 19: Using Grill Mode
During cooking, cook time and temperature are available to change the setting. • Cooking time : Just turn multi function selector. • Temperature: Press selector button and then turn multi function selector. In Convection Mode settings, the top and Convection heating elements switch off and on throughout cooking to regulate the temperature. -
Page 20: Using Grill Combi Mode
USING GRILL COMBI MODE Food is heated by the top heating elements combined with a cycle of microwave energy. For grilling, open the door and place the food on the rack. Do not use Square tray for Grill combi mode. High rack High rack + Crusty plate Square tray... -
Page 21: Using Convection Combi Mode
USING CONVECTION COMBI MODE Food is heated by dual grill and one convection heating element, combined with a cycle of microwave energy, while one fan from side distributes the hot air evenly. Low rack or Low rack+Crusty plate are placed on the turntable. -
Page 22: Using Sensor Cook Mode
Important 1. ALWAYS use microwave-safe and oven-proof cookware. Glass or ceramic dishes are ideal as they allow the microwaves to penetrate the food evenly. 2. ALWAYS use oven gloves when touching the recipients in the oven, as they will be very hot. 3. - Page 23 The sensor programs cannot used when the oven is hot. If “NOW COOLING” appears in the display, fan will automatically operate for cooling down the oven, as long as the sentence “NOW COOLING” is left in the display, otherwise cooling may take longer. If in a hurry, cook the food manually, Select the correct power level, temperature and cooking time.
- Page 24 standing serving dish/ food time Recommendations size Accessory (min.) Soup/ Chilled 300-500 Microwave Pour into a deep ceramic plate or bowl and cover Sauce soup/ safe dish with plastic lid during Sauce heating. Put soup in the centre of turntable. Stir carefully before and after standing time.
- Page 25 standing serving dish/ food time Recommendations size Accessory (min.) Pota- Peeled 400-800 Microwave Wash and peel the potatoes and cut into toes potatoes safe dish a similar size. Put them into a glass bowl with lid. Add 45-60 ml (3-4 tablespoons) water.
- Page 26 standing serving dish/ food time Recommendations size Accessory (min.) Chicken Chicken Brush chilled chicken pieces with oil and pieces g-1.2kg spices. Put skin-side down on the high rack. Set rack on crusty plate. Turn over, as soon as the oven beeps. Push start button to continue process.
- Page 27 standing serving dish/ food time Recommendations size Accessory (min.) Frozen cake (-18 5-25 Put one frozen cake in the center, put frozen °C) g-1.2kg cake pieces side by side on the low rack. By the help of convection heat the cake will be warmed and crisp up.
-
Page 28: Using The Sensor Steam Cook Mode
USING ThE SENSOR STEAM COOk MODE The Sensor steam cook feature provide preprogrammed cooking time. You do not need to set either the cooking time or power level. You can adjust the desired sensor steam cook program by turning the multi function selector. First, place the Pro Steamer(with food) in the center of the turntable. - Page 29 Sensor steam cook Features The following table presents 5 Sensor Steam Cook programmes. It contains its quantities, standing times after cooking and appropriate recommendations. Cooking times and power levels are pre-programmed for your convenience. These programmes can only be used together with the steam accessory. Use oven gloves while taking out! food serving...
- Page 30 food serving dish standing Recommendations size (kg) time (min.) Boiled 100-500 g Pour ½ l water into the steam plate eggs of Steamer. Insert steam tray into steam plate. plus 500 Pierce 3-8 fresh eggs, each about ml cold 60 g (medium size) and set into the water small cavities of the tray.
-
Page 31: Using The Manual Steam Cook Mode
USING ThE MANUAL STEAM COOk MODE Using Pro Steamer, not only can you Sensor steam cook, but you can also Manual Steam Cook referring to the Manual Steam Cooking table on the right. The following procedure explains how to manual steam cook. (50-51 page) ALWAYS check your cooking settings before leaving the oven unattended. - Page 32 3. Press the start button. Result : The oven light comes on and the turntable starts rotating. • Cooking starts and when it has finished the oven beeps four times. • The end reminder signal will beep 3 times(once every minute). •...
-
Page 33: Using The Sensor Crusty Cook Mode
Normally when cooking in microwave oven, using grill or microwave mode in grill/ convection ovens, foods like pastries and pizza become soggy from bottom side. Using the Samsung Crusty plate helps to gain a crispy cooked result of your food. The crusty plate can also be used for bacon, eggs, sausages, etc. - Page 34 The sensor programs cannot used when the oven is hot. If “NOW COOLING” appears in the display, fan will automatically operate for cooling down the oven, as long as the sentence “NOW COOLING” is left in the display, otherwise cooling may take longer. If in a hurry, cook the food manually, Select the correct power level, temperature and cooking time.
-
Page 35: Using The Manual Crusty Cook Mode
Normally when cooking in microwave oven, using grill or microwave mode in grill/ convection ovens, foods like pastries and pizza become soggy from bottom side. Using the Samsung Crusty plate helps to gain a crispy cookde result of your food. The crusty plate can also be used for bacon, eggs, sausages, etc. - Page 36 6. Select the cooking time turning the multi function selector as required. Set the cooking time referring to the cooking time in the Manual Crusty Cooking Guide on the 60 page. 7. Press the start button. Result : When cooking has finished, the oven will beep and flash “End”...
-
Page 37: Using Sensor Defrost Mode
USING SENSOR DEFROST MODE Setting Sensor Defrost mode Choose from two pre - programmed microwave settings for defrosting. Defrosting time and power level are automatically set. Simply select the setting and weight to start defrosting. Open the door. Place the frozen food in the center of the Defrosting plate. Close the door. - Page 38 • Open the door. Place the frozen food in center of the Turntable. • Press the start button. And then it will be calculated defrosting time and weight by weight sensor. Display shows them. The sensor programs cannot used when the oven is hot. If “NOW COOLING”...
-
Page 39: Using The Keep Warm Mode
USING ThE kEEP WARM MODE 1. Press stop/cancel/Power save button for standby mode. 2. Press the Keep warm button. 3. Select the item by turnning the multi function selector. (Refer to page 40) 4. Press start button. Result : Keep warm starts. It operate for 30 minutes. - Page 40 keep warm Features The following table presents 4 Keep warm Programmes. It contains which type of food / ovenware is suitable in each programmes. The time and temperature are pre-programmed for your convenience. The convection heater operates only and it will cycle on and off to keep food warm. Use oven gloves while taking out! code Item...
-
Page 41: Using The Manual Keep Warm Mode
USING ThE MANUAL kEEP WARM MODE 1. Turn the Mode selector dial and press button to select a mode except fast Preheat, sensor steam cook and sensor defrost mode. 2. Press Keep warm button to select Keep Warm stage. (1st stage -> 2nd stage -> no keep warm ) •... -
Page 42: Using The Weight Guide Mode
USING ThE WEIGhT GUIDE MODE 1. Press stop/cancel/Power save button for standby mode. 2. Press the Weight guide button. If it shows ‘0 g’ on the display, place the food on the center of the turntable and press the weight guide button again. -
Page 43: How A Microwave Oven Works
hOW A MICROWAVE OVEN WORkS Microwaves are high - frequency electromagnetic waves; the energy released enables food to be cooked or reheated without changing either the form or the colour. You can use your microwave to: • Defrost • Cook Cooking principle 1. -
Page 44: Using Microwave Mode
USING MICROWAVE MODE Microwaves are high frequency electromagnetic waves. In microwave cooking, microwave energy penetrates food, attracted and absorbed by its water, fat and sugar content. The microwaves cause the molecules in the food to move rapidly. The rapid movement of these molecules creates friction and the resulting heat cooks the food. Setting microwave setting 1. - Page 45 Guide to microwave power levels PoWeR level PeRceNtAGe outPut RemARK PoWeR (W) For heating up liquids. hIGh For heating up and cooking hIGh LOW food. For heating up and cooking MEDIUM hIGh food. MEDIUM For cooking meat and heating up delicate foods. MEDIUM LOW For defrosting and continued DEFROST...
- Page 46 cookware microwave- comments safe • Recycled paper or May cause arcing. metal trims Glassware • Oven-to-table ware Can be used, unless decorated with a metal trim. Can be used to warm foods or • Fine glassware liquids. Delicate glass may break or crack if heated suddenly.
- Page 47 Microwave cooking guide Microwaves Microwave energy actually penetrates food, attracted and absorbed by its water, fat and sugar content. The microwaves cause the molecules in the food to move rapidly. The rapid movement of these molecules creates friction and the resulting heat cooks the food.
- Page 48 Cooking Guide for frozen vegetables Use a suitable glass pyrex bowl with lid. Cook covered for the minimum time – see table. Continue cooking to get the result you prefer. Stir twice during cooking and once after cooking. Add salt, herbs or butter after cooking.
- Page 49 All fresh vegetables should be cooked using full microwave power (900 W). food Portion time standing Instructions (min.) time (min.) Broccoli Prepare even sized florets. Arrange the stems to the center. Add 60-75 ml (5-6 tbsp.) water. Brussels Sprouts Carrots Cut carrots into even sized slices.
- Page 50 Steam Guide for Steamer Pour 500 ml cold water into the steam plate of steamer. Put the steam tray into the plate, add food on tray and cover with stainless steel lid. Put steamer on the turntable. The cooking time depends on size, thickness and type of food. When steaming thin slices or small pieces we recommend to reduce the time.
- Page 51 food Portion cold Power time Instructions Water (ml) (min.) Pierce 3-8 fresh eggs (size M) and set them in the small cavities of steam Boiled Eggs 3-8 eggs 15-20 tray. After steaming keep standing covered for 2-5 minutes. Sprinkle blue prawns with 250 g 1-2 tablespoons lemon Blue Prawns...
- Page 52 Cooking guide for rice and pasta Rice – Use a large glass pyrex bowl with lid – rice doubles in volume during cooking. Cook covered. After the cooking time is over, stir before standing time and salt or add herbs and butter. The rice may not have absorbed all water after the cooking time is finished.
- Page 53 Reheating Your microwave oven will reheat food in a fraction of the time that conventional ovens hobs normally take. Use the power levels and reheating times in the following chart as a guide. The times in the chart consider liquids with a room temperature of about +18 to +20 °C or a chilled food with a temperature of about +5 to +7°C.
- Page 54 Reheating liquids Always allow a standing time of at least 20 seconds after the oven has been switched off to allow the temperature to even out. Stir during heating, if necessary, and ALWAYS stir after heating. To prevent eruptive boiling and possible scalding, you should put a spoon or glass stick into the beverages and stir before, during and after heating.
- Page 55 Reheating baby food baby food Empty into a deep ceramic plate. Cover with plastic lid. Stir well after reheating! Let stand for 2-3 minutes before serving. Stir again and check the temperature. Recommended serving temperature: between 30–40 °C. baby milk Pour milk into a sterilised glass bottle.
- Page 56 Defrosting Microwaves are an excellent way of defrosting frozen food. Microwaves gently defrost frozen food in a short period of time. This can be of great advantage, if unexpected guests suddenly show up. Frozen poultry must be thoroughly thawed before cooking. Remove any metal ties and take it out of any wrapping to allow thawed liquid to drain away.
- Page 57 All frozen food should be defrosted using defrosting power level (180 W). food Portion time standing Instructions (min.) time (min.) Meat Minced Meat 250 g 15-30 Place the meat on the ceramic 500 g 9-11 plate. Shield thinner edges with Pork Steaks 250 g aluminium foil.
- Page 58 GRILL The grill-heating elements are located underneath the ceiling of the cavity. They operate while the door is closed and the turntable is rotating. The turntable’s rotation makes the food brown more evenly. Preheating the grill for 2-3 minutes will make the food brown more quickly. cookware for grilling: Should be flameproof and may include metal.
- Page 59 fresh food Portion Power 1. side 2. side Instructions time time (min.) (min.) Toast Slices 4 pcs Grill 2- 2½ Put toast slices side by side on the high rack. (each 25 g) only Grilled 400 g 300 W Cut tomatoes into halves. Put some cheese on top.
- Page 60 Crusty Plate Guide We recommend to preheat crusty plate directly on the turntable. Preheat crusty plate for 3-4 min. and follow the times and instructions in the table. Use oven gloves while taking out. food Portion Preheat cooking Instructions mode time mode time...
- Page 61 CONVECTION Cooking with convection is the traditional and well known method of cooking food in a traditional oven with hot air. The heating element and the fan position is at the side-wall, so that the hot air is circulating. cookware for convection cooking: All conventional ovenproof cookware, baking tins and sheets –...
- Page 62 Convection guide Preheat the convection with the fast pre-heat function to the desired temperature. Use the power levels and times in this table as guide lines for convection cooking. Use oven gloves when taking out. fresh food Portion Power time Instructions 300-400 g 450 W +...
- Page 63 Square tray guide Use square tray accessory only with convection or grill mode. Insert the square tray into the support guide. Preheat the oven with the fast preheat function to the desired temperature, unless it is not recommended – see table. When using grill only function, preheat the grill for 3-4 minutes.
-
Page 64: Switching Off The Beeper
Quick & Easy meltING butteR Put 50 g butter into a small deep glass dish. Cover with plastic lid. Heat for 30-40 seconds using 900 W, until butter is melted. meltING chocolAte Put 100 g chocolate into a small deep glass dish. Heat for 3-5 minutes, using 450 W until chocolate is melted. -
Page 65: Fast Preheating The Oven
FAST PREhEATING ThE OVEN For convection cooking, it is recommended that you preheat the oven to the appropriate temperature before placing the food in the oven. When the oven reaches the requested temperature, it is maintained for approximately 10 minutes; it is then switched off automatically. -
Page 66: Cleaning And Care
cleaning and care CLEANING YOUR OVEN Using the steam clean feature The steam provided by steam clean system will soak the cavity surface. After using steam clean function, you can easily clean the cavity of oven. Important: • Use this function only after the oven has completely cooled. (Room temperature) •... - Page 67 6. Open the Door. 7. Please clean cavity of oven with dried dishtowel. Remove the turntable, support tray and then only under rack with kitchen paper. • Water Bowl only can be use during “Steam Clean” mode. • When cooking non-liquid items, remove water bowl because It will damage and cause fire to the microwave oven.
-
Page 68: Troubleshooting And Error Code
Repairs should only be made by a qualified service technician. If oven requires servicing, unplug the oven and contact the nearest Samsung Customer Service Center. When calling, please have the following information ready: • The model number and serial number (Can be found at rear of the oven.) •... - Page 69 Electronic interference causes display to be reset. • Disconnect the power plug and reconnect it. Reset the time. Condensation appears inside the oven. • This is a normal occurrence. Simply wipe away after cooking. The fan continues to operate after the oven has been turned off. •...
-
Page 70: Error Codes
ERROR CODES error code General functions GAs seNsoR oPeN In case the value of the gas sensor value is more than 210 during operation/cancellation. GAs seNsoR shoRt In case the value of the gas sensor value is less than 6 during operation/cancellation. -
Page 71: Technical Data
Samsung strives to improve its products at all times. Both the design specifications and these user instructions are thus subject to change without notice. By right of the common regulation 2/1984 (III.10) BKM-IpM. we as distributors testify, that the CP1395E, CP1395EST ovens of Samsung comply with the undermentioned technological parameters. - Page 72 SOUTH AFRICA 0860-SAMSUNG (726-7864 ) NIGERIA 0800-726-7864 0800-10077 GHANA 0302-200077 Cote D’ Ivoire 8000 0077 ww w.samsung.com SENEGAL 800-00-0077 CAMEROON 7095- 0077 KENYA 0800 724 000 UGANDA 0800 300 300 0685 88 99 00 TANZANIA Code No. : DE68-03885G CP1395EST_XFA_EN_DE68-03885G.indb 72...
Need help?
Do you have a question about the CP1395E and is the answer not in the manual?
Questions and answers