Table of Contents
Advertisement
Quick Links
Advertisement
Table of Contents

Related Manuals for Univers by FTE U5500


Summary of Contents for Univers by FTE U5500
- Page 1 U5500...
-
Page 2: Remote Control
CONTENT RECEIVER BATTERIES X 2 REMOTE CONTROL USER’S MANUAL PAG. - Page 3 QUICK INSTALLATION GUIDE The lightning fl ash with The exclamation point Warning: To reduce the risk of electric arrowhead symbol, within shock, don’t open the cabinet. Refer within an equilateral an equilateral triangle, is triangle is intended servicing to qualifi ed personnel only. intended to alert the user to alert the user to to “dangerous voltage”...
- Page 4 QUICK INSTALLATION GUIDE QUICK INSTALLATION GUIDE Follow next steps for the correct installation of this receiver. STEP 1: CONNECTIONS Connect a coaxial cable from the output socket to the “Ant In” connector. Connect a coaxial cable from the “Loop” connector at the receiver to your TV input connector as it is shown in Scheme1. This receiver has not built in modulator so it has to be connected to the TV through a SCART cable.
- Page 5 QUICK INSTALLATION GUIDE STEP 2: BASIC CONFIGURATION OF THE RECEIVER The receiver includes an installation assistant that will help you to setup the different parameters. When the receiver is turned on at fi rst time (using the button at the rear panel of the receiver), the next menu is shown on IMAGE 1 the TV: In order to move through the different options of this menu,...
-
Page 6: Installation
QUICK INSTALLATION GUIDE CHANNEL TV Channel List: This option shows the list of TV stored channels. Radio Channel List: This option shows the list of Radio stored channels. Delete All Channels: This option deletes all TV and Radio stored channels. INSTALLATION Auto Scan: This option make a full scan of all TV and Radio channels received. - Page 7 QUICK INSTALLATION GUIDE TOOLS Information: This option shows all the technical information for the receiver Load Factory Default: If this option is selected, a reset of the receiver will be done and it will load the factory default values. Software Upgrade: To update the receiver by USB Remove USB device: Allows remove USB device of safety way.
- Page 8 INDEX 1. Remote control & panel description 1.1.Front panel description.................10 1.2.Rear panel description.................10 1.3.Remote control description................11 2. Hotkey 2.1.Standby......................12 2.2.CH+/Ch-......................12 2.3.Vol+/Vol-......................12 2.4.Number......................12 2.5.TV/RADIO....................12 2 . 6 . T V c h a n n e l l i s t ................1 2 2.7.Audio......................12 2.8.EPG.......................12 2.9.Subtitles.......................13...
- Page 9 INDEX 5. System setup 5.1. OSD language......................20 5.2.TV system....................20 5 . 3 . R e g i o n a n d t i m e ................2 1 5 .
-
Page 10: Panel & Remote Control Description
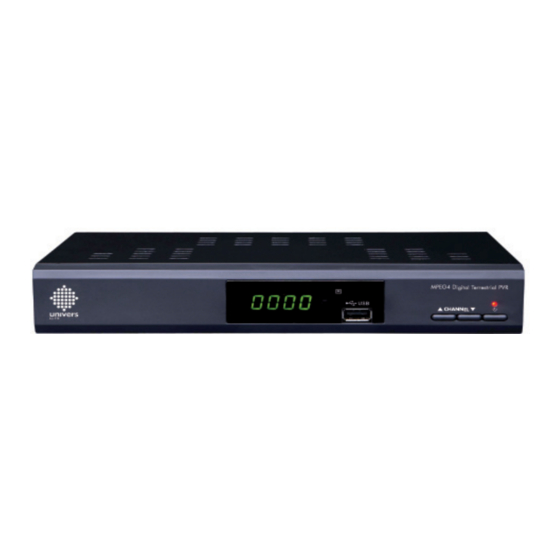
REMOTE CONTROL & PANEL DESCRIPTION 1. PANEL & REMOTE CONTROL DESCRIPTION 1.1. FRONT PANEL DESCRIPTION 1. DISPLAY: 4 Digits to display the program numbers. 2. IR-SENSOR: Detects the infrared signals from the remote control unit. 3. USB: USB Connector 2.0 4. - Page 11 REMOTE CONTROL & PANEL DESCRIPTION 1.3 REMOTE CONTROL DESCRIPTION 1. Standby: Switches receiver ON or in stand-by-mode. 2. Info: Shows channel information with signal bar. 3. SUB: Switches subtitle on and off. 4. DTV/VCR: Swithes between TV Scart and VCR Scart. 5.
-
Page 12: Basic Operations
BASIC OPERATIONS 2. HOTKEY 2.1 STANDBY 1.Press [Power] button to switch from TV mode to Standby mode 2.In Standby mode press [Power] button again to switch back to TV mode. The last active channel will be showed. 3.To switch off the STB complete press the main power button. - Page 13 BASIC OPERATIONS 2.9. SUBTITLES In TV mode, press [Subtitle] button for activating / deactivating the channel subtitles, depending on the provider information (OSD 4). 2.10 EXIT [Exit] key can exit current menu. 2.11 MENU OSD 4 [Menu] key can enter the menu or exit current menu. 2.12 MUTE 1.Press the [Mute] button to mute the sound.
- Page 14 BASIC OPERATIONS 2.18. TIMESHIFT In order to activate this Timeshif option, please access to DVR confi guration menu (OSD 8). From the moment the user access to the channel, the receiver keeps all the channel information in a buffer. All the information is on the hard disk, for this reason it is possible to play, pausa, fast forward and reward.
-
Page 15: Tv Channel List
CHANNEL 3.CHANNEL Press [Menu] in the TV mode to enter the main menu (OSD 1. Press [ ] to select the Channel item. 2. Press [OK] to enter the selected item. In the Channel menu (OSD 10): OSD 9 3. Press [ ] to select the wanted menu item. -
Page 16: Tv Channel List Edit
CHANNEL 3.1.3 SKIP In “TV Channel List Edit” menu, press number key [Green] can make a “skip mark” in the right side of the highlighted channel. After save and exit “TV Channel List Edit” menu, the channel will be skip while user change channel in the full screen. -
Page 17: Radio Channel List
CHANNEL 3.1.5.3 DELETE In “TV Channel List Edit” menu, press number key [Blue], the channel will be deleted. Next press [OK] over the channel you wish to remove (OSD 19). 3.2 RADIO CHANNEL LIST Basically, the operation of “Radio Channel List” is same as “TV Channel List”, but there is one point different: In “Radio OSD 19 Channel List”... -
Page 18: Channel Scan
INSTALLATION 4.INSTALLATION Press [Menu] in the TV mode to enter the main menu (OSD 22). 1. Press [ ] to select the Installation item. 2. Press [OK] to enter the selected item. In the Installation menu (OSD 23): 3. Press [ ] to select the wanted menu item. -
Page 19: Tuner Setting
INSTALLATION 4.3 TUNER SETTING When you enter to “Tuner setting” menu, there will display the screen like below (OS26): In Aerial Adjustment mode: Tuner Power: On / Off. Select a channel with signal to verify that reception is correct to turn on the supply of 5Vdc. 4.4 LCN OSD 26 This option makes an automatic ordering of the channels after... -
Page 20: System Setup
SYSTEM SETUP 5. SYSTEM SETUP Press [Menu] in the TV mode to enter the main menu . 1. Press [ ] to select the System Setup item. 2. Press [OK] to enter the selected item. In the System Setup menu (OSD 28): 3. -
Page 21: Region And Time
SYSTEM SETUP You can press [ ] key to select each mode circularly. 2. Aspect Mode is used for switching the screen aspect ratio mode. Now we provide below options: 4:3 PS / 4:3 LB / 16:9 / AUTO. You can press [ ] key to select each mode circularly. -
Page 22: Parental Lock
SYSTEM SETUP Once the time’s up, no matter what the system is in standby mode or in playing mode, the system will automatically switch to the channel you want and start to play. 7. Duration: Please introduce the duration of the timing. *Press [Exit] can exit the current menu. -
Page 23: Group Rename
SYSTEM SETUP 3. Load OSD Setting Default: If you are not satisfy with your setting, you can move highlight to this item and press [OK] key to reset parameters as default value. 5.7. GROUP RENAME In this menu, user is able to change the name of the Favourite Groups. -
Page 24: Load Factory Default
TOOLS 6.TOOLS Press [Menu] in the TV mode to enter the main menu (OSD 38). 1. Press [ ] to select the Tools item. 2. Press [OK] to enter the selected item. In the Tools menu (OSD 39): 3. Press [ ] to select the wanted menu item. -
Page 25: Safely Remove Storage Device
TOOLS 6.4 SOFTWARE UPGRADE BY USB This option allows updating the software of the receiver with the received data from a USB 2.0 memory device. To do it, connect a USB 2.0 memory device to the receiver and acces to this menu option (OSD 43). The last software version to be loaded must be placed at the root path of your USB device. - Page 26 GAMES 7.GAMES When you enter “Game” menu (OSD 45), you will see three Games include Tetris, Othello and Sudoku (OSD 46) 7.1 TETRIS 1. Moving highlight to “Setup” and press [ ] key to select the game level (speed) (OSD 47). 2.
- Page 27 MEDIA + 8. MEDIA + Press the key [Menu] on the remote control to go to the main menu (OSD 50). 1. Press the arrows on the remote control [ ] to select the option Record. 2. Press [Ok] to enter the submenu Record. 3.
-
Page 28: Configure The Slide Show
MEDIA + - PLAYLIST These lists are created adding the fi les you want to the previous lists. You can create 2 lists: - Picture List - Music List In order to open the play list, please press [yellow button] and select which of the two list you wish to open (OSD 53). -
Page 29: Picture Viewer
MEDIA + 8.1.4.PICTURE VIEWER 1. Press [OK] over the fi le .JPG that you want to show. 2.The selected image will be shown in the screen and the reproduction of the images will start in slide show way. You can rotate the picture with the buttons [ ]. -
Page 30: How To Delete A Recording
MEDIA + with password” (chapter x.x). - Press the key [Exit] to leave. A window will ask for confi rmation of saving the changes. 8.2.4. HOW TO DELETE A RECORDING To delete one or more recordings, press the [Blue] key on the recording you want to delete (if you want to delete several recordings, select them one by one). -
Page 31: Jump Step Value
MEDIA + 8.6. JUMP STEP VALUE With this option you can settle the jump marks forward and reward (OSD 66). On a current reproduction, press the keys [|<<] or [ >>|] to make a jump of a certain period of time on the reproduction. This period is confi... -
Page 32: Technical Specifications
TECHNICAL SPECIFICATIONS Video Decoding MPEG-1 / MPEG-2 MP@ML / MPEG-4 AVC / H.264 HP @L3 Output PAL/NTSC Aspect ratio 4:3 PS, 4:3 LB, 16:9, Auto Output connector Scart / RCA Audio Decoding MPEG-1 Layer 1,2 PCM / AC3 / HE-AAC V1.0 Output connector Scart / RCA / Coaxial SPDIF Demodulator... -
Page 33: Low Voltage Directive 2006/95/Ec
PART OF THE DECLARATION OF CONFORMITY CE “WE , UNIVERSBYFTE, DECLARE THAT THE PRODUCT U5500 IS IN CONFORMITY WITH FOLLOWING DIRECTIVES LOW VOLTAGE DIRECTIVE 2006/95/EC EMC DIRECTIVE 2004/108/EC” PAG.
Need help?
Do you have a question about the U5500 and is the answer not in the manual?
Questions and answers