Table of Contents
Advertisement
Quick Links
Advertisement
Table of Contents

Subscribe to Our Youtube Channel
Related Manuals for Univers by FTE U4149


Summary of Contents for Univers by FTE U4149
- Page 1 U4149...
- Page 2 QUICK INSTALLATION GUIDE The lightning fl ash with The exclamation point Warning: To reduce the risk of electric arrowhead symbol, within shock, don’t open the cabinet. Refer within an equilateral an equilateral triangle, is triangle is intended servicing to qualifi ed personnel only. intended to alert the user to alert the user to to “dangerous voltage”...
- Page 3 QUICK INSTALLATION GUIDE QUICK INSTALLATION GUIDE Follow next steps for the correct installation of this receiver. STEP 1: CONNECTIONS Connect a coaxial cable from the output socket to the “Antenna Input” connector. Connect a coaxial cable from the “Loop out” connector at the receiver to your TV input connector as it is shown in Scheme1.
- Page 4 QUICK INSTALLATION GUIDE STEP 2: BASIC CONFIGURATION OF THE RECEIVER The receiver includes an installation assistant that will help you to setup the different parameters. When the receiver is turned on at fi rst time (using the button at the rear panel of the receiver), the next menu is shown on the TV: In order to move through the different options of this menu, please use the keys of the remote control.
- Page 5 QUICK INSTALLATION GUIDE STEP 3: TIME CONFIGURATION It is recommended to setup the clock before starting to enjoy the receiver, because correct time maybe is required by some applications. Please complete following options: Press the [Menu] key of the remote control for appearing the main menu.
- Page 6 QUICK INSTALLATION GUIDE TV Channel List: This option shows the list of TV stored channels. Radio Channel List: This option shows the list of Radio stored channels. Favourite Channel List Name: It allows changing the name of the favourite groups. Delete All Favourites: This option deletes all the favourite lists created.
- Page 7 QUICK INSTALLATION GUIDE OSD Language: This option allows selecting different menu and options languages. TV System: This option allows choosing the video Standard and other parameters of the screen. Start up Service: This option allows setting the receiver to start in a predefi ned channel. Region and Time: In this option, the time of the receiver and user region or country can be confi...
-
Page 8: Table Of Contents
INDEX 1. Remote control & panel description 1.1.Front panel description.................11 1.2.Rear panel description.................11 1.3.Remote control description................12 2. Hotkey 2.1.Standby......................12 2.2.CH+/CH-.......................12 2.3.Vol+/Vol-......................12 2.4.Number......................12 2.5.TV/Radio......................13 2.6.Channel List........................13 2.7.Audio......................13 2.8.EPG.......................13 2.9.FAV+/-......................13 2.10.Exit......................13 2.11.Menu......................13 2.12.Mute......................13 2.13.BACK......................14 2.14.FAV......................14 2.15.Information....................14 2.16.Pup+/Pdown-....................14 2.17.TTX......................14 2.18.Zoom......................14 2.19.Multiwindow....................14 2.20.SUB......................14 3. Channel 3.TV Channel List....................15 3.1.1.Favorite....................15 3.1.2.Move.....................15... - Page 9 INDEX 4. Installation 4 . 1 . A u t o s c a n ................1 9 4 .
-
Page 10: Safety Precaution
SAFETY PRECAUTION The lightning fl ash with The exclamation point Warning: To reduce the risk of electric arrowhead symbol, within shock, don’t open the cabinet. Refer within an equilateral an equilateral triangle, is triangle is intended servicing to qualifi ed personnel only. intended to alert the user to alert the user to to “dangerous voltage”... -
Page 11: Remote Control & Panel Description
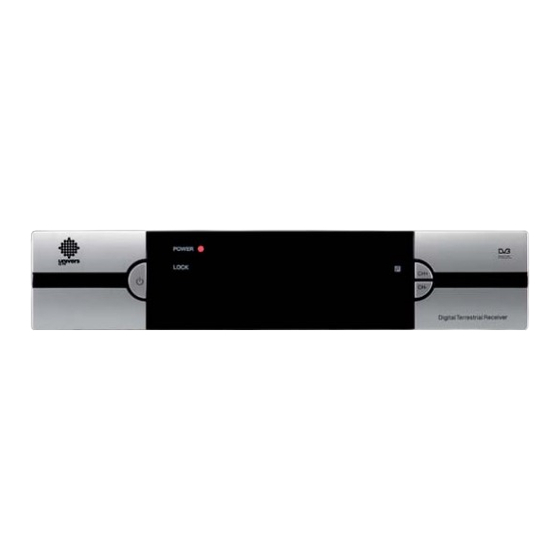
REMOTE CONTROL & PANEL DESCRIPTION 1. PANEL & REMOTE CONTROL DESCRIPTION 1.1. FRONT PANEL DESCRIPTION 1. POWER: Switches the receiver on, or enters standby mode. To completely switch off the receiver, you have to use the switch on the back of the receiver. 2. -
Page 12: Remote Control Description
REMOTE CONTROL & PANEL DESCRIPTION 1.3 REMOTE CONTROL DESCRIPTION 1- Standby 2- CH+/CH- 3- Vol+/Vol- 4- Number 5- TV/Radio 6- OK 7- Audio 8- EPG 9- FAV+/- 10- Exit 11- Menu 12- Mute 13- Recall/Back 14- FAV 15- Información 16- Pup / Pdw 17- TTX 18- Zoom 19- Multiwindow... -
Page 13: Tv/Radio
BASIC OPERATIONS 2.5 TV/RADIO In TV mode, press [TV/RADIO] to switch to Radio mode. In Radio mode press [TV/RADIO] again to switch back to TV mode. OSD 1 2.6 CHANNEL LIST 1. In full screen, press [OK] / [List] key can enter “Channel List”, please refer to TV Channel List for detail information. -
Page 14: Back
BASIC OPERATIONS 2.13 BACK Pressing the [Recall] button allows you to toggle between the actual and the last selected channel. 2.14 FAV 1. In TV mode press the [Favorite] button to display the Favorite Group window on the screen as the picture beside shows (OSD 5). -
Page 15: Channel
CHANNEL 3.CHANNEL Press [Menu] in the TV mode to enter the main menu (OSD 1. Press [ ] to select the Channel item. 2. Press [OK] to enter the selected item. In the Channel menu (OSD 7): OSD 6 3. Press [ ] to select the wanted menu item. -
Page 16: Find
CHANNEL 3.1.3 FIND 1. Press number key [3] can open the “Find” window like above (OSD 11). You can press number [0] key to [9] key to input letter or number into the dialogue. Every time you press number key it will change the letter or number. For example, every time you press number [2], it will show “a”- >”b”->”c”->”2”... -
Page 17: 3.Lock
CHANNEL screen. (OSD 15). 3.1.5.3 LOCK In “TV Channel List Edit” menu, press number key [3] can make a “lock mark” in the right side of the highlighted channel. After save and exit “TV Channel List Edit” menu, STB will request you to input the password while you want to watch the locked channel. -
Page 18: D E L E T E A L L F A V O R I T E
CHANNEL 3.4. DELETE ALL FAVORITES In “Delete All” item (OSD 20): 1. There will display an dialogue for user to key in password. The default Password is “0000”. 2. When you input the correct password, there will show up a warning message box to inquire you whether delete all or not. -
Page 19: A U T O S C A
INSTALLATION 4.INSTALLATION Press [Menu] in the TV mode to enter the main menu (OSD 22). 1. Press [ ] to select the Installation item. 2. Press [OK] to enter the selected item. In the Installation menu (OSD 23): 3. Press [ ] to select the wanted menu item. -
Page 20: C H A N N E L S E T U
INSTALLATION 4.3 CHANNEL SETUP When you enter to “Channel Setup” menu, there will display the screen like below: 1. You can see the channel information like the picture displaying (OSD 26). 2. Move the [ ] key can move the highlight to select the channel. -
Page 21: System Setup
SYSTEM SETUP 5. SYSTEM SETUP Press [Menu] in the TV mode to enter the main menu (OSD 29). 1. Press [ ] to select the System Setup item. 2. Press [OK] to enter the selected item. In the System Setup menu (OSD 30): 3. -
Page 22: Start Up Service
SYSTEM SETUP PAL-BG / NTSC/ PAL-N. You can press [ ] key to select each mode circularly. 2. Aspect Mode is used for switching the screen aspect ratio mode. Now we provide below options: 4:3 PS/4:3LB /16:9/ Auto. You can press [ ] key to select each mode circularly. -
Page 23: Ti M E R S E T T I N
SYSTEM SETUP 5.5 TIMER SETTING When you enter “Timer Setting”, you will see the window like below(OSD 35): 1. Program Timer: Select “Program Timer” item and pres [OK] key to enter “Program Timer” menu. • Current time information will display on the fi rst column; if the current time is incorrect, please modify the time information in “Time”... -
Page 24: O S D S E T T I N
SYSTEM SETUP 3. Load Default Timer Setting When you enter “Load Default Timer Setting”, you will see the window like below: •Press [OK] key on “Load Default Timer Setting”, it will show “Inpute Password” dialogue. •After you input the correct password, there will show a warning message to inquiry you “All Timers will be cleared, continue?”... - Page 25 SYSTEM SETUP the lock channels, whether have to input the password or not. If the setting is “Yes”, play the channels with lock mark will show up a dialogue on the screen and ask for the password. If the setting of “Channel Lock ”is “No”, the Lock function will invalid.
-
Page 26: Tools
TOOLS 6.TOOLS Press [Menu] in the TV mode to enter the main menu (OSD 41). 1. Press [ ] to select the Tools item. 2. Press [OK] to enter the selected item. In the Tools menu (OSD 42): 3. Press [ ] to select the wanted menu item. -
Page 27: Load Factory Default
TOOLS • [ ] — use these arrow keys to guide the snake. •[OK] — Pause/Play game •[Exit] — Quit game and draw back to “Game” menu. 3. Othello • Moving highlight to “Setup” and press [Left/Right] keys to select the game level (degree of diffi culty). •... -
Page 28: Welcome Page
TOOLS 6.5. WELCOME PAGE The receiver includes an installation assistant that will help you to setup the different parameters as you can see at OSD 44. 1. Language: press [ ] to select the language that will appear on the menus (see point 5.1.) 2. -
Page 29: Technical Specification 7.Technical Specification
TECHNICAL SPECIFICATIONS Video Decoding Compatible MPEG-2 & MEPG-1 Bit rate Max 15Mbps Output PAL/NTSC Aspect ratio 4:3, 16:9, Auto Active pixel 720x480 @ 30fps; 720x576 @25fps Output connector Scart / RCA Audio Decoding MPEG-2/MEPG -1 Layer I & II Sampling rate 32 /44,1/ 48 Khz Output connector Scart / RCA... - Page 30 PART OF THE DECLARATION OF CONFORMITY CE “WE , UNIVERS BY FTE, DECLARE THAT THE PRODUCTS U4149 IS IN CONFORMITY WITH FOLLOWING DIRECTIVES LOW VOLTAGE DIRECTIVE 2006/95/EC EMC DIRECTIVE 2004/108/EC” PAG.
Need help?
Do you have a question about the U4149 and is the answer not in the manual?
Questions and answers