Table of Contents
Advertisement
Advertisement
Table of Contents

Related Manuals for Cozy N Safe Morgan i-Size


Summary of Contents for Cozy N Safe Morgan i-Size
- Page 1 organ i-Size EST 173 Instruction Manual...
- Page 2 Only suitable if the approved vehicles are fitted with 3 point safety-belts, approved to UN/ECE Regulation No. 16 or other equivalent standards. Without Compromise... Cozy N Safe Oxford Street, Wolverhampton, West Midlands, WV14 7DP, U.K. Tel: +44 (0) 1902 494905 Fax: +44 (0) 1902 490211 Email: enq@cozynsafe.com...
-
Page 3: Table Of Contents
Contents Important notice Features Use in the vehicle Installing and removing the car seat 4.1 ISOFIX ATTACHMENT installation 4.2 Top tether installation 4.3 40-87CM 4.4 76-105CM 4.5 100-125CM 4.6 ISOFIX ATTACHMENT removal Seat adjustment 5.1 Opening and closing side impact protection 5.2 Recline position adjustment 5.3 Forward and rearward rotation adjustment 5.4 Shoulder strap adjustment... -
Page 4: Important Notice
1. Important notice This child car seat is suitable for children who's stature is 40-105cm (≤18kg) and 100- 125cm. Please remove the instruction manual from the car seat and read carefully. Please read carefully before installation, serious injury will occur if installed incorrectly. The manufacturer will not take any responsibility in this case. - Page 5 The user should not make any alterations or additions to the child car seat without the approval of the manufacturer. It is dangerous to not follow the instruction manual provided by the manufacturer. Ensure that the child is not left in the car seat unattended. Ensure that the child car seat is kept away from corrosive substances.
- Page 6 If you have any questions about using and installing the child car seat, please contact the manufacturer. Ensure that the buckle and child car seat fitting is checked prior to every journey. The vehicle handbook should also be consulted when fitting this child car seat. Ensure that food and drink are not consumed whilst the child is in the car seat as crumbs and liquid could spill and compromise the safety function of this car seat.
-
Page 7: Features
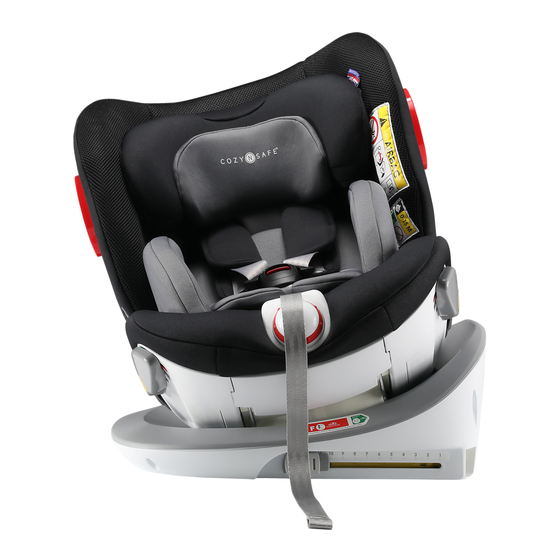
2. Features-front Headrest adjustment handle Headrest Shoulder straps Shoulder pad Harness buckle Buckle pad Cushion (Stature 40-87 cm) Harness adjuster Harness adjustment strap Recline adjustment dial Seat rotation lever Shoulder strap guide hook... - Page 8 2. Features-back Side Impact Protection Side Impact Protection button Top Tether Top Tether fixing hook Top Tether guide slot Belt guide slot ISOFIX second lock button ISOFIX ISOFIX release button ISOFIX guide Fabric cover plug Instruction Manual Compartment...
- Page 9 Seat parts Accessories and instructions Accessories placed on the seat Shoulder pads Buckle pad Cushion Accessories for seats ISOFIX guides Instruction Manual Fabric cover plug These guides the ISOFIX bars The instruction manual is a detailed Use this to put the cover back onto on the car seat onto the guide on how to use the car seat, it the seat when it has been removed...
-
Page 10: Use In The Vehicle
3. Use in the vehicle In order to properly protect your child, please read the instruction manual and vehicle handbook carefully prior to installation of the car seat. Not installable Installable DO NOT use on a passenger seat with an enabled airbag. - Page 11 Car seat ISOFIX anchor point Before using the ISOFIX and top tether belts, please check if the ISOFIX anchor point is matched with the ISOFIX size category on the car seat. Top tether ISOFIX Seat anchor point Seat anchor point Caution Check the top tether belt hook and the anchor points are installed on the vehicle.
- Page 12 Car seat installation warning Incorrect installation may result in death or serious injury. Parents Danger should check the car seat installation on every journey to eliminate any risks. The car seat should not be The top tether belt hook and ISOFIX installed in the vehicle middle should be suitable with the anchor seat.
- Page 13 Child’s sitting position Incorrect installation may result in death or serious injury. Parents Danger should check the car seat installation on every journey to eliminate any risks. This is the correct position for the child. Ensure DO NOT remove the harness when the vehicle is in motion as this may cause that the chest pads go over the shoulders and connect into the buckle and the child's feet are...
-
Page 14: Installing And Removing The Car Seat
4. Installing and removing the car seat Installation Always ensure that the child car seat is secured in the vehicle, even when it is not in use. Installation modes 40-87cm 76-105cm 100-125cm (rearward facing) (forward facing) (forward facing) ISOFIX+Top Tether ISOFIX+Top Tether EzFix + Vehicle 3-point Belt... -
Page 15: Isofix Attachment Installation
4.1 ISOFIX ATTACHMENT installation in vehicle Step 1 Step 1 If your vehicle is not equipped with ISOFIX guides 22, please use the ones provided with this seat. The ISOFIX guides are clamped onto the ISOFIX anchor points, with the incision part facing upwards (see illustration) Caution... - Page 16 Step 3 Step 3 Push the child seat base with both hands to insert into the guide sleeves, and push the child seat toward the backrest until the ISOFIX has become attached to the anchor points on both sides. When you hear a "Click"...
-
Page 17: Top Tether Installation
4.2 Top tether installation Step 1 Attach the top tether hook to the car seat anchor point as described in the vehicle handbook and tighten the top tether 15 (when the top tether is fully tightened the hook indicator will turn green) Caution Do not use the luggage hook as a substitute for the top tether... -
Page 18: 40-87Cm
4.3 40-87CM Seat installation Step 1 Install the child seat into the vehicle seat (see 4.1 for how to install the seat) Step 2 Pull the seat rotation lever upwards, and rotate the seat by 90° to the side (see illustration) Placing the child in the seat Step 1... - Page 19 Step 3 Open harness buckle Step 4 Put the child in the seat and place their legs on either side of the buckle pad 6. Step 5 Pull the headrest adjustment handle above the headrest of the seat, and adjust the headrest to the proper height for your child (see 5.5 for headrest adjustment).
- Page 20 Caution Grasp both shoulder straps with one hand, and pull the adjustment strap forwards with the other hand slowly. When the hand with shoulder strap touches child body, stop pulling the adjustment strap. The shoulder straps should be close against the child's chest. (You should be able to fit 2 adult fingers between the child’s strap and their chest.) Step 8 Rotate the seat by 90°...
-
Page 21: 76-105Cm
4.4 76-105CM Seat installation Step 1 Install the child seat into the vehicle seat (see 4.1 for how to install the seat). Step 2 Pull the seat rotation adjuster upwards, and rotate the seat by 90° to the side (see illustration) Placing the child in the seat Step 1... - Page 22 Step 3 Open harness buckle 5. Step 4 Put the child in the seat and place their legs either side of the buckle pad 6. Step 5 Pull the headrest adjustment handle above the headrest of the seat, and adjust the headrest to the proper height for your child (see 5.5 for headrest adjustment).
- Page 23 Caution Grasp both shoulder straps with one hand, and pull the adjustment strap forwards with your other hand slowly. When the hand holding the shoulder straps touches child body, stop pulling the adjustment strap. The shoulder straps should be close against the child's chest. (You should be able to fit 2 adult fingers between the child’s strap and their chest.) Step 8...
-
Page 24: 100-125Cm
4.5 100-125CM EzFix + Vehicle 3-point belt Hiding the integral 5 point harness. Step 1 To use the car seat in this stage the integral harness should be hidden, take out cushion 7. Step 2 Unbuckle the buckle pad and remove. Step 3 Open the fastener of shoulder pad 4, and remove the pad from the connecting buckle A. - Page 25 Step 4 Hold down the harness adjuster with one hand, and pull the two shoulder straps outward with the other hand to loosen. Step 5 Pull the headrest up to the appropriate height, using the adjustment handle 1. Step 6 Rotate the harness buckle strap of the T shaped slot by 90°...
- Page 26 Securing the child Step 1 Pull the headrest adjustment handle above the headrest of the seat, and pull the headrest up to the proper position. Step 2 Put the vehicle seat belt through the shoulder strap guide hook and over the child's shoulder. Step 3 Pull the vehicle waist belt through the waist belt guide slot over the child's lap.
- Page 27 Caution The child seat must be as close as possible to the vehicle backrest. Step 4 Pass the vehicle shoulder belt and waist belt through the belt guide slot 18 on the other side, and buckle the seat belt. Step 5 Open the side impact protection nearest the door (see 5.1 for how to open and close...
- Page 28 Vehicle 3-point belt Hiding the integral 5 point harness. Step 1 Hide the 5 point harness belt (for details see 4.5 EzFix + 3-point fitting with hidden integral harness). Securing the child Step 1 Secure the child into the car seat (for details see 4.5 securing the child).
-
Page 29: Isofix Attachment Removal
4.6 ISOFIX ATTACHMENT removal Step 1 Press the clasp of the top tether strap adjustment hook 16, pull the hook downwards, and then the hook can detach from the anchor point. Step 2 Press the ISOFIX second lock button and ISOFIX release button at the same time until the ISOFIX separates from the vehicle seat. -
Page 30: Seat Adjustment
5. Seat adjustment 5.1 Opening and closing the side impact protection Opening the side impact protection Step 1 After the child seat is properly secured into the car seat, press the side impact protection button nearest the door. The other side impact protection button may also be pressed at this time. -
Page 31: Recline Position Adjustment
5.2 Recline position adjustment Step 1 Rotate the recline adjustment dial to adjust the seat to the most suitable position (clockwise for upright and counterclockwise for reclining the seat backwards). Caution For rearward facing installation, the seat must be adjusted to the maximum recline angle. 5.3 Forward and rearward rotation adjustment Step 1 Pull the seat rotation adjuster... -
Page 32: Shoulder Strap Adjustment
5.4 Shoulder strap adjustment Loosening shoulder straps Step 1 Push the harness adjuster button at the front with one hand, grasp the two shoulder straps with the other hand (grasp the two shoulder straps together, do not pull the shoulder pads), and pull them forward. -
Page 33: Headrest Height Adjustment
WARNING Check and tighten the top tether, ISOFIX and harness safety belt to ensure that the seat and child are firmly secured. Do not twist or intertwine the top tether or the harness seat belt. Installation of ISOFIX guide is recommended for easy installation. - Page 34 Caution When using the integral harness to fasten the child, you need to loosen the shoulder strap and then lift it up (see 5.4 for how to adjust the shoulder strap) When using the vehicle seat belt to fasten the child into the car seat the straps can be removed.
-
Page 35: Top Tether Adjustment
5.6 Tightening and loosening the top tether Step 1 Press the top tether adjustment button to adjust the top tether. Step 2 Press the clasp of the top tether strap adjustment hook 16, pull the hook downwards, and then the hook can detach from the anchor point. Step 3 The top tether must pass under the vehicle seat headrest... -
Page 36: Installing And Removing Fabric Cover
6. Installing and removing fabric cover 6.1 Fabric cover removal Step 1 Press down on the harness adjuster button with one hand, and pull the two shoulder straps outwards with the other hand to loosen the straps. Step 2 Open the fastener of shoulder pad 4, and remove the pad from the connecting buckle A. - Page 37 Step 2 Take cushion out. Fabric cover removal Step 1 Pull the headrest to the highest position, open the fabric cover from the top and remove the headrest fabric from the shell, continue to remove from top to bottom. Step 2 Carefully take out the seat cover from the seam on the...
-
Page 38: Installing Fabric Cover
6.2 Fabric cover installation Fabric cover installation Step 1 Put the seat cover on the seat frame (the fabric cover plug 23 can be used to insert the fabric inside when installing the cover) Fabric cover plug Step 2 Pull the headrest to the highest position and put the headrest cover on the headrest frame. - Page 39 Installation of shoulder pads Step 1 Insert the two buckle latches into the harness buckle until you hear a “click” sound. Click Step 2 Secure the buckle pad on the buckle. Step 3 Fasten the shoulder pad to the buckle A, and seal the shoulder pad fasteners.
-
Page 40: Cleaning And Maintenance
7. Cleaning and maintenance Important tip The cover is a safety feature. Never use the child car seat without it. DO NOT put your child's safety at risk by using another replacement cover. This could hinder the child car seat from protecting your child as it should do. -
Page 41: Steps To Take After An Accident
8. Steps to take after an accident After an impact if the speed was greater than 10km/h, the child car seat should not be used and you should consult your insurer and retailer for further assistance. 9. Warranty For the seat, we extend a warranty against defects in materials and workmanship for up to one year. The warranty period begins on the date of purchase. - Page 42 ..............................Cozy N Safe...
Need help?
Do you have a question about the Morgan i-Size and is the answer not in the manual?
Questions and answers