Table of Contents
Advertisement
Quick Links
User manual
300059
User Manual for the portable device
Rev. 02 valid from:
myDatalogEASYmbm
Firmware version: 02v003
l
Modem version: 02v002 bzw. 03v001
l
Hardware version: 1.1
l
Microtronics
Engineering GmbH |
Hauptstrasse 7 | 3244 Ruprechtshofen | Austria
Tel +43 2756 77180 23 | Fax +43 2756 77180 33 | support@microtronics.at
www.microtronics.at
Advertisement
Table of Contents

Related Manuals for Microtronics myDatalogEASYmbm


Summary of Contents for Microtronics myDatalogEASYmbm
-
Page 1: User Manual For The Portable Device Mydatalogeasymbm
Rev. 02 valid from: Firmware version: 02v003 Modem version: 02v002 bzw. 03v001 Hardware version: 1.1 Microtronics Engineering GmbH | www.microtronics.at Hauptstrasse 7 | 3244 Ruprechtshofen | Austria Tel +43 2756 77180 23 | Fax +43 2756 77180 33 | support@microtronics.at... -
Page 3: Table Of Contents
Chapter 1 Table of contents Chapter 1 Table of contents User Manual for the portable device myDatalogEASYmbm Chapter 1 Table of contents Chapter 2 Declaration of conformity Chapter 3 Technical data Chapter 4 General specifications 4.1 Translation 4.2 Copyright 4.3 General descriptive names 4.4 Safety instructions... - Page 4 7.4.1 Connecting the sensors, actuators and power supply 7.4.2 Connecting the modbus slaves 7.4.2.1 myDatalogEASY RS485 connection cable with open end(206.656) 7.4.2.2 myDatalogEASYmbm RS485 SUB-D(f) connection cable (206.650 ) 7.4.2.3 myDatalogEASYmbm RS232 SUB-D(f) connection cable (206.688) 7.4.3 Connecting the GSM antenna 7.4.4 Technical details regarding the universal inputs...
- Page 5 8.1 User information 8.2 General principles 8.3 Placing the system into operation 8.4 Testing the communication with the device Chapter 9 User interfaces 9.1 User interface on the myDatalogEASYmbm 9.1.1 Operating elements 9.1.1.1 Status LED 9.1.1.2 Buttons 9.1.1.3 Solenoid switch 9.2 User interface on the myDataweb-Server...
- Page 6 9.2.1.7 Calculated channels 9.2.1.7.1 Basis 9.2.1.7.2 Calculation 9.2.1.7.3 Alarm 9.2.1.8 Output channels 9.2.1.8.1 Basis 9.2.1.8.2 Config 9.2.1.9 Internal channels 9.2.1.9.1 Basis 9.2.1.9.2 Alarms 9.2.1.9.3 Trigger 9.2.1.10 Modbus interface 9.2.1.11 Alarm settings 9.2.1.12 Basic settings 9.2.1.13 FTP export settings 9.2.2 Device configuration 9.2.2.1 Comments 9.2.2.2 Measurement instrument 9.2.2.3 Device-specific settings...
- Page 7 Chapter 1 Table of contents 12.2.2 Evaluating the device log using myDatanetDeviceConfig Chapter 13 Spare parts and accessories 13.1 Internal expansions 13.2 Assembly sets 13.3 Antennas 13.4 Accu and battery packs 13.5 Modbus connection cable 13.6 Sensors 13.7 Other accessories Chapter 14 Contact information Rev.
-
Page 9: Chapter 2 Declaration Of Conformity
Chapter 2 Declaration of conformity Chapter 2 Declaration of conformity Rev. 02... -
Page 11: Chapter 3 Technical Data
Chapter 3 Technical data Chapter 3 Technical data Voltage supply Battery pack BP434R: 2 x Li-SOCl2 - Cells fully fabricated with 26Ah Accu pack AP413D+: 2 x Li-ion - Accu cell fully fabricated with 13,6Ah Charging voltage 7...30VDC (typically 170mA@12V) (only when using an accu pack) Housing... - Page 12 (32 Bit floating point) Data By means of GSM/GPRS quad-band modem to the relevant myDataweb server transmission The myDatalogEASYmbm is equipped with an integrated SIM chip. Monthly data t.b.d. at two-minute measurement interval and 120-minute transmission cycle volume Rev. 02...
-
Page 13: Chapter 4 General Specifications
4.4 Safety instructions For the connection, commissioning and operation of the myDatalogEASYmbm , the following infor- mation and higher legal regulations of the country (e.g. ÖVE), such as valid EX regulations as well as the applicable safety and accident prevention regulations for the respective application case must be observed. -
Page 14: Use Of The Hazard Warnings
Ensure that the safety equipment of this measurement device is not impaired. Install and use the measuring system only in the manner and method described in this manual. Important note: The manufacturer's products that are designed for use outdoors include extensive protection against penetrating moisture and dust. -
Page 15: Safety And Precautionary Measures For The Gsm/Gprs Modem Installation
Chapter 4 General specifications 4.4.2.1 Safety and precautionary measures for the GSM/GPRS modem installation This device may only be installed by a trained technician who applies the recognised instal- lation practices for a radio frequency transmitter including the of external antennas. The device may not be operated in hospitals and/or near medical equipment such as heart pacemakers or hearing aids. -
Page 16: Overview
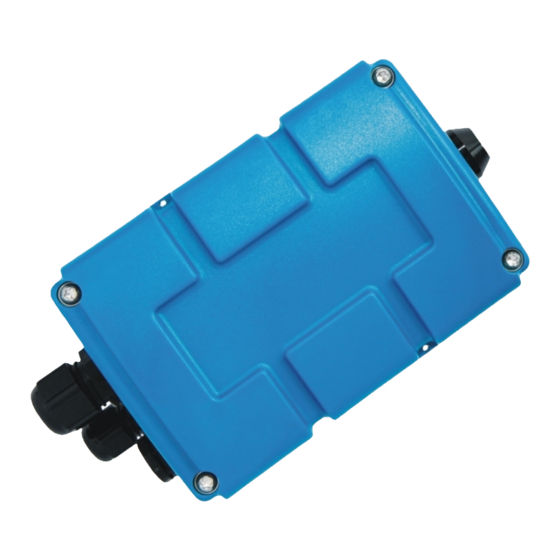
4.5 Overview Overview myDatalogEASYmbm 1 Antenna connection 4 Pressure compensation 2 Housing cover 5 M20x1.5 cable screw connection (cable dia- meter of 5 to 10mm) 3 M12x1.5 cable screw connection (cable dia- meter of 3.5 to 7 mm) 4.6 Intended use The portable measurement device is used to record measurement data read-out from one or more modbus slaves. -
Page 17: General Product Information
USB interface if the optional SIM/USB option is available. 4.8 Device labelling The specifications in this manual apply exclusively to the device type myDatalogEASYmbm . The type plate is located on the right side of the device and includes the following specifications:... -
Page 18: Installation Of Replacement And Wear Parts
Only then can we process requests promptly and properly. myDatalogEASYmbm type plate Note: This symbol indicates that the myDatalogEASYmbm is equipped with an integrated SIM chip. Note: These operating instructions are part of the device and must be available for the user at all times. -
Page 19: Obligation Of The Operator
, disconnect this from the device before removing the accu or battery pack. The remaining cables and antenna can then be removed. Store the myDatalogEASYmbm and accu or bat- tery pack in the compartments provided in the original packaging. -
Page 21: Chapter 5 Functioning Principle
Chapter 5 Functioning principle 5.1 ALOHA transmission mode ALOHA transmission mode is a special connection mode whereby the myDatalogEASYmbm creates a connection to the myDataweb server for a period of time configured using the "Basic settings" con- figuration section (see "Aloha/wake-up duration" in chapter "Basic settings" on page 81). -
Page 23: Chapter 6 Storage, Delivery And Transport
98) and the modbus connection cable (see "Modbus connection cable" on page 98) are not part of the standard scope of delivery and must be ordered separately. . The standard scope of delivery of the myDatalogEASYmbm (206.248) includes: myDatalogEASYmbm myDatanet Tool Pen (206.646) 10-pole connector plug MDN Magnet (206.803) -
Page 24: Transportation
Note: The table above only includes the storage conditions for the two energy sources used most frequently for the myDatalogEASYmbm . Please consult the appropriate factsheet for information about the storage conditions of other accu or battery packs. Important note: Remove the accu or battery pack from the myDatalogEASYmbm prior to stor- age. -
Page 25: Chapter 7 Installation
7.1 Dimensions Dimensions: Width and height Dimensions: Depth 7.2 Installing the myDatalogEASYmbm Important note: Ensure the installation is completed properly. Comply with the existing legal and/or operational directives. Improper handling can cause injuries and/or damage to the devices. -
Page 26: Wall Mounting
206.640) 1. First attach the assembly loop (3) using the screws (2) included in the "Universal bracket for housing myDatanet 86x126 (206.640)" equipment set to the myDatalogEASYmbm (see "Step 1 of the wall mounting" on page 26). -
Page 27: Top-Hat Rail Assembly
If you want to use the tapping screws (4) included in the equipment set, first of all insert the supplied wall plugs into each of the four drill holes before screwing the myDatalogEASYmbm with the attached assembly loop (3) to the wall (see "Step 2 of the wall mounting" on page 26). -
Page 28: Pipe Assembly
2. Place the assembly loop (3) onto the top edge of the top-hat rail. When turned slightly around the horizontal axis of the myDatalogEASYmbm with the assembly loop (3) attached, the assembly loop (3) engages on the top-hat rail (see "Step 2 of the top-hat rail assembly" on page 27). -
Page 29: Safety Instructions For The Cabling
Chapter 7 Installation 1 of the pipe assembly " on page 28). 2. Position the myDatalogEASYmbm with the attached assembly loop (3) on the pipe and use the supplied cable binders (4) to secure the myDatalogEASYmbm (see "Step 2 of the pipe assembly"... -
Page 30: Electrical Installation
Run all data and power cables so that they do not pose a trip hazard and ensure that cables do not have any sharp bends. The myDatalogEASYmbm must not be operated in the field with the lid open. The myDatalogEASYmbm cannot be operated without an internal power supply (accu or battery pack). - Page 31 Chapter 7 Installation Connection of the sensors and power supply 1 Housing cover 7 Pressure compensation 2 Supply connector 8 M16x1.5 cable screw connection (cable diameter of 4.5 to 10 mm) 3 Accu or battery pack 9 Main terminal block X12 4 Antenna connection 10 Mounting for the accu or battery pack Rev.
- Page 32 Output 2: Isolated switch contact 1. Remove the four screws that secure the housing cover. Then open the myDatalogEASYmbm . Important note: In the event of adverse weather conditions including rain or in a location where water can penetrate from above, suitable measures must be implemented to protect the device from penetrating moisture when the housing cover is open.
-
Page 33: Modbus Register
4. Then connect your sensors and actuators with the universal inputs and outputs. Subsequently connect the modbus slaves with the modbus connection cable. (see "Connecting the modbus slaves" on page 34). If you are using an accu pack to supply the myDatalogEASYmbm , connect the external charging voltage to V and the GND. -
Page 34: Connecting The Modbus Slaves
8. Connect the antenna (see "Connecting the GSM antenna" on page 38). The antenna is not included in the scope of delivery and must be ordered separately. 9. Connect the accu or battery pack to the supply connector. The status LED should then start to flicker (see "Status LED"... -
Page 35: Mydatalogeasymbm Rs485 Sub-D(F) Connection Cable (206.650 )
2. Connect the modbus slave(s) with the myDatalogEASY RS485 connection cable with open end(206.656). The assignment of the cable is specified in the table above. 7.4.2.2 myDatalogEASYmbm RS485 SUB-D(f) connection cable (206.650 ) Important note: All cabling work must be performed in the de-energised state. - Page 36 Connecting the modbus slave when using the myDatalogEASYmbm RS485 SUB-D(f) connection cable (206.650 ) 1 connector X4 for the external temperature 3 Gender changer (included in the scope of sensor or the RS485 connection cable delivery of 206.650 ) 2 myDatalogEASYmbm RS485 SUB-D(f) connection cable (206.650 )
-
Page 37: Mydatalogeasymbm Rs232 Sub-D(F) Connection Cable (206.688)
Run all data and power cables so that they do not pose a trip hazard and ensure that cables do not have any sharp bends. Connecting the modbus slave when using the myDatalogEASYmbm RS232 SUB-D(f) connection cable (206.688) 1 RS232 option (included in the scope of 3 Gender changer (included in the scope of delivery of 206.688) -
Page 38: Connecting The Gsm Antenna
The standard antenna is directly attached to the antenna connector (see "Overview" on page 16) of the myDatalogEASYmbm . In the event of a low radio signal strength, you can use the Flat antenna Smart Disc FME-F (206.814). -
Page 39: Technical Details Regarding The Universal Inputs
Chapter 7 Installation 5. Check whether the connection to the myDataweb has functioned correctly (see "Testing the communication with the device" on page 44). 7.4.4 Technical details regarding the universal inputs 7.4.4.1 0/4 to 20mA mode Note: Above 22,5mA, the affected input becomes highly resistive (safety shutdown to prevent damage to the universal input). -
Page 40: Low Power Digital Mode (Lp Digital)
7.4.4.5 Low power digital mode (LP digital) Important note: If a universal input is in "LP digital", a switch contact must only be supplied by V . Attaching an external voltage will cause damage to the universal input. In batt comparison to "digital"... -
Page 41: Direct Accu Or Battery Voltage Output (Vbatt)
The RS232 or RS485 interface is fed through to the outside of the device"Connecting the modbus slaves" on page 34), depending on the modbus connection cable (see"Modbus connection cable" on page 98) selected when ordering the myDatalogEASYmbm . Both of the interfaces cannot be operated simultaneously. -
Page 42: Technical Details Regarding Energy Management
7.4.7 Technical details regarding energy management The device will work until 3,1V, if the myDatalogEASYmbm is operated without an external charging voltage (V ). It then switches to energy-saving mode in which only the charge controller is active. If an external charging voltage (V ) is supplied in this mode, the accu pack can be charged up again. -
Page 43: Chapter 8 Placing Into Operation
8.3 Placing the system into operation Note: It is recommended that the myDatalogEASYmbm is first placed into operation in the office before per- manently mounting the device at the place of use. In doing so you should set a site for the later operation on the myDataweb server (see "myDatanet Server Manual "... -
Page 44: Testing The Communication With The Device
3. Configure the created site according to your requirements (see "Site configuration" on page 49). 4. Link the myDatalogEASYmbm with the created site (see "Site" on page 49). 5. Check whether the type of accu pack set in the device configuration (see "Device-specific set- tings"... - Page 45 Chapter 8 Placing into operation Server Manual " 805002). Particular attention must be paid to the internal "GSM level" and "battery" measurement values. Note: Additional explanation about evaluating the "GSM level": "GSM level" >-64dBm -64 to -73dBm -74 to -83dBm -84 to -93dBm -94 to -107dBm <= -108dBm...
-
Page 47: Chapter 9 User Interfaces
Chapter 9 User interfaces Chapter 9 User interfaces The configuration of the myDatalogEASYmbm is carried out via the web interface on the myDataweb server (see "User interface on the myDataweb-Server" on page 49), which your responsible sales partner will provide to you. -
Page 48: Buttons
GPRS connection established or button/solenoid switch actuates Normal measuring operation according to configuration until the next transmission 9.1.1.2 Buttons The button can also be used to initiate the ALOHA transmission mode or to instruct the myDatalogEASYmbm to immediately give out the error/status code. Rev. 02... -
Page 49: Solenoid Switch
Chapter 9 User interfaces User action Device response Operation after releasing the button Press briefly for Status LED illuminates Error/status code is displayed (see approx. one "Status LED" on page 47) second Press and hold for Status LED flashes three times and ALOHA transmission mode five seconds then remains on... - Page 50 Title 1Wire Freely selectable channel title for the external temperature sensor Rev. 02...
- Page 51 Chapter 9 User interfaces Mode Basic settings for the measurement channel Universal Measurement channel deactivated inputs Digital Invert Inverts the input signal (digital modes) Digital LP Invert Inverts the input signal Cnt.Day Impulse Count value of an impulse in the measuring unit Defines the upper scale end of the pointer instruments Unit...
- Page 52 Universal 0-20 mA Start of measurement range in the measurement unit inputs 100% End of measurement range in the measurement unit (analogue Unit String, which is used as the measurement unit by all modes) of the server display elements Decimal Number of decimal places that are used by all of the places server display elements 4-20 mA...
-
Page 53: Config
Chapter 9 User interfaces 9.2.1.3.2 Config Universal inputs Digital Filter time Minimum signal length for signal detection (digital modes) Decay Temporal function in the measurement cycle Minimum signal length for x seconds on rising edge Down Minimum signal length for x seconds on falling edge Up &... - Page 54 Universal inputs Cnt.Day Filter time Minimum signal length for signal detection Reset at Reset time of the day counter (Counter modes) Cnt.Intervl. Filter time Minimum signal length for signal detection Decay Temporal function in the measurement cycle Decay deactivated The minimum of the last x measurement values is recorded.
- Page 55 Chapter 9 User interfaces Universal inputs Freq Filter time Minimum signal length for signal detection Decay Temporal function in the measurement cycle (Frequency mode (1/2) 1/2) Decay deactivated The minimum of the last x measurement values is recorded. The maximum of the last x measurement values is recorded.
- Page 56 Universal inputs Freq Overflow Handling measurement range violations Ignore The measured value is calculated (Frequency mode (2/2) beyond the range limits. 2/2) Silent cutoff The measured value is cutoff at the range limits. Overflow If the measurement value is below the lower limit, the error value "UF"...
- Page 57 Chapter 9 User interfaces Universal inputs Filter time Minimum signal length for signal detection Decay Temporal function in the measurement cycle (PWM mode 1/2) (1/2) Decay deactivated The minimum of the last x measurement values is recorded. The maximum of the last x measurement values is recorded.
- Page 58 Universal inputs Overflow Handling measurement (PWM mode 2/2) (2/2) range violations Ignore The measured value is calculated beyond the range limits. Silent cutoff The measured value is cutoff at the range limits. Overflow If the measurement value is below the lower limit, the error value "UF"...
- Page 59 Chapter 9 User interfaces Universal inputs 0-20 mA Filter time Temporal averaging for signal smoothing Decay Temporal function in the measurement cycle (0-20 mA mode (1/2) 1/2) Decay deactivated The minimum of the last x measurement values is recorded. The maximum of the last x measurement values is recorded.
- Page 60 Universal inputs 0-20 mA Overflow Handling measurement (0-20 mA mode (2/2) range 2/2) violations Ignore The measured value is calculated beyond the range limits. Silent cutoff The measured value is cutoff at the range limits. Overflow If the measured value is above 20.1 mA, the error value "SC"...
- Page 61 Chapter 9 User interfaces Universal inputs 4-20 mA Filter time Temporal averaging for signal smoothing Decay Temporal function in the measurement cycle (4-20 mA mode (1/2) 1/2) Decay deactivated The minimum of the last x measurement values is recorded. The maximum of the last x measurement values is recorded.
- Page 62 Universal inputs 4-20 mA Overflow Handling measurement (4-20 mA mode (2/2) range 2/2) violations Ignore The measured value is calculated beyond the range limits. Silent cutoff The measured value is cutoff at the range limits. Overflow If the measured value is below 3.9 mA, the error value "OL"...
- Page 63 Chapter 9 User interfaces Universal inputs 0-2V Filter time Temporal averaging for signal smoothing Decay Temporal function in the measurement cycle (0-2V mode 1/2) (1/2) Decay deactivated The minimum of the last x measurement values is recorded. The maximum of the last x measurement values is recorded.
- Page 64 Universal inputs 0-2V Overflow Handling measurement (0-2V mode 2/2) (2/2) range violations Ignore The measured value is calculated beyond the range limits. Silent cutoff The measured value is cutoff at the range limits. Overflow If the measured value is above 2.01V, the error value "OF"...
- Page 65 Chapter 9 User interfaces Universal inputs 0-10V Filter time Temporal averaging for signal smoothing Decay Temporal function in the measurement cycle (0-10V mode 1/2) (1/2) Decay deactivated The minimum of the last x measurement values is recorded. The maximum of the last x measurement values is recorded.
-
Page 66: Alarms
Universal inputs 0-10V Overflow Handling measurement (0-10V mode 2/2) (2/2) range violations Ignore The measured value is calculated beyond the range limits. Silent cutoff The measured value is cutoff at the range limits. Overflow If the measured value is above 10.05V, the error value "OF"... -
Page 67: Trigger
Chapter 9 User interfaces 9.2.1.3.4 Trigger "Digital" or "Digital Fastrecording (recording cycle = recording cycle / factor) LP" mode Slow recording (recording cycle = recording cycle * factor) Start measuring cycle immediately Initiate transmission Activate online mode Edge Selection of the edge at which the trigger should be initiated Rising Rising edge initiates trigger. -
Page 68: Config
Mode Basis settings for the measurement channel: Measurement channel deactivated Defines the lower scale end of the pointer instruments Defines the upper scale end of the pointer instruments Config > Format Digital Signed Unit String, which is used as the (see "Config."... - Page 69 Chapter 9 User interfaces Format Data type Digital A digital value must be read. Function Read coils (0x01) Read discrete inputs (0x02) Signed A signed integer value should to be read. 16 16-bit integer 32 32-bit integer. Two registers must be read from the modbus slave for this purpose.
-
Page 70: Alarms
9.2.1.4.3 Alarms Warning Value low A warning is initiated if the measurement value drops to or below this value. Value high A warning is initiated if the measurement value meets or exceeds this value. Alarm Value low An alarm is initiated if the measurement value drops to or below this value. -
Page 71: Basis
Chapter 9 User interfaces 9.2.1.6.1 Basis Title 1-32 Freely selectable channel title for the modbus output register Mode Basis setting for the output channel: Output channel deactivated Defines the lower scale end of the pointer instruments Defines the upper scale end of the pointer instruments Config >... - Page 72 Format Data type Digital A digital value must be written. Function Write single coils (0x05) Write multiple coils (0x0F) Signed A signed integer value should to be written. 16 16-bit integer 32 32-bit integer. Two registers must be written in the modbus slave for this purpose.
- Page 73 Chapter 9 User interfaces 9.2.1.7 Calculated channels Note: The values of the calculated channels are calculated directly for the data output (display on myDataweb server or download from myDataweb server). They are not saved in the server database. 9.2.1.7.1 Basis Title 1-5 Freely selectable channel title for the calculated channels Mode...
- Page 74 Digital Source Selection of the channel from which the input data is used High level Signal recognition level +, -, x, / Source Selection of the channel from which the input data is used +, -, x, / Source Selection of the channel from which the input data is used 9.2.1.7.3 Alarm Note: The alarm levels for calculated channels can only be evaluated once the device has transmitted the measurement data to the myDataweb server.
- Page 75 Chapter 9 User interfaces Mode Basic setting for the output channel Output channel deactivated Ext warmup The output channel is switched on "ext warmup time" seconds prior the to time measurement. If the value is "0", the output channel is not switched on at all. Digital Invert Inverts the level issued by the device (see "Additional...
- Page 76 Note: Additional explanation of "Digital" mode Invert Setpoint Output on device Off (low) On (high) On (high) Off (low) 9.2.1.8.2 Config Ext warmup time Frequency Impulse Duration Duration of an output impulse 9.2.1.9 Internal channels 9.2.1.9.1 Basis Voltage title Freely selectable channel title for V (external charging voltage) Unit String, which is used as the measurement unit by all of the server...
- Page 77 Chapter 9 User interfaces 9.2.1.9.2 Alarms Warning Value low A warning is initiated if the measurement value drops to or below this value. Value high A warning is initiated if the measurement value meets or exceeds this value. Alarm Value low An alarm is initiated if the measurement value drops to or below this value.
- Page 78 Activates the 120 Ω load resistance between RS485 A and B Mode Data is transferred in binary format. ASCII Data is transferred in ASCII format. Response Time during which the modbus slave must react to the timeout command from the myDatalogEASYmbm Rev. 02...
- Page 79 Time during which the modbus slave must react to the timeout command from the myDatalogEASYmbm Order option "myDatalogEASYmbm RS485 SUB-D(f) connection cable (206.650 )" or "myDatalogEASY RS485 connection cable with open end (206.656)" required. Order option "myDatalogEASYmbm RS232 SUB-D(f) connection cable (206.688)" required.
- Page 80 9.2.1.11 Alarm settings Acknowledgement Standard The global server setting is used (see "myDatanet Server Manual " 805002) to determine whether to acknowledge the alarms automatically or manually. Automatically Alarms are acknowledged automatically as soon as all of the messages have been sent. If SMS that have a tariff with a delivery confirmation function are also sent, acknowledgement is provided after delivery confirmation.
- Page 81 Chapter 9 User interfaces 9.2.1.12 Basic settings Connection type Cycle The device registers in the transmission cycle Cycle & wakeup The device registers in the transmission cycle and can be placed into the ALOHA transmission mode via the server. Online The device does not disconnect the connection and continuously transmits the measurement data.
- Page 82 Note: Example for explaining the recording, measuring and burst cycles (in conjunction with the decay) Basic setting Recoding cycle 5 min. Burst cycle 1 min. Measurement cycle 15 sec. Measurement channels -> Decay Config. Time 60 sec. Measured value formation: The last four measurement values are used to determine the median and recorded as the measurement value.
- Page 83 Chapter 9 User interfaces 9.2.2 Device configuration Note: Several of the configuration fields in the following sub chapters may possibly be hidden depending on the respective user level. In this case, please contact the myDataweb-Server administrator. You can reach the input screen for configuring the device by clicking on the serial number in the site list (see "myDatanet Server Manual "...
- Page 84 Last In each case, the last time stamp of the affected operation connection Last wakeup Last disconnection Last transmission error Last Aloha connection Firmware Firmware update is deactivated update As soon as a new version of the selected firmware type is available, this is installed immediately.
- Page 85 Chapter 9 User interfaces Accu type Charging rule for the accu pack used (temp...charging conditions, V ... charge level) Battery Charge regulator deactivated Li-ion Temp.:0°C to +45°C, V :3,7V NiMH Temp.:-10°C to +60°C, V :3,9V Solar Temp.:0°C to +45°C, always charging AP404D Temp.:0°C to +45°C, V :3,7V...
- Page 87 Check all of the connections for leaks or corrosion on a regular basis. Check all of the cables for mechanical damage at regular intervals. Clean the myDatalogEASYmbm with a soft, moist cloth. Use a mild cleaning agent, if nec- essary.
- Page 88 Replacing the accu or battery pack 1 Housing cover 7 Pressure compensation 2 Supply connector 8 M16x1.5 cable screw connection (cable dia- meter of 4.5 to 10 mm ) 3 Accu or battery pack 9 Main terminal block X12 4 Antenna connection 10 Mounting for the accu or battery pack Rev.
- Page 89 The accu packs are delivered charged. If you use an external charging voltage (V ) during operation, the accu pack is constantly charged by the charge controller integrated in the myDatalogEASYmbm . If no external charging voltage (V ) is available during operation, it is recommended to recharge the accu pack prior to first use for reasons of operational safety.
- Page 90 Important note: The accu or battery pack must only be replaced and/or charged in non-haz- ardous areas and in dry conditions. Only use the Charger myDatalogEASY (206.710) to charge the lithium ion accu pack. The charger specifications must be observed. The use of atypical chargers can destroy the accu pack, for example, causing the cells to leak or an explosion, etc.
- Page 91 Chapter 10 Maintenance 10.3 Accu or battery pack While battery packs are intended for single use and must be disposed of accordingly after depletion, accu packs can be recharged and used again and again. However, the service time of accu packs is not indefinite.
- Page 93 Dispose of the device in accordance with the locally valid environmental regulations for electronic products. Rechargeable batteries and/or battery packs may not remain in the myDatalogEASYmbm after dis- charging. Ensure that the used rechargeable batteries and/or battery packs are disposed of in an environmentally proper way.
- Page 95 Communication problems Evaluate the status LED blink code (see "Status LED" on page 47). Load the device log from the myDatalogEASYmbm or the myDataweb server and use myDatanetDeviceConfig for the evaluation (see "Evaluating the device log" on page 96). The accu or battery pack capacity is virtually depleted.
- Page 96 The optional equipment SIM/USB option (206.404) is required to read the log entries directly from the myDatalogEASYmbm using the myDatanetDeviceConfig. With this equipment, all of the log entries stored in the device, including those that have not yet been transmitted to the myDataweb server can be read.
- Page 97 Chapter 13 Spare parts and accessories Chapter 13 Spare parts and accessories 13.1 Internal expansions Note: The following components are order options. They cannot be ordered separately or installed by the customer. Description Quantity Order no. SIM/USB option 206.404 12VDC sensor supply 206.750 24VDC sensor supply 206.751...
- Page 98 1)2) Cable temperature sensor 20m 206.635 Not possible in conjunction with "myDatalogEASYmbm RS485 SUB-D(f) connection cable (206.650 )" or "myDatalogEASY RS485 connection cable with open end (206.656)". Order options that cannot be ordered separately or installed by the customer. Rev. 02...
- Page 99 Chapter 13 Spare parts and accessories 13.7 Other accessories Description Quantity Order no. myDatanet Tool Pen 206.646 MDN Magnet 206.803 Terminal box 206.622 Charger myDatalogEASY 206.710 MDN power device 206.623 Rev. 02...
- Page 101 Chapter 14 Contact information Chapter 14 Contact information Support & Service: Microtronics Engineering GmbH Hauptstrasse 7 3244 Ruprechtshofen Austria, Europe Tel. +43 (0)2756 7718023 support@microtronics.at www.microtronics.at Microtronics Engineering GmbH Microtronics-UK Ldt. (Headquarter) 9b The Shade, Soham, Ely Hauptstrasse 7 Cambs, CB7 5DE...
Need help?
Do you have a question about the myDatalogEASYmbm and is the answer not in the manual?
Questions and answers