Table of Contents
Advertisement
Quick Links
Advertisement
Table of Contents

Related Manuals for Gigaset Dune CL540


Summary of Contents for Gigaset Dune CL540
- Page 1 CL540 GIGASET. INSPIRING CONVERSATION. MADE IN GERMANY...
-
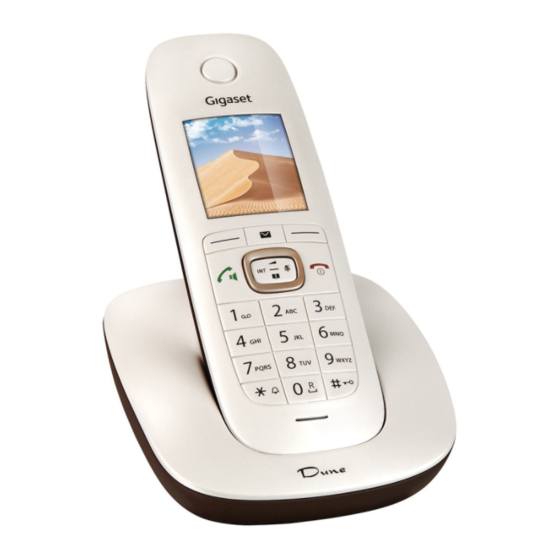
Page 3: Overview Of Gigaset Dune (Cl540)
Overview of Gigaset Dune (CL540) Overview of Gigaset Dune (CL540) Handset 1 Display in idle status ¢ 2 Status bar ( page 49) Icons display current settings and operating status of the phone ¢ ¢ 3 Display keys ( page 17, page 29) ¢... - Page 4 Overview of Gigaset Dune (CL540) Registration/paging key ¢ Locate handsets ("Paging") (press briefly) page 35. ¢ Register handsets and DECT devices (press and hold) page 34. bg cs en hr ro sk sl sr...
-
Page 5: Table Of Contents
Overview of Gigaset Dune (CL540) ........ -
Page 6: Safety Precautions
Do not use the devices in environments with a potential explosion hazard (e.g. paint shops). If you give your Gigaset to a third party, make sure you also give them the user guide. Remove faulty devices from use or have them repaired by our Service team, as these could interfere with other wireless services. - Page 7 Safety precautions Do not use the device if the display is cracked or broken. Broken glass or plastic can cause injury to hands and face. Send the device to our Service department to be repaired. To prevent loss of hearing, avoid listening at high volume over long periods of time. Please note The device cannot be used in the event of a power failure.
-
Page 8: Getting Started
Never expose the telephone to the effects of heat sources, direct sunlight or other electrical devices. Protect your Gigaset from moisture, dust, corrosive liquids and fumes. Pay attention to the range of the base. This is up to 50 m inside buildings and up to 300 m in unobstructed outdoor areas. - Page 9 Getting started Connecting the base station to the telephone network and the mains power supply ¤ Insert the phone cable into the con- nection socket at the rear of the base until it clicks into place and feed under the cable protection. ¤...
- Page 10 Getting started Connecting the charging cradle (if included) ¤ Connect the flat plug to the charging cradle ¤ Plug the power adapter into the power socket If you have to remove the plug from the charging cradle again: ¤ Disconnect the power adapter from the mains power supply.
- Page 11 Getting started Insert battery Caution Use only rechargeable batteries recommended by Gigaset Communications GmbH ¢ page 59) , as this could otherwise result in significant health risks and personal injury. For example, the outer casing of the batteries could be destroyed or the batteries could explode.
- Page 12 Getting started Charging the batteries The batteries are supplied partially charged. Please charge completely before use. (The batteries are fully charged when the power icon disappears from the display.) ¤ Charge the handset in the base for 8.5 hours. 8.5 h Notes The handset may only be placed in the designated base/charging cradle.
- Page 13 Getting started Changing the display language You can also change the display language via the menu: Ï ¤ ¤ ¤ q Language ¤ ¤ q Select language ¤ Select or, if you do not understand the language currently set, go to: ¤...
- Page 14 Getting started Setting the date and time Set the date/time so that the correct date and time can be assigned to incoming calls, and so that you can use the alarm. ¤ Press the key Time below the display screen to open the input field.
- Page 15 Your phone is now ready for use. Calls Calendar Connecting the headset You can connect a headset with 2.5 mm jack connectors. For information on recommended headsets, see the relevant product page at www.gigaset.com bg cs en hr ro sk sl sr...
- Page 16 Getting started What would you like to do next? After successfully setting up the phone, you can make calls straight away, customise your Gigaset according to your requirements or firstly familiarise yourself with the operation. Setting ringtones ¢ Assign specific tunes to internal and external calls, reminders ( page 27), wake-up calls ¢...
-
Page 17: Understanding The Operating Steps In The User Guide
Understanding the operating steps in the user guide Understanding the operating steps in the user guide The keys on your Gigaset handset are set out in these operating instructions as follows: c / v / a Answer call key / Menu key / End call key... -
Page 18: Operating The Phone
Operating the phone Operating the phone Switching the handset on/off ¤ Press and hold the End call key a in idle status to switch the handset on or off. Locking/unlocking the keypad The keypad lock prevents any accidental use of the phone. If you press a key when the keypad is locked, a message is displayed. - Page 19 Operating the phone Display keys The display keys have a function preset by default in idle status, but the keys can be re-assigned ¢ page 29). The functions of the display keys change depending on the operating situation. Example Current display key functions Back Save Display keys...
- Page 20 Operating the phone Submenus The functions in the submenus are displayed as lists. Example To access a function: Settings ¤ Scroll to the function using the control key q and press OK. Date/Time Returning to the previous menu level: Briefly press the display Audio Settings key Back or End call key a.
- Page 21 Operating the phone Entering numbers and text If several number and/or text fields are displayed (e.g. New Entry First Name and Surname in a phonebook entry), the field is automatically activated. The following fields must be activated by navigating with the control key q. A field is First Name: activated when a cursor is blinking inside it.
-
Page 22: Making Calls
Making calls Making calls Making an external call ¤ Enter number, briefly press the Answer call key c. ¤ Press and hold the Answer call key c, enter number. You can cancel the dialling process with the End call key a. Dialling with the redial list The redial list contains the 20 numbers last dialled with the handset. - Page 23 26), remove the handset from the charging cradle. ¢ Accepting a call with the Gigaset L410 handsfree clip ( page 61): Press the Answer call key. To use your L410, you must register it to your base station. Proceed as described in the operating instructions for the Gigaset L410.
- Page 24 By default, the number of the caller is shown on the handset of your telephone, page 55 or ¤ www.gigaset.com/service Handsfree mode If you are going to let someone listen in, you should tell the other party that this is happening.
- Page 25 Making calls Using provider-specific functions (network services) Network services depend on and must be requested from your network provider (which may incur additional charges). Network services fall into two distinct groups Network services that are activated for the following call or all subsequent calls when no call is being made (e.g.
- Page 26 Making calls Making a consultation call Make another external call during an external call. The first Consultation call is placed on hold. ¤ ¤ Ext. Call Enter the second participant's number. The previous call is placed on hold. The second participant is called.
-
Page 27: Adjusting The Telephone Settings
Adjusting the telephone settings Adjusting the telephone settings The handset and base station are preconfigured, but you can change the settings to suit your individual requirements. The settings can be changed via the menu Settings whilst on a call or in idle status. Changing the display language Ï... - Page 28 Adjusting the telephone settings Setting the display backlight The display backlight is always lit when the handset is not in the base/charging cradle or when a key is pressed. Any digit keys pressed appear on the display for pre-dialling. Ï You can also activate/deactivate the display backlight for idle status: ¤...
- Page 29 Adjusting the telephone settings Setting earpiece profiles You can set various profiles for the earpiece to optimally adapt your phone to your environment. Check which is the most comfortable for you. Ï ¤ ¤ ¤ ¤ ¤ ¤ ¤ q Audio Settings q Earpiece Profiles q Select ¤...
- Page 30 Adjusting the telephone settings Activating/deactivating advisory tones Your handset uses advisory tones to tell you about different activities and statuses. These advisory tones can be activated/deactivated independently of each other. Ï ¤ ¤ ¤ ¤ ¤ ¤ q Audio Settings q Advisory Tones ¤...
- Page 31 Adjusting the telephone settings Quick access to numbers and functions The digit keys 2 up to O can be assigned to a number from the phonebook. The left and right display keys have a function preset by default, but the keys can be re-assigned ¢...
-
Page 32: Operating A Repeater
Operating a repeater Operating a repeater You can use the Gigaset Repeater to increase the range of your Gigaset handset. The function and setting of your repeater depends on the repeater version used. The repeater version can be identified by the item number on the product label: Gigaset Repeater (earlier than version 2.0) S30853-S601-... -
Page 33: Changing The System Pin
Changing the system PIN Changing the system PIN Ï ¤ ¤ ¤ ¤ ¤ ¤ q System q System PIN ¤ ¤ If current PIN not 0000: enter current PIN ¤ ¤ Enter new system PIN (4 digits; 0 - 9) Save Resetting system PIN If you have forgotten your system PIN, you can reset it to 0000. -
Page 34: Eco Dect
ECO DECT ECO DECT ECO DECT uses less energy and reduces transmission power. Reducing transmission power (radiation) In normal operation (default setting): The device range is set to maximum as default. This guarantees optimum wireless management. In idle status, the handset will not function (as it is not transmitting). Only the base will maintain contact with the handset via a low wireless signal. -
Page 35: Network Mailbox
Network mailbox Network mailbox You cannot use the network mailbox unless you have requested it from your provider and saved the network mailbox number in your phone. Ì ¤ ¤ ¤ ¤ ¤ q Network Mailbox Network Mailbox: Enter the phone number ¤... -
Page 36: Multiple Handsets
In this case, de-register another handset that is no longer required and repeat the registration procedure. For other Gigaset handsets and handsets for other devices with GAP functionality, start the registration of the handset according to the respective user guide. - Page 37 Multiple handsets De-registering handsets Ï ¤ ¤ ¤ q Registration ¤ ¤ q De-register Handset ¤ ¤ ¤ q Select another handset if required. ¤ ¤ The handset used is selected. If system ¤ ¤ PIN <> 0000: Enter the system PIN. Confirm de-registration with Yes.
- Page 38 Multiple handsets ¤ Hang up before the participant calls: Press the End call key a. If the participant called does not answer of does not transfer the call, end the consultation with End. Establishing a conference call/call swapping You are taking a call while a second call is being held. Both callers are indicated on the display. ¤...
-
Page 39: Phonebook (Address Book)
Phonebook (Address book) Phonebook (Address book) In a phonebook entry, you can store first names and surnames, up to three numbers, an anniversary with a reminder, and caller melody. You can create the directory (with up to 200 entries) individually for each of your handsets. You ¢... - Page 40 Phonebook (Address book) Displaying the number of entries that are available in the directory ¤ ¤ ¤ ¤ q Available Memory Open phonebook. Options Selecting a phonebook entry, searching in the phonebook ¤ Open phonebook. ¤ Scroll to the name you are searching for using q. Holding down q scrolls continuously upwards or downwards through the phonebook.
- Page 41 Phonebook (Address book) Transferring a displayed number to the phonebook You can transfer numbers to the phonebook which are displayed in a list, e.g. the caller list, the redial list, as well as numbers that you have already selected or have entered for selection. ¤...
-
Page 42: Call List
Call list Call list Your telephone stores calls in various lists. Opening the lists: Missed calls list: Message key f ¤ q Missed Calls: ¤ List selection: v ¤ Ê ¤ ¤ q Select list. ¤ The last 20 entries are displayed in the call list. List entry The following information is displayed in the list entries: Example... -
Page 43: Contactability
Contactability Contactability Call forwarding (CF) You can forward calls to another number. No call forwarding is activated yet or you want to Ç change the current setting: ¤ ¤ ¤ q Call Divert ¤ ¤ Status: r On / Off Unknown is always displayed when calling up the menu. -
Page 44: Calendar
Calendar Calendar You can remind yourself of up to 30 appointments. May 2014 In the calendar, the current day is outlined in white; on days Mo Tu We Th Fr Sa Su with appointments, the numbers are displayed in colour. 01 02 03 04 When a day is selected, it will be highlighted. - Page 45 Calendar Displaying missed appointments/anniversaries The following appointments and anniversaries are stored in the Missed Alarms list: The appointment/anniversary call was not acknowledged. The appointment/anniversary was signalled during a phone call. The handset was switched off at the time of the appointment/anniversary. The last 10 entries are stored.
-
Page 46: Alarm Clock
Alarm clock Alarm clock ¢ Prerequisite: Date and time are set ( page 12). Example ì You can activate/deactivate and set the alarm clock as follows: Alarm Clock ¤ ¤ ¤ Activation: r On/Off ¤ Activation: Changing the settings: <On >... -
Page 47: Baby Monitor
Baby monitor Baby monitor When the baby monitor is switched on, the stored (internal or external) destination number is called as soon as a defined noise level is exceeded in the vicinity of the handset. The baby mon- itor alarm to an external number is cancelled after approximately 90 seconds. In baby monitor mode, incoming calls are only signalled on the display (without ringtone). - Page 48 Baby monitor Activating/deactivating and setting the baby Baby monitor activated monitor É ¤ ¤ ¤ ¤ q Baby Monitor ¤ Activation: r On/Off 07:15 ¤ Á Setting the baby monitor: INT 1 14 Oct Send alarm to: r Internal (at least 2 handsets are registered)/ External Baby Monitor If Internal is selected:...
-
Page 49: Operating The Telephone On A Router/Pabx
Operating the telephone on a router/PABX Operating the telephone on a router/PABX Operation with a router When operating on the analogue connection of a router, potentially occurring echoes can be reduced by switching on XES mode 1 . If XES mode 1 does not suppress the echoes sufficiently, you can activate XES mode 2. - Page 50 Operating the telephone on a router/PABX Setting pauses Menu key v ¤ *#Q5# ¤ Then enter one of the following function-specific codes: Pause after line seizure: ¤ ¤ OK (for 1 sec.) ¤ ¤ OK (for 3 secs.) ¤ ¤ OK (for 7 secs.) Pause after Recall key: ¤...
-
Page 51: Display Icons
Display icons Display icons Icons in the status bar The following icons are displayed in the status bar depending on the settings and the operating status of your telephone: Icon Meaning Icon Meaning Signal strength (No Radiation off ) Battery charge status: Ð... - Page 52 Display icons Display key icons The following icons indicate the current function of the display keys according to the operating situation: Icon Action Icon Action Ò ö Last number redial Opening phonebook Ñ Ó Deleting text Copy number to the phonebook Display icons for signalling of Connection No connection...
-
Page 53: Menu Tree
Menu tree Menu tree Opening the main menu: Press v whilst the telephone is in idle status. Note Not all functions described in this user guide are available in all countries or with all network providers. ì ¢ Alarm Clock page 44 Ê... - Page 54 Menu tree Ï Settings ¢ Date/Time page 12 ¢ Audio Settings Handset Volume page 22 ¢ Earpiece Profiles page 27 ¢ Advisory Tones page 28 ¢ Ringtones (Handset) page 27 ¢ Music on hold page 28 ¢ Display Screensaver page 25 ¢...
-
Page 55: Customer Service & Assistance
Customer Service & Assistance Customer Service & Assistance Do you have any questions? As a Gigaset customer, you can find help quickly in this User Manual and in the service section of our Gigaset online portal www.gigaset.com/service. Please register your phone online right after purchase. - Page 56 Questions and answers If you have any queries about the use of your telephone, suggested solutions are available on our web-site at www.gigaset.com/faq. The table below also lists steps for troubleshooting. The display is blank. 1. The handset is not activated.
- Page 57 This device is intended for analogue phone lines in your network. Country-specific requirements have been taken into consideration. We, Gigaset Communications GmbH, declare that this device meets the essential requirements and other relevant regulations laid down in Directive 1999/5/EC. A copy of the Declaration of Conformity is available at this Internet address: www.gigaset.com/docs...
- Page 58 Customer Service & Assistance Exclusion of liability Your handset display has a resolution of 128 x 160 pixels. Each pixel consists of three sub-pixels (red, green, blue). It may be the case that a pixel is incorrectly controlled or has a colour deviation. This is normal and no reason for a warranty claim.
-
Page 59: Environment
Environment Our environmental mission statement We, Gigaset Communications GmbH, bear social responsibility and are actively committed to a better world. Our ideas, technologies and actions serve people, society and the environment. The aim of our global activity is to secure sustainable life resources for humanity. We are com- mitted to a responsibility for our products that comprises their entire life cycle. -
Page 60: Appendix
Appendix Appendix Care Wipe the device with a damp cloth or an antistatic cloth. Do not use solvents or microfibre cloths. Never use a dry cloth; this can cause static. In rare cases, contact with chemical substances can cause changes to the device’s exterior. Due to the wide variety of chemical products available on the market, it was not possible to test all substances. - Page 61 Capacity: 800 mAh Handset operating times/charging times The operating time of your Gigaset depends on the capacity and age of the battery and the way it is used. (All times are maximum possible times). Standby time (hours) * 320 *...
- Page 62 Appendix Pin connections on the 1 unused telephone jack 2 unused 5 unused 6 unused Character charts Standard characters 9x 10x Press the relevant key the number of times indicated. ä á à â ã ç ë é è ê ï...
-
Page 63: Accessories
Accessories Accessories Upgrade your Gigaset to a cordless PABX: Gigaset Handset Dune Brilliant sound quality in handsfree mode 1.8" TFT colour display Directory for 200 entries Talk/standby time of up to 20 hrs/250 hrs, standard batteries Screensaver (analogue and digital clock) - Page 64 Talk/standby time of up to 8,5 hrs/180 hrs Weight approx. 8,5g www.gigaset.com/zx830 Gigaset Repeater/Gigaset Repeater 2.0 You can use the Gigaset Repeater to increase the receiving range between your Gigaset handset and the base. www.gigaset.com/gigasetrepeater Compatibility You can find more information about the handset functions in connection with the individual Gigaset base stations at: www.gigaset.com/compatibility...
-
Page 65: Index
Index Index Call ......accepting ... . . accepting automatically . - Page 66 Index ... . . Connections with the base Consultation call ..... . Earpiece profile .
- Page 67 Index Handset Icon ..........advisory tones alarm clock .
- Page 68 Index ..... Language Network mailbox ......display Network services .
- Page 69 ..after access code Registering other Gigaset handsets ........
- Page 70 Index ..........Safety precautions Unknown .
- Page 71 Issued by Gigaset Communications GmbH Frankenstr. 2a, D-46395 Bocholt © Gigaset Communications GmbH 2014 Subject to availability. All rights reserved. Rights of modifications reserved. www.gigaset.com This user guide is made from 100% recycled paper. *A31008-M2602-R601-1-TK19* A31008-M2602-R601-1-TK19...
Need help?
Do you have a question about the Dune CL540 and is the answer not in the manual?
Questions and answers