
Related Manuals for Gigaset C300


Summary of Contents for Gigaset C300
- Page 1 Congratulations By purchasing a Gigaset, you have chosen a brand that is fully committed to sustainability. This product’s packaging is eco-friendly! To learn more, visit www.gigaset.com.
-
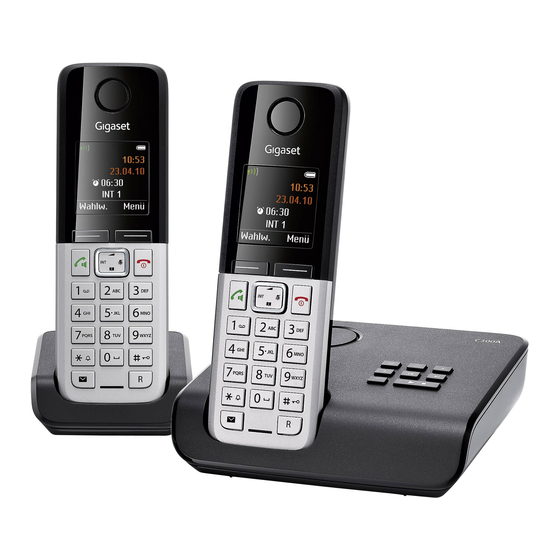
Page 3: Gigaset C300/C300A - Your High-Quality Accessory
(¢ page 46). Other practical information Transfer the directory from an existing Gigaset handset (¢ page 31), use the shortcut func- tion (¢ page 31) and adjust the color and contrast of the display to your requirements (¢ page 45). -
Page 4: Overview
Overview Overview 1 Signal strength (¢ page 17) Color changes when Eco Mode is activated (¢ page 41) 2 Control key (¢ page 20) Mute microphone (¢ page 29) 3 Talk/Handsfree key Flashes: incoming call; Lights up: handsfree mode activated; accept call;... -
Page 5: Understanding The Display Icons
Overview Understanding the display icons The following symbols are displayed dependent on the settings and the operating status of your telephone: Signal strength i (¢ page 17) Keypad locked (¢ page 22) Ringer switched off (¢ page 46) Answering machine activated (C300A only) Battery charging (¢... -
Page 6: Using The Display Keys
Using the display keys Other display icons: Connection cannot be established or con- nection interrupted Establishing a connection Connection established Ø ¼ Ú Ø Ü Ú Ø å Ú External call (¢ page 27) Internal call (¢ page 43) Alarm call (¢ page 41) Answering machine Ø... -
Page 7: Base Overview
You can use the keys on the base to operate Flashes: at least one new message is present. the integrated answering machine Flashes very quickly: memory is full. (Gigaset C300A only), search for handsets ¢ (paging, page 42 and register handsets... -
Page 8: Table Of Contents
Contents Gigaset C300/C300A – your high-quality accessory ....1 Overview ............2 Understanding the display icons . - Page 9 Answering machine list (Gigaset C300A only) ....... . . 33...
- Page 10 Contents Troubleshooting ..........50 Protecting our environment .
-
Page 11: Following Safety Precautions
Do not use your phone in environments with a potential explosion hazard (e.g., paint shops). ƒ If you give your Gigaset to a third party, make sure you also give them the user guide. Remove faulty bases from use, as these could interfere with other wireless services. Please note u Not all of the functions described in this user guide are available in all countries. -
Page 12: Taking The First Steps
Taking the first steps Taking the first steps Checking the package contents One Gigaset C300/C300A base One power adapter for the base One Gigaset handset Two batteries One battery cover One phone cord One user guide If you have purchased a... -
Page 13: Setting Up The Base And Charger (If Included)
Please note: u Never expose the telephone to the influence of heat sources, direct sunlight or other electrical devices. u Protect your Gigaset from moisture, dust, corrosive liquids and fumes. Connecting the base ¤ First, connect the telephone jack and insert the cables into the cable ducts. -
Page 14: Connecting The Charger (If Included)
Taking the first steps Connecting the charger (if included) ¤ Connect the flat plug from the power adapter 1. ¤ Plug the power adapter into a power outlet 2. To disconnect the plug from the charger, press the release button and disconnect the plug 4. -
Page 15: Setting Up The Handset For Use
Inserting the battery and closing the battery cover Warning Use only rechargeable batteries recommended by Gigaset Communications GmbH (¢ page 52), as this could otherwise result in significant health risks and personal injury. For example, the outer casing of the batteries could be destroyed or the batteries could explode. - Page 16 ¤ Charge the handset in the base for 8.5 hours. 8.5 hrs Please note The handset must only be placed in the designated Gigaset C300/C300A base or charger. ¤ After charging, remove the handset from the base and only replace it when the batteries are fully discharged.
-
Page 17: Changing The Display Language
Taking the first steps Changing the display language To change the display language: ¤ Press right on the control key.. ¤ Press the keys Land 4 slowly one after the other. The display for setting languages appears. English English ³ ³... -
Page 18: Setting The Date And Time
Taking the first steps Setting the date and time Set the date and time so that the correct date and time can be assigned to incoming calls, and so that the alarm can be used. Please note Depending on your network provider, the date and time may be displayed automatically. -
Page 19: Battery Charge Status
Taking the first steps μ Saved The display shows Saved. You will hear a confirmation tone and the handset automatically reverts to idle status, or returns to the "Settings" menu if the setting was made using the menu. Please note If your phone receives the date and time during Caller ID Display (e.g., through your network provider or PBX), you can specify whether this date/time should be applied to your phone:... -
Page 20: Name Of The Handset
Taking the first steps u INT 1 Internal name of the handset (¢ page 44) Your phone is now ready for use! Setting up area codes Before you can return a call from the Calls list (¢ page 33), you must store the local area code of the area in which your phone is being used. -
Page 21: What Would You Like To Do Next
Taking the first steps What would you like to do next? Now that you have successfully set up your Gigaset, you can immediately start call- ing – or you can adapt it to your personal requirements. Use the following guide to quickly locate the most important functions. -
Page 22: Using The Phone
Using the phone Using the phone Using the control key In the description below, the side of the control key (up, down, right, left) which you have to press in the different operating situations is marked in black, e.g., v for "press the right edge of the control key". -
Page 23: Using The Menus
Using the phone Using the menus Your telephone's functions are accessed using a menu consisting of several levels (menu overview, ¢ page 25). Main menu (first menu level) ¤ With the handset in idle status, press the display key §Menu§ or right on the control key v to open the main menu. -
Page 24: Activating/Deactivating The Handset
Using the phone Activating/deactivating the handset In idle status, press and hold the end call key (confirmation tone). Activating/deactivating keypad lock Keypad lock prevents any inadvertent use of the phone. In idle status, press and hold the pound key (confirmation tone). The keypad lock is switched on or off. -
Page 25: Understanding The Operating Steps
Using the phone Understanding the operating steps The operating steps are shown in abbreviated form, for example: ¤ Settings ¤ Eco Mode (³ = on) §Menu§ ¤ This means you should proceed as follows: ¤ Press the key below §Menu§ on the dis- Redial Menu... - Page 26 Using the phone ... until the Eco Mode menu item Eco Mode ³ appears. Back §OK§ Press the key below on the display screen to switch the function on or off (³ = on). ¤ Press the key below §Back§ on the display screen to jump back to the previous menu level.
-
Page 27: Menu Overview
Menu overview Menu overview The menu entries are partially subdivided. The page numbers refer to the rel- evant description in the user guide. §Menu§ To open the main menu: press the display key when the phone is in idle mode. ì... - Page 28 Menu overview Ï Settings ¢ page 16 Date/Time ¢ page 45 Audio Settings Call Volume ¢ page 46 Ringer Volume ¢ page 45 Advisory Tones ¢ page 45 Battery Low ¢ page 46 Ringtones (Handset) ¢ page 47 Ringtones (Base) ¢...
-
Page 29: Number (Or Name) Of Caller
Menu To accept the call, press the talk key c. 1 Ringer icon 2 Number or name of caller Gigaset C300A: Instead of accepting the call, you can also redirect it to the answering machine: ¤ Divert to AM ¤... -
Page 30: Display With Cid And Location
External Call, if no number is transmitted. By default, the number of the caller is shown u Withheld, if the caller has withheld in the display of your Gigaset telephone. You do not have to make any other settings on Caller ID. -
Page 31: Using Handsfree Mode
The display shows Microphone is turned Additional information on this subject can off. be found on the Gigaset homepage at: Press the key again to reactivate www.gigaset.com/service the microphone. Using handsfree mode In handsfree mode, you activate the loud- speaker so that you can hear the caller with- out having to hold the handset to your ear. -
Page 32: Using The Directory And Lists
Call lists 3. Letters (alphabetical) u Answering machine list 4. Other characters (Gigaset C300A only) To work round the alphabetical order of You can create a personalized directory for entries, insert a space or a digit before the your own handset. You can also send lists/ first letter of the name. -
Page 33: Another Handset
(press the key you want to assign the number to) in the directory, page 30). To dial, press and hold the required shortcut Gigaset C300A: Message playback is inter- key. rupted during the number transfer from the answering machine list. -
Page 34: Using The Redial List
Icon New message ... Managing entries in the redial list à ... in the answering machine list (Gigaset C300A only) or on the net- Press and hold the key. work mailbox ™ Select entry..in the missed calls list §Menu§... -
Page 35: Answering Machine List (Gigaset C300A Only)
All calls for missed calls or M for messages on the answer- – Accepted calls ing machine (Gigaset C300A – Unanswered calls only)/network mailbox – Calls recorded by the answering Your selection is displayed (e.g. 5 for machine (Gigaset C300A only) missed calls);... - Page 36 Status of entry – New Call: new missed call. – Old Call: entry already read. – Call recv.: call accepted. – Ans Mach (Gigaset C300A): the answering machine accepted the call. A message was left. u Entry number u Number or name of caller u Call date and time (if set, ¢...
-
Page 37: Operating The Gigaset C300A Base Answering Machine
Operating the Gigaset C300A base answering machine Operating the Recording an announcement ¤ Voice Mail ¤ Announcements §Menu§ Gigaset C300A base ¤ Record Announcement ¤ Press OK, talk after tone answering machine §OK§ Press the display key to start the recording. -
Page 38: Deleting An Announcement
Operating the Gigaset C300A base answering machine Deleting an announcement Stopping and controlling playback ¤ Voice Mail ¤ Announcements During message playback: §Menu§ ¤ Delete Announcement Pause playback. Press 2 again to resume. §OK§ Press the display key to confirm the prompt. -
Page 39: Activating/Deactivating Call Screening
Operating the Gigaset C300A base answering machine §End§ Accepting a call from the Press the display key to stop two-way record. answering machine The maximum recording time depends on You can pick up a call while the answering the capacity available on the answering machine is recording or is being operated machine. -
Page 40: Setting The Recording Parameters
Operating the Gigaset C300A base answering machine Setting the recording Changing the language for parameters voice prompt and prerecorded announcement The answering machine has already been preset at the factory. Individual settings can §Menu§ Open main menu. *#Q5#2 be adjusted using the handset. -
Page 41: Answering Machine Remote Operation
Operating the Gigaset C300A base answering machine Answering Machine Remote Activating the answering machine ¤ Phone home and let the phone ring until Operation you hear: "Please enter PIN". You can check and activate your answering Enter system PIN. machine from any other telephone (hotel, Your answering machine is activated. -
Page 42: Using The Network Mailbox
The following information is only applica- only) ble when using your handset with a Gigaset C300 base. If you have registered your handset to a different base, such as Viewing the network mailbox the Gigaset C300A, please refer to your message base user guide. -
Page 43: Eco Dect
ECO DECT Using the handset as an alarm clock You are helping to protect the environment with your Gigaset. Prerequisite: The date and time have already been set (¢ page 16). Reducing energy consumption Your telephone has a power-saving adapter Activating/deactivating the alarm plug and uses less power. -
Page 44: Using Multiple Handsets
Using multiple handsets Using multiple handsets Deregistering handsets You can deregister all other registered hand- Registering handsets sets from each of the registered Gigaset handsets. ¤ Settings ¤ Registration You can register up to four handsets on your §Menu§ ¤ De-register Handset base station. -
Page 45: Making Internal Calls
Using multiple handsets Making internal calls Either Press the end call key. The exter- Internal calls are free calls between handsets nal call is transferred to the that are registered with the same base. other handset. Calling a specific handset §Back§... -
Page 46: Changing The Name Of A Handset
Handset settings Internal listening in Handset settings The line is busy with an external call. Your Your handset is preset, but you can change screen will display information to that effect. the settings to suit your individual require- To listen in to the external call. ments. -
Page 47: Activating/Deactivating Auto Answer
Handset settings The screensaver is not displayed in cer- Changing the handsfree/ tain situations, e.g., during a call or if the earpiece volume handset is deregistered. To show the display in idle status, briefly press end call key a. You can set the volume for handsfree mode and earpiece mode to five different levels. -
Page 48: Setting The Ringer Volume
Handset settings Setting the ringer volume Settings Ringer off from: / Ringer off until: The ringer volume is the same for all types of Enter time in 4-digit format. ring. Please note In idle status: t ¤ Ringer Volume During this period, you will con- tinue to receive calls from num- Set the volume. -
Page 49: Restoring The Handset Default Settings
The base settings are carried out using a reg- Your handset uses advisory tones to tell you istered Gigaset handset. about different activities and statuses. These can be activated and deactivated independ- Changing the Gigaset C300A base ently of each other: u Advisory Tones ringtones u Volume: –... -
Page 50: Protecting Against Unauthorized Access
(default setting: 0000) to a 4-digit be reregistered. All settings are reset to PIN known only by you. the default settings. Gigaset C300A: Setting a system PIN enables remote operation of the answering machine (¢ page 39). Resetting the base to the ¤... -
Page 51: Connecting The Base To The Pbx
Connecting the base to the PBX Connecting the base to Setting pauses the PBX Changing the pause after line seizure The following settings are only necessary if your PBX requires them; see the PBX user You can change the length of the pause that is inserted between pressing the talk key c guide. -
Page 52: Troubleshooting
¥ Set your PBX to tone dialing. 2. The phone only rings if the phone number has been transferred. Gigaset C300A only: ¥ Activate the ringer for unknown calls (¢ page 46). No time is specified for a message in the call list. -
Page 53: Protecting Our Environment
Batteries should not be disposed of in gen- eral household waste. Observe the local At Gigaset Communications GmbH, bear, we waste disposal regulations, details of which take our social responsibilities very seriously can be obtained from your local authority or and are actively committed to a better the dealer you purchased the product from. -
Page 54: Appendix
Appendix Appendix Handset operating and charging times This Gigaset can charge batteries up to a Caring for your phone capacity of 1000 mAh. The use of special high-performance batteries or batteries with high capacities is not recommended for Wipe down the base station and handset cordless phones. -
Page 55: Writing And Editing Text
Appendix u Press the display key §Delete§ General specifications DECT to delete the character to the left of the cursor. DECT standard Is supported u The first letter of the name of directory GAP standard Is supported entries is automatically capitalized and followed by lowercase letters. -
Page 56: Industry Canada Certification
Warning: Changes or modifications to this unit tions (1) this device may not cause interference, not expressly approved by Gigaset Communica- and (2) this device must accept any interference, tions USA LLC could void the FCC authority to including interference that may cause undesired operate the equipment. -
Page 57: Safety Precautions
FCC / ACTA Information Notice for Direct Inward Dialing until the problem has been corrected or until you are sure that the equipment is not malfunction- ("DID") ing. ALLOWING THIS EQUIPMENT TO BE OPERATED IN If trouble is experienced with this equipment, for SUCH A MANNER AS TO NOT PROVIDE FOR repair or warranty information, please contact PROPER ANSWER SUPERVISION IS A VIOLATION... -
Page 58: Battery Safety Precautions
FCC / ACTA Information 5. Place this product securely on a stable surface. 14. Do not use the telephone to report a gas leak Serious damage and/or injury may result if the in the vicinity of the leak. unit falls. 15. -
Page 59: Service (Customer Care)
– Products which have been repaired, main- tained or modified (including the antenna) by This product is covered by a one year limited war- anyone other than Gigaset NAM or a Gigaset ranty. Any repair replacement or warranty service, NAM-approved repair facility, or that have and all questions about this product should be been improperly installed. - Page 60 TIES OF MERCHANTABILITY AND FITNESS FOR A All warranty claims must be made by notifying PARTICULAR PURPOSE, OF ACCURACY OR COM- Gigaset NAM prior to the expiration of the war- PLETENESS OR RESPONSES, OF RESULTS, OF ranty period. Gigaset NAM's obligation to provide...
-
Page 61: Governing Law
International Sale of Goods. TIAL DAMAGES WHATSOEVER (INCLUDING, BUT NOT LIMITED TO, DAMAGES FOR LOSS OF PROFITS If you want to learn more about Gigaset Service or OR CONFIDENTIAL OR OTHER INFORMATION, FOR for Support on your Gigaset phone, visit our web BUSINESS INTERRUPTION, FOR PERSONAL INJURY, site at http://www.gigaset.com or please call... -
Page 62: Accessories
Accessories Accessories Gigaset handsets Upgrade your Gigaset to a cordless PBX: Gigaset C300H handset u Hear whom the call is for with VIP ringtones u High-quality keypad with illumination u 1.7" CSTN color display u Directory for up to 250 entries... - Page 63 Room monitor www.gigaset.com/gigasetsl78h Compatibility For more information on handset functions in relation to Gigaset bases, please visit: www.gigaset.com/compatibility All accessories and batteries are available from your phone retailer. Use only original accessories. This will avoid possible health risks and personal...
-
Page 64: Mounting The Base On The Wall
Mounting the base on the wall Mounting the base on the wall C300A: 1.90 inches C300: 1.18 inches ø max. 0.31 inches ø max. 0.16 inches Approx. 0.28 inches Mounting the charger on the wall 0.85 inches ø max. 0.31 inches ø... -
Page 65: Index
Index Index ......system PIN Battery charging ...... - Page 66 Index Entry ... . . selecting from directory Deactivating ......Error tone .
- Page 67 Index Idle status internal ............
- Page 68 Index PD (pulse dialing) ..... melody ......
- Page 69 Index...
Need help?
Do you have a question about the C300 and is the answer not in the manual?
Questions and answers
SMS Memory full. How do I delete?
To delete SMS messages on the Gigaset C300 to free up memory:
1. Open the incoming list via the SMS menu.
2. Select the SMS you want to delete.
3. Press the display key §Menu§.
4. Choose the option to delete the SMS.
Regularly deleting old SMS messages is recommended, especially when the SMS memory is full.
This answer is automatically generated