Advertisement
Quick Links
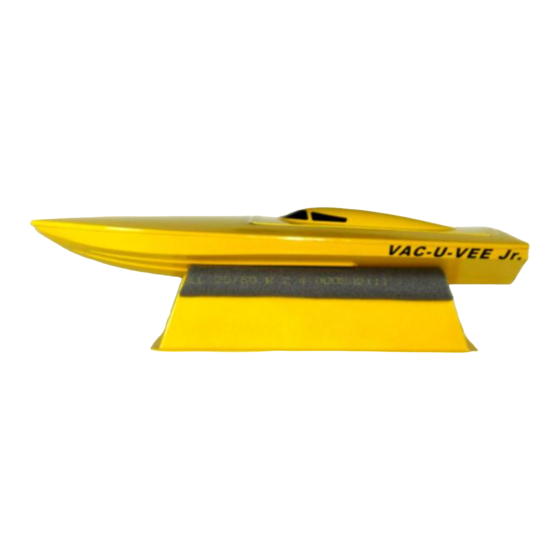
Length: 19-7/8 in. Beam: 7-3/8 in.
This "High Impact Polystyrene" model boat is engineered for racing. It has minimum
freeboard and an aerodynamic bow design to let it fly in straight-a-ways yet turn solid without
flipping. The deck comes from the 1/10-scale Vac-U-Cracker with a large hatch cover for easy
hardware installation. The hull is modified into a Deep-Vee with a sharp keel and a fully
reinforced bottom having the strength of a fiberglass hull without the weight.
The Full Kit includes a Hull, Hull Reinforcement, 3/16" hot-pressed mahogany plywood
Transom, Deck, forward Deck Reinforcement, teardrop Hatch Cover, Aluminum Motor Mount
with 3/16" hot-pressed mahogany Base with pre-installed 6-32 blind nuts, stainless motor
mount socket head screws, motor mount stainless washers, hex wrench, M3 motor socket head
screws, motor washers, motor hex wrench, molded Boat Stand with pre-cut foam mount pads,
an easy-to-apply combined windshield and roof hatch decal set, side decals, six deck
reinforcement clamps (clothes pins) two really cheap ratchet clamps, a wood scrap to clamp
the transom, an epoxy brush and a piece of 100 grit sandpaper.
The even-more economical Plastic Hull-Only kit includes the Hull, Hull Reinforcement,
3/16" hot-pressed mahogany plywood Transom, Deck, Deck Reinforcement, teardrop Hatch
Cover, Boat Stand and decal set. (No motor mount, no assembly bits.)
This hull will perform with a ROAR Stock brushed motor, or with the latest Brushless
setups. The reinforced motor mount slot allows for motor placement for flex drives or straight-
shaft drive systems. The transom will accommodate most struts and rudders made for smaller
boats. The sharp keel and makes turn fins unnecessary.
Vac-U-Vee Jr.
Mono Vee Hull Kit
Manufactured by Vac-U-Boat
1259 Humphries Rd.
Conyers, GA 30012
philpace@vac-u-boat.com
© 2012 Philip Pace dba Vac-U-Boat™
™
™
Advertisement

Related Manuals for Vac-U-Boat Vac-U-Vee Jr.


Summary of Contents for Vac-U-Boat Vac-U-Vee Jr.
- Page 1 The reinforced motor mount slot allows for motor placement for flex drives or straight- shaft drive systems. The transom will accommodate most struts and rudders made for smaller boats. The sharp keel and makes turn fins unnecessary. © 2012 Philip Pace dba Vac-U-Boat™...
- Page 2 If you bought this direct from Vac-U-Boat, I’ll reimburse you for standard return shipping. If you need some help, find a local boat club to join, check with the hobby shop where you purchased your motor and radio gear, or contact internet clubs and organizations for assistance.
- Page 3 INSTRUCTIONS We are ready to get started building this Vac-U-Vee Jr. Follow the photos and captions to assemble your boat. Read through the instructions before building. Assemble the necessary tools and adhesives on a clean workbench or table. Keep paper towels handy to catch spills. Don’t forget the safety glasses! With holding the hull upside down on the Rock the razor left and right until it...
- Page 4 Score the hatch opening at the marked Cut slowly. The plastic is thicker on Save the scrap to use to test paints or line 2 to 3 times until the opening the deck than the hull. glues. separates from the hull. Cut the hatch on the marked trim line.
- Page 5 There are lots of clever ways to clamp a liner to a hull leaving the hull surface flat and true. This is just one example. Mix a large puddle of 30 minute Raise the outer edges of the books until Take two books or pieces of wood, epoxy.
- Page 6 Let the epoxy cure. When you are sure it is set, remove the clamps and tape. Now we assemble the glued hull. You can use RTV sealants, heavily filled epoxies or other glues. Avoid glues that would melt styrene. I am using PL brand Polyurethane Roof Sealant in a caulking tube.
- Page 7 Apply sealant to the transom One side of the transom reinforcement The side to glue to the transom is the side reinforcement and set into the transom. with beveled edges. Test fit before gluing. has sharp edges. This is the inside. Put a piece of tape across the top of the Peel up the tape to lift the excess Smooth the sealant onto the top of...
- Page 8 See that the sides fit inside the deck Set the hull into the deck transom-first Set the deck with sealant on a padded flange. surface. with no gaps. Start the tape on the deck under the Work from the transom toward the With pieces of tape ready, pull the boat.
- Page 9 You can strengthen the seal by Smoothed sealant. Wider seal joint. Check under the deck flange along the smoothing it with a finger increasing the side making sure the tape wasn’t contact area with the hull and deck. After the sealant has cured and the tape In hot weather, if you are worried that Test fit your hatch.
Need help?
Do you have a question about the Vac-U-Vee Jr. and is the answer not in the manual?
Questions and answers