
Subscribe to Our Youtube Channel
Related Manuals for infobit iVoice 210


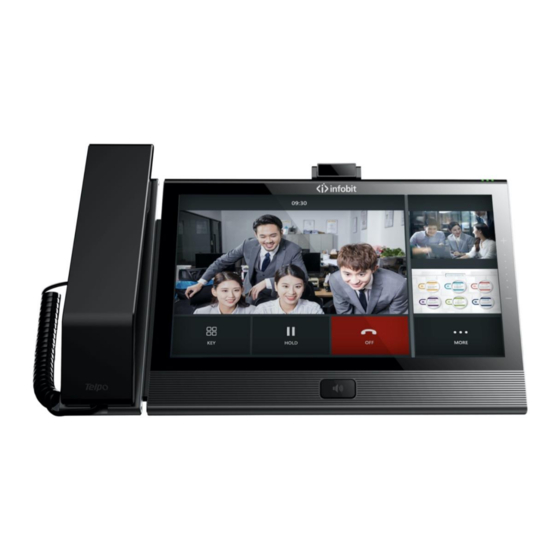
Summary of Contents for infobit iVoice 210
- Page 1 210 User Manual 21V1.0 iVoice 210 Video Phone User Manual www.infobitav.com info@infobitav.com 1 / 88...
- Page 2 210 User Manual 21V1.0 Version Description Version No. Edit Date Editor Description 2021-06-01 V1.0 2 / 88...
-
Page 3: Table Of Contents
210 User Manual 21V1.0 Catalogue 1 Installation requirement ....................5 2 Get Started .......................... 5 3 Device Introduction ......................6 3.1 Overview ........................... 6 3.2 Features ............................. 7 Button and keys ......................... 8 3.4 Ports ............................9 3.5 Specification ........................... 10 3.6 Indicator .......................... - Page 4 210 User Manual 21V1.0 5.1 Call function..........................43 5.1.1 Dial numbers ..........................43 5.1.2 Incoming calls ..........................46 5.1.3 Explanation of function buttons during calls ..............50 5.1.4 Call Log ............................56 Contacts ..........................63 5.2.1 Contacts ............................63 5.2.2 Enterprise contact ........................
-
Page 5: Installation Requirement
Please keep device away from the heat source. Power requirement Power supply must meet the requirements of this manual. 2 Get Started Thanks for use our iVoice 210 Smart Video Phone. Please read the user manual before 5 / 88... -
Page 6: Device Introduction
210 User Manual 21V1.0 use this device. In this user manual, we will introduce the specification, features, configuration and troubleshooting. 3 Device Introduction 3.1 Overview This video phone is a high-end media video phone with OCTA Core, 64 bit CPU. -
Page 7: Features
210 User Manual 21V1.0 3.2 Features Standard communicate protocol Support protocol, strong extensibility compatibility, communicate with different IMS/Soft switch platform. HD Video Build-in 1280x800 pixel, multi-touch 10-inch IPS screen, and 8MP camera, support 1080P Dual Stream, can send HD Main Stream and HD Sub Stream at the same time. -
Page 8: Button And Keys
210 User Manual 21V1.0 one USB, one SD/TF card port. 3.3 Button and keys Menu key: tap menu key to set wallpaper/add widgets Search key: tap search key to enter the searching interface of contact list. Return key: tap return key to return back to the last interface Home key: tap home key to back to home interface. -
Page 9: Ports
210 User Manual 21V1.0 3.4 Ports 9 / 88... -
Page 10: Specification
210 User Manual 21V1.0 3.5 Specification Items Video Phone Android 7.1 OCTA core, 64 bit, 2GHz System FLASH 16GB, eMMC 2GB, DDR3 Screen Size 10.1'', 1280x800, IPS multi touch screen Camera 8 mega-pixel, angle adjustable Display Display angle adjustable from 10~70 degree... - Page 11 210 User Manual 21V1.0 Audio DTMF, AEC, PLC, AGC, VAD, CNG, AJB, ANR, VQM, Codec Side tone Cancellation Voice Support Record Video Encoding: H.264, VP8 Codec Decoding: H.264, VP8, H265, MPEG-4 Video QVGA(320 x 240), CIF(352x288), VGA(640x480), Resolution 4CIF(704x576), 720p(1280x720),1080p(1920 x 1080)
-
Page 12: Indicator
210 User Manual 21V1.0 Size 300mm*200mm*72mm 3.6 Indicator The device indicator on right top side, status shows as below Status of Indicator Descriptions Light off Device on standby and SIP account is working Red light on Network disconnect or SIP account is error... -
Page 13: Touch Screen Operation
210 User Manual 21V1.0 4.1.1 Touch screen Operation Please tap the touch screen to use the soft key, application, option choosing, button press. Long press If want to enable any application options, just need to long press this application until its option show. -
Page 14: Power On/Off
210 User Manual 21V1.0 4.1.2 Power on/off 4.1.2.1 Power on The device will power on automatically when plug in the power supply. 4.1.2.2 Power off You can plug off the power supply if you do use the device, it will help to save the electric power. -
Page 15: Home Interface
210 User Manual 21V1.0 4.1.3 Home interface ★There are some frequently used applications on bottom of Home interface, there are Dialer, Call Log, Contact List, Record, Browser, Setting ★There is MORE icon on the bottom middle of Home interface, tap to show more... - Page 16 210 User Manual 21V1.0 ★Date shows on the top left side, SIP account status and network status show on the top right side. ★On the top right side there are showing network status and current account, you can slide down the status bar to switch the accounts.
-
Page 17: Network Setting
210 User Manual 21V1.0 4.2 Network Setting This device can support wired network and WIFI. In wired network, it can support both static IP and DHCP. If enable both wired network and WIFI, device will use wired network first. - Page 18 210 User Manual 21V1.0 Attention: if fail to get IP address from DHCP, IP address information will show Not Available. 18 / 88...
-
Page 19: Static Ip
210 User Manual 21V1.0 4.2.2 Static IP You can configure the Static IP following below steps: Tap Setting icon—Ethernet, select Static IP. Pictures show as below. Parameter Description as below 19 / 88... -
Page 20: Wi-Fi
210 User Manual 21V1.0 Parameter Descriptions IP address Set the device IP address Netmask Set the device netmask DNS 1 Local main DNS address DNS 2 Local standby DNS address Gateway Set the outbound gateway 4.2.3 Wi-Fi Tap Setting icon—Wi-Fi, enable Wi-Fi option, and select the WIFI hotspot. - Page 21 210 User Manual 21V1.0 3. When tap the AP with password, please fill in the password to connect. If password error, it will show as below. Test 21 / 88...
-
Page 22: Wi-Fi Ap
210 User Manual 21V1.0 4.2.4 Wi-Fi AP This device can share hotspot to mobile phones or other wireless devices. Please tap Setting icon—WiFiAP, then can enter to enable the hotspot function. 1. First please set the hotspot name and password: Please tap Wireless Hotspot Name, set the hotspot name in the pop-up box. -
Page 23: Voip Setting
210 User Manual 21V1.0 4. Attentions: When the device Wi-Fi connecting, the hotspot cannot work at the same time. When enable the hotspot, please ensure the Ethernet wire connecting with the device, and ensure the 4.3 VOIP Setting VoIP Settings are including SIP Account Setting and Call Setting. - Page 24 210 User Manual 21V1.0 There are 4 VoIP accounts available to set, please tap one of them to enter the configuration interface. Parameter description as below: 24 / 88...
- Page 25 210 User Manual 21V1.0 Parameter Descriptions Enable Enable the VoIP account Phone number The register ID of SIP account Password The register password of SIP account The register server of SIP account, server configuration format Domain should be domain/IP[:port],server could be domain or IP...
- Page 26 210 User Manual 21V1.0 If want to modify the account setting, please tap the account directly, and set it basing on your need. Please tap √ to submit after configuration. Clear accounts option to clear all account configurations. 26 / 88...
-
Page 27: Call Setting
210 User Manual 21V1.0 4.3.2 Call Setting After enter VoIP setting, please tap Call Setting to configure the call, picture show as below: 27 / 88... - Page 28 210 User Manual 21V1.0 4.3.2.1 Dial if end with # After enabling this option Dial if end with #, when dialing, press # to call out after press all number. This option is enabled by default. 4.3.2.2 Hotline After enable Hotline, can set the Hotline number and Hotline delay time, the hotline delay time is 0 by default.
- Page 29 210 User Manual 21V1.0 Block logs: can check the block logs. The missed block logs will show on message bar, drop down the message bar to check the missed block logs, as below: Blacklist: can add/modify/delete the black list. The method to add/modify/delete are as below: 1.
- Page 30 210 User Manual 21V1.0 2. Enter Setting—VOIP Settings—Call setting—Harassment interception—Blacklist, tap Add to fill in number, name(optional) to set blacklist. Tap the number in Blacklist to modify. Long press the number to delete. Whitelist: can add/modify/delete the blacklist. The method to add/modify/delete are as below: 1.
- Page 31 210 User Manual 21V1.0 4.3.2.4 Do Not Disturb Enable Do Not Disturb option to reject all calls. This option is disabled by default. 4.3.2.5 Enable Sub Stream This option is enabled by default. After enabling it, device can send sub stream to opposite end terminal by accessory, like HDMI, Wi-Fi screen sharing.
- Page 32 210 User Manual 21V1.0 4.3.2.6 Auto Answer After enabling this Auto Answer option, device can pick up all incoming calls during from start time to end time. It will be cyclically effective. s 4.3.2.7 One Way Video Call This option is disabled by default. After enabling this option, device will do video decoding but don’t do video coding, that means during video call, local end will see...
-
Page 33: Bluetooth Settings
210 User Manual 21V1.0 during video call. Tap this icon to show both ends parameters, including video codec, video resolution, video bitrate, video frame rate, etc. 4.3.2.10 IP Address Dial After enabling this option, allow to dial to IP address. Enable by default. - Page 34 210 User Manual 21V1.0 Enable Bluetooth: 1. After enable Bluetooth, the device will search Bluetooth device and show all on list. Tap the Bluetooth to connect. After successfully pair, will show on Available Devices list. 2. After enable Bluetooth, other devices can search and connect with this device with you allow.
-
Page 35: Display Setting
210 User Manual 21V1.0 4.5 Display Setting Tap Setting icon—Display, to configure the display parameters. Brightness: Configure the brightness of the screen, can drag progress bar or tap the brightness level. Sleep time: set sleep time. Device will shut down the screen once over the sleep time. -
Page 36: Sound
210 User Manual 21V1.0 4.6 Sound Tap Setting icon—Sound to enter voice setting interface, picture show as below. Ringer Volume: User can drag the bar to set ringer volume, or tap somewhere on bar to set a ringer volume. - Page 37 210 User Manual 21V1.0 Voice Volume: User can drag the bar to set voice volume, or tap somewhere on bar to set a voice volume. Media Volume: User can drag the bar to set media volume, or tap somewhere on bar to set a media volume.
-
Page 38: Date & Time
210 User Manual 21V1.0 4.7 Date & Time Tap Setting icon—Date & Time, to enter the date configuration interface, picture shows as below: 1. Device is Auto Get Time by default. Auto get time zone, is the date and time same... -
Page 39: Language
210 User Manual 21V1.0 with device networking server. 2. If want to set by manual, can disable Auto Get Time and Auto Get Time Zone, then set date and time manually. 3. Use 24-hour format: Enable this option to set hour format. If disable this option, device time formation will be 12-hour format. -
Page 40: Security
210 User Manual 21V1.0 4.9 Security Tap Setting—Security, to enter security configuration interface, can set screen lock. None: None by default will enter device interface without any password. Slide to enter: Slide up to enter device interface. Password: fill in password to enter device interface. -
Page 41: Advanced Setting
210 User Manual 21V1.0 4.10 Advanced Setting Tap Setting icon—Advanced Setting, to enter the system maintenance. Restore factory settings: After Restore factory setting, all settings and information will be cleared. Setting steps: Tap Restore factory settings—OK—Factory data reset—reset phone—Erase everything Update: Use disk to copy update.zip file on system root directory, and tap update... -
Page 42: About
210 User Manual 21V1.0 4.11 About Tap Setting icon—About, to enter system information interface. You can get network information like IP/DNS/MAC, model, Android version, SN, firmware version, hardware version in this interface. 42 / 88... -
Page 43: How To Use
210 User Manual 21V1.0 5 How to use 5.1 Call function The phone support audio call and video call. When using call function, please make sure available SIP accounts are already configured. Please refer to 4.1 for the configuration of SIP accounts. - Page 44 1. Press the digit buttons to dial the numbers, press key to delete certain number. 2. After inputting numbers, click to start audio call, click to start video call. If enabling “Dial if end with #”, then once dial numbers and press #, it will immediately start an audio call.
- Page 45 5.1.1.2 Dial from Contacts We can enter the contact screen in below ways. Enter the dial screen, and click the “Contacts “label. Tap the “Contacts” icon on main screen. 45 / 88...
-
Page 46: Incoming Calls
The Contacts includes “Favorite Contacts”, “Enterprise Contacts” , “Mobile Contacts “and “Group”. Through clicking any contact, or inputting the first letter, name, numbers, the details of contact will be displayed on the right side. Click the numbers, we can make audio calls. - Page 47 We can click the audio receiving button to answer the call, or pick up the handset, or press Handfree button to answer it. 5.1.2.2 To answer the video call When we receive an incoming video call, it’s like this. 47 / 88...
- Page 48 We can click the button to answer the video phone call, if we click the button, or simply pick up the handset, or press Handfree button, then it will be an audio call. 5.1.2.3 Reject an incoming call No matter the incoming call is an audio or a video call, we can reject with a click of button.
- Page 49 This equipment 2025 stop ringing, 2011 ring and answer, 2011 and 2026 talk. Note:Call Transfer function need IPPBX supports. 49 / 88...
-
Page 50: Explanation Of Function Buttons During Calls
5.1.3 Explanation of function buttons during calls 5.1.3.1 Explanation of function buttons during audio calls During audio calls, below menu buttons will be displayed. They are hidden by default, but once click on the calling screen, the menu buttons will occur again. Explanation of function buttons in calling screen. - Page 51 invitation to the other side, once the other side accepts, then the original audio call will turn into a video call. Click “ Close sound ” button then it will turn to be highlight , it means local microphone will be Close sound disabled,the other side cannot hear, click the button again then it will revert.
- Page 52 During the call, click "Pause" to maintain the original Pause call, listen to the hold sound, and click again to resume the call Click "more" to display more functions, as shown in the More figure below. Functional Function Description button During the call, A calls B, B can click “Transfer”, input C number and call out, that is, transfer A to C, B to hang Transfer...
- Page 53 During the call between A and B, the terminal B clicks "new call", enters the number C and exhales, the call between A and B is maintained, A listens to the hold New call tone, and B and C speak. When B and C finish the call, B clicks "restore"...
- Page 54 The function menu on the left side in video calls is basically same as the function menu in an audio call. Please refer to the description of function buttons in the audio call in section 5.1.3.1. The function menu above only relates to video calls, which are explained in detail here. Function Buttons Function Description When it’s displaying both the main stream and...
- Page 55 Click this button again to cancel. Note: before video call, the button can only appear when "Enable sub stream" is turned on in the Call Settings. Please refer to section 4.3.2.5 for details. Click "Full screen display" to display video in full size.
-
Page 56: Call Log
Please refer to section 4.3.2.10 for details. Click , then the video call will turn to an Voice audio call. 5.1.4 Call Log 5.1.4.1 All Call Log Click the shortcut icon "Dialer" or "Call Log" on the main screen, to enter the "Call Log"... - Page 57 Call Log list shows phone number, name (non-stranger calls), outgoing time or incoming time; The icon for received call is green , the icon for missed call is red and the icon for dialed call is black Click the button to view the detailed call information, including the call duration and the date and time when the call started.
- Page 58 2. Delete Call Log 1) Delete one single call record Long press certain call record and click "Delete logs" in the pop-up dialog box. 58 / 88...
- Page 59 2) Batch deletion of call records Click the Settings button in the upper right corner of the Call Log interface, and select "batch delete records" in the dialog box that pops up, and the picture below appears. Check the call record to be deleted and click delete. 3.
- Page 60 There is a shortcut to enter recording files in the call recording interface. Click the Settings button in the upper right corner and select "Recording files" to open the folder where recording files are located. The picture is as below: 60 / 88...
- Page 61 5.1.4.2 Missed Call The Call Log interface displays all the call records by default, we can also choose to display missed calls. Click the icon on the right of "all calls" and tick "missed call", it’s shown as below. Call Log - Missed call, check all missed calls. 61 / 88...
- Page 62 If we have got missed call, the indicator light in the upper right corner will flash red, and the notification bar in the upper left corner will display that there is a missed call. Drop down the notification bar to view, click the notification to jump to the call record interface.
-
Page 63: Contacts
3) Open the file manager and copy the contact files of USB disk or SD card to the root directory of iVoice 210 phone (that is, the directory in the current interface of the file manager). See 5.4.2 for file manager usage... - Page 64 to pop up the menu as shown below 5) Select "Import contact" and the phone will search the contact file and pop up a list. Click and select the contact file you want to import. 64 / 88...
- Page 65 6) Drop down the status bar to view the importing progress, as shown in the figure below: Import contacts from web (support VCF, CSV, XML format) 1) Log into the web (input phone IP, input account and password to log in) and enter the "Contact"...
- Page 66 and click "Export contact" in the pop-up menu, and the system will pop up a confirmation dialogs, as shown in the figure below: 2) Click "OK" to export the local contacts to the root directory of the phone; 3) Pull down the status bar to check the export progress. Export contacts from web (support VCF, CSV, XML format) : 1) Log into the web (enter phone IP, enter account and password to log in) and enter the "Contacts"...
- Page 67 5.2.1.3 Contacts-Add contact After entering the contact interface, click the icon of adding new contacts in the upper right corner, and the interface of adding contacts is as follows: Description: 1) Head image Settings: head image can be added by taking photos or from photo album.
- Page 68 1) Add number: can add multiple Numbers to the contact. 2) Add birthday and remark: in the add contact interface, click the menu icon the upper right corner to pop up the fields "birthday" and "remark" that can be added. 3) Please fill in other information literally, only the telephone number is mandatory.
- Page 69 1)Click Add, and the dialog box will pop up as shown below. You can select "Add new contact" or "save to the existing contacts". 2) Select "new contact" and jump to the interface of adding new contact. Please refer to section 5.3.1.3 for the method of adding new contact. 3) Select "Save to the existing contacts"...
- Page 70 Click "select contacts" to jump to the edit interface of the contact. The number will been automatically added to the contact information. If you do not need to modify other information, click the finish button in the upper right corner to complete the addition. 70 / 88...
- Page 71 5.2.1.4 Local call log - modify contacts In the contact details screen, click the edit button on the right side of the contact head image to enter the contact editing interface, as shown below: 71 / 88...
- Page 72 Description: 1) Press red button to delete the information of the corresponding row; 2) To supplement information or modify, please refer to the description of adding contact in section 5.3.1.3. 3) After modification, click the finish button in the upper right corner. 5.2.1.5 Contacts - delete contacts Delete contact: enter the contact list interface, long press a single contact in the local contact list, and click "Delete contact"...
-
Page 73: Enterprise Contact
5.2.2 Enterprise contact Enterprise contact setting 1) Log in to the web (input phone IP, account and password to log in), click the left menu "Contact" -- click the right menu "LDAP"; 2) Select "Advanced contact"; 3) Fill in the address, port, account and password of the enterprise contact server, and then click submit;... -
Page 74: Mobile Contact
2) The enterprise contact is displayed in a tree structure. Click the department to open the contact in the department, and click the contact to view details. 3) In the enterprise contact interface, click the menu icon in the upper right corner to pop up the menu of "update enterprise contact". - Page 75 4) Click and select "Sync phone address book", then will pop up the mobile’s name which connected currently with iVoice 210 phone via Bluetooth. Select the mobile you want to synchronize, and then the synchronization will be completed in short time.
- Page 76 5) Click and select "Clear Mobile Contacts", a confirmation box will pop up to confirm whether to clear it or not, click "cancel" not to clear phone address book, and click "ok" to clear phone communication on the phone. 76 / 88...
-
Page 77: Favorite Contacts
5.2.4 Favorite Contacts Click "Favorites Contacts" in the contacts interface to enter the favorites contacts list, as shown in the figure below Add contacts to favorites: 77 / 88... - Page 78 Method 1: enter the favorites contacts interface and click the menu icon in the upper right corner to select "add Enterprise Contacts", "Add Local Contacts" and "Add Mobile Contacts". There is a small box on the right of each contact. Click the box to check the contacts to be added to favorites.
- Page 79 Delete favorite contacts: 1. Delete single favorite contact: enter the favorites interface and click the contact to be deleted. In the contact details displayed on the right, click the favorites button on the right of the contact’s head image to cancel the favorites. 2, Batch delete favorites contact: in the favorites interface, click the icon the upper right corner of the menu, and select "Batch delete"...
-
Page 80: Group
Note: to delete favorite’s contacts, just cancel favorites, no longer show in favorites, but contacts still exist. 5.2.5 Group Grouping the contacts from Local Contacts and Mobile Contacts. Tap Group on Contacts interface, to enter Group interface. There are Coworkers, Family, Friends group by default. - Page 81 Add Group: On the bottom of Group interface, tap Add Group, name Group and submit. Add contacts to Group: add the contacts to the group Method 1: Tap the Group on Group interface, to enter any group. You can tap Add Person to add contacts into this group.
-
Page 82: Blacklist And White List
Method 2: Enter Local Contacts or Mobile Contacts, tap Edit icon on each contact detail interface, tap the Groups option Add to Group to add this contact to any group. Please remember to submit it by on top right side. 5.2.6 Blacklist and White List Tap the Blacklist or Whitelist on Contacts, can enter the configuration interface. - Page 83 search the contacts. You can enter the initial letter of contact/number to search. Device will show the searching reason when filling in the searching content. The searching range is covering Enterprise Contacts, Local Contacts, Mobile Contacts. After entering and search on the Enterprise Contacts interface, Mobile Contacts interface, Favorite Contacts interface or Group interface, the searching range will be only on current interface.
-
Page 84: Other Application
desktop. Can follow the step on 4.1.3. Delete Contacts: can delete contacts you select. 5.3.7.3 Long Press the Contact Number Enter Enterprise Contacts, Mobile Contacts or Local Contacts, tap any contact to call out. If long press the contact number, will pop up some options, like Add into Blacklist, Add into Whitelist, Edit before Call. - Page 85 3. Open the File Manager, there is an operating option on the right side of each file and folder, tick it to operate. 4. Tick any file or folder to enter other file manager, tap the icon on the top right side, can operate on pop-up options, including deselect, etc.
-
Page 86: Gallery
5.3.3 Gallery You can view the pictures using the Gallery App, picture shows as below: 5.3.4 Input Method Editor Tap any input box on device LCD screen, the input method editor will show up. In the first time, need to make some modify basing on your use habits. There are 26- keys or 9-keys keyboard type in English input. -
Page 87: Install Third-Party Application
5.3.5 Install Third-party Application This is special for system integrators or software developers. This device is supported to install third-party application to meet different needs, and value-adding for various industries. You can install application by browser, USB, SD card, etc. Before install application, please enable the Unknown source installation. Enable to install application on WEB: Log in WEB GUI, enter Menu: Maintain—... -
Page 88: Faq
6 FAQ 1. Q: After connect WAN with Ethernet cable, but the Ethernet icon on device is grey, showing no networking. A: Please check follow the steps as below to promise the correct networking. Step 1 : Check whether enable the Ethernet or not. Tap Setting icon— Ethernet, check whether enable the Ethernet.
Need help?
Do you have a question about the iVoice 210 and is the answer not in the manual?
Questions and answers