Table of Contents
Advertisement
Quick Links
www.infobitav.com
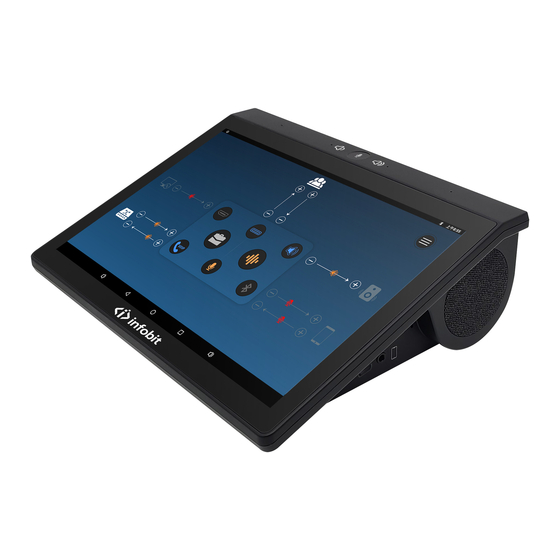
iSpeaker
All-in-One Speakerphone with UC controller
Model: iSpeaker CM800
User Guide
Copyright Notice
All contents of this manual, whose copyright belongs to our Corporation cannot be cloned,
copied or translated without the permission of the company. Product specifications and
information which were referred to in this document are for reference only. We may change,
delete, or update any content at any time and without prior notice.
===================================================================================
This is class A production. Electromagnetic radiation at specific frequencies may affect the
image quality of TV in home environment.
Advertisement
Table of Contents

Related Manuals for infobit iSpeaker CM800


Summary of Contents for infobit iSpeaker CM800
- Page 1 All-in-One Speakerphone with UC controller Model: iSpeaker CM800 User Guide Copyright Notice All contents of this manual, whose copyright belongs to our Corporation cannot be cloned, copied or translated without the permission of the company. Product specifications and information which were referred to in this document are for reference only.
-
Page 2: Table Of Contents
www.infobitav.com Catalog Packing List................... 1 About Product ................2 Product Features .................. 2 Appearance and Interface ..............3 Connection and Power On/Off ............5 Connection Cable ................. 5 Power On/Off ..................6 Audio Control ................7 Built-in Microphone ................8 Built-in Speakers &... -
Page 3: Packing List
Packing List When unpacking, please check and confirm all accessories that should be provided. ISpeaker CM800 x 1 Power Adapter x 1 HDMI Cable x 1 USB Cable x 1 User Guide x 1... -
Page 4: About Product
About Product This iSpeaker CM800 is a touch screen device that integrates multiple conference functions, and can be flexibly deployed in a variety of application scenarios. The main application scenarios include speaker phone, hands-free headset, voice meeting bridge, and android tablet with touchscreen. -
Page 5: Appearance And Interface
www.infobitav.com 2.2 Appearance and Interface Name Function Touch Screen Touch input and display Volume - Decrease the volume of the built-in or external speakers... - Page 6 www.infobitav.com Name Function When power off: Short press to power on. When power on: Short press to mute/unmute built-in Power/Mic Key microphone. LED is green when microphone is unmuted, and and LED red when microphone is muted. Long press for 3 seconds to show power option. Long press for more than 5 seconds to force reboot.
-
Page 7: Connection And Power On/Off
www.infobitav.com Connection and Power On/Off 3.1 Connection Cable The cable connections shown in the following figure contains optional configurations. They are for reference only. Please connect cables according to actual needs. -
Page 8: Power On/Off
www.infobitav.com 3.2 Power On/Off Power On Non-power-on state: plug in the power source and the device will automatically turn on. Shutdown state: Short press the power button to turn on the device. Restart Long press the power button for 3 seconds to let go, the "Shutdown and Restart Options" pops up, and select restart. -
Page 9: Audio Control
www.infobitav.com Audio Control Audio Console software is the built-in audio central control software of the device, which can finely configure various audio input and output interfaces of the device. After the device is started, short press the floating ball on the system desktop to run the application. Audio Console interface Figure 4-1: Figure 4-1 Audio Console operation interface Audio Console buttons and instructions:... -
Page 10: Built-In Microphone
www.infobitav.com 4.1 Built-in Microphone Short press the microphone icon to switch the built-in microphone pickup or mute. 4.2 Built-in Speakers & External Speakers Click the speaker icon in the gray area to pop up the volume adjustment bar. Click the "volume icon"... -
Page 11: Hdmi
www.infobitav.com Gain Adjustment: Control the Bluetooth audio gain when connected to the phone via Bluetooth only. When connected to a mobile phone via phone 3.5, control the audio gain of the phone 3.5 interface. Plug the 3.5mm audio head into the interface, it is recognized as connected to the mobile phone. -
Page 12: Audio Settings
www.infobitav.com Recording tool description: Recording pointer: The rotation range of the pointer indicates the sound pickup volume of the built-in microphone. Three buttons: the left is to start recording, the right is to stop recording, and the middle is to play recording. 4.7 Audio Settings Short press the upper right corner of the Audio Console interface to open... -
Page 13: Application Scenarios
www.infobitav.com Application Scenarios Before setting up and using, please read and understand the relevant content of the "Audio Console" part of this manual. 5.1 Speakerphone The device can be used as a USB microphone and speaker for a computer or terminal, and the device will enable the audio 3A function. -
Page 14: Headset Function
www.infobitav.com Step 3 Built-in microphone mute Use the "Mute button" on the device panel to switch the mute or pickup state of the built-in microphone. Press the volume key on the device panel to adjust the volume of the built-in speaker. -
Page 15: Connect Gooseneck Microphone
www.infobitav.com Step 2 Establish Bluetooth Connection Turn on the Bluetooth on the phone, search for the Bluetooth device, find the device, connect the device and confirm "pairing". At this time, "Pairing Request" pops up in the status bar at the top of the device screen, click "Pairing and Connecting"... -
Page 16: Bridge Access
www.infobitav.com Step 4 Forcibly close the built-in microphone (optional) Navigate to "Audio Settings" > "Advanced Settings" in the upper right corner. After enabling "Forcibly turn off the built-in microphone", the device's built-in microphone is in the mute state, the built-in microphone indicator is red, and the built-in microphone pickup state cannot be switched by pressing the mute button shortly. - Page 17 www.infobitav.com to the TV screen. The following describes how to project the PC screen and audio to the TV screen through the device. Step 1 The TV screen turns on wireless projection Various brands of TV screens have different ways to turn on the wireless projection function, please refer to the TV screen instruction manual.
- Page 18 www.infobitav.com Figure 5-2 HDMI IN Software Submenu Select the upper right corner of the "cast" interface and check "Turn on wireless display". Select from searched device list and connect to the TV screen to be connected. Figure 5-3 Projection Interface Step 4 Press the return key at the bottom of the screen to return to the HDMI IN software interface and continue to preview the PC screen;...
-
Page 19: Android Conference Platform
www.infobitav.com 5.6 Android Conference Platform The device provides an Android platform, and users can install the adapted meeting APP or meeting control software by themselves. Let's take "Zoom Control" as an example to introduce how to install the video meeting APP by yourself and how to control the volume. Step 1 Connect Network To connect the device to a wired or wireless network, please browse Settings >... - Page 20 www.infobitav.com Click Settings after the installation authorization prompt pops up. Figure 5-5 Installation authorization (1) Check "Allow Installation". Figure 5-6 Installation authorization (2)
- Page 21 www.infobitav.com After pressing the "return" button at the bottom of the screen, the program will automatically complete the installation. Figure 5-7 Installation Interface After the installation is complete, click "Open" to run "Zoom Control".
- Page 22 www.infobitav.com Step 3 Join video conference Please follow the instructions of the software to complete registration, login, and joining the conference. For detailed steps, please refer to the official zoom control document. Step 4 Mute and volume adjustment Short press the "Mute button" on the device panel to switch the mute state of the local microphone pickup.
-
Page 23: System Upgrade
www.infobitav.com System Upgrade The system supports TF card upgrade, HTTP upgrade, WEB upload upgrade. 6.1 TF card upgrade The specific steps are as follows: Step 1 Copy the version upgrade package "update.zip" to the root directory of the TF card. Note: You can copy the upgrade package on the computer to the TF card via a card reader. - Page 24 www.infobitav.com Step 2 The device runs "Upgrade Program" and select "Network Upgrade". Step 3 Enter the upgrade path: http://192.168.1.254:8080/v1.0/. Step 4 Click "Save", then the upgrade program pops up version confirmation, click "OK", the system enters the upgrade program...
Need help?
Do you have a question about the iSpeaker CM800 and is the answer not in the manual?
Questions and answers