Bosch HDD80051UC Installation Instructions Manual
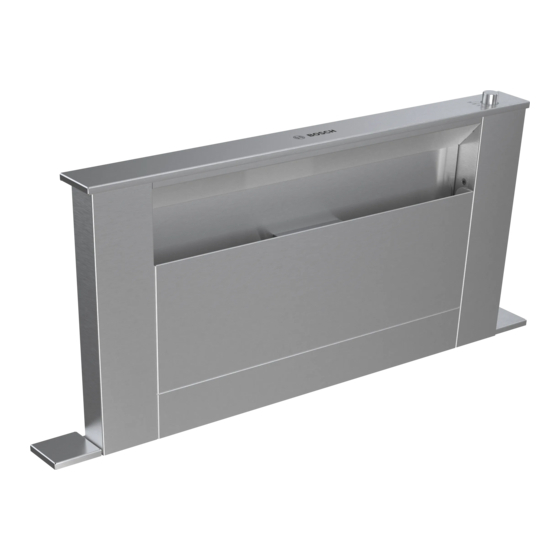
Downdraft hood
Hide thumbs
Also See for HDD80051UC:
- Installation instructions manual (64 pages) ,
- Use and care manual (40 pages)
Table of Contents
Advertisement
Available languages
Available languages
Quick Links
Advertisement
Chapters
Table of Contents

Related Manuals for Bosch HDD80051UC


Summary of Contents for Bosch HDD80051UC
- Page 1 All manuals and user guides at all-guides.com...
- Page 2 Plug elec Tools needed ... Connect Parts supplied .. Install co PLAN THE INST ....Attach e Select ducting op ® SUPPO BOSCH ..Ductwork prepar Before c Plan cabinetry .. Data lab DUCT EQUIVAL ....Service . SYSTEM DIMEN .....
- Page 3 All manuals and user guides at all-guides.com ABOUT THIS MANUAL Be sure to observe all listed warnings and cautions. Look for the triangles with exclamation marks inside. NOTICE: This indicates that damage to the appliance or WARNING property may occur as a result of non-compliance with This indicates that death or serious injuries may this advisory.
- Page 4 All manuals and user guides at all-guides.com IMPORTANT SAFETY INSTRUCTIONS READ AND SAVE THESE INSTRUCTIONS General notes Examine the appliance after unpacking it. In the event of INSTALLER: LEAVE THESE INSTRUCTIONS transport damage, do not plug it in. WITH THE APPLIANCE AFTER INSTALLATION IS NOTE: Do not remove any of the aluminum tape as it is COMPLETE.
- Page 5 All manuals and user guides at all-guides.com IMPORTANT SAFETY INSTRUCTIONS READ AND SAVE THESE INSTRUCTIONS Proper installation and maintenance WARNING WARNING Remove all tape and packaging before using the Unit is heavy and requires at least two people or proper appliance.
- Page 6 All manuals and user guides at all-guides.com IMPORTANT SAFETY INSTRUCTIONS READ AND SAVE THESE INSTRUCTIONS Fire safety WARNING WARNING RISK OF FIRE Use this appliance only for its intended use as described in this manual. Hot oil and fat catch Þ re fast. Never leave hot oil and fat unsupervised.
- Page 7 IMPORTANT S All manuals and user guides at all-guides.com READ AND SAV Child safety Protectin When children b Unpack it is the responsi line with to ensure that th quali Þ ed persons. NOTICE Do not allow any Risk of d any part of an ap applianc or cause injury.
- Page 8 All manuals and user guides at all-guides.com BEFORE YOU BEGIN Installation review Parts supplied This downdraft system can be used to exhaust cooking 1 Parts Bag containing: by-products such as heat, steam, and smoke that may be created while cooking using gas or electric cooktops. With its versatile design, there are six (6) basic discharge options - left, right, rear, front, down and recirculation.
- Page 9 Remote Blower or Flex Blower in remote location. Use 1-7/8” x 19” BOSCH ® recommends not exceeding 50 ft. (15 m) of (48 mm x 483 mm) to 6” (152 mm) or 8” (203 mm) round transition or 1-7/8” x 19” (48 mm x 483 mm) ductwork as appropriate.
- Page 10 All manuals and user guides at all-guides.com DUCT EQUIVALENT CHART Equivalent Equivalent Size Size Duct Piece Length Length Duct Piece (in./mm) (in./mm) (ft/m) (ft/m) 6 (152) 1.2 (0.37) 3¼" x 10" (83 mm x 254 mm) 6 (152) 10 (3) 8 (203) 0.7 (0.21) Smooth, straight...
- Page 11 HDDSTRAN8 1-7/8” X 19” (48 x 483) TO 8” (203) RD. TRANSITION Measurements in inches (mm). HDDSTRAN6 6” (152) RD. 1-7/8” X 19” ELBOW Not available from Bosch. (48 x 483) 5.000” Purchase locally. TO 6” (152) RD. (127) 7.500”...
- Page 12 ACCESSORIES (purchase se All manuals and user guides at all-guides.com Flexible Blower Bosch DHG602D MODEL MODEL Inline and Remote B l owers Non-Duct Rec 1-7/8” B o sch M o dels DH G 6 0 2 3 R UC, DH G 6 0 1 5 N UC Used in applic 6”...
- Page 13 All manuals and user guides at all-guides.com INSTALLATION Take measurements Cut countertop opening 1. Refer to the cooktop installation instructions for 1. Lay out and cut the cooktop cut-out far enough dimensions of cooktop, countertop cut-out, and FORWARD so downdraft will Þ t behind it. cabinet requirements.
- Page 14 All manuals and user guides at all-guides.com INSTALLATION Template 2-1/8” (54 mm) 24-11/16” (627 mm) Installation with gas cooktops 22-5/16” (567 mm) Downdraft cutout width: Dimension “BT” is thickness of 30” (762 mm) is 27-1/16” (687 mm) the backsplash that provides 19-1/8”...
- Page 15 All manuals and user guides at all-guides.com INSTALLATION Optional: Electrical panel can be A - Installation using ß exible blower mounted in a remote location. attached to downdraft Example: There is a drawer at the bottom of the cabinet, in front of the downdraft.
- Page 16 All manuals and user guides at all-guides.com INSTALLATION C - Installation using inline or remote B - Installation using ß exible or remote blower - ducting through left, right, blower - mounted in a remote below or rear location - ducting through front panel opening (Requires purchase of 1-7/8”...
- Page 17 INSTALLATION All manuals and user guides at all-guides.com Cut out ductwork 3. Chec from dow 1. Measure and 4. Remo in the cabinet ba Use the dimensi how and where CAUTIO cabinet. Before c for interf ß oor jo wiring o 5.
- Page 18 All manuals and user guides at all-guides.com INSTALLATION Gas cooktops only: Install gas cooktop seal kit (HDD0RSP, HDD6RSP) (purchase separately) Available for application with gas cooktops - where proper sealing is required and holes are required in cabinet base. Kit includes trim seal, toe-kick cover plate, and cabinet hole cover plate.
- Page 19 All manuals and user guides at all-guides.com INSTALLATION Clean housing surface (B) with Isopropyl Alcohol or Install the electrical panel Rubbing Alcohol. Remove TAPE STRIPS to reveal (if previously removed from downdraft housing) adhesive side of tape from the back side of TRIM BRACKET (A).
- Page 20 All manuals and user guides at all-guides.com INSTALLATION B - Remote blower wiring Install electrical wiring 3. The following exterior or inline blowers can be used: CAUTION: Installation work and electrical wiring must DHG6023RUC - 600 cfm (17 m 3 /min) Remote Blower be done by quali Þ...
- Page 21 All manuals and user guides at all-guides.com INSTALLATION Plug electrical panel Attach endcaps to downdraft SPECIAL KEY (INCLUDED Plug electrical panel cable into lower receptacle on side of downdraft. Connect downdraft to power 1. Plug the downdraft’s power cord into the 3-pronged receptacle.
- Page 22 ® SUPPORT BOSCH All manuals and user guides at all-guides.com To avoid Before calling se when ca See the Use and spaces b information. Refe Warranty”. Model N To reach a servic Serial No information at the Date of with the informat Purchas when calling.
-
Page 23: Table Of Contents
Sélection des options de conduits ........ 30 Fixation des capots d’extrémité sur la hotte ....42 Préparation des conduits ..........30 ASSISTANCE BOSCH ® ..........43 PlaniÞ cation des armoires ..........30 Avant d’appeler le service à la clientèle ....... 43 TABLEAU DES ÉQUIVALENCES DE CONDUITS .. -
Page 24: À Propos De Ce Manuel
All manuals and user guides at all-guides.com À PROPOS DE CE MANUEL Assurez-vous de respecter tous les avertissements et mises en garde énumérés. Cherchez les triangles avec des points d’exclamation à l’intérieur. AVIS : Ceci indique que le non-respect de cet avis peut AVERTISSEMENT entraîner des dommages matériels. -
Page 25: Consignes De Sécurité Importantes
All manuals and user guides at all-guides.com CONSIGNES DE SÉCURITÉ IMPORTANTES LISEZ CES DIRECTIVES ET CONSERVEZ-LES Généralités Inspectez l’appareil après l’avoir déballé. S’il a été INSTALLATEUR : LAISSEZ CES INSTRUCTIONS AVEC endommagé durant le transport, ne le branchez pas. L’APPAREIL UNE FOIS L’INSTALLATION TERMINÉE. REMARQUE : Ne retirez aucune partie de ruban d’aluminium car il est indispensable pour colmater les fuites d’air. -
Page 26: Installation Adéquate Et Entretien
All manuals and user guides at all-guides.com CONSIGNES DE SÉCURITÉ IMPORTANTES LISEZ CES DIRECTIVES ET CONSERVEZ-LES Installation adéquate et entretien AVERTISSEMENT AVERTISSEMENT L’appareil est lourd et nécessite au moins deux personnes Enlevez tous les rubans adhésifs et l’emballage avant d’utiliser l’appareil. Détruisez l’emballage une fois ou un équipement approprié... -
Page 27: Sécurité Incendie
CONSIGNES D All manuals and user guides at all-guides.com LISEZ CES DIR Sécurité incendie AVERTIS AVERTISSEMEN RISQUE Utilisez cet appa Þ ns auxquell été conçu, tel qu Lorsque ustensile Ayez toujours un une chal la cuisine. Si vos dessus d feu, roulez-vous feu. -
Page 28: Sécurité De L'enfant
All manuals and user guides at all-guides.com CONSIGNES DE SÉCURITÉ IMPORTANTES LISEZ CES DIRECTIVES ET CONSERVEZ-LES Sécurité de l’enfant Protection de l’environnement Lorsque des enfants sont en âge d’utiliser l’appareil, Déballez l’appareil et mettez l’emballage au rebut il incombe aux parents ou aux tuteurs légaux de veiller conformément aux exigences environnementales. -
Page 29: Avant De Commencer
All manuals and user guides at all-guides.com AVANT DE COMMENCER Contrôle de l’installation Pièces fournies Ce système d’aspiration descendante peut être utilisé 1 - Sac de pièces comprenant : pour évacuer les sous-produits de cuisson tels que la chaleur, la vapeur et la fumée qui peuvent être créés lors de la cuisson à... -
Page 30: Planification De La Pose
8 po (203 mm) rond, selon ce qui est approprié. BOSCH ® recommande de ne pas dépasser 50 pi (15 mètres) E = 1-7/8 po x 19 po (48 mm x 483 mm) , sortie à droite du boîtier vers le de conduit équivalent. -
Page 31: Tableau Des Équivalences De Conduits
All manuals and user guides at all-guides.com TABLEAU DES ÉQUIVALENCES DE CONDUITS Dimensions Équivalent Dimensions Équivalent (en pouces/ en longueur (en pouces/ en longueur Section de conduit Section de conduit (pieds/m) (pieds/m) 6 (152) 1,2 (0,37) 83 mm x 254 mm 6 (152) 10 (3) (3¼... -
Page 32: Dimensions Du Système
(48 x 483) À 8 PO (203) ROND Mesures en pouces (millimètres). HDDSTRAN6 TRANSITION 6 PO (152), DE 1-7/8 PO X 19 PO COUDE ROND Non disponible auprès de Bosch (48 x 483) 5,000 po Acheter localement. À 6 PO (152) ROND (127) -
Page 33: Accessoires
ACCESSOIRES (vendus séparément) Ventilateur ß exible Ventilateurs en ligne et à distance Bosch DHG602DUC M o dèles B o sch DH G 6 0 2 3 R UC, DH G 6 0 1 5 N UC MODÈLE DESCRIPTION MODÈLE DESCRIPTION Ensemble de recirculation. -
Page 34: Prise De Mesures
All manuals and user guides at all-guides.com INSTALLATION Prise de mesures Découpage de l’ouverture du comptoir 1. Consulter les directives d’installation de la surface de 1. Tracer et découper l’ouverture pour la surface de cuisson pour les dimensions de la surface de cuisson, de cuisson suf Þ... -
Page 35: Installation Avec Surfaces De Cuisson Au Gaz
All manuals and user guides at all-guides.com INSTALLATION Gabarit 2-1/8 po (54 mm) 24-11/16 po (627 mm) Installation avec surfaces de cuisson au gaz 22-5/16 po (567 mm) Largeur de l'ouverture pour la hotte : La dimension « BT » est 30 po (762 mm) est 27-1/16 po (687 mm) l’épaisseur du dosseret 36 po (914 mm) est 33-1/16 po (840 mm) -
Page 36: En Option : Le Boîtier Électrique Peut Être Monté À Distance
All manuals and user guides at all-guides.com INSTALLATION En option : Le boîtier électrique peut A - Installation avec ventilateur ß exible être monté à distance attaché à la hotte Exemple : Un tiroir se trouve au bas de l’armoire, devant la hotte. -
Page 37: Insertion Des Supports De Þ Xation Supérieurs Et Installation Des Pieds
INSTALLATION All manuals and user guides at all-guides.com B - Installation avec ß exible Installati ou à distance - m à distanc conduits passan à droite, panneau avant (Requier (48 mm x ATTENTION rond. De Si le ventilateur ß exible est mo de 1-7/8 en ligne : Ne pas disponib... -
Page 38: Découpage De L'ouverture Pour Conduits Dans L'armoire
All manuals and user guides at all-guides.com INSTALLATION 3. VériÞ er que les repères de l’armoire s’alignent sur les Découpage de l’ouverture pour conduits conduits venant de la hotte. dans l’armoire 4. Sortir le boîtier de la hotte de l’armoire. 1. -
Page 39: Surface De Cuisson Au Gaz Uniquement : Pose De L'ensemble De Joint D'étanchéité Pour Surface De Cuisson Au Gaz (Hdd0Rsp, Hdd6Rsp)
All manuals and user guides at all-guides.com INSTALLATION Surfaces de cuisson au gaz uniquement : Pose de l’ensemble de joint d’étanchéité pour surface de cuisson au gaz (HDD0RSP, HDD6RSP) (acheter séparément) Disponible pour les surfaces de cuisson au gaz - lorsqu’une étanchéité... -
Page 40: Installation D'un Capuchon Mural Ou De Toit, Ou De
All manuals and user guides at all-guides.com INSTALLATION Installation du boîtier électrique ( s i précédemment retiré du boîtier de la hotte) 1 . Si le boîtier électrique a été retiré du boîtier de la hotte pour pouvoir le monter à distance : Monter le boîtier à l’emplacement choisi. -
Page 41: Installation Du Câblage Électrique
All manuals and user guides at all-guides.com INSTALLATION B - Câblage de ventilateur à distance Installation du câblage électrique 3. Les ventilateurs à distance suivants peuvent être utilisés : ATTENTION : La pose de l’appareil et les travaux DHG6023RUC - Ventilateur distant 600 pi³/min (17 m³/min) d’électricité... -
Page 42: Branchement Du Boîtier Électrique
INSTALLATION All manuals and user guides at all-guides.com Branchement du Fixation d CLÉ SP ( I NCLUS Brancher le câbl inférieure sur le c Branchement de électrique 1. Brancher le co prise pour Þ ches à trois br électrique passe de cuisson. -
Page 43: Assistance Bosch
Þ ter de nombreuses années de cuisine créative avec votre appareil. Pour toute question dans l’éventualité peu probable où votre appareil Bosch® nécessite une intervention, n’hésitez pas à communiquer avec notre service à la clientèle. Notre équipe d’assistance est prête à vous aider. -
Page 44: Www.bosch-Home.com/Us/Store
Corte la abertura de la cubierta ........55 servicios en www.bosch-home.com y en la tienda por Internet Instalación con estufas eléctricas y de inducción ..55 www.bosch-home.com/us/store Instalación con estufas a gas ........56 Prepare la cubierta del tiro descendente ...... -
Page 45: Acerca De Este Manual
All manuals and user guides at all-guides.com ACERCA DE ESTE MANUAL Asegúrese de observar todas las advertencias y precauciones de la lista. Busque los triángulos con signos de admiración dentro. AVISO: Esto indica que podrían producirse daños al ADVERTENCIA electrodoméstico o a la propiedad como resultado de no hacer caso de este aviso. -
Page 46: Instrucciones Importantes De Seguridad
All manuals and user guides at all-guides.com INSTRUCCIONES IMPORTANTES DE SEGURIDAD LEA Y CONSERVE ESTAS INSTRUCCIONES Notas generales Examine el electrodoméstico antes de desempacarlo. INSTALADOR: DEJE ESTAS INSTRUCCIONES CON En caso de daños durante el transporte, no lo conecte. EL ELECTRODOMÉSTICO DESPUÉS DE TERMINAR NOTA: No retire nada de la cinta de aluminio, ya que se CON LA INSTALACIÓN. -
Page 47: Instalación Y Mantenimiento Adecuados
INSTRUCCION All manuals and user guides at all-guides.com LEA Y CONSER Instalación y ma adecuados ADVERT ADVERTENCIA Las supe Þ cies oc Þ lad Retire toda la cin Tenga cu electrodoméstico electrodo desempacar el e niños jueguen co ADVERT INSTALADOR: Muestre al pro La unida del disyuntor o fu... -
Page 48: Seguridad Ante Incendios
All manuals and user guides at all-guides.com INSTRUCCIONES IMPORTANTES DE SEGURIDAD LEA Y CONSERVE ESTAS INSTRUCCIONES Seguridad ante incendios ADVERTENCIA ADVERTENCIA Use este electrodoméstico únicamente para lo que está RIESGO DE INCENDIO diseñado, tal como se describe en este manual. Cuando los quemadores de gas funcionan sin tener utensilios de cocina sobre ellos, pueden acumular mucho Siempre tenga cerca de la cocina un detector de humos... -
Page 49: Seguridad Con Los Niños
All manuals and user guides at all-guides.com INSTRUCCIONES IMPORTANTES DE SEGURIDAD LEA Y CONSERVE ESTAS INSTRUCCIONES Seguridad con los niños Protección del medio ambiente Cuando los niños crecen lo su Þ ciente como para usar Desempaque el electrodoméstico y deseche el empaque, el electrodoméstico, es responsabilidad de los padres o de acuerdo con los requisitos ambientales. -
Page 50: Antes De Comenzar
All manuals and user guides at all-guides.com ANTES DE COMENZAR Revisión de la instalación Piezas suministradas Este sistema de corriente descendente se puede usar para Una bolsa de piezas que contiene: extraer los subproductos de la cocción como el calor, el vapor y el humo que pueden crearse al cocinar con estufas de gas o eléctricas. -
Page 51: Planee La Instalación
C = Conducto redondo de 8 pulg. (203 mm) , de descarga descendente por el BOSCH ® recomienda que no se superen los 50 pies (15 m) ventilador ß exible (el panel eléctrico se puede montar de forma remota) de conducto equivalente. -
Page 52: Cuadro De Equivalencia De Conductos
CUADRO DE EQ All manuals and user guides at all-guides.com Longitud Longitud Tamaño Tamaño equivalente equivalente Pieza de conducto (pulg./mm) (pulg./mm) Pieza de conducto (pies/m) (pies/m) 6 (152) 1.2 (0.37) 3¼ pulg. x 10 pulg. (83 mm x 254 mm) 6 (152) 10 (3) Liso, recto... -
Page 53: Dimensiones Del Sistema
Mediciones en pulgadas (milímetros). TRANSICIÓN HDDSTRAN6 CODO RED. DE 1-7/8 PULG. X 19 PULG. DE 6 PULG. (152) No está disponible con (48 x 483) A 6 PULG. (152) RED. 5.000 pulg. Bosch. Compre a nivel local. (127) 7.500 pulg. (191) Español 53... -
Page 54: Accesorios
Ventilador ß exible V e ntiladores en línea y remotos Bosch DHG602DUC M o delos B o sch D H G 6 0 2 3 R U C , D H G 6 0 1 5 N U C MODELO DESCRIPCIÓN... -
Page 55: Instalación
All manuals and user guides at all-guides.com INSTALACIÓN Tome medidas Corte la abertura de la cubierta 1. Consulte las instrucciones de instalación de la estufa 1. Trace y haga el recorte para la estufa lo para ver las dimensiones de la estufa, el recorte en la su Þ... -
Page 56: Instalación Con Estufas A Gas
All manuals and user guides at all-guides.com INSTALACIÓN Plantilla Ancho de recorte 2-1/8 pulg. (54 mm) 24-11/16 pulg. (627 mm) de tiro descendente: Instalación con estufas a gas 30 pulg. (762 mm) es 22-5/16 pulg. (567 mm) 27-1/16 pulg. (687 mm) La dimensión “BT”... -
Page 57: Opcional: El Panel Eléctrico Se Puede Montar En Un Sitio Remoto
INSTALACIÓN All manuals and user guides at all-guides.com Opcional: El pan A - Instal montar en un siti ß exible Þ jo al ti Por ejemplo: La p frente al tiro desce eléctrico se monte del ventilador está eléctrico. (Compre ß... -
Page 58: B - Instalación Usando Un Ventilador Ss Exible O Remoto - Montado En Un Sitio Remoto - Conductos A Través De La Abertura Del Panel Frontal
All manuals and user guides at all-guides.com B - Instalación usando un ventilador C - Instalación usando un ventilador en ß exible o remoto - montado en un línea o remoto - conductos a través sitio remoto - conductos a través de del lado izquierdo, derecho, abajo o la abertura del panel frontal la parte posterior... -
Page 59: Recorte La Abertura Para El Conducto En El Gabinete
All manuals and user guides at all-guides.com INSTALACIÓN 3. VeriÞ que que las marcas en el gabinete estén alineadas Recorte la abertura para el conducto con el conducto que viene del tiro descendente. en el gabinete 4. Retire del gabinete la cubierta del tiro descendente. 1. -
Page 60: Solo Estufas De Gas: Instale El Juego Para Sellar Estufas De Gas (Hdd0Rsp, Hdd6Rsp)
All manuals and user guides at all-guides.com INSTALACIÓN Solo estufas de gas: Instale el juego para sellar estufas de gas (HDD0RSP, HDD6RSP) (se compra por separado) Disponible para aplicarse con estufas de gas, donde se requiere el sellado adecuado y se requieren ori Þ cios en la base del gabinete. -
Page 61: Instale Una Tapa De Techo, Una Tapa De Pared O Un Ventilador Remoto
All manuals and user guides at all-guides.com INSTA L A C IÓN Instale el panel eléctrico (si lo quitó anteriormente de la cubierta del tiro descendente) 1. Si retiró el panel eléctrico de la cubierta del tiro descendente con el Þ n de montarlo en un sitio remoto: Monte el panel eléctrico en el sitio elegido. -
Page 62: Instale El Cableado Eléctrico
INSTALACIÓN All manuals and user guides at all-guides.com B - Cabl Instale el cablea 3. Se pu PRECAUCIÓN: Una o más pe Þ cadas para ext deben realizar e 3 / m DHG6 eléctrico, siguien 3 / m DHG601 y normas corres 120 VCA normas de cons Þ... -
Page 63: Enchufe El Panel Eléctrico
All manuals and user guides at all-guides.com INSTALACIÓN Fije las tapas de extremo en el tiro Enchufe el panel eléctrico descendente LLAVE ESPECIAL (INCLUIDA Enchufe el cable del panel eléctrico en el receptáculo inferior en el lado del tiro de descendente. Conecte el tiro descendente a la electricidad 1. -
Page 64: Atención De Bosch
No dude en comunicarse con nuestro Departamento de Atención al Cliente en caso de que tuviera preguntas o en el caso poco probable de que el electrodoméstico Bosch® necesite servicio. Nuestro equipo de servicio está listo para ayudarle. EE.UU. 800-944-2904 www.bosch-home.com/us/support Canadá...
Need help?
Do you have a question about the HDD80051UC and is the answer not in the manual?
Questions and answers