Table of Contents
Advertisement
Available languages
Available languages
Quick Links
Advertisement
Table of Contents

Related Manuals for Oster TSSTTV0045


Summary of Contents for Oster TSSTTV0045
- Page 1 MODEL TSSTTV0045 MODELO Manual de Instrucciones HORNO TOSTADOR LEA TODAS LAS INSTRUCCIONES ANTES DE UTILIZAR ESTE APARATO Instruction Manual TOASTER OVEN PLEASE READ ALL INSTRUCTIONS BEFORE USING THIS APPLIANCE...
-
Page 2: Precauciones Importantes
NO opere ningún aparato con un cable o enchufe dañado, después de que el aparato haya fallado o si se cae al suelo o se daña de cualquier otra manera. Lleve el aparato al Centro de Servicio Oster® Autorizado más cercano para examinarlo, repararlo o para ajustarlo mecánica o eléctricamente. - Page 3 17. NO cubra la bandeja para migas o ninguna parte del horno tostador con papel aluminio o metálico. Esto puede causar el sobrecalentamiento del aparato. 18. Los alimentos grandes o utensilios metálicos no deben ser introducidos en el horno tostador ya que pueden causar incendios o descargas eléctricas. 19.
-
Page 4: Descripción Del Aparato
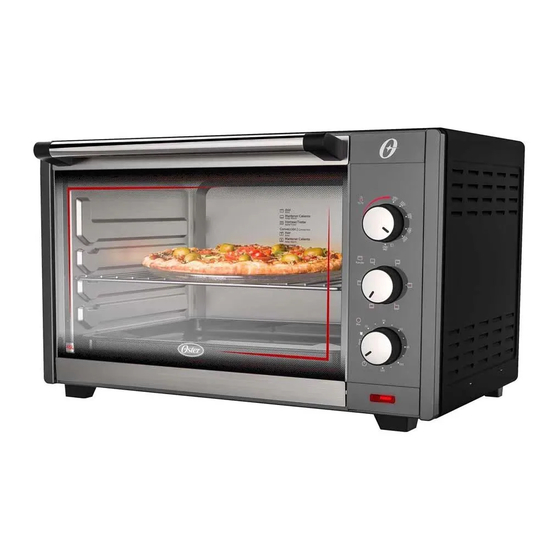
DESCRIPCIÓN DEL APARATO 1. Manija de la Puerta 2. Puerta de Vidrio 3. Recolector de Grasa y Migajas 4. Rejilla 5. Cuerpo del Horno tostador 6. Resistencia de Calentamiento Superior 7. Lámpara 8. Panel de Control 9. Perilla Selectora de Temperatura 10. -
Page 5: Luz Indicadora
FUNCIONES Perilla Selectora de Temperatura Puede ajustar la temperatura de su horno tostador de 100 a 250 grados centígrados. Verifi que la temperatura indicada para la preparación de su alimento y ajuste la perilla selectora de temperatura. Perilla Selectora de Función Su horno tostador tiene un ventilador de convección y permite más confi guraciones para la operación de resistencias. - Page 6 Asegúrese de insertar el vidrio protector de la lámpara de nuevo en su lugar. Las lámparas se pueden encontrar en centros de servicios autorizados de Oster®. El uso de lámparas distintas a la del producto original anulará su garantía.
- Page 7 Recolector de Grasa y Migajas Recoje las migas, grasa o los restos de comida que caigan. Se saca para facilitar su limpieza. Para Retirar o Reposicionar la rejilla [01] Abra la puerta del horno tostador halando de ella por la manija de la puerta. Si el producto está...
-
Page 8: Antes De Usarlo
Realice este procedimiento en un lugar ventilado. Nota: Realice este procedimiento en un entorno ventilado con las ventanas de su hogar abiertas. Si el humo y el olor persisten durante mucho tiempo, apague el aparato y llévelo a un Centro de Servicio Oster® Autorizado. -
Page 9: Consejos Para Ahorrar Energía
Utilizando su Horno Tostador [01] Coloque la rejilla en la posición deseada. [02] Coloque una bandeja para hornear con alimento en la rejilla. [03] Cierre completamente la puerta de vidrio. [04] Gire la perilla selectora de temperatura hacia la derecha hasta el nivel de temperatura deseado para la preparación de su receta. -
Page 10: Sugerencias De Uso
A continuación, encontrará algunos consejos para ayudarle a ahorrar energía al utilizar su aparato en la cocina: “Revisando el asado en el horno tostador” al abrir la puerta puede causar pérdida de calor, mayor tiempo de cocción y malos resultados de cocción. Supervise el asado a través de la puerta de vidrio de su horno tostador. -
Page 11: Cuidado Y Limpieza
CUIDADO Y LIMPIEZA Desenchufe el horno tostador tostador y deje que se enfríe antes de limpiarlo. Utilice un paño húmedo para limpiarlo. ¡NO LO SUMERJA EN AGUA! Asegúrese de usar únicamente agua y un jabón suave. Los limpiadores abrasivos, cepillos para frotar y limpiadores químicos dañarán el recubrimiento de la unidad. -
Page 12: Important Safeguards
DO NOT operate this or any appliance with a frayed or damaged cord or plug or after the appliance malfunctions or is dropped or has been damaged in any manner. Take this appliance only to the nearest Authorized Oster® Service Center for examination, repair or adjustment. -
Page 13: Special Cord Set Instructions
19. DO NOT clean with metal scouring pads. Pieces can break off the pad and touch electrical parts involving a risk of electrical shock. 20. When broiling, use extreme caution when removing tray or disposing of hot grease. 21. The door and the outer surface may get hot when appliance is used. 22. -
Page 14: Description Of The Appliance
DESCRIPTION OF THE APPLIANCE 1. Door Handle 2. Glass door 3. Removable Crumb/Grease Tray 4. Removable Wire Rack 5. Product Housing 6. Upper Heating Elements 7. Light 8. Control Panel 9. Temperature Control Knob 10. Function Selector Knob 11. Time Control Knob 12. -
Page 15: Temperature Control Knob
FUNCTIONS Temperature Control Knob You can adjust your oven temperature from 100° to 250° degrees Celsius. Adjust the temperature control knob to the required setting Adjust the temperature control knob to the required setting for your recipe. Functions Your oven has a convection fan and allows additional confi gurations for heating elements operation. -
Page 16: Oven Light
Be sure to insert the light bulb cover back in its place. Light bulbs can be found at the Authorized Oster® Service Centers. The use of light bulbs other than the original ones will void your warranty. - Page 17 Removable Crumb/Grease Tray Collects crumbs, grease or fallen food particles. Pulls out for easy cleaning. To Remove or Place Back the Baking Pand and Rack [01] Open the oven door by pulling it by the door handle. If the product is hot, wear oven mitts. [02] Remove the pan/rack by pulling it out of the oven opening.
-
Page 18: Before Use
Perform this procedure in a well-ventilated room. Note: Perform this procedure in a ventilated room with the windows open. If the smoke and smell persist for a long time, turn off the product and take it to the nearest Authorized Oster® Service Center. -
Page 19: Using The Oven
Using the Oven [01] Position the rack in the desired position. [02] Place the baking pan with food inside the rack. [03] Close the glass door completely. [04] Turn the temperature control knob clockwise to the desired temperature to prepare of your recipe. -
Page 20: Usage Tips
“Monitoring the roasting process in the oven” by opening the door can cause heat loss, longer cooking time and poor cooking results. Monitor the roasting process through the glass door of your toaster oven. Bake cakes, pies or cookies when the toaster oven is hot. The best time to bake is right after a meal has been prepared in the toaster oven. -
Page 21: Cleaning And Maintenance
CLEANING AND MAINTENANCE Before cleaning your toaster oven, unplug it and allow it to cool. To clean, wipe with damp cloth. DO NOT IMMERSE IN WATER! Make sure to use only mild, soapy water. Abrasive cleaners, scrubbing brushes and chemical cleaners will damage the coating on this unit. Empty crumb tray frequently to avoid accumulation of crumbs. - Page 22 Notas/Notes...
- Page 23 Notas/Notes...
- Page 24 Garantía limitada de un año – por favor consulte los detalles en el inserto. © 2019 Sunbeam Products, Inc. All rights reserved. One Year Limited Warranty - please see insert for details. www.oster.com P.N. 200763 Impreso en China Printed in China...
Need help?
Do you have a question about the TSSTTV0045 and is the answer not in the manual?
Questions and answers