Table of Contents
Advertisement
Available languages
Available languages
Quick Links
Download this manual
See also:
User Manual
MODEL/MODÈLE
TSSTTVVGS1
MODELO
Instruction Manual
COMPACT TOASTER OVEN
READ ALL INSTRUCTIONS BEFORE USING THIS APPLIANCE
Manuel d'Instructions
MINI-FOUR GRILL COMPACT
LIRE TOUTES LES INSTRUCTIONS AVANT D ' UTILISER CET APPAREIL
Manual de Instrucciones
HORNO TOSTADOR COMPACTO
LEA TODAS LAS INSTRUCCIONES ANTES DE USAR ESTE APARATO
Manual de Instruções
FORNO TOSTADOR COMPACTO
LEIA TODAS AS INSTRUÇÕES ANTES DE USAR ESTE APARELHO
Advertisement
Table of Contents

Related Manuals for Oster TSSTTVVGS1


Summary of Contents for Oster TSSTTVVGS1
- Page 1 MODEL/MODÈLE TSSTTVVGS1 MODELO Instruction Manual COMPACT TOASTER OVEN READ ALL INSTRUCTIONS BEFORE USING THIS APPLIANCE Manuel d’Instructions MINI-FOUR GRILL COMPACT LIRE TOUTES LES INSTRUCTIONS AVANT D ’ UTILISER CET APPAREIL Manual de Instrucciones HORNO TOSTADOR COMPACTO LEA TODAS LAS INSTRUCCIONES ANTES DE USAR ESTE APARATO Manual de Instruções...
-
Page 2: Important Safeguards
4. DO NOT operate this or any appliance with a frayed or damaged cord or plug or after the appliance malfunctions or is dropped or has been damaged in any manner. Take this appliance only to the nearest Authorized Oster Service Center for examination, ®... - Page 3 20. To turn this appliance off, return all controls to the off “O” position. 21. This appliance is not intended for use by persons (including children) with reduced physical, sensory or mental capabilities, or lack of experience and knowledge, unless they have been given supervision or instruction concerning use of the appliance by a person responsible for their safety.
-
Page 4: Description Of The Appliance
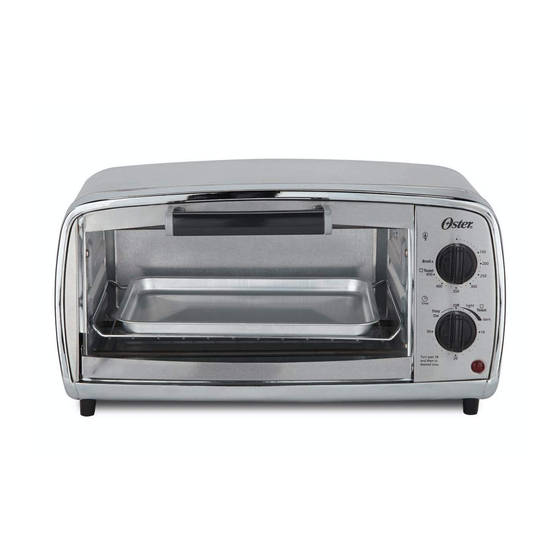
DE S C R IP T I O N O F T H E A P P L IA N C E 1. Temperature Control Dial 2. Toast Setting 3. Broil Setting 4. Toast Color Control / Timer Dial 5. Stay-On Setting 6. -
Page 5: L Ea R N I Ng Abo Ut Yo U R Toa St Er O V En
L EA R N I NG ABO UT YO U R TOA ST ER O V EN 1. Removable Wire Rack – To accommodate a wide variety of foods. 2. Temperature Selector/Function Selector Knob – Adjust the thermostat dial to the desired temperature. - Page 6 OP E R AT I NG IN S T RUC T ION S Your Oster Toaster Oven/Broiler is equipped with all the options of a full-size oven in ® a countertop appliance; toasts, bakes and broils. NOTE: During initial start up you may detect a slight smell and/or smoke. Turn the temperature to max and let run for approximately 5 minutes.
- Page 7 TO USE THE BROIL FUNCTION 1. Place the food on the baking pan and then place the pan on the top of the wire rack in the oven. 2. Close the door to the first notch, leaving approximately a 3-inch gap at the top. This will insure adequate airflow during broiling.
-
Page 8: C L Eani Ng Yo Ur To A St E R O V En
C L EANI NG YO UR TO A ST E R O V EN Before cleaning your Oster Toaster Oven, unplug it and allow it to cool. To clean, wipe ® with damp cloth. DO NOT IMMERSE IN WATER! Make sure to use only mild, soapy water. - Page 9 HELPFUL TIPS/ TROUBLESHOOTING PROBLEM POTENTIAL CAUSE SOLUTION • Overcooked / undercooked foods. • Incorrect temperature or time • You may have to adjust the time and setting. temperature to the desired taste. • Because your oven is smaller than your regular oven, it will heat up faster and generally cook in shorter periods of time.
- Page 10 Pour toute inspection, réparation ou ajustement, n’apporter cet appareil que dans un Centre de Service après-vente agréé Oster ® 5. NE PAS utiliser d’accessoires non recommandés par le fabricant; Ils peuvent provoquer un incendie, une électrocution ou des blessures.
- Page 11 18. Quand vous faites rôtir, veuillez saisir le plateau ou disposer de la graisse chaude avec extrême précaution. 19. Il est possible que la porte et la surface extérieure deviennent brûlantes lorsque l’appareil est en marche. 20. Pour arrêter l’appareil, tourner tous les boutons de contrôle sur la position d’arrêt “O” 21.
- Page 12 S A U VE G A R D E R C ES IN ST RUC T ION S 1. Sélecteur de réglage du Thermostat 2. Réglage Grille-Pain 3. Réglage Rôtisserie 4. Sélecteur Brunissage/Minuterie 5. Réglage Arrêt Manuel 6. Voyant d’Alimentation 7.
- Page 13 A PROPOS DE VOTRE FOUR 1. Grille Amovible – Pour accommoder une grande variété d’aliments. 2. Sélecteur de réglage du Thermostat et de la Fonction – Tourner le sélecteur de réglage du thermostat sur la température désirée. Tourner le bouton pour choisir la fonction de cuisson désirée (Voir schéma No.1) 3.
- Page 14 M O D E D’EM PLOI Votre Mini-Four Grill/Rôtisserie Oster est équipé de toutes les options que possèdent un ® four de dimensions standard mais en four de comptoir; grille-pain, cuisson et rôtisserie. REMARQUE: Pendant la mise en marche initiale, il est possible que vous détectiez une légère odeur et/ou un peu de fumée.
- Page 15 LA FONCTION ROTISSERIE 1. Placer les aliments sur le plateau puis mettre le plateau au four sur le dessus de la grille métallique. 2. Fermer la porte jusqu’au premier cran en laissant un espace d’environ 3 pouces entre le four et la porte. Ceci permettra à l’air de circuler correctement pendant la cuisson. 3.
- Page 16 NETTOYER VOT R E FO U R Avant de nettoyer votre mini-four grill OSTER , le débrancher et le laisser refroidir. ® Pour nettoyer, essuyer avec un chiffon humide. NE PAS LE PLONGER DANS L’EAU! Assurez-vous de n’utiliser que de l’eau douce savonneuse. Des produits nettoyants abrasifs, tampons récurrents et produits chimiques endommagent la superficie propre...
- Page 17 CONSEILS UTILES/ DEPANNAGE PROBLEME CAUSE POSSIBLE SOLUTION • Aliments trop cuits/pas assez cuits. • Réglage incorrect du thermostat ou • Il est probable qu’il faille ajuster le de la minuterie. temps de cuisson et la température • Position de la grille. en fonction de vos gouts.
-
Page 18: Precauciones Importantes
Regrese el artefacto al Centro de Servicio Oster Autorizado más cercano para ®... - Page 19 cubra la bandeja para migas o ninguna parte del horno con papel aluminio o metálico. Esto puede causar el sobrecalentamiento del artefacto. 16. Los alimentos grandes o utensilios metálicos no deben ser introducidos en el horno ya que pueden causar incendios o descargas eléctricas. limpie con esponjas o fibras metálicas.
-
Page 20: D E Sc R I P C I Ó N D E L A Rte Fa C To
D E SC R I P C I Ó N D E L A RTE FA C TO 1. Disco de Control de Temperatura 2. Posición para Tostar 3. Posición para Asar 4. Cronómetro de 15 Minutos / Control del Nivel de Tostado 5. - Page 21 C O N OC I END O S U H O RN O TO STA D OR 1. Rejilla de Alambre Removible – El horno cuenta con una rejilla que puede colocarse en dos posiciones para cocinar una amplia 2. Perilla de Control de Temperatura/ Perilla para Seleccionar la Función - Ajuste el termostato a la temperatura deseada.
- Page 22 U S AN D O S U HORN O TOS TA DOR Su Horno Tostador / Asador Oster está equipado con todas las opciones de un horno ® de tamaño completo; hace tostadas, hornea y asa. NOTA: Durante el uso inicial usted puede detectar un leve olor y/o humo.
- Page 23 UTILIZANDO LA FUNCIóN DE ASAR 1. Ponga los alimentos en la bandeja para hornear y coloque la bandeja encima de la Repisa de Alambre en el horno. Cierre la puerta del horno. 2. Cierre la puerta hasta la primera muesca, dejando aproximadamente un espacio de 3 pulgadas en la parte superior.
- Page 24 L I M PIANDO S U H O R N O TO STA D O R Antes de limpiar su Horno Tostador Oster , desconéctelo y permita que se enfríe. Limpie ® con un paño suave y húmedo. ¡NO LO SUMERJA EN AGUA! Asegúrese de usar solamente jabón suave y agua.
- Page 25 PROBLEMAS Y SOLUCIONES PROBLEMA CAUSA POTENCIAL SOLUCION • Cocción excesiva o insuficiente de • Temperatura o tiempo incorrectos. • Usted puede ajustar el cronómetro y la temperatura al gusto. los alimentos. • Porque su horno es más • Posición de la rejilla. pequeño que su horno regular, entonces se calentará...
-
Page 26: Precauções Importantes
4. NÃO use este ou qualquer outro aparelho se o fio ou o plugue estiverem danificados, ou se o aparelho estiver apresentando falhas, se tiver caído ou estiver danificado. Leve este aparelho somente no Centro de Serviço Autorizado Oster ®... - Page 27 18. Quando grelhar, tomo muito cuidado ao retirar a bandeja ou ao jogar fora a gordura quente. 19. A porta e a superfície externa poderão estar quentes quando o aparelho estiver sendo usado. 20. Desligue o aparelho, coloque todos os controles na posição de desligado “O”. 21.
-
Page 28: Descrição Do Aparelho
DE SC R I Ç Ã O D O A PA R E LH O 1. Botão de controle da temperatura 2. Ajuste para tostar 3. Ajuste para grelhar 4. Controle da intensidade de tostado/ Botão do timer 5. Ajuste para manter ligado 6. - Page 29 C O NH E CE ND O SEU FORN O 1. Grade removível - Possibilita colocar uma grande variedade de alimentos. 2. Botão da temperatura/ para selecionar as funções - Ajuste o botão para selecionar a temperatura desejada. Gire o botão para selecionar a função desejada. (veja a figura 1) 3.
-
Page 30: I N S Tr U Ç Õ E S De U So
I N S TR U Ç Õ E S DE U SO Seu forno tostador Oster inclui todas as funções de um forno tostador grande; tosta, ® assa e grelha. OBSERVAÇÃO: Durante o primeiro uso talvez sinta um leve odor a queimado. - Page 31 USANDO A FUNÇÃO PARA GRELHAR 1. Coloque os alimentos na bandeja para assar e em seguida coloque a bandeja em cima da grade no forno. 2. Feche a porta somente até a primeira trava, deixando-a aberta aproximadamente 8 cm (3 polegadas) da parte superior. Isso irá garantir que entre um fluxo adequado de ar enquanto estiver grelhando.
- Page 32 L IMPAND O SE U FO R N O Antes de limpar seu forno OSTER , desligue-o da tomada e deixe-o esfriar bem. Para ® limpar, use um pano levemente umedecido. NÃO SUBMERGIR NA ÁGUA! Certifique-se de usar apenas água ensaboada. Produtos de limpeza abrasivos e esponjas grossas danificarão a superfície do aparelho.
- Page 33 DICAS/ SOLUÇÃO DE PROBLEMAS PROBLEMA POSSÍVEL CAUSA SOLUÇÃO • Alimentos cozidos demais ou pouco • A temperatura selecionada está • Você poderá ter que ajustar o tempo cozidos. incorreta. e a temperatura de acordo com sua • Posicionamento da grade. preferência.
- Page 34 La siguiente información es para México solamente. A informação a seguir é somente para o México. ® HORNO TOSTADOR OSTER MODELOS: TSSTTVVGS1, TSSTTVVGS1-013 LEA EL INSTRUCTIVO ANTES DE USAR EL APARATO LA SIGUIENTE INFORMACIÓN ES PARA MÉXICO: IMPORTADOR: SUNBEAM MEXICANA, S.A. DE C.V.
Need help?
Do you have a question about the TSSTTVVGS1 and is the answer not in the manual?
Questions and answers