
Related Manuals for Makita XPG01


Summary of Contents for Makita XPG01
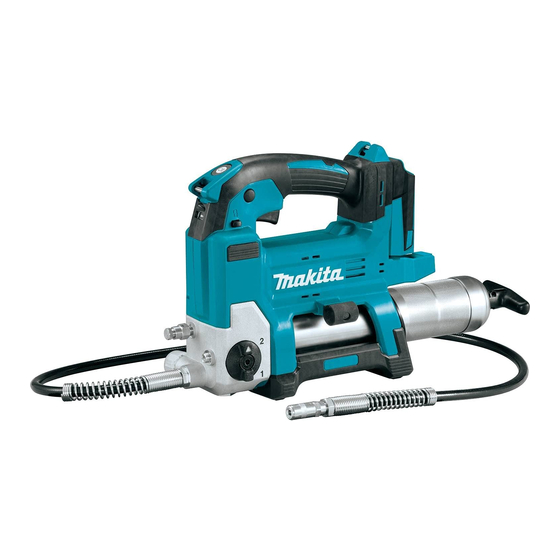
- Page 1 INSTRUCTION MANUAL MANUAL DE INSTRUCCIONES Cordless Grease Gun Pistola Engrasadora Inalámbrica XPG01 IMPORTANT: Read Before Using. IMPORTANTE: Lea antes de usar.
-
Page 2: Specifications
ENGLISH (Original instructions) SPECIFICATIONS Model: XPG01 Rated voltage D.C. 18 V Grease capacity (with A-type barrel) Cartridge 410 g (14.5 oz) Bulk 455 g (16.0 oz) Grease capacity (with B-type barrel) Cartridge 450 g (15.9 oz) Bulk 570 g (20.1 oz) - Page 3 When operating a power tool outdoors, use an Disconnect the plug from the power source extension cord suitable for outdoor use. Use of a cord and/or remove the battery pack, if detachable, from the power tool before making any adjust- suitable for outdoor use reduces the risk of electric shock.
- Page 4 13. Do not point the adapter at anyone in the vicinity. observe possibly more detailed national regulations. 14. Use the flexible hose only specified by Makita. Tape or mask off open contacts and pack up the Use of any other hose might present a risk of injury.
-
Page 5: Parts Description
It will also void the Makita warranty for the Makita tool and Charge the battery cartridge if you do not use charger. -
Page 6: Functional Description
Overheat protection FUNCTIONAL DESCRIPTION When the tool or battery is overheated, the tool stops automatically and the lamp blinks. In this case, let the CAUTION: Always be sure that the tool is tool and battery cool before turning the tool on again. switched off and the battery cartridge is removed Overdischarge protection before adjusting or checking function on the tool. -
Page 7: Selecting The Speed Mode
Switch action Selecting the speed mode NOTICE: Change the speed mode only after the CAUTION: Before installing the battery cartridge into tool comes to a complete stop. the tool, always check to see that the switch trigger actuates properly and returns to the "OFF" position when released. The tool employs the speed mode changing knob. -
Page 8: Hose Holder
To lock the rod handle fully pulled, pull the rod handle ASSEMBLY until the groove on the rod can be seen, and then hook the groove onto the slot. To unlock the rod handle, unhook the groove so the rod moves forward. CAUTION: Always be sure that the tool is switched off and the battery cartridge is removed... -
Page 9: Shoulder Strap
Remove the barrel from the tool then fully pull the Shoulder strap rod handle and lock it. Remove the plastic cap of the grease cartridge WARNING: Never use the strap hole for lan- and insert the grease cartridge into the barrel. yard (tether strap). - Page 10 Filling grease in the barrel from a bulk You can also fill grease into the barrel using a filler pump (commercially-bought) attached to the bulk container (commercially-bought) container. Remove the barrel from the tool. Remove the filler port plug. Attach a loader fitting (commercially-bought) to the filler port.
-
Page 11: Maintenance
To maintain product SAFETY and RELIABILITY, of the grease may decline. repairs, any other maintenance or adjustment should be performed by Makita Authorized or Factory Service NOTE: The tool has been tested at the factory and Centers, always using Makita replacement parts. -
Page 12: Optional Accessories
OPTIONAL ACCESSORIES CAUTION: These accessories or attachments are recommended for use with your Makita tool specified in this manual. The use of any other accessories or attachments might present a risk of injury to persons. Only use accessory or attachment... - Page 13 Install B-type barrel. Cartridge barrel You can see the grease cartridge through the hole on the cartridge barrel. ► 1. Joint 2. Rubber packing 3. Tab 4. Groove When using the cartridge barrel, transfer the piston 5. Screw parts from the corresponding barrel to the cartridge barrel.
-
Page 14: Angle Adapter
United States of America: www.makitatools.com Canada: www.makita.ca Other countries: www.makita.com ► 1. Lever 2. Lock on adapter To assemble the lock on adapter, refer to the section for replacing of the adapter. 14 ENGLISH... -
Page 15: Especificaciones
ESPAÑOL (Instrucciones originales) ESPECIFICACIONES Modelo: XPG01 Tensión nominal 18 V c.c. Capacidad de almacenamiento Cartucho 410 g (14,5 oz) de grasa (con depósito tipo A) A granel 455 g (16,0 oz) Capacidad de almacenamiento Cartucho 450 g (15,9 oz) de grasa (con depósito tipo B) - Page 16 Seguridad eléctrica Retire cualquier llave de ajuste o llave de apriete antes de encender la herramienta. Una Las clavijas de conexión de las herramientas llave de ajuste o llave de apriete que haya sido eléctricas deberán encajar perfectamente en la dejada puesta en una parte giratoria de la herra- toma de corriente.
- Page 17 130 °C podría causar una explosión. 14. Utilice la manguera flexible especificada por Siga todas las instrucciones para la carga y Makita únicamente. El uso de cualquier otra evite cargar la herramienta o la batería fuera manguera podría generar un riesgo de lesión.
- Page 18 Asimismo, esto inva- No clave, corte, aplaste, lance o deje caer el lidará la garantía de Makita para la herramienta y el cartucho de batería, ni golpee un objeto sólido cargador Makita.
-
Page 19: Descripción De Las Piezas
Consejos para alargar al máximo Cargue el cartucho de batería a una tempera- tura ambiente de 10 °C - 40 °C (50 °F - 104 °F). la vida útil de la batería Si un cartucho de batería está caliente, déjelo enfriar antes de cargarlo. -
Page 20: Descripción Del Funcionamiento
Sistema de protección para la DESCRIPCIÓN DEL herramienta/batería FUNCIONAMIENTO La herramienta está equipada con un sistema de pro- tección de la herramienta/batería. Este sistema corta PRECAUCIÓN: Asegúrese siempre de que la en forma automática el suministro de energía al motor herramienta esté... - Page 21 Luces indicadoras Capacidad restante Iluminadas Apagadas Parpadeando 75% a 100% 50% a 75% 25% a 50% 0% a 25% Cargar la batería. ► 1. Gatillo interruptor 2. Botón de bloqueo 3. Botón La batería de bloqueo del gatillo pudo haber funcionado Iluminación de la luz delantera mal.
-
Page 22: Montaje
Selección del modo de velocidad MONTAJE AVISO: Cambie el modo de velocidad única- PRECAUCIÓN: Asegúrese siempre de que la mente después de que la herramienta se haya herramienta esté apagada y el cartucho de batería detenido por completo. haya sido extraído antes de realizar cualquier La herramienta emplea la perilla de cambio de modo de trabajo en la misma. -
Page 23: Operación
Para bloquear el mango de la barra jalado por com- Correa para hombro pleto, tire del mango de la barra hasta que se vea la ranura de la barra, y luego enganche la ranura en la ADVERTENCIA: hendidura. Para desbloquear el mango de la barra, Nunca utilice el orificio para desenganche la ranura para que la barra se mueva la correa como cordel de seguridad (correa de... - Page 24 Existen las siguientes formas de suministrar grasa: Libere el mango de la barra. Instalación del cartucho de grasa (comprado comercialmente) en el depósito AVISO: (Para depósito tipo A solamente) Utilice el cartucho de grasa, cuyo reborde puede engancharse sobre la superficie de extremo del depósito.
- Page 25 Expulse el aire que quede en la trayectoria de flujo Ponga a funcionar la bomba de suministro. La de la grasa. (Consulte la sección para expulsión barra del mango de la barra se empujará hacia de aire.) afuera conforme el depósito se va llenando con grasa.
-
Page 26: Mantenimiento
AVISO: Antes de conectar el adaptador a la de servicio autorizados o de fábrica Makita, empleando boquilla de engrase, siempre asegúrese de que la siempre repuestos Makita. herramienta surta la grasa correctamente. -
Page 27: Accesorios Opcionales
OPCIONALES PRECAUCIÓN: Estos accesorios o aditamen- tos están recomendados para utilizarse con su herramienta Makita especificada en este manual. PRECAUCIÓN: Reemplace el anillo de goma El empleo de cualquier otro accesorio o aditamento unido a la parte de conexión de la nueva man- puede conllevar el riesgo de lesiones personales. - Page 28 Instale el depósito tipo B. Depósito del cartucho Usted puede ver el cartucho de grasa a través del orificio en el depósito del cartucho. ► 1. Junta 2. Empaque de goma 3. Lengüeta Cuando utilice el depósito del cartucho, transfiera las 4.
- Page 29 Estados Unidos de América: www.makitatools.com Canadá: www.makita.ca Otros países: www.makita.com ► 1. Palanca 2. Adaptador de bloqueo Para ensamblar el adaptador de bloqueo, consulte la sección para reemplazo del adaptador.
- Page 32 Para reducir la exposición a estos productos químicos: trabaje en un área bien ventilada y póngase el equipo de seguridad indicado, tal como las máscaras contra polvo que están especialmente diseñadas para filtrar partículas microscópicas. Makita Corporation 3-11-8, Sumiyoshi-cho, Anjo, Aichi 446-8502 Japan 885731-947...
Need help?
Do you have a question about the XPG01 and is the answer not in the manual?
Questions and answers