Table of Contents
Advertisement
Quick Links
Advertisement
Table of Contents

Summary of Contents for True XFW8300
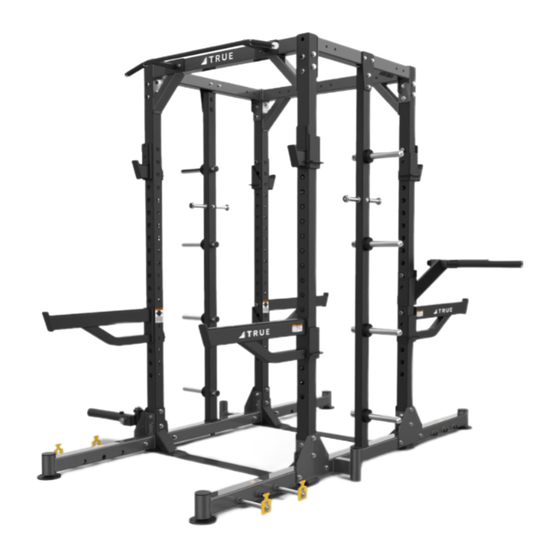
- Page 1 XFW8300 Dual Sided Half Rack OWNER’S MANUAL Model # XFW8300 Revision 091418...
- Page 2 ESSAGE TO USTOMERS Thank you for purchasing products from the TRUE XFW line. Because of the many unique features included in these machines, this manual was created to provide you with information on how to properly install and maintain your equipment. Proper maintenance will ensure that your new equipment will last for years.
-
Page 3: Table Of Contents
EIGHTS & D ................PTIONS IMENSIONS ......................SSEMBLY ....................PTION ....................PTION ..................LATE OLDER PTION ..................... PTION ................... NCHORING TO THE LOOR & S ..................INAL HECK ERVICE & W ..............NTENDED ARNING ABELS TRUE L ................. IMITED ARRANTY... -
Page 4: Safety
9. If the machine appears damaged or inoperable, contact a facility staff member to place an “OUT OF ORDER, DO NOT USE” sign on the machine until it is repaired. Only use TRUE supplied replacement components to service this machine. - Page 5 3. Install this piece of equipment on a solid level surface that does not deviate more then 1/8” over a 10’ distance (or as defined and required by local building and architectural codes. 4. TRUE strongly recommends that all equipment be anchored to the floor to prevent movement and increase stability.
- Page 6 • Frames and Lifting Arms: Inspect weekly for integrity and function. Replace any component at first signs of wear. Use only TRUE supplied components. 4. Replace any warning label at first sign of wear. Labels and the Facility Safety Sign may be obtained from TRUE free of charge.
-
Page 7: General Care And Maintenance
13. Be sure all hardware is tight before using the machine. Retain these instructions for future reference. If you have any questions, do not hesitate to contact your TRUE dealer or TRUE Fitness Technology at (800)883-8783 or service@truefitness.com. -
Page 8: Machine Dimensions & Weights
IMENSIONS AND EIGHTS Assembled Weight (no options as shown to the right): 547 lbs (157 kg) Maximum Load Capacity = 765 LBS. (347 KG.) Tools Required: 9/16” & 3/4” socket Ratchet Handle 9/16” & 3/4” box/open end wrench Hammer... -
Page 9: Rack Options & Dimensions
& D PTIONS IMENSIONS OP VIEW SHOWING PLATE HOLDER OPTION Core Trainer Center Catch Rails... -
Page 10: Assembly
1: B SSEMBLY C766, WASHER AND LOOSELY ASSEMBLE THE FRAME AS SHOWN. DO NOT FULLY TIGHTEN HARDWARE IN THIS STEP. - Page 11 1: B SSEMBLY...
- Page 12 2: U PPER RAME SSEMBLY 17 C766 WASHER AND...
- Page 13 2: U PPER RAME SSEMBLY Completely assemble the frame as shown, keeping the hardware loose until the entire frame is assembled. Incrementally tighten the hardware in several passes around the machine. DO NOT insert and fully tighten hardware at one junction, then proceed to the next.
- Page 14 3: A SSEMBLE ATCH OOKS After verifying that all hardware is tight, assemble the catch hooks. Check to see if all four leveler feet are in contact with the ground and that the unit is stable. The levelers can be adjusted to contact the ground by rotating them in or out. ADJUST EACH LEVELER AS REQUIRED.
-
Page 15: Chin Bar Option
PTION 3 3/ Note: The olympic bar holder can be placed on either the outer left/right or inner left/right of the base frame. -
Page 16: Band Peg Option
PTION XFW83-BPG... -
Page 17: Plate Holder Option
LATE OLDER PTION... -
Page 18: Land Mine Option
RAINER Remove an existing gusset plate from the base of any of the columns. Install the land mine attachment using the same hardware. CRT CORE TRAINER... - Page 19 USPENSION RACKET PTION XFW83-SUS ITEM NO. PART NUMBER DESCRIPTION QTY. XFW83-SB000 SUSPENSION BRACKET WASHER, FLAT, 3/8" SAE, C-754C HH SCREW, 3/8"-16, 3- C-457 3/4" LOCK NUT, 3/8"-16, NYL C-766A INS JAM NUT DETAIL J...
-
Page 20: Anchoring To The Floor
NCHORING TO THE LOOR Shown below are the provisions in the frame for anchoring the machine to the floor. TRUE strongly recommends that all equipment be anchored to the floor to prevent movement and increase stability. • Due to the wide variation of flooring on which the unit can be installed, contact a qualified contractor to determine an appropriate fastening system for your floor. -
Page 21: Intended Use & Warning Labels
& W NTENDED ARNING ABELS INTENDED USE 1. This unit is intended to support Olympic bars in multiple positions facilitating press, squat, row or dead lift exercises. 2. Stop catches must be used when performing squat or pressing movements. Adjust their position based on the exercise, user size and range desired. -
Page 22: True Limited Warranty
B T A I N E R V I C E For warranty service, contact an Authorized TRUE Dealer or a TRUE Customer Service representative at 1-800-883-8783 You can also email us at service@truefitness.com. Before you call, please have the following information ready: •... - Page 23 Hours of operation 8:30am - 5:00 pm CST workmanship for a 10 years. The frame is warranted for labor and freight (for parts shipped from TRUE) for one year from date of purchase. * This limited warranty on structural frame does not include paint or coatings.
- Page 24 DAMAGES, SO THE ABOVE LIMITATION OR EXCLUSION MAY NOT APPLY TO YOU. TRUE within 30 days of purchaser’s receipt of this Product. The serial number must be intact on the Product for this Limited Warranty to be valid.
- Page 25 If you prefer to mail your warranty card, have the owner of the product complete the information below and return it to TRUE Fitness within 30 days from the date of equipment installation.


Need help?
Do you have a question about the XFW8300 and is the answer not in the manual?
Questions and answers