
Related Manuals for Slayer STEAM X


Summary of Contents for Slayer STEAM X
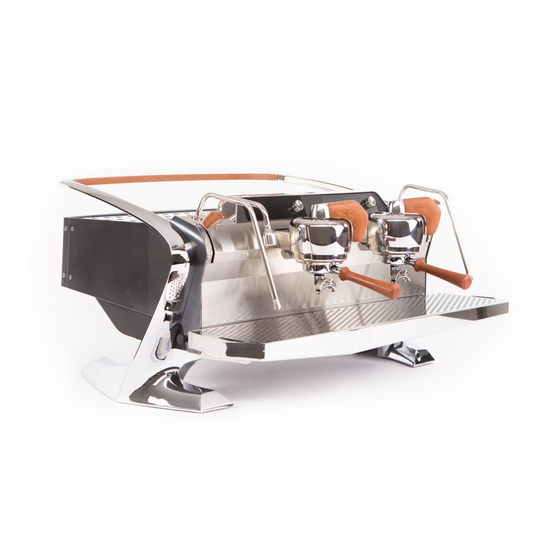
- Page 1 USER MANUAL VERSION 1.1 SEPTEMBER 2019 SLAYER STEAM X USER MANUAL V1.1 | SEPTEMBER 2019...
- Page 2 Information contained herein is subject to change without notice. Every precaution has been taken in the preparation of this manual; nevertheless, Slayer assumes no responsibility for errors or omissions or any damages resulting from the use of this information.
-
Page 3: Table Of Contents
TABLE OF CONTENTS Slayer Steam X Prepare Espresso Copyright Information Steam Milk Table of Contents Machine Calibrations Welcome Advanced Menu Resources CL E AN IN G & PREVE N TATIVE MAI NT EN AN CE Warranty Information Clean the Machine Exterior... - Page 4 Make Coffee Better™. Expanding the Slayer portfolio of professional equipment, we now turn to the milk-dominating world of high-volume coffee business with the same inventive approach that we first took to espresso. SLAYER STEAM X USER MANUAL V1.1 | SEPTEMBER 2019...
- Page 5 +1 (206) 284-7171 EXT. 2 T RA I NI NG & E DU CATI O N S HIPPI NG training@slayerespresso.com shipping@slayerespresso.com +1 (206) 284-7171 EXT. 5006 +1 (206) 284-7171 EXT. 4 SLAYER STEAM X USER MANUAL V1.1 | SEPTEMBER 2019...
- Page 6 Warranty coverage does not include parts that are subject to normal wear merchantability, and fitness for a particular purpose. and tear, as determined by Slayer. These include, but are not limited to, Warranty claims must be authorized by a Slayer Support representative shower screens, portafilter gaskets, expansion or anti-suction valves, and prior to repair or remedial action.
- Page 7 Using your machine outside of its defined with water suitable for human consumption (according to local laws functionality – as it is described in the “Using Slayer” section on pg. 17 of in force) this guide – may be a safety hazard, resulting in property damage, physical injury, or even death, and will immediately void the warranty.
- Page 8 “softness” of water. The desirable range of hardness is 4-5 grains. Over time, calcium carbonate accumulates as a hard substance, called All Slayer espresso machines need to be connected to a carbon water “scale”, and will inhibit the flow of water. Machines subjected to “harder”...
-
Page 9: Recommended Tools & Accessories
Pick or awl • Pliers • 9/16 inch socket wrench • Adjustable wrench • Slayer Espresso Machine Cleaner • Steam wand cleaner • Non-abrasive surface cleaner • Slayer Lubricant • Teflon tape SLAYER STEAM X USER MANUAL V1.1 | SEPTEMBER 2019... -
Page 10: Installation
INSTALLATION Only qualified service personnel should install Slayer espresso machines. For a list of certified Slayer technicians near you please contact our support department. Incorrect installation may result in injury and/or damage to the equipment. Please read the “Safety Advisory” on pg. 7 before beginning installation. -
Page 11: Step 1: Prepare Site
Read “Water Treatment Requirements” on pg. 8 for information about avoiding and addressing water-related issues. Your Slayer Steam machine needs to be installed on a structure that is capable of supporting its weight, including the weight of the water, once... -
Page 12: Step 2: Unpack Equipment
STEP 2: UNPACK EQUIPMENT 5. Remove hook and loop strap from the machine body. To protect the Your Slayer Steam X machine will arrive in a lidded wooden crate, bolted machine during installation, keep all other packing material in place. -
Page 13: Step 3: Connect Plumbing
STEP 3: CONNECT PLUMBING P R O C E D U R E Your Slayer Steam X machine will arrive with two (2) plumbing lines and two (2) drain hoses attached. One (1) additional plumbing line 1. Install your water treatment system according to the instructions will arrive inside of the accessories box. -
Page 14: Step 4: Connect Power
STEP 4: CONNECT POWER P R O C E D U R E Your Slayer Steam X machine will ship with the power configuration requested at the time of purchase. In most cases, this will include a 1. Ensure that both steam actuators are in the “off” position and the plug end on the power cord. -
Page 15: Step 5, 6: Fill Tanks And Turn On Elements
7. Activate the electronics by pressing any one of the jog wheels on the Barista Dashboard. Power DO NOT move the steam actuators to the “on” position. DO NOT engage the white heating element breaker. Breaker SLAYER STEAM X USER MANUAL V1.1 | SEPTEMBER 2019... -
Page 16: Using Slayer Steam Lp
These innovations will promote efficiency, accuracy, and comfort on every bar where Slayer Steam X is found. Whether this is your first espresso machine or the latest in a long career, our instructions should serve as a helpful baseline for getting the most out of Steam X. -
Page 17: Espresso Basics
– produces coffee with distinct characteristics that espresso prepared from dark-roasted coffee will more closely resemble contribute to discernible differences in beverage flavor. Slayer Steam is the characteristics of caramel, dark chocolate and nutty flavors. In some... - Page 18 Larger coffee dose (more weight): Recommended when espresso tastes bitter. • Increased flavor intensity To adjust the brew temperature, see instructions under Using Slayer > Adjust Brew Temperature on pg. 28. • Longer extraction time Recommended when espresso tastes sour, feels thin, extracts WATE R PRE SSURE quickly, or has no crema.
- Page 19 No one knows your coffee better than your roaster and in some cases you are still the best maestro for conducting great cup experiences. As a baseline Slayer recommends using a scale or graduated shot glasses to measure 25-40 grams or 1.0-1.5 fluid ounces of espresso per serving.
-
Page 20: Factory Settings
S L AY E R S T E A M X FA C T O R Y S E T T I N G S Brew Tank Temperature 93° C (200° F) Brew Pump Pressure 9 bar Steam X Tank Pressure 1.4 bar Volumetrics Dose 1/Dose 2 30/ 60 SLAYER STEAM X USER MANUAL V1.1 | SEPTEMBER 2019... -
Page 21: The Barista Dashboard
The Barista Dashboard™ Slayer Steam X is equipped with a digital interface that displays • Brew weight (“WT”) for the previous extraction, measured by the essential functions of the machine. Through the Barista a flow meter and displayed in tenth-gram (0.1-gram) increments. - Page 22 Maximum setting: 97° C (206° F) Do not interact with the Advanced Menu before reading this Adjustable in tenth-degree (0.1-degree) increments manual in its entirety. Then – if unsure – consult your Slayer Option 2: Brew representative, reseller, or qualified service personnel.
- Page 23 All systems begin heating for normal operation thirty (30) minutes before power-save is scheduled “OFF” To configure the power-save program, see instructions under Using Slayer > Other Menu Actions on page #31. SLAYER STEAM X USER MANUAL V1.1 | SEPTEMBER 2019...
-
Page 24: Prepare Espresso
PREPARE ESPRESSO P R O C E D U R E Slayer Steam X utilizes a classic “9-bar” extraction method to produce espresso in a system with custom gicleurs and precision 1. Remove the portafilter from the grouphead and wipe the basket with a dry towel. -
Page 25: Steam Milk
STEAM MILK Slayer Steam X Actuator has three positions. Move the lever up to P R O C E D U R E purge out the steam wand of built up condensation or the post steam purge to push out any steam wand milk residue. OFF is the resting 1. -
Page 26: Use Hot Water Tap
Slayer Steam X features an adjustable-height drain tray with four (4) distinct positions. Slayer Steam X features a blended hot water valve that draws from the steam tank and main cold water line. The hot water tap is located on the left side of the machine, adjacent to the steam wand. -
Page 27: Adjust Brew Pump Pressure
Note: When using a scale to measure output, if the weight in the glass does not match the adjusted shot volume, you may need to calibrate your flow meters. To calibrate your flow meter, see instructions on page #23. SLAYER STEAM X USER MANUAL V1.1 | SEPTEMBER 2019... -
Page 28: Adjust Brew Tank Temperature
To configure a different temperature for each brew tank, repeat steps 1-7 at each grouphead. Protip: To quick exit the program menu move the actuator Left/Right to Save and Exit the menu. SLAYER STEAM X USER MANUAL V1.1 | SEPTEMBER 2019... -
Page 29: Adjust Hot Water Dose
ADJUST HOT WATER TEMPERATURE Slayer Steam X utilizes a timer to dispense pre-configured Slayer Steam X features a blending valve that draws water from the volumes of hot water. Adjust the hot water dose with the steam tank and main cold water line simultaneously. Custom water following steps. -
Page 30: Other Menu Options
5. Press and release the jog wheel to confirm your new settings and return to the menu for additional adjustments OR move the brew actuator Left to Right to save and exit the Advanced Menu. SLAYER STEAM X USER MANUAL V1.1 | SEPTEMBER 2019... - Page 31 4. Rotate the jog wheel to adjust the “on at” setting for the for the leftmost grouphead in tenth-degree (0.1-degree) weekday schedule to Fahrenheit increments: clockwise rotations increase the offset value; counter-clockwise rotations decrease the offset value. SLAYER STEAM X USER MANUAL V1.1 | SEPTEMBER 2019...
- Page 32 5. Press and release the jog wheel to cofirm your language and return to the menu for additional adjustments OR move the brew actuator Left to Right to save and exit the Advanced Menu. SLAYER STEAM X USER MANUAL V1.1 | SEPTEMBER 2019...
- Page 33 The frequency CONTENTS Clean Your Machine Clean the Steam Wands General Grouphead Care Backflush the Groupheads Backflush the Groupheads, continued Fast Clean SLAYER STEAM X USER MANUAL V1.1 | SEPTEMBER 2019...
- Page 34 “purge” position. If clogging occurs, soak the steam wand in hot water for several minutes, then purge while submerged. For tough clogs, use an approved espresso machine steam wand cleaning solution. SLAYER STEAM X USER MANUAL V1.1 | SEPTEMBER 2019...
- Page 35 • 1-liter (or larger) heat-tolerant container installed. • Soft, clean towel 5. Rinse the portafilter with hot water, then insert the portafilter basket and lock it in the grouphead. SLAYER STEAM X USER MANUAL V1.1 | SEPTEMBER 2019...
- Page 36 A countdown will begin at the grouphead(s) running the cleaning program. The cleaning program is complete when a buzz sounds and the shot light pulses. 12. Follow the prompt on the screen to remove the portafilter(s) from the SLAYER STEAM X USER MANUAL V1.1 | SEPTEMBER 2019...
- Page 37 6. Press and release the jog wheel to select and initiate Fast Clean. 7. Follow the prompt on the screen to remove the portafilter from the grouphead, then press and release the jog wheel to continue. SLAYER STEAM X USER MANUAL V1.1 | SEPTEMBER 2019...
- Page 38 Only qualified service personnel should repair Slayer Espresso machines. Incorrect repair may result in injury and/ or damage to the equipment. Please consult your distributor for a qualified Slayer service technician.
-
Page 39: Brew Group Head Components
BREW GROUP HEAD COMPONENTS SLAYER STEAM X USER MANUAL V1.1 | SEPTEMBER 2019... - Page 40 Thermistor, Steam - 3K3 NTC 10000-16161 Stem for Brew Actuator, V3 46000-50240 Belleville Disc Spring for Valve Assembly, Stainless 10000-16200 Bushing, Oilite 46000-53070 Gasket for Steam Valve Brew Actuator, 27mm, Teflon SLAYER STEAM X USER MANUAL V1.1 | SEPTEMBER 2019...
-
Page 41: Brew Tank Components
BREW TANK COMPONENTS SLAYER STEAM X USER MANUAL V1.1 | SEPTEMBER 2019... - Page 42 Fitting, 90 Deg Elbow for 1/4" Tube OD x 1/8" NPTF - M, Brass 44005-10012 18-8 Stainless Steel Socket Head Screw M6 x 1 mm Thread, 12 mm Long 44000-36110 Lock Washer, Tank Mount 46000-53040 Washer, Flat, M7 Screw Size, 14mm OD, 1.4mm-1.8mm Thick SLAYER STEAM X USER MANUAL V1.1 | SEPTEMBER 2019...
-
Page 43: Steam Tank Components
STEAM TANK COMPONENTS SLAYER STEAM X USER MANUAL V1.1 | SEPTEMBER 2019... - Page 44 Gasket, Element, Teflon 30000-20090 Element, Steam, 3500 Watt, 220V, 2 Group 30000-20100 Element, Steam, 4500 Watt, 220V, 3 Group 30000-20261 Thermostat, 25A, 145C, Steam tank 44000-10030 Washer, Aluminum, 0.174" ID, 0.375" OD SLAYER STEAM X USER MANUAL V1.1 | SEPTEMBER 2019...
-
Page 45: Steam Wand Components
STEAM WAND COMPONENTS SLAYER STEAM X USER MANUAL V1.1 | SEPTEMBER 2019... - Page 46 Plug, JIS, Female, 1/8", for 3-Way Valve 46000-53050 O-Ring for Peek Steam Valve Bushing 30000-20152 Steam X, 3 Way Solenoid, 24VDC COIL, 1/4" NPT 42000-34680 Fitting, Easy-Align, Compression Tube, Elbow for 5/16" Tube OD x 1/4 - M Pipe, Brass 46005-53010...
-
Page 47: Steam Actuator Components - Right/Left
STEAM ACTUATOR COMPONENTS - RIGHT/LEFT SLAYER STEAM X USER MANUAL V1.1 | SEPTEMBER 2019... - Page 48 Magnetic Switch Mount 44005-10350 18-8 External-Tooth Lock Washer for M4 Screw 44005-10340 18-8 Phillips Rounded Head Screws M4 x 0.7 mm Thread 10 mm Long 30005-20031 Barrel Switch w/ Molex, N/C SLAYER STEAM X USER MANUAL V1.1 | SEPTEMBER 2019...
-
Page 49: Hot Water Wand Components
HOT WATER WAND COMPONENTS SLAYER STEAM X USER MANUAL V1.1 | SEPTEMBER 2019... - Page 50 Washer, Flat, M7 Screw Size, 14mm OD, 1.4mm-1.8mm Thick 46005-53060 Bushing, 15 X 10.5mm Peek Plastic 46005-53110 Steam Seal, Peek Plastic 10005-10002 Steam, Wand Socket 10005-10008 Steam and Hot Water Lock Nut SLAYER STEAM X USER MANUAL V1.1 | SEPTEMBER 2019...
-
Page 51: Drain Circuit
DRAIN CIRCUIT SLAYER STEAM X USER MANUAL V1.1 | SEPTEMBER 2019... - Page 52 Drain Manifold, Steam, 3 Group 40000-32060 Worm-Drive Hose Clamp, Non Slip Screw 1/2" to 1-1/16" Clamp Diameter Range, 9/16" Band Width 40000-32170 3-A Sanitary Clear PVC Vacuum Tubing 5/8" ID, 7/8" OD, 1/8" Wall Thickness SLAYER STEAM X USER MANUAL V1.1 | SEPTEMBER 2019...
-
Page 53: Water Fill Circuit
WATER FILL CIRCUIT SLAYER STEAM X USER MANUAL V1.1 | SEPTEMBER 2019... - Page 54 Solenoid Valve, 2-Way, 1/8" NPT, 2.5mm, 24v Steam Tank Fill 40005-32040 Steam Fill Tube, Long 42000-10010 Extension, Fitting, 3/8" 42004-34500 Fitting, Medium-Pressure, Threaded Pipe, 3/8 Pipe Size, M x F Elbow, Brass 46005-34620 Check Valve, 3/8" NPT, Slayer Steam SLAYER STEAM X USER MANUAL V1.1 | SEPTEMBER 2019...
-
Page 55: Steam Circuit
STEAM CIRCUIT SLAYER STEAM X USER MANUAL V1.1 | SEPTEMBER 2019... - Page 56 PRV Manifold, Steam 40015-32002 Honeywell Pressure Transducer Tube 44000-36220 Fitting, 45 Degree, Flared, Short Nut for 1/4" Tube OD, Brass 99005-17000 Steam Transducer Assembly 40005-32220 Right Steam Out Tube, Steam X SLAYER STEAM X USER MANUAL V1.1 | SEPTEMBER 2019...
-
Page 57: Hot Water Circuit
HOT WATER CIRCUIT SLAYER STEAM X USER MANUAL V1.1 | SEPTEMBER 2019... - Page 58 Hot Water Assembly, Steam 40005-32120 Ball Valve to Drain Tube 99005-34670 Cold Mix Water Inlet Assembly 44000-36220 Fitting, 45 Degree, Flared, Short Nut for 1/4" Tube OD, Brass 40005-10016 Outlet Tube, Mixed Water SLAYER STEAM X USER MANUAL V1.1 | SEPTEMBER 2019...
-
Page 59: Display Components
DISPLAY COMPONENTS SLAYER STEAM X USER MANUAL V1.1 | SEPTEMBER 2019... - Page 60 Button Ring, Lower, Steam 13005-20052 Display Cover, Upper Panel, Steam, 2 Group 13005-30052 Display Cover, Upper Panel, Steam, 3 Group 44005-10211 Screw, Flat Head Phillips, M4 Size, 8mm Length, .7mm Pitch, Stainless SLAYER STEAM X USER MANUAL V1.1 | SEPTEMBER 2019...
-
Page 61: E L Ec Tro N Ic S Pa Ne L Co Mp O N E Nts
ELECTRONIC PANEL COMPONENTS SLAYER STEAM X USER MANUAL V1.1 | SEPTEMBER 2019... - Page 62 Electrical Shield, Assembly, Steam, 3 Group 30005-10080 Main Brain, Slayer Steam 44005-10370 Rounded Head Screws M4 x 0.7 mm 16 mm Long 44005-10390 Screw, M3-0.5x8.0, PHMS, Phillips,18-8 30000-20050 Solid State Relay, 40 Amp SLAYER STEAM X USER MANUAL V1.1 | SEPTEMBER 2019...
-
Page 63: Portafilters
PORTAFILTERS SLAYER STEAM X USER MANUAL V1.1 | SEPTEMBER 2019... - Page 64 SLAYER CLEANER NOT SHOWN IN IMAGE CO MP LE TE P ORTA F I LTE R S 86005-50000 Duratex Naked Portafilter 86005-50001 Duratex Single Spouted Portafilter 86005-50002 Duratex Double Spouted Portafilter SLAYER STEAM X USER MANUAL V1.1 | SEPTEMBER 2019...
-
Page 65: Pump Components & Lines
PUMP COMPONENTS & LINES SLAYER STEAM X USER MANUAL V1.1 | SEPTEMBER 2019... - Page 66 Reducer, 3/8" - M x 1/8" - F 46000-50320 Brew Gauge, 20BAR Custom Printed Slayer Logo 42000-10010 Extension, Fitting, 3/8" 42000-10030 Tee Fitting, 3/8 M/M/M 40005-10010 Stainless Steel Hose, 3/8" Fc x CFc 2000mm 30000-58030 Pump, 45 GPH SLAYER STEAM X USER MANUAL V1.1 | SEPTEMBER 2019...
-
Page 67: Drip Trays & Cup Trays
DRIP TRAYS & CUP TRAYS SLAYER STEAM X USER MANUAL V1.1 | SEPTEMBER 2019... - Page 68 Screw, Hex Head Cap, M6 Thread, 1mm Pitch, 10mm Long, Fully Threaded, Stainless 44000-36110 Lock Washer, Tank Mount 44005-10050 Hex Nut, M6x1 Thread Size, 10mm Wide, 5mm High, Stainless 13005-30040 Drip Tray, Adjustable Rail, Left, Steam 44005-50080 Spring Pin SLAYER STEAM X USER MANUAL V1.1 | SEPTEMBER 2019...
-
Page 69: Panels, Rails, Wings
PANELS, RAILS, WINGS SLAYER STEAM X USER MANUAL V1.1 | SEPTEMBER 2019... - Page 70 Back Panel, Steam, 3 Group - "GALAXY BLACK" 13005-30090-46 Back Panel, Steam, 3 Group - "BONE BEIGE" 13005-30090-47 Back Panel, Steam, 3 Group - "CRIMSON RED" 13005-30090-48 Back Panel, Steam, 3 Group - "SEATTLE SKY BLUE" SLAYER STEAM X USER MANUAL V1.1 | SEPTEMBER 2019...
- Page 71 18-8 Stainless Steel Split Lock Washer for M12 Screw Size, 12.7 mm ID, 21.1 mm OD 44005-10110 Screw, Socket Head Cap, M12 Thread, 30mm Length, 1.75mm Pitch, Stainless 24005-10010 Slayer Decal, Urethane Dome, Clear SLAYER DECAL NOT SHOWN IN IMAGE SLAYER STEAM X USER MANUAL V1.1 | SEPTEMBER 2019...
Need help?
Do you have a question about the STEAM X and is the answer not in the manual?
Questions and answers