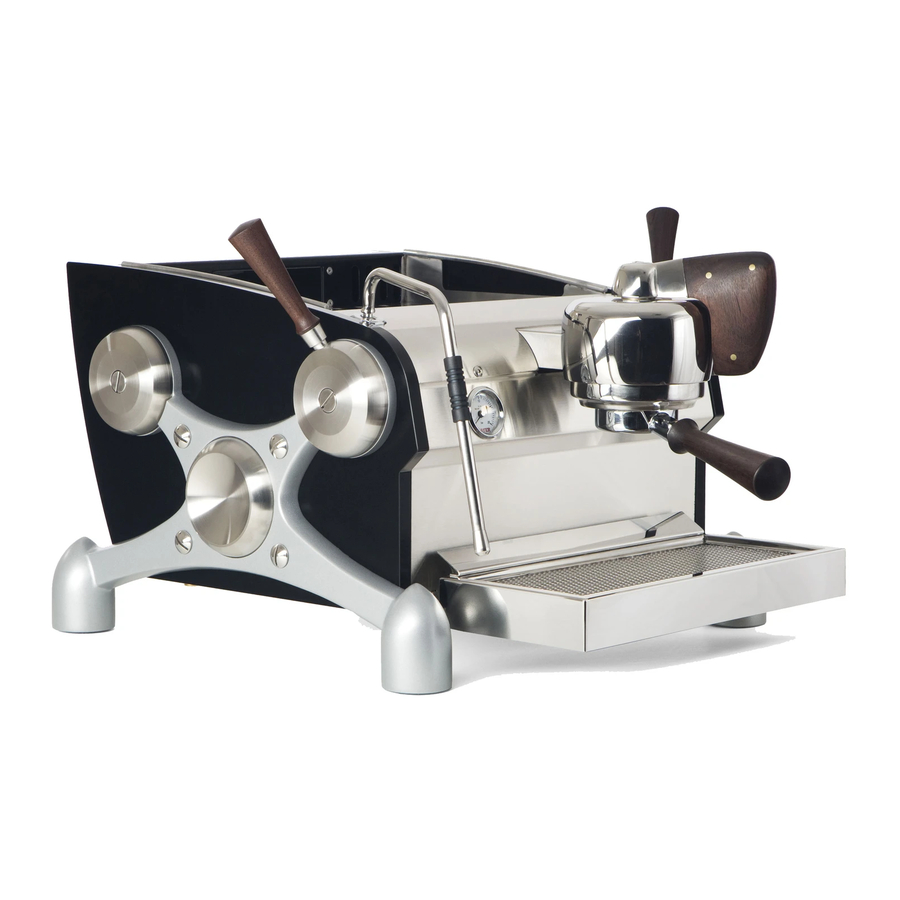
Slayer Single Group User Manual

Slayer Single Group User Manual

Hide thumbs Also See for Single Group:

Advertisement

User Manual
Version 3
Revision 3

1

Advertisement

Table of Contents
loading
Need help?

Need help?

Do you have a question about the Single Group and is the answer not in the manual?

Questions and answers

Subscribe to Our Youtube Channel

Summary of Contents for Slayer Single Group

  • Page 1 User Manual Version 3 Revision 3
...
  • Page 2: Table Of Contents

    Table of Contents Section Page Contacting Slayer Warranty Information Important Safety Advisory Water Treatment Requirements Recommended Tools & Accessories Installing Your Machine Factory Settings Using Slayer Cleaning & Preventative Maintenance Troubleshooting 
 Video Guides...
  • Page 3: Contacting Slayer

    Contacting Slayer Phone +1 (206) 284-7171 Address Seattle Espresso Machine Corporation 5628 Airport Way South Studio 238 Seattle, Washington 98108 United States of America CEO & Creator Jason Prefontaine jason@slayerespresso.com Fred Baruch fred@slayerespresso.com Technical Support support@slayerespresso.com Parts & Inventory Melinda Davis melinda@slayerespresso.com...
  • Page 4: Warranty Information

    Due to the nature and characteristics of wood(s) used on Slayer machines, cracking, shrinking, and/or warping of this wood is not covered under warranty. Damage to or failure of your Slayer machine due to inadequately treated water is not covered under warranty. Read “Water Treatment Requirements” on page 6 for...
  • Page 5: Important Safety Advisory

    Using your machine outside of its defined functionality – as it is described in the "Using Slayer" section on page 23 of this guide – may be a safety hazard, resulting in property damage, physical injury, or even death, and will immediately void the warranty.
  • Page 6: Water Treatment Requirements

    Water is complex and varies significantly between regions, so take great care to test the water quality at your location and adjust as necessary. Employ the help of a reliable company (Slayer recommends OptiPure and BWT) to evaluate your water and recommend and administer treatments.
  • Page 7 75-125 ppm. Experiment with various TDS levels to determine what is ideal. IMPORTANT: All Slayer espresso machines need to be connected to a carbon water filter to remove chlorine, sediments, odor, and undesirable tastes from the water. This requirement is in addition to any other necessary water filtration systems.
  • Page 8: Recommended Tools & Accessories

    Recommended Tools & Accessories To properly use and maintain your espresso machine, Slayer recommends owning an assortment of tools and accessories. These can each be organized in two categories: Beverage Preparation and Equipment Care & Maintenance. Specific requirements accompany each recommendation.
  • Page 9: Installing Your Machine

    Treatment Advisory on pages 6-7 for information about avoiding and addressing water-related issues. Your Slayer espresso machine weighs approximately 160 kg (350 lb.) when filled with water and needs to be installed on a structure that is capable of supporting its weight.
  • Page 10 2 Group 3 Group...
  • Page 11 Step 2: Unpack Equipment Your Slayer espresso machine will arrive in a lidded wooden crate, bolted to a pallet at the base. Unpack with the following steps. Parts and tools: Phillips-head screwdriver • Two (2) Rubber feet (included) • Steam handles (included) •...
  • Page 12 Step 3: Connect Drain Hose Parts and tools: Drain hose (included) • Hose clamp (included) • Flat-head screwdriver • Procedure: 1. Use the hose clamp to fasten the drain hose to the drain outlet, as shown. The drain hose has an inside ‣...
  • Page 13 Step 4B: Connect Water Line For machines with hot water IMPORTANT: Before connecting a water treatment system to your espresso machine, rinse the system by running water through it for at least two (2) minutes. Failure to follow this step will result in equipment damage. Read the Water Treatment Requirements on pages 6-7 for information about avoiding and addressing water-related issues.
  • Page 14 Elements”. Mix-Valve Step 5: Connect Pump Two (2) electrical cords extend from outside of your Slayer espresso machine. The thinner of these cords has a small, white quick-connect plug. Insert the quick connect plug into the matching plug unit on the pump motor.
  • Page 15 Filling will take approximately and is complete when the pump motor ‣ ceases to work and a “click” is heard. 3. When Slayer has filled completely, move the brew actuators left, into the “on” positions. 4. When water begins to run from the groupheads, return the brew actuator to the "off"...
  • Page 16: Factory Settings

    Factory Settings Brew Tank Temperature: 93°C (200°F) Pre-Heat Tank Temperature: 85°C (185°F) Steam Tank Temperature: 118°C (245°F) Steam Pressure: 1.5 bar Flow Rate: 40 grams per 30 seconds 
 Pump Pressure: 9 bar...
  • Page 17: Using Slayer

    Due to its slower introduction of water, permitted by a precision needle valve, Slayer is able to brew espresso with coffee that has been ground at extremely fine settings. Smaller particles reveal more of the coffee’s surface area to water, thereby allowing the extraction of more flavor-carrying oils.
  • Page 18 Preparing Espresso Slayer’s brew actuator allows for three positions: "off", “pre-brew", and "full brew". The grouphead is in the "off" position when the brew actuator is moved all the way right. The "pre-brew" setting is activated when the actuator is moved to the middle of the group.
  • Page 19 "off" position and return the portafilter. "Slayer Shot" To brew a "Slayer shot", ensure that the flow rate is at the desired setting and the grinder is set finer than normal, then: 1. Remove the portafilter from the grouphead and wipe the basket with a clean, dry towel.
  • Page 20 Sweetness” and “Reducing Acidity”, if desired. Steaming Milk Slayer produces powerful steam by combining high pressure with restricted steam tip holes. Various steam tip options (numbered 0-5) are available to allow the barista to customize their steaming experience and milk texture.
  • Page 21 Timer • Procedure: 1. Ensure that Slayer is fully heated. 2. Remove portafilters from all groupheads and set aside. 3. Begin with one grouphead: briefly move the brew actuator to the "pre-brew" position, then to the "full brew" position for a few seconds before returning the grouphead to the "off"...
  • Page 22 Adjust Brew Pump Pressure At the Slayer studio, the brew pump pressure is set at 9 bar. Actual brew pressure, as indicated by the pressure gauge on the face of your machine, will be influenced by incoming water pressure (line pressure) at your location.
  • Page 23 Adjust Steam Tank Temperature & Pressure At the Slayer studio, steam tanks are set to 118°C (245°F). The temperature of the tank is directly related to the steam pressure: increasing the temperature will increase the pressure, while decreasing the temperature will decrease the pressure.
  • Page 24 Upon request, each group can be outfitted with its own timer. To prepare espresso with the pre-brew timer, see instructions under “Using Slayer > Using Pre-Brew Timer” on page 25. The timer is activated with a push button located to the right of the corresponding grouphead.
  • Page 25 2. Grind, dose, and tamp coffee as usual, then lock the portafilter in the grouphead. 3. Move the brew actuator to the "full brew" position to begin extraction. Slayer will automatically initiate the pre-brew and full brew stages. 4. Allow the espresso to brew until the preferred extraction has been achieved...
  • Page 26: Cleaning & Preventative Maintenance

    The follow recommendations assume heavy use in a commercial setting. Please observe the following preventative maintenance schedule. CAUTION: Slayer and its parts may be very hot. Please read the Important Safety Information section prior to using Slayer and take the necessary steps to protect yourself and others.
  • Page 27 Use a soft, clean towel to wipe the surfaces of the machine. Do not use abrasive cleaners. Small amounts of window cleaner may be used on the stainless steel components. If your Slayer has wood panels, please refer to the “Wood Care” section.
  • Page 28 6. Repeat all steps for each grouphead. Backflushing with Water Only Recommended once daily Parts and tools: Cleaning brush or towel • Flat-head screwdriver • Blind portafilter insert • Portafilter • Procedure: 1. Complete “General Group Cleaning” steps 1-4 above. 2.
  • Page 29 5. Begin with one group: place the included blind insert in a portafilter, add approved espresso machine powder, and lock in grouphead. 6. Move the brew actuator to the "full brew" position and activate the brew cycle for 10 seconds, then move the actuator back to the “off” position and wait 10 seconds.
  • Page 30 For additional assistance with this procedure, refer to parts ‣ diagrams on pages 58-74. Replacing Portafilter Gasket vimeo.com/20084652 (password: prebrewpressure) ➡ The portafilter gasket forms a seal between the portafilter and the grouphead, preventing leaks. Over time, the portafilter gasket will become hard and lose its seal.
  • Page 31 Draining Steam Tank vimeo.com/20110440 (password: prebrewpressure) ➡ As steam is produced and exits the wand, minerals in the water are left behind build up inside the boiler. The steam tank needs to be drained periodically to remove these excess minerals. For assistance with this procedure, refer to parts diagrams on pages 58-74.
  • Page 32 4. Use a pick or awl to remove the o-rings (#8) from the steam valve pin and discard them. Put the new o-rings on the pin. 5. Rub Slayer lubricant on the pin and return the pin to the steam valve. Shoulder Bolt Shims The shoulder bolt’s shims create a snug fit between the steam actuator hub...
  • Page 33 Flat-head screwdriver • Allen key • Procedure: 1. Use a flat-head screwdriver to remove the lock screw from the top of the brew actuator. 2. Tighten the locking nut with an allen key. Test tightness by moving the actuator back and forth. 3.
  • Page 34 • #8 - # 5302, Valve Nut O-Ring • Two (2) large wrenches • Pick or awl • Slayer lubricant • Needle-nose pliers • Teflon tape • Procedure: 1. Drain the steam tank by engaging both steam actuators until steam ceases to flow from the wands, then return both steam actuators to the “off”...
  • Page 35 5. Use a pick or awl to remove the o-ring (#8) from the inside of the steam wand valve nut. 6. Clean the inside of the nut and insert a new o-ring. Apply Slayer lubricant to the o-ring and inside of the nut.
  • Page 36 Wood Care Keep all wood components dry and away from harsh elements. Use a soft, dry towel to wipe the wood clean. For tougher messes, use a slightly damp towel, then promptly dry the wood. Do not use chemicals or cleaning agents. Moisture and chemicals may cause the wood to warp or crack.
  • Page 37: Troubleshooting

    Troubleshooting Use this list of common symptoms to diagnose and resolve issues you experience with your espresso machine. Slayer’s instructional videos are password-protected, but can be accessed with the code “prebrewpressure”. Symptom Possible cause(s) Instructional video Bent gauges Needle valve closed vimeo.com/20345156...
  • Page 38 Symptom Possible cause(s) Instructional video Leaking steam actuator Worn steam valve pin o- vimeo.com/20114980 rings No flow during pre-brew Needle valve closed vimeo.com/20220777...
  • Page 39: Video Guides

    Video Guides Use these videos to learn common procedures for your espresso machine. Slayer’s instructional videos are password-protected, but can be accessed with the code “prebrewpressure”. Procedure Instructional video Adjusting pre-brew flow rate vimeo.com/20121811 Replacing grouphead seals and/or vimeo.com/20084652 screens Replacing steam valve pin vimeo.com/20114980...

This manual is also suitable for:

2 group3 group

Table of Contents