Table of Contents
Advertisement
Available languages
Available languages
Quick Links
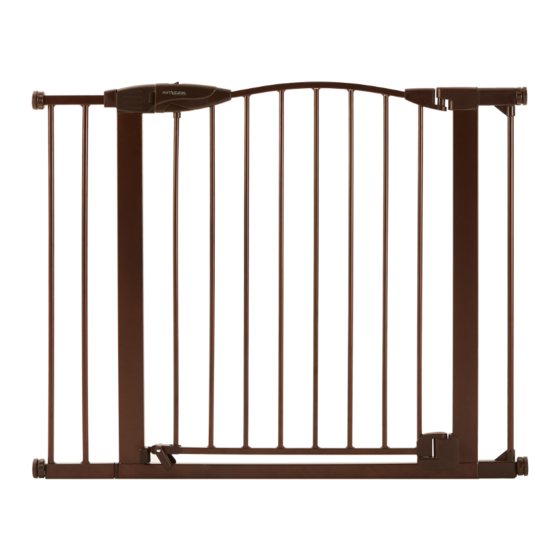
INSTRUCTIONS FOR MODELS
INSTRUCTIONS FOR MODELS
IMPORTANT: PLEASE KEEP FOR FUTURE REFERENCE!
For helpful tips and instructions, please visit our website: www.northstatesind.com or
contact our Customer Care department via email: CustomerService@northstatesind.com
5335/5337
5343/5344
Phone: (763) 486-1754 or Toll Free: (800) 848-8421
Intended for use with children 6-24 months
Quality Products
for the way you live
Advertisement
Table of Contents

Subscribe to Our Youtube Channel
Related Manuals for NORTH STATES 5343


Summary of Contents for NORTH STATES 5343
- Page 1 INSTRUCTIONS FOR MODELS INSTRUCTIONS FOR MODELS 5335/5337 5343/5344 IMPORTANT: PLEASE KEEP FOR FUTURE REFERENCE! For helpful tips and instructions, please visit our website: www.northstatesind.com or contact our Customer Care department via email: CustomerService@northstatesind.com Phone: (763) 486-1754 or Toll Free: (800) 848-8421...
-
Page 2: Important Safety Information
Page 2 IMPORTANT! READ AND FOLLOW THESE INSTRUCTIONS CAREFULLY AND KEEP FOR FUTURE REFERENCE Important Safety Information There is a gap between your gate frame and handle. This is not a defect. The gap on your gate will close once it is properly mounted. •... -
Page 3: Installation
Page 3 Installation • Measure width of opening. Step 1 • Refer to Figures 1A, 1B, 1C, 1D to determine the correct installation. 29.75”-32.5” 33”-35” 35.4” – 37.8” 37.8” – 40.5” (75.5 to 82.5 cm) (83.8 to 88.9 cm) (89.9 to 96 cm) (96 to 102.8 cm) With 1-Bar Extension With 2-Bar Extension... - Page 4 Page 4 • To install wall cups, place the gate in the opening so that the Step 3 bottom of the gate frame is completely at on the oor (Figure 3A). • Fasten the mounting cups to the wall by aligning them with the bolts.
- Page 5 Page 5 • Tighten both of the bottom tension knobs by turning them clockwise (Figure 4A). • Tighten both of the upper tension knobs by turning them clockwise so that the gap between the gate and upper right corner comes together, leaving 1.5 ~ 2 mm gap as shown in Figure 4B. 1/16"...
-
Page 6: Operation
Page 6 Operation Opening the gate: Pull back the button on the top of the handle with your thumb, squeeze the trigger on the lower side of the handle, then lift the inner door up and open the door. Closing the gate: Simply release the gate and allow it to swing closed (unless Stay-Open feature is used). - Page 7 CLEANING: Clean the safety gate using warm water and mild detergent. Use a soft cloth or sponge to avoid scratches. Never use solvents or chemicals to clean the safety gate. Distributed exclusively in the United States by North States Industries, Inc. 5455 Highway 169 N Plymouth, MN 55442 www.northstatesind.com...
- Page 8 Productos de calidad para su estilo de vida Produits de qualité pour la façon dont vous vivez INSTRUCCIONES PARA LOS MODELOS 5343/5344 MODE D'EMPLOI POUR TOUS LES MODÈLES 5343/5344 IMPORTANTE: ¡CONSERVE COMO REFERENCIA FUTURA! Para obtener consejos útiles e instrucciones, visite nuestro sitio web: www.northstatesind.com, o Comuníquese con nuestro Departamento de Atención al Cliente por correo electrónico:...
- Page 9 Página 9 ¡IMPORTANTE! LEA DETENIDAMENTE, SIGA ESTAS INSTRUCCIONES Y GUÁRDELAS PARA REFERENCIA FUTURA! Información importante de seguridad Hay un espacio entre el marco y la manija de la puerta. Esto no es un defecto. El espacio en la puerta se cierra cuando la instale correctamente. •...
-
Page 10: Instalación
Página 10 Instalación Paso 1 • Mida el ancho de la abertura. • Consulte las Figuras 1A, 1B, 1C, y 1D para determinar la instalación correcta. 29.75”–32.5” 33”–35” 35.4” – 37.8” 37.8” – 40.5” (75.5 – 82.5 cm) (83.8 – 88.9 cm) (89.9 –... - Page 11 Página 11 Paso 3 • Para instalar copas de pared, coloque la puerta en la abertura de modo que la parte inferior del marco de la puerta esté completamente plano sobre el suelo (Figura 3A). • Fije las tapas de montaje en la pared al alinearlas con los pernos.
- Page 12 Página 12 • Apriete ambas perillas de tensión inferior girándolas hacia la derecha (Figura 4A). • Apriete ambas perillas de tensión superior girándolas hacia la derecha de modo que el espacio entre la puerta y la esquina superior derecha se reduzca deje un espacio de 1.5 ~ 2 mm como se muestra en la Figura 4B.
-
Page 13: Operación
Página 13 Operación Abrir la puerta: jale el botón que se encuentra en la parte superior de la manija con su pulgar, apriete el disparador del lado inferior de la manija, luego levante la puerta interior y abra la puerta. Cerrar la puerta: Simplemente libere la puerta y deje que se cierre (a menos que esté... - Page 14 Nunca utilice solventes ni sustancias químicas para limpiar la puerta de seguridad. Distribuido exclusivamente en Estados Unidos por North States Industries, Inc. 5455 Highway 169 N Plymouth, MN 55442 www.northstatesind.com...
- Page 15 Page 15 IMPORTANT! LIRE ET SUIVRE CES DIRECTIVES ATTENTIVEMENT ET CONSERVER POUR RÉFÉRENCE ULTÉRIEURE Informations de sécurité importantes Un espace existe entre le châssis et la poignée de votre portail. Ce n’est pas un défaut. Une fois le portail monté correctement, l’espace disparaîtra. •...
- Page 16 Page 16 Installation • Mesurez la largeur de l’ouverture. Étape 1 • Référez-vous aux gures 1A, 1B, 1C, 1D pour déterminer la bonne installation. 37.8” – 40.5” 29.75”– 32.5” 33”– 35” 35.4” – 37.8” (96 – 102.8 cm) (75.5 – 82.5 cm) (83.8 –...
- Page 17 Page 17 Étape 3 • Pour installez les cupules murales, placez le portail dans l’ouverture de sorte que la partie inférieure du châssis du portail soit complètement à plat sur le plancher (Figure 3A). • Fixez les cupules de montage au mur en les alignant avec les boulons. Utilisez le ruban adhésif double face ou les vis fournis, comme indiqué...
- Page 18 Page 18 • Serrez les deux molettes de tension en les tournant dans le sens horaire (Figure 4A). • Serrez les deux molettes de tension supérieures en les tournant dans le sens horaire de sorte que l’espace entre le portail et le coin supérieur droit se réduise laissez un espace d’environ 1,5 à...
- Page 19 Page 19 Fonctionnement Ouvrir le portail : À l’aide de votre pouce, ramenez vers l’arrière le bouton se trouvant au-dessus de la poignée, appuyez sur la gâchette située sur la partie inférieure de la poignée, puis levez la porte intérieure et ouvrez-la. Fermeture du portail : relâchez le portail et laissez-le se fermer (à...
-
Page 20: Entretien
Utilisez un chi on doux ou une éponge pour éviter de l’éra er. N’utilisez jamais de solvants ou de produits chimiques pour nettoyer le portail. Distribué exclusivement aux États-Unis par North States Industries, Inc. 5455 Highway 169 N Plymouth, MN 55442 www.northstatesind.com Fabriqué...
Need help?
Do you have a question about the 5343 and is the answer not in the manual?
Questions and answers