Dometic 10-Series Installation Manual
Absorption refrigerator
Hide thumbs
Also See for 10-Series:
- User manual ,
- Operating manual (804 pages) ,
- Operating instructions manual (468 pages)
Advertisement
Quick Links
Advertisement

Related Manuals for Dometic 10-Series


Summary of Contents for Dometic 10-Series
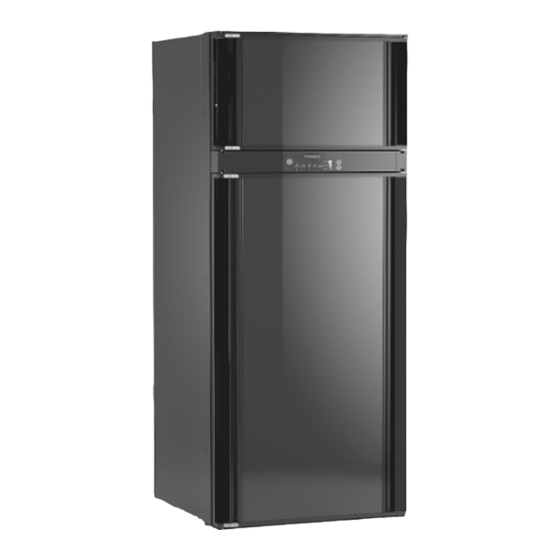
- Page 1 REFRIGERATION 10-SERIES RMD10.5XS Absorption refrigerator Installation Manual...
- Page 2 © 2020 Dometic Group. The visual appearance of the contents of this manual is protected by copyright and design law. The underlying technical design and the products contained herein may be protected by design, patent or be patent pending. The trademarks mentioned in this manual belong to Dometic Sweden AB.
-
Page 3: Table Of Contents
Dometic accepts no liability for any loss, damage or injury incurred, directly or indirectly, from the installation, use or maintenance of the product not in compliance with the instructions and warnings in the product manual. -
Page 4: Explanation Of Symbols
Explanation of symbols RMD10.5XS Explanation of symbols WARNING! Safety instruction: Indicates a hazardous situation that, if not avoided, could result in death or serious injury. CAUTION! Safety instruction: Indicates a hazardous situation that, if not avoided, could result in minor or moderate injury. NOTICE! Indicates a situation that, if not avoided, can result in property damage. - Page 5 RMD10.5XS Safety instructions • If the AC power cable for this refrigerator is damaged, it must be replaced by the manufacturer, service agent or a similarly qualified person in order to prevent safety hazards. • Never use a naked flame to check the refrigerator for leaks. •...
-
Page 6: Accessories
Installation, Operating Manual and Quick Start Guide Accessories Available as accessories (not included in the scope of delivery): Description Dometic gas flue kit 3776 Dometic Roof Vent Kit LS 300 ventilation grille All the accessories are available from specialist dealers. If you have any questions,... -
Page 7: Installing The Refrigerator
This product is only suitable for the intended purpose and application in accordance with this instruction. Any other use, deviating from the intended use, is not allowed! Dometic accepts no liability for any loss, damage or injury incurred, directly or indirectly due to other as the intended use. - Page 8 • The refrigerator may not be installed in the rear of motor homes with the door pointing in the direction of travel. • Use exclusively original Dometic ventilation grills to ensure safe operation. When installing the refrigerator, note the following: •...
- Page 9 RMD10.5XS Installing the refrigerator • The refrigerator must be installed in a recess so that it stands secure when the vehicle is in motion. Note the dimensions in fig. 1 for this purpose. Refrigerator Overall dimension with flange in mm Height (A) 1260 Width (B)
- Page 10 3a/3b LS300 ventilation grille Recommended height is at least equal to the height of the refrigerator Dometic gas flue kit 3776 Air deflection plate Gas escape hole, min. 40 mm – required if lower air vent would not permit all leaked gas to escape •...
- Page 11 RMD10.5XS Installing the refrigerator • The distance between the air inlet and outlet vents must be at least 1250 mm (fig. 3). 10 – 25 mm >25 mm >25 mm • The distance between the refrigerator and the rear wall must be at least 10 mm but no more than 25 mm.
- Page 12 Installing the refrigerator RMD10.5XS • A distance of more than 25 mm between the refrigerator and rear wall leads to poor performance and increases the power consumption of the refrigerator. Reduce the space behind the refrigerator to create adequate air inlet and outlet ventilation.
- Page 13 RMD10.5XS Installing the refrigerator ≥ 300 mm • If the minimum distance between the air inlet and outlet vents cannot be met, a roof vent must be installed instead of the air outlet vent. – The roof vent should be installed directly above the back of the refrigerator as far as this is possible.
- Page 14 Installing the refrigerator RMD10.5XS • The gas installation must comply with national and local regulations including: AS/NZS 5601.2 – Gas installations – LP Gas installations in caravans and boats • The refrigerator must be installed in a draft-proof location, see chapter “Installing the refrigerator in a sealed location separate from the living space”...
- Page 15 RMD10.5XS Installing the refrigerator Making air inlet and outlet vents NOTE At high ambient temperatures, the refrigerator can only provide its maximum cooling capacity if the optimum ventilation has been provided. ➤ Make an air inlet vent and an air outlet vent in the outer wall with the size of 249 mm x 490 mm.
- Page 16 Installing the refrigerator RMD10.5XS Installing the ventilation grill NOTE Only use original Dometic ventilation grills (accessory) to ensure safe operation. No. in fig. a Description Slider Ventilation grill Installation frame Fastening for condensation drain ➤ Seal the installation frame to make the connection waterproof (fig. b).
- Page 17 RMD10.5XS Installing the refrigerator ➤ Insert the installation frame and screw it down tightly (fig. c). Use all the fixing holes for this. ➤ Insert the ventilation grill as shown (fig. d). Installing condensation drain NOTICE! • To avoid damage on the drain water hose, position the hole for the drain water hose in a way, that the hose does not touch the boiler casing.
- Page 18 Installing the refrigerator RMD10.5XS Install the roof vent No. in fig. e Description Hood Installation frame ➤ Seal the installation frame to make the connection waterproof (fig. f). ➤ Insert the installation frame and screw it down tightly (fig. g). Use all the fixing holes for this.
- Page 19 ➤ Insert the hood and screw it down tightly (fig. h, page 18). Installing the flue duct NOTE • Install the Dometic gas flue kit 3776. • To ensure optimal performance the minimum number of flue stacks required should be used.
- Page 20 Installing the refrigerator RMD10.5XS Install the flue duct as follows: min. 15 mm ➤ Make a rectangular opening in the outer wall of the vehicle (fig. j). – The opening must be as wide as the flue pipe (fig. i 2). –...
- Page 21 RMD10.5XS Installing the refrigerator NOTE In some installation situations, it is possible that the flue pipe would extend too far out of the vehicle in its installed state. Shorten the flue pipe to the correct length if necessary. ➤ Slide the flue pipe at least 15 mm onto the T-piece (fig. k). ➤...
- Page 22 Installing the refrigerator RMD10.5XS Securing the refrigerator WARNING! Risk of injury To avoid a hazard due to instability of the appliance, it must be fixed in accordance with the instructions. CAUTION! Only screw through the bushes built into the refrigerator, otherwise foamed components, including electrical wiring, can be damaged.
- Page 23 RMD10.5XS Installing the refrigerator Positioning the shelves WARNING! Children beware! Fix and lock all shelves in place to prevent children from climbing inside the refrigerator. ➤ Remove the shelf as shown (fig. n). ➤ Re-assemble the shelf in the reverse order.
-
Page 24: Connecting The Refrigerator
Connecting the refrigerator RMD10.5XS Connecting the refrigerator Connecting to the gas supply NOTICE! • This refrigerator may only be connected to the gas supply by a spe- cialist in accordance with the applicable guidelines and standards. • Use flexible gas piping to ensure that the installation remains in a tensionless state (not included in the scope of the delivery). - Page 25 RMD10.5XS Connecting the refrigerator No. in fig. o Description Pressure testing point Manual shut-off Refrigerator gas connection (5/8" 18 UNF 2A) Rigid gas piping ➤ Connect the flexible gas piping securely to the refrigerator gas connection (fig. o). Always use a back up wrench when loosening and tightening connections.
- Page 26 Connecting the refrigerator RMD10.5XS Connecting to DC and AC NOTICE! • The electrical installation and repairs may only be performed by a specialist in accordance with the applicable regulations and standards. • The device can be connected to 12 V DC and 230 – 240 V AC power supply.
- Page 27 RMD10.5XS Connecting the refrigerator NOTE • The mains socket must be readily accessible so that you can unplug it if required, thereby disconnecting the refrigerator from the power. • The device plug must not be placed directly behind the ventilation grill in order to prevent the air circulation from being impaired and to protect the device plug from splashes of water.
- Page 28 Connecting the refrigerator RMD10.5XS ➤ Connect the refrigerator according to fig. q, page 27. DC power WARNING! Fire hazard! • The supply line to the heating element must be protected with a 20 A fuse. • The supply line to the electronics must be protected with a 2 A fuse. NOTICE! •...
- Page 29 RMD10.5XS Connecting the refrigerator Connection to suit motor home or caravan with the D+ wire connected to the vehicle alternator or ignition switch. No house battery recharging from the vehicle. The D+ connection is taken to the vehicle alternator. Refrigerator DC connections Electronics Heating DC House Battery...
- Page 30 Connecting the refrigerator RMD10.5XS Refrigerator DC connections Electronics Heating DC Fridge House Battery Switch Anderson Plug Anderson cables must be the Vehicle Anderson plug must recommended size. be controlled by ignition relay. Using a fridge movement switch to add 12 Vg to the D+ connection wire, only when the vehicle is moving.
-
Page 31: Technical Data
– overall (Door slider excluded) – from flange rear face: Weight: 52.5 kg Inspection/certification: DO NOT REMOVE NOTE The power and gas consumptions are measured at 32 °C ambient temperature with 3 °C average cooling temperature in the refrigerator compartment. Detailed information dometic.com... - Page 32 YOUR LOCAL YOUR LOCAL YOUR LOCAL DEALER SUPPORT SALES OFFICE dometic.com/dealer dometic.com/contact dometic DOMETIC GROUP AB...
Need help?
Do you have a question about the 10-Series and is the answer not in the manual?
Questions and answers