Miele WXD 160 Operating And Installation Instructions
Hide thumbs
Also See for WXD 160:
- Operating instructions manual (88 pages) ,
- Operating and installation instructions (88 pages)

Related Manuals for Miele WXD 160


Summary of Contents for Miele WXD 160
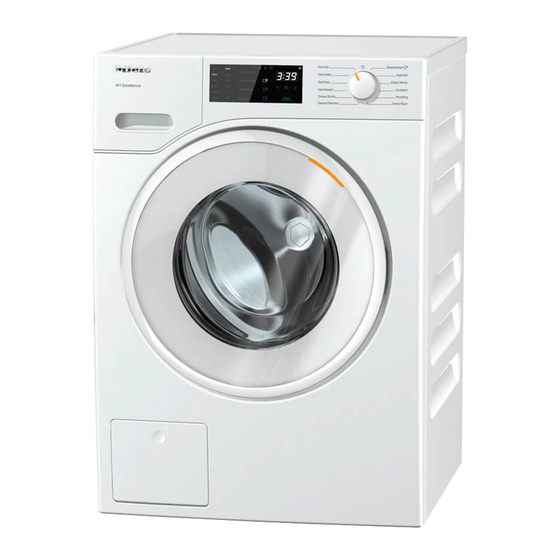
- Page 1 Operating and Installation Instructions Washer To prevent accidents and appliance damage, read these instructions before installation or use. en-US M.-Nr. 11 622 780...
-
Page 2: Table Of Contents
Before using for the first time ................14 Miele@home ......................15 1. Removing the shipping struts ................. 16 2. Setting up Miele@home .................. 16 3. Starting the calibration program..............17 Environmentally friendly washing ..............18 Energy and water consumption ................18 Detergent consumption.................. - Page 3 Changing the program sequence ..............40 Changing a program (safety lock) ............... 40 Canceling a program ................... 40 Detergent ......................41 Detergents recommended by Miele ..............41 General detergent recommendations..............42 Cleaning and care ..................... 43 Cleaning the housing and control panel.............. 43 Cleaning the detergent dispensing drawer ............
- Page 4 Contents Installation......................58 Front view ......................58 Rear view......................59 Installation surface ....................60 Transporting the washing machine to its installation site........60 Removing the shipping struts ................61 Installing the shipping struts ................63 Leveling the machine................... 64 Unscrewing and adjusting the feet..............64 Installing under a countertop................
- Page 5 Contents Welcome tone....................79 Networking ......................80 Remote control ..................... 80 SmartGrid..................... 80 RemoteUpdate ..................... 81 Switching off WiFi....................82 Detergents and care products ................. 83 Detergent......................83 Special-purpose detergents ................. 84 Fabric care ....................85 Additives ....................... 85 Machine care....................... 85...
-
Page 6: Important Safety Instructions
IMPORTANT SAFETY INSTRUCTIONS WARNING To reduce the risk of fire, electric shock or injury to persons while using your appliance follow basic safety precautions, including the following: Read all instructions before using the appliance. GROUNDING INSTRUCTIONS This appliance must be grounded. In the event of a malfunction or breakdown, grounding will reduce the risk of electric shock by providing a path of least resistance for electric current. - Page 7 If the power cord is damaged it must only be replaced by a Miele Service technician with a genuine Miele power cord. Under certain conditions, hydrogen gas may be produced in a hot water system that has not been used for 2 weeks or more.
- Page 8 IMPORTANT SAFETY INSTRUCTIONS Do not allow children to play on or in the appliance. Close supervision is necessary when the appliance is used near children. The drum door glass will be hot when washing at very high temperatures. Do not touch the glass. Danger of burns! Keep children away from the washer when in use.
- Page 9 Miele tumble dryer and the Miele washing machine. If installing the machine on a Miele plinth (available as an optional accessory), please make sure you order the correct one for this washing machine.
- Page 10 IMPORTANT SAFETY INSTRUCTIONS FCC Declaration of Conformity These devices comply with FCC Rules Part 15. This equipment has been tested and found to be in compliance with the limits for a Class B digital device, pursuant to Part 15 of the FCC Rules of Operation and is subject to the following conditions: These devices may not cause harmful interference.
-
Page 11: Caring For The Environment
Consult with local authorities, dealers or Miele in order to dispose of and recycle electrical and electronic appliances. Miele assumes no responsibility for deleting any personal data left on the appliance being disposed. -
Page 12: Guide To The Washer
Guide to the washer Control panel a Control field e Indicator lights The control field consists of a time Lights up if there are faults display and various sensor buttons. affecting the water intake and The individual sensor buttons are drainage. -
Page 13: How The Control Field Works
Guide to the washer g Time display i Start/Add laundry sensor button After the program has started, the The program can be started as program duration will appear on the soon as the sensor button is display in hours and minutes. flashing on and off. -
Page 14: Before Using For The First Time
Before using for the first time Damage from incorrect installation and connection. Installing and connecting the washing machine incorrectly will cause serious damage to property. See “Installation”. Removing the protective film and stickers Remove: - any protective film from the door ... -
Page 15: Miele@Home
- A WiFi network Therefore, the availability of featured functions cannot be guaranteed. - The Miele@mobile app - A Miele user account. The user Miele@home availability account can be created via the The ability to use the Miele app Miele@mobile app. -
Page 16: Removing The Shipping Struts
Tip: If the connection has not been set There are 2 ways of connecting: up when the timeout has finished 1. via the Miele app (default) counting down, repeat the process. 2. via WPS To do so, you will need a WPS- compatible router. -
Page 17: Starting The Calibration Program
Before using for the first time Opening the door at the end of the 3. Starting the calibration program program The door remains locked during the For optimum water and energy Anti-crease phase. The control field consumption and excellent wash lights up for the first 10 minutes. -
Page 18: Environmentally Friendly Washing
Select the highest possible spin speed bacteria and odors to build up in the for the wash program to save energy in washing machine. Miele therefore the subsequent tumble dryer cycle. recommends cleaning the washing machine once every month. -
Page 19: Prepare The Laundry
Tip: Stains (such as blood, egg, coffee, and tea) can be pre-treated using some handy tricks which can be found in the Miele guide to laundry care. Please contact Miele directly or submit a request via Internet page to obtain or view a copy of this manual. -
Page 20: Selecting A Program
2. Selecting a program Switching on the washing 2. Selecting programs via the machine MobileStart program selector position and the Miele Turn the program selector to a program. Tip: To use MobileStart , the washing 1. Selecting wash programs machine must be logged on to the WiFi... -
Page 21: Loading The Washing Machine
3. Loading the washing machine Opening the door Closing the door Take hold of the door and pull it Make sure that no items are caught open. between the door and the seal. Check the drum for pets or foreign objects before loading it with laundry. -
Page 22: Selecting Program Settings
4. Selecting program settings Selecting a temperature and Selecting extra options spin speed The selection of extra options available for the wash program lights The wash program’s pre-set up dimly. temperature and spin speed light up brightly. The choice of temperatures and spin speeds selectable for the wash program light up dimly. -
Page 23: Add Detergent
5. Add detergent Using chlorine bleach Detergent dispenser drawer This washing machine requires high Damage due to chlorine bleach. efficiency detergent. Adhere strictly to Textiles may be discolored or their the dispensing amounts supplied by the fibers damaged. detergent manufacturer. The detergents Only use chlorine bleach on suitable must be marked with the following textiles. -
Page 24: Adding Fabric Softener
5. Add detergent Adding fabric softener Tips for dispensing Adjust the detergent dosage to the level of soiling of the laundry and the maximum load. Reduce the amount of detergent with smaller loads (e.g., reduce the amount of detergent by ⅓ when washing a half load). -
Page 25: Capdosing
Each capsule contains the correct amount for one wash cycle. Capsules are available to order from Open the lid of the / Miele’s online store, Miele customer compartment. service, or your Miele dealer. Capsules pose a health risk. - Page 26 5. Add detergent Switching off/Changing CapDosing In order to switch off CapDosing, touch the brightly lit sensor button. In order to change CapDosing, touch one of the other capsule sensor buttons. Color run and dye removers Damage due to color run/dye removers.
-
Page 27: Starting A Program
6. Starting a program Starting a program Adding laundry during a program sequence (AddLoad) Touch the flashing Start/Add laundry sensor button. Laundry can be added or removed at any time, provided that the symbol The door will lock and the wash is not illuminated on the control field. -
Page 28: Program End
7. Program end Opening the door and Items left in the drum could discolor removing the laundry other items in the next wash or become discolored themselves. The door remains locked during the Remove all items from the drum. Anti-crease phase. The control field lights up for the first 10 minutes. -
Page 29: Spin Cycle
Spin cycle Final spin speed Program Selectable spin speeds in words and numbers (rpm) High Slow 1,600 1,200 Normal – – – Delicates – – Sanitize – – Handwash – Dress Shirts – –... - Page 30 Spin cycle Rinse-spin Final spin speed in wash program There is a spin cycle after the main wash and between the rinse cycles. A When a program is selected, the sensor reduction in the final spin speed will button for the optimum spin speed for also reduce the interim spin speed as that program will be brightly lit up on appropriate.
-
Page 31: Delay Start/Smartstart
Delay start/SmartStart Turn the program selector to the Delay Start position. With the Delay Start function, you can Turn the program selector to any delay the start of the program. program. This function is active when the Rotating bars ... ... ... - Page 32 Delay start/SmartStart Setting the time period SmartStart If the SmartGrid programmable The SmartStart function lets you function is activated, the function of define a time period during which your the sensor button changes. The washing machine will start time display no longer shows the automatically based on an external delay-start period, and instead shows signal.
-
Page 33: Program Guide
Program guide Temperature Item/Tip with garment care label symbols Normal Full load (17.6 lb/8 kg) Hot+ 140°F/60°C Cotton, linen, and mixed fiber textiles made of both cotton and linen. 120°F/50°C Warm+ 105°F/40°C Warm 85°F/30°C Cold Cold USA test program in accordance with: DOE Federal Register 10 CFR Part 430 Appendix J2 to subpart B Canada test program in accordance with: CAN/CSA-C360-13 Delicates... - Page 34 Program guide Temperature Item/Tip with garment care label symbols Dress Shirts Small load (4.4 lb/2 kg) Hot+ 140°F/60°C Pre-treat collars and cuffs depending on the level of soiling. 120°F/50°C Wash dress shirts and silk blouses in the Warm+ 105°F/40°C ...
- Page 35 Program guide Temperature Item/Tip with garment care label symbols Outdoor Small load (5.5 lb/2.5 kg) Warm+ 105°F/40°C Performance outerwear (e.g., jackets and trousers) made from membrane fabric such as Warm 85°F/30°C Gore-Tex®, SYMPATEX®, WINDSTOPPER®, etc. Cold Cold - Zip up or close any jackets with Velcro before washing.
-
Page 36: Extra Options
Extra options You can supplement the wash SoftSteam programs with extra options. In order to reduce creasing, the laundry Extra options are selected and undergoes a smoothing process at the deselected using the relevant sensor end of the program. Reducing the buttons on the control field. -
Page 37: Wash Program Overview - Extra Options
Wash program overview – extra options The following extra options can be selected in addition to the programs Lightly Heavy SoftSteam Buzzer soiled soiled Normal – Delicates Sanitize Handwash ... -
Page 38: Program Sequence
Program sequence Main wash Rinses Spin cycle Water Wash Water Rinses level rhythm level Normal Delicates Sanitize Handwash Dress Shirts Darks/Denims ... - Page 39 Program sequence Special features in the = low water level program sequence = medium water level Anti-crease: = high water level At the end of the program, the drum = intensive rhythm continues to turn at intervals for up to 30 minutes to help prevent creasing.
-
Page 40: Changing The Program Sequence
Changing the program sequence Changing a program (safety Canceling a program lock) You can cancel a wash program at any time after it has started. A program, temperature, spin speed, or selected extra options cannot be Turn the program selector to the changed once the machine has been position. -
Page 41: Detergent
Detergent Detergents recommended by Miele Miele Detergents have been specially designed for day-to-day use in Miele Washing Machines. See “Detergents and care products” for more information about these detergents. Miele Detergents Miele Capsules UltraWhite UltraColor ... -
Page 42: General Detergent Recommendations
Detergent General detergent recommendations The wash programs that are not listed do not have a detergent recommendation Universal Color Detergent for Bleach detergent detergent Woolens and delicates Normal – Delicates – – – Sanitize –... -
Page 43: Cleaning And Care
Cleaning and care Cleaning the housing and Cleaning the detergent control panel dispensing drawer Washing at low temperatures and the Risk of electric shock. use of liquid detergent can lead to a Mains voltage is present when the build-up of bacteria in the detergent washing machine is switched off dispenser drawer. - Page 44 Cleaning and care Removing and cleaning the insert for Cleaning the compartment liquid detergents Compartment 1 has a siphon for better An insert for liquid detergents is located dispensing of the chlorine bleach. in the compartment of the detergent dispenser drawer.
- Page 45 Cleaning and care Cleaning the siphon and the / compartment channel Liquid starch results in clogging. The siphon in the / compartment no longer works and the compartment can overflow. Clean the siphon particularly thoroughly after using liquid starch a few times.
-
Page 46: Sanitize Info(Cleaning The Drum)
Cleaning and care Clean the filter. Sanitize info (Cleaning the drum) Reassemble in reverse order. Washing at low temperatures and/or Cleaning the filter in the inlet valve using liquid detergent can cause Using pliers, carefully loosen the bacteria and unpleasant odors to build ribbed plastic nut on the inlet valve up in the washing machine. -
Page 47: Frequently Asked Questions
Frequently Asked Questions With the help of the following guide minor faults in the performance of the machine, some of which may result from incorrect operation, can be remedied without contacting the Service Department. This guide may help you to find the reason for the fault, and how to correct it. A wash program cannot be started Problem Possible cause and solution... -
Page 48: The Program Is Canceled And A Fault Indicator Light Lights Up On The Control Field
Wait at least 2 minutes before reconnecting the washing machine to the power supply. Then switch the washing machine on again. Restart the program. If the fault message appears again, contact Miele Customer Service. During the program, a symbol appears on the time display Message Possible cause and solution ... -
Page 49: At The End Of The Program, An Indicator Light Lights Up On The Control Field
(see “Installation – Leveling the machine”). Check whether the maximum drain height of 3' 3" (1 m) has been exceeded. If the fault message appears again, contact Miele Customer Service. The washing machine can still be used, but without the SoftSteam extra option. -
Page 50: General Problems With The Washer
Frequently Asked Questions General problems with the washer Problem Possible cause and solution The indicator light lighting up and appearing on The washing machine is emitting an odor. the time display was ignored. When washing, a wash program using a temperature of Hot+ has not been run for a long time. - Page 51 Frequently Asked Questions General problems with the washing machine Problem Possible cause and solution Large amounts of deter- The water pressure is too low. gent residue remain in Clean the filter in the water intake. the detergent dispens- Please note that the water pressure must be at ing drawer.
-
Page 52: Poor Wash Results
Frequently Asked Questions Poor wash results Problem Possible cause and solution Liquid detergent is not Liquid detergents do not usually contain bleaching achieving the required agents. Consequently, fruit, coffee, and tea stains results. cannot always be removed. Use powder detergent containing a bleaching agent. -
Page 53: The Drum Door Cannot Be Opened
Frequently Asked Questions The drum door cannot be opened Problem Possible cause and solution The door cannot be The drum is locked during a program. pulled open during a Follow the description in “5. Starting a program – program. Adding or removing laundry”. -
Page 54: Opening The Door In The Event Of A Blocked Drain Outlet And/Or Power Outage
Frequently Asked Questions Draining the washing machine Opening the door in the event of a blocked drain outlet and/ Remove the drain filter, though not or power outage completely. Turn off the washing machine. Place a suitable container under the flap, e.g., a bowl or dish. - Page 55 Frequently Asked Questions Opening the door Danger of injury due to rotating drum. Reaching into a rotating drum is extremely dangerous and may result in injury. Always make sure that the drum is stationary before reaching in to remove laundry. ...
-
Page 56: Customer Service
Miele dealer or Miele. Miele dealer or Miele Customer Service. Appliance warranty and You can book a Miele Service Call product registration online at www.miele.com/service. You can register your product and/or Contact information for Miele view the manufacturer´s warranty terms... - Page 57 Installation instructions Alteration rights reserved. Visit our website for all the current product specifications, technical appliance information, and warranty information. To avoid accidents or damage to the appliance, please read these instructions before installing and/or using it.
-
Page 58: Installation
*INSTALLATION* Installation Front view a Drain hose f Detergent dispenser drawer b Hot-water inlet hose (pressure-proof g Door to 870 psi/6,000 kPa) h Flap for drain filters, drain pump, and c Cold-water inlet hose (pressure- emergency release proof to 870 psi/6,000 kPa) i Flap for TwinDos cartridges d Electrical connection j Four height-adjustable feet e Control panel... -
Page 59: Rear View
*INSTALLATION* Installation Rear view a Drain hose e Cold-water inlet hose (pressure- proof to 870 psi/6,000 kPa) b Transport clips for inlet and drain f Hot-water inlet hose (pressure-proof hoses and power cord to 870 psi/6,000 kPa) c Electrical connection g Safety caps for shipping struts d Protruding lid for holding when h Transport clips for inlet and drain moving the machine... -
Page 60: Installation Surface
(concrete or brick), in order to ensure it cannot fall or slip. Secure the washing machine using a clamp/fastening bracket (MTS floor mounting kit – available from your Miele dealer or Miele Service). -
Page 61: Removing The Shipping Struts
*INSTALLATION* Installation Removing the right-hand shipping Removing the shipping struts strut Removing the left-hand shipping strut Open the cover and use the wrench supplied with the washing machine to Open the cover and use the wrench turn the shipping strut 90°. supplied with the washing machine to turn the shipping strut 90°. - Page 62 *INSTALLATION* Installation Covering the holes Securing the shipping struts Risk of injury from sharp edges. There is a risk of injury from reaching into holes that are not covered. Cover the holes for the shipping struts after they have been removed. ...
-
Page 63: Installing The Shipping Struts
*INSTALLATION* Installation Installing the shipping struts Opening the covers Press against the catch with a thin object (a narrow screwdriver, for example). The cover opens. Installing the shipping struts Install the shipping struts by following the instructions for their removal in reverse order. -
Page 64: Leveling The Machine
*INSTALLATION* Installation Leveling the machine The washing machine must stand perfectly level on all four feet to ensure safe and proper operation. Incorrect installation may increase electric and water consumption and may cause the machine to move about. Unscrewing and adjusting the feet The four adjustable screw feet are used to level the washing machine. -
Page 65: Installing Under A Countertop
Risk of electric shock due to as a washer-dryer stack together with a exposed cables Miele Tumble Dryer. A WTV stacking kit* There is a risk of coming into contact is required for this. with live parts while the lid is Parts marked with * are available from removed. -
Page 66: Additional Installation Requirements
*INSTALLATION* Installation Setting up the cabinet Additional installation requirements The washing machine must be installed in accordance with the relevant local regulations. Damage resulting from failure to remove the shipping struts. Failure to remove the shipping struts can result in damage to the washing machine and to adjacent cabinetry or appliances. -
Page 67: For Closets At Room Height
*INSTALLATION* Installation For closets at room height Product Dimensions You can also insert a ventilation Dimensions opening at the top of the closet. In addition, you must provide an opening on the bottom side of the door. Risk of damage due to overheating of the washing machine. -
Page 68: Installation On A Plinth
*INSTALLATION* Installation Installation on a plinth - WTS 510 (only available in white) Washer-dryer stack - WTV 512 and WTV 502 washer-dryer stacking kit... -
Page 69: The Water Protection System
Installation Electronic module and washing The water protection system machine housing The Miele water protection system - Sump: Any leaking water is collected protects all parts of the washing in a sump in the base of the machine. machine and its surroundings from A float switches off the water inlet water damage. -
Page 70: Water Intake
*INSTALLATION* Installation Maintenance Water intake Only use a genuine Miele hose that has Health risk and risk of damage been tested to withstand pressure of at due to contaminated incoming water. least 870 psi (6,000 kPa) should you The quality of the incoming water ever need a replacement. -
Page 71: Water Drainage
If required, the hose can be extended to a length of up to 16.4 ft (5 m). Accessories are available from your Miele dealer or Miele Customer Service. For a delivery head of more than 3.2 ft (1 m) (up to a max. of 5.9 ft (1.8 m)) a replacement drain pump will need to be installed. -
Page 72: Electrical Connection
*INSTALLATION* Installation ELECTRICAL INSTRUCTIONS Electrical connection This installation should be performed by GROUNDING INSTRUCTIONS an experienced and qualified This appliance must be grounded. In technician, in accordance with local the event of a malfunction or codes and regulations. breakdown, grounding will reduce the risk of electric shock by The washing machine is supplied with a providing a path of least resistance... -
Page 73: Technical Data
Technical data Height 33 7/16" (850 mm) Width 23 7/16" (596 mm) Depth 25 1/16" (636 mm) Depth with door open 41 1/2" (1054 mm) Height for building under 32 5/16" (+5/16"/-1/16") (820 mm) Width for building under 23 5/8" (600 mm) Weight Approx. -
Page 74: Programmable Functions
Programmable functions Programmable functions The programmable functions are used to alter the machine’s electronics to Buzzer suit changing requirements. Keypad tone Programmable functions can be PIN code altered at any time. Control field switch-off status Programming is carried out in 8 steps ... -
Page 75: Editing And Saving The Programmable Function
Programmable functions Confirm the chosen selection with Editing and saving the the Start/Add laundry sensor button. programmable function The number of the programmable You can either switch a programmable function, e.g., , will then light up function on/off or select different again. -
Page 76: Pin Code
Programmable functions PIN code Control field switch-off status The PIN code prevents the washing machine being used without your To save energy, the time display and knowledge. sensor buttons will go out after 10 minutes, and only the Start/Stop When the PIN code has been activated, sensor button will flash. -
Page 77: Memory
The washing machine will save the At high altitudes, water has a lower last settings (temperature, spin speed, boiling point. Miele recommends and some of the extra options) switching on the reduce temperature selected for a wash program after the setting at altitudes of 6,560 ft... -
Page 78: Suds Cooling
Programmable functions Suds cooling Anti-crease Additional water flows into the drum at The Anti-crease function helps prevent the end of the main wash to cool the creasing after the end of the program. suds down. At the end of the program, the drum Suds cooling takes place when a continues to turn for up to 30 minutes. -
Page 79: Chlorine Bleach
Programmable functions Chlorine bleach Welcome tone You can activate the automatic The welcome tone sounds whenever addition of chlorine bleach at the end the washing machine is switched on. of the main wash. You can switch the welcome tone on or Chlorine bleach may only be used in off. -
Page 80: Networking
sensor button will have the new Remote control “SmartStart” function rather than the “Delay Start” function. You can use the Miele app to check the status of your washing machine Use the sensor button to set a from anywhere and start it remotely. -
Page 81: Remoteupdate
If you do not install an update, you can you initiate installation manually. continue to use your washing machine Deactivate RemoteUpdate if you do not in the usual way. However, Miele want any updates to be downloaded recommends installing updates. automatically. -
Page 82: Switching Off Wifi
This is the only way to ensure that all personal data has been removed and the previous owner will no longer be able to access the washing machine. A new connection setup has to be carried out in order to use the Miele@home setting again. -
Page 83: Detergents And Care Products
- Excellent stain removal even at low Miele washing machines. temperatures These and many other useful products can be ordered via the Miele online UltraColor (liquid detergent) shop, from your Miele dealer, or from - With color-protection formula for Miele directly (see end of this manual brilliant colors for contact details). -
Page 84: Special-Purpose Detergents
These special-purpose detergents are available as convenient single-use - Visibly renews fabrics with just one capsules. wash - Special Miele formula with Caps Sport Novozymes technology - For synthetic fabrics - Removes pilling and renews color - Neutralizes unpleasant odors thanks... -
Page 85: Fabric Care
Detergents and care products Fabric care Machine care These fabric-care products are available TwinDosCare as convenient single-use capsules. - Cleaning agent for the TwinDos Fabric softener capsules dispensing system - Fabric softener for freshly scented - For use prior to a longer pause in use laundry (at least 2 months) - Pure and thorough cleanliness with a... - Page 87 Customer Service. U.S.A. Canada Miele, Inc. Importer Miele Limited National Headquarters 9 Independence Way Headquarters and Miele Centre Princeton, NJ 08540 161 Four Valley Drive www.mieleusa.com Vaughan, ON L4K 4V8 www.miele.ca Customer Support Phone: 888-99-MIELE (64353) Customer Care Centre info@mieleusa.com...
- Page 88 WXD 160 en-US M.-Nr. 11 622 780 / 01...
Need help?
Do you have a question about the WXD 160 and is the answer not in the manual?
Questions and answers