
Related Manuals for IBM 7316-TF5


Summary of Contents for IBM 7316-TF5
- Page 1 Power Systems Installing the 7316-TF4 18.5-Inch and 7316-TF5 17.3-Inch Flat Panel Rack- Mounted Monitor and Keyboard...
- Page 2 Note Before using this information and the product it supports, read the information in “Safety notices” on page v, “Notices” on page 65, the IBM Systems Safety Notices manual, G229-9054, and the IBM Environmental Notices and User Guide, Z125–5823. ®...
-
Page 3: Table Of Contents
7316-TF5 17.3-Inch flat panel rack-mounted monitor and keyboard specifications......59 Replaceable components.......................... 60 Installing the inner rails to the monitor and keyboard assembly.............61 Installing the 7316-TF5 17.3-Inch flat panel rack-mounted monitor and keyboard into a rack... 62 Installing the cable-management arm......................63 Replacing the TF5 console........................64 Supporting information..........................64... -
Page 5: Safety Notices
Das Produkt ist nicht für den Einsatz an Bildschirmarbeitsplätzen im Sinne § 2 der Bildschirmarbeitsverordnung geeignet. Laser safety information IBM servers can use I/O cards or features that are fiber-optic based and that utilize lasers or LEDs. Laser compliance IBM servers may be installed inside or outside of an IT equipment rack. - Page 6 • To avoid hazardous conditions due to uneven mechanical loading, always install the heaviest devices in the bottom of the rack cabinet. Always install servers and optional devices starting from the bottom of the rack cabinet. vi Power Systems: Installing the 7316-TF4 18.5-Inch and 7316-TF5 17.3-Inch Flat Panel Rack-Mounted Monitor and Keyboard...
- Page 7 • Rack-mounted devices are not to be used as shelves or work spaces. Do not place objects on top of rack-mounted devices. In addition, do not lean on rack mounted devices and do not use them to stabilize your body position (for example, when working from a ladder). •...
- Page 8 DANGER: Hazardous voltage, current, or energy levels are present inside any component that has this label attached. Do not open any cover or barrier that contains this label. (L001) (L002) viii Power Systems: Installing the 7316-TF4 18.5-Inch and 7316-TF5 17.3-Inch Flat Panel Rack-Mounted Monitor and Keyboard...
- Page 9 DANGER: Rack-mounted devices are not to be used as shelves or work spaces. Do not place objects on top of rack-mounted devices. In addition, do not lean on rack-mounted devices and do not use them to stabilize your body position (for example, when working from a ladder). Stability hazard: •...
- Page 10 DC power cables. To remove all hazardous voltages, disconnect all power cords and power cables. (L003) (L007) CAUTION: A hot surface nearby. (L007) x Power Systems: Installing the 7316-TF4 18.5-Inch and 7316-TF5 17.3-Inch Flat Panel Rack-Mounted Monitor and Keyboard...
- Page 11 Exchange only with the IBM-approved part. Recycle or discard the battery as instructed by local regulations. In the United States, IBM has a process for the collection of this battery. For information, call 1-800-426-4333. Have the IBM part number for the battery unit available when you call.
- Page 12 Be sure winch is locked in position before releasing handle. Read instruction page before operating this winch. Never allow winch to unwind freely. xii Power Systems: Installing the 7316-TF4 18.5-Inch and 7316-TF5 17.3-Inch Flat Panel Rack-Mounted Monitor and Keyboard...
- Page 13 Freewheeling will cause uneven cable wrapping around winch drum, damage cable, and may cause serious injury. • This TOOL must be maintained correctly for IBM Service personnel to use it. IBM shall inspect condition and verify maintenance history before operation. Personnel reserve the right not to use TOOL if inadequate.
- Page 14 Power Systems: Installing the 7316-TF4 18.5-Inch and 7316-TF5 17.3-Inch Flat Panel Rack-Mounted Monitor and Keyboard...
-
Page 15: Installing The 7316-Tf4 18.5-Inch Flat Panel Rack-Mounted Monitor And Keyboard
• Can be shipped installed in an IBM rack Check Your Inventory Find information about the parts shipped along with the 7316-TF4 and 7316-TF5 18.5-Inch Flat Panel Rack-Mounted Monitor and Keyboard console. Note: The illustrations in this topic might differ slightly from your hardware. - Page 16 • One 2.8-m (9-ft) IEC connector power cable • Bag with M5 clip nuts, M5 stability screws, and M5 shipping screws • IBM Documentation CD 2 Power Systems: Installing the 7316-TF4 18.5-Inch and 7316-TF5 17.3-Inch Flat Panel Rack-Mounted Monitor and Keyboard...
-
Page 17: Notices And Statements In This Document
7316-TF5 18.5-Inch Flat Panel Rack-Mounted Monitor and Keyboard. The console unit fits in a rack with the front to rear rail dimensions as shown in the following table. The console unit dimensions are measured outside-to-outside and are for IBM and non-IBM racks with unthreaded and threaded holes. -
Page 18: Installing The 7316-Tf4 18.5-Inch Flat Panel Rack-Mounted Monitor And Keyboard
76 mm (3 in.) over the edge of the surface. This will help you route the keyboard-and-mouse cable more easily later in the procedure. 4 Power Systems: Installing the 7316-TF4 18.5-Inch and 7316-TF5 17.3-Inch Flat Panel Rack-Mounted Monitor and Keyboard... - Page 19 2. Carefully lift the front of the flat-panel display to the full upright position. Attention: Do not extend the keyboard feet. The flat-panel display screen might be damaged if the feet are extended when the display is closed. 3. Hold the keyboard near the keyboard tray and carefully route the keyboard-and-mouse cable down through the keyboard tray cutout and up through the cutout that is behind the flat-panel display.
-
Page 20: Installing The Console Unit In The Rack
2. Select a 1U location in the rack for the console unit. 3. Remove the shipping screw from each outer slide-rail. 6 Power Systems: Installing the 7316-TF4 18.5-Inch and 7316-TF5 17.3-Inch Flat Panel Rack-Mounted Monitor and Keyboard... - Page 21 4. (For non-threaded hole racks) Install an M5 clip nut in the front of the rack in the top hole of the 1 U-space position that you select. The clip nuts are in the bag of screws that come with the console unit.
- Page 22 8 Power Systems: Installing the 7316-TF4 18.5-Inch and 7316-TF5 17.3-Inch Flat Panel Rack-Mounted Monitor and Keyboard...
- Page 23 6. Remove the rollers from the rail and fasten them to the display using three screws on each rail. Installing the 7316-TF4 18.5-Inch Flat Panel Rack-Mounted monitor and keyboard 9...
- Page 24 Carefully slide the console unit into the ball-bearing assemblies in the rails. Carefully slide the rollers on the console unit into the notch in the slide-rails as shown in the illustration. 10 Power Systems: Installing the 7316-TF4 18.5-Inch and 7316-TF5 17.3-Inch Flat Panel Rack-Mounted Monitor and Keyboard...
- Page 25 7. Press in both release latches 1; then, grasp both sides of the console unit and push it completely into the rack 2. There will be resistance initially as the inner and outer rails are aligned. Pull the console unit out halfway, and then push it back in to seat the console unit in the rails. Do this a few times until the console unit moves smoothly in the rails.
- Page 26 Slide the C-channel onto the bracket until the cable-management arm thumbscrew aligns with the hole in the bracket. Tighten the thumbscrew. 12 Power Systems: Installing the 7316-TF4 18.5-Inch and 7316-TF5 17.3-Inch Flat Panel Rack-Mounted Monitor and Keyboard...
- Page 27 9. Connect all cables to either a server or a console switch in the rack. Connect the power cord to the short jumper cord on the cable-management arm, and then connect the power cord to a properly grounded electrical outlet or power distribution unit (PDU). For information about installing a console switch behind the console unit in the rack, see Installing the Optional Console Switch.
- Page 28 To minimize the electrical interference if you have excess video cable, arrange the cable in figure- eight loops, as shown in the following illustration. Secure the cable in the middle with a cable tie or strap. 14 Power Systems: Installing the 7316-TF4 18.5-Inch and 7316-TF5 17.3-Inch Flat Panel Rack-Mounted Monitor and Keyboard...
- Page 29 (Optional for all racks) To secure the slide-rails to the rack after installation, install an M5 flat-head stabilizer screw in the top hole on the front of each slide-rail. Installing the 7316-TF4 18.5-Inch Flat Panel Rack-Mounted monitor and keyboard 15...
- Page 30 Before you move a rack with a console unit to another location, secure the front of the console unit to the rack with two M5 shipping screws that come in the bag of screws (see the illustration). 16 Power Systems: Installing the 7316-TF4 18.5-Inch and 7316-TF5 17.3-Inch Flat Panel Rack-Mounted Monitor and Keyboard...
-
Page 31: Installing The Optional Console Switch
11. See Using the TFT-LCD display for information about operating the display. See the keyboard documentation for information about operating the keyboard. Installing the optional console switch Learn how to install the optional console switch. You can use a console switch to attach more than one server to a single display and keyboard. The optional console switch is available separately. -
Page 32: Using The Tft-Lcd Display
Learn how to use the control buttons on the TFT - LCD display. The control buttons on the lower right of the LCD display are shown in the following illustration. 18 Power Systems: Installing the 7316-TF4 18.5-Inch and 7316-TF5 17.3-Inch Flat Panel Rack-Mounted Monitor and Keyboard... - Page 33 • Brightness/Contrast: Press this button to access the controls. • Left arrow and right arrow buttons: – Press the right arrow button to select the function that is to be adjusted. – Press the left arrow or right arrow button to decrease or increase the value of the selected adjustment or to select the correct setting.
- Page 34 – Sharpness - Visual reference to light and dark - Default 50, incremental adjustment by 10 from 0 - – Pixel Clock - Analog input control - Default Panel Dependent 20 Power Systems: Installing the 7316-TF4 18.5-Inch and 7316-TF5 17.3-Inch Flat Panel Rack-Mounted Monitor and Keyboard...
-
Page 35: Maintaining The Tft-Lcd Display
– Phase - Analog input control - Default Panel Dependent – Display Info - Display Resolution and Refresh Rate – Reset Display settings - Reset Display Settings to Factory Default - confirmation required • Color Settings – Standard – Warm –... -
Page 36: Technical Specifications
• Remove finger marks and grease with a damp cloth and mild detergent; do not use solvents or abrasives. • Never use flammable cleaning material to clean an IBM display or any other electronic device. Technical specifications This topic provides the detailed technical specifications of the TFT-LCD display unit. -
Page 37: Supported Resolution Timing Charts
Operating altitude 3000 meters maximum Storage temperature -20°C to +60°C Storage humidity 5% to 95% Storage altitude 3000 meters maximum Supported resolution timing charts This topic provides the detailed supported resolution timing charts for the TFT-LCD display unit. The following tables are the supported resolution timing charts. Although additional resolutions might work, these are the supported signals. - Page 38 1024 pixels 13.003 μs 1024 pixels Blanking 4.923 μs 320 pixels 3.657 μs 288 pixels Sync 2.092 μs 136 pixels 1.219 μs 96 pixels 24 Power Systems: Installing the 7316-TF4 18.5-Inch and 7316-TF5 17.3-Inch Flat Panel Rack-Mounted Monitor and Keyboard...
- Page 39 Table 5. 1024 x 768 timing chart (continued) Type Standard Back porch 2.462 μs 160 pixels 2.235 μs 176 pixels Front porch 0.369 μs 24 pixels 0.203 μs 16 pixels Vertical Total 16.666 ms 806 lines 13.328 ms 800 lines Display 15.880 ms 768 lines...
- Page 40 1680 pixels 15.925 μs 1696 pixels Display 15.329 μs 1280 pixels 12.019 μs 1280 pixels Blanking 4.790 μs 400 pixels 3.906 μs 416 pixels 26 Power Systems: Installing the 7316-TF4 18.5-Inch and 7316-TF5 17.3-Inch Flat Panel Rack-Mounted Monitor and Keyboard...
- Page 41 Table 8. 1280 x 800 timing chart (continued) Type Standard Sync 1.533 μs 128 pixels 1.202 μs 128 pixels Back porch 2.395 μs 200 pixels 1.935 μs 206 pixels Front porch 0.862 μs 72 pixels 0.751 μs 80 pixels Vertical Total 16.720 ms 831 lines...
- Page 42 2160 pixels 15.316 μs 2240 pixels Display 9.877 μs 1600 pixels 11.487 μs 1680 pixels Blanking 3.457 μs 560 pixels 3.829 μs 560 pixels 28 Power Systems: Installing the 7316-TF4 18.5-Inch and 7316-TF5 17.3-Inch Flat Panel Rack-Mounted Monitor and Keyboard...
-
Page 43: Hardware Maintenance Information
Field replaceable units (FRUs) must be replaced only by a trained service technician, unless they are classified as customer replaceable units (CRUs). Tier 1 CRU: Replacement of Tier 1 CRUs is your responsibility. If IBM installs a Tier 1 CRU at your request without a service contract, you will be charged for the installation. - Page 44 Power cord that connects the power supply to a 39M5377 power distribution unit (PDU) You need the following tools to replace customer replaceable units: 30 Power Systems: Installing the 7316-TF4 18.5-Inch and 7316-TF5 17.3-Inch Flat Panel Rack-Mounted Monitor and Keyboard...
-
Page 45: Power Cords
For your safety, IBM provides a power cord with a grounded attachment plug to use with this IBM product. To avoid electrical shock, always use the power cord and plug with a properly grounded outlet. - Page 46 Republic of), Trinidad and Tobago, United Arab Emirates (Dubai), United Kingdom, Yemen, Zambia, Zimbabwe 39M5158 Liechtenstein, Switzerland 39M5165 Chile, Italy, Libyan Arab Jamahiriya 39M5172 Israel 32 Power Systems: Installing the 7316-TF4 18.5-Inch and 7316-TF5 17.3-Inch Flat Panel Rack-Mounted Monitor and Keyboard...
-
Page 47: Replacing The Keyboard
Table 13. Power cord part numbers and associated regions (continued) IBM power cord part number Used in these countries and regions 39M5095 220 - 240 V Antigua and Barbuda, Aruba, Bahamas, Barbados, Belize, Bermuda, Bolivia, Brazil, Caicos Islands, Canada, Cayman Islands,... - Page 48 (See the illustration.) Carefully pull the cable through the cutouts. 34 Power Systems: Installing the 7316-TF4 18.5-Inch and 7316-TF5 17.3-Inch Flat Panel Rack-Mounted Monitor and Keyboard...
-
Page 49: Replacing The Cable-Management Arm
9. Place the keyboard in the tray and exert a small amount of pressure on the keyboard to secure it to the double-sided tape on the front of the console tray. 10. Close the flat-panel display. 11. If you removed the console unit from the rack, go to “Installing the console unit in the rack” to complete the procedure. - Page 50 11. Align the C-channel on the end of the cable-management arm with the bracket on the console unit. Slide the C-channel onto the bracket until the cable-management arm thumbscrew aligns with the hole in the bracket. Tighten the thumbscrew. 36 Power Systems: Installing the 7316-TF4 18.5-Inch and 7316-TF5 17.3-Inch Flat Panel Rack-Mounted Monitor and Keyboard...
-
Page 51: Replacing The Slide-Rail Assemblies
12. If you removed a console switch from behind the console unit, reinstall it now. 13. Reconnect to the server or console switch all cables that you removed in step 2. 14. Connect power to the display. Replacing the slide-rail assemblies Learn how to replace the slide-rail assemblies. - Page 52 Remove the thumbscrew that attaches the cable-management arm to the outer slide-rail bracket. Slide the C-channel on the cable-management arm completely away from the bracket on the console unit. 38 Power Systems: Installing the 7316-TF4 18.5-Inch and 7316-TF5 17.3-Inch Flat Panel Rack-Mounted Monitor and Keyboard...
- Page 53 L012 CAUTION: Pinch hazard. (L012) b. Fully extend the console unit out of the rack. c. Press in both release latches 1. Installing the 7316-TF4 18.5-Inch Flat Panel Rack-Mounted monitor and keyboard 39...
- Page 54 7. Remove the rear bracket of the outer slide-rail from the rack by pulling the blue tab out 1 while you move the end of the slide-rail away from the rack flange and toward the center of the rack 2. 40 Power Systems: Installing the 7316-TF4 18.5-Inch and 7316-TF5 17.3-Inch Flat Panel Rack-Mounted Monitor and Keyboard...
- Page 55 8. Remove the front bracket of the outer slide-rail from the rack by pulling the blue tab out 1 while you pull the end of the slide-rail away from the rack flange and toward the center of the rack 2. Installing the 7316-TF4 18.5-Inch Flat Panel Rack-Mounted monitor and keyboard 41...
- Page 56 Holding the slide-rail horizontally, align the rear slide-rail bracket so that the bracket is on the outside of the rack mounting flanges. 42 Power Systems: Installing the 7316-TF4 18.5-Inch and 7316-TF5 17.3-Inch Flat Panel Rack-Mounted Monitor and Keyboard...
- Page 57 b. Press the rear slide-rail bracket toward the rack flange and then pull it towards the front of the rack until the locking bracket clicks into place behind the rack flange. c. Extend the slide-rail and press the front slide-rail bracket toward the rack flange and then push it towards the rear of the rack until the locking bracket clicks into place behind the rack flange.
-
Page 58: Replacing The Console Unit
2. Turn off the display and disconnect the power cord from the short jumper cord on the cable- management arm from the electrical outlet or power distribution unit (PDU). Disconnect from the 44 Power Systems: Installing the 7316-TF4 18.5-Inch and 7316-TF5 17.3-Inch Flat Panel Rack-Mounted Monitor and Keyboard... - Page 59 server or console switch any cables that are connected to the console unit (keyboard-and-mouse, video, and power cables). 3. Close the flat-panel display. 4. Remove the console unit from the rack: a. Remove the thumbscrew that attaches the cable-management arm to the outer slide-rail bracket. Slide the C-channel on the cable-management arm completely away from the bracket on the console unit.
- Page 60 (See the illustration.) Carefully pull the cable through the cutouts. 46 Power Systems: Installing the 7316-TF4 18.5-Inch and 7316-TF5 17.3-Inch Flat Panel Rack-Mounted Monitor and Keyboard...
- Page 61 5. Place the keyboard in the tray and exert a small amount of pressure on the keyboard to secure it to the double-sided tape on the front of the console tray. 6. Close the flat-panel display. Attention: • When you route the keyboard-and-mouse cable, make sure that the cable does not hang below the underside of the keyboard where it might be damaged if it interferes with the devices in the rack space below the console unit.
- Page 62 2. Repeat step “1” on page 47 and “2” on page 48 for the other outer slide-rail. 48 Power Systems: Installing the 7316-TF4 18.5-Inch and 7316-TF5 17.3-Inch Flat Panel Rack-Mounted Monitor and Keyboard...
- Page 63 3. Remove the shipping screw from each new outer slide-rail. Installing the 7316-TF4 18.5-Inch Flat Panel Rack-Mounted monitor and keyboard 49...
- Page 64 Extend the slide-rail and press the front slide-rail bracket towards the rack flange and then push it towards the rear of the rack until the locking bracket clicks into place behind the rack flange. 50 Power Systems: Installing the 7316-TF4 18.5-Inch and 7316-TF5 17.3-Inch Flat Panel Rack-Mounted Monitor and Keyboard...
- Page 65 d. Repeat steps “4.a” on page 50 to “4.c” on page 50 to attach the other outer slide-rail. Installing the console unit in the rack Learn how to install the console unit in the rack. To install the console unit in the rack, complete the following steps: 1.
- Page 66 Do this a few times until the console unit moves smoothly in the rails. 52 Power Systems: Installing the 7316-TF4 18.5-Inch and 7316-TF5 17.3-Inch Flat Panel Rack-Mounted Monitor and Keyboard...
- Page 67 3. Align the C-channel on the end of the cable-management arm with the bracket on the console unit. Slide the C-channel onto the bracket until the cable-management arm thumbscrew aligns with the hole in the bracket. Tighten the thumbscrew. Installing the 7316-TF4 18.5-Inch Flat Panel Rack-Mounted monitor and keyboard 53...
- Page 68 4. Reinstall the stabilizer screws if you have removed them. 54 Power Systems: Installing the 7316-TF4 18.5-Inch and 7316-TF5 17.3-Inch Flat Panel Rack-Mounted Monitor and Keyboard...
- Page 69 5. If you removed a console switch from behind the console unit, reinstall it now. 6. Reconnect to the server or console switch all cables that you removed. 7. Connect power to the display. 8. Fully extend the console unit from the front of the rack, and then neatly route the cables within the rack and secure them with cable straps along the way.
- Page 70 To minimize the electrical interference if you have excess video cable, arrange the cable in figure-eight loops, as shown in the following illustration. Secure the cable in the middle with a cable tie or strap. 56 Power Systems: Installing the 7316-TF4 18.5-Inch and 7316-TF5 17.3-Inch Flat Panel Rack-Mounted Monitor and Keyboard...
- Page 71 Installing the 7316-TF4 18.5-Inch Flat Panel Rack-Mounted monitor and keyboard 57...
- Page 72 58 Power Systems: Installing the 7316-TF4 18.5-Inch and 7316-TF5 17.3-Inch Flat Panel Rack-Mounted Monitor and Keyboard...
-
Page 73: Installing The 7316-Tf5 17.3-Inch Flat Panel Rack-Mounted Monitor And Keyboard
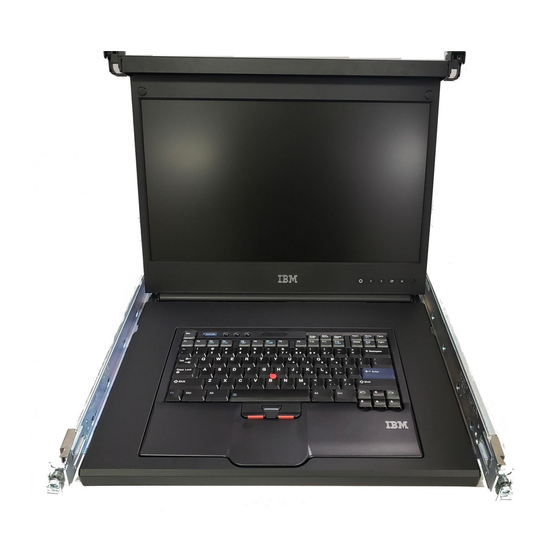
Learn how to install the 7316-TF5 17.3-Inch flat panel rack-mounted monitor and keyboard. The IBM 7316-TF5 17.3-Inch flat panel rack-mounted monitor and keyboard is a flat-panel display and keyboard tray in one unit. The console unit occupies 1U of space in a rack. You can install an optional console switch behind the standard console in the rack to attach more than one server to the flat-panel display and keyboard. -
Page 74: Replaceable Components
Display with Keyboard, Sweden / Fin 02JD506 Display with Keyboard, Switzerland 02JD507 Display with Keyboard, Portugal 02JD508 Display with Keyboard, Belgium 02JD509 Display with Keyboard, Japan 02JD510 60 Power Systems: Installing the 7316-TF4 18.5-Inch and 7316-TF5 17.3-Inch Flat Panel Rack-Mounted Monitor and Keyboard... -
Page 75: Installing The Inner Rails To The Monitor And Keyboard Assembly
Installing the inner rails to the monitor and keyboard assembly To install the 7316-TF5 into a rack, you may need to attach the inner slide rails to the TF5 console. Attach the electrostatic discharge (ESD) wrist strap. The ESD wrist strap must be connected to an unpainted metal surface until the service procedure is completed, and if applicable, until the service access cover is replaced. -
Page 76: Installing The 7316-Tf5 17.3-Inch Flat Panel Rack-Mounted Monitor And Keyboard Into A Rack
Install the 7316-TF5 17.3-Inch flat panel rack-mounted monitor and keyboard into a rack. To install the 7316-TF5 17.3-Inch flat panel rack-mounted monitor and keyboard into a rack, do the following: Attach the electrostatic discharge (ESD) wrist strap. The ESD wrist strap must be connected to an unpainted metal surface until the service procedure is completed, and if applicable, until the service access cover is replaced. -
Page 77: Installing The Cable-Management Arm
4. Attach the cable management arm to the rear of the unit with the two 6-32 screws that removed in the previous step. 5. Connect the cables and route them through the cable management arm and unit opening. Installing the 7316-TF5 17.3-Inch flat panel rack-mounted monitor and keyboard 63... -
Page 78: Replacing The Tf5 Console
IBM to entitle the machine for future maintenance or warranty service. • Verify that the machine serial number on the failing console matches the serial number reported to IBM technical support. -
Page 79: Notices
Consult your local IBM representative for information on the products and services currently available in your area. Any reference to an IBM product, program, or service is not intended to state or imply that only that IBM product, program, or service may be used. Any functionally equivalent product, program, or service that does not infringe any IBM intellectual property right may be used instead. -
Page 80: Privacy Policy Considerations
International Business Machines Corp., registered in many jurisdictions worldwide. Other product and service names might be trademarks of IBM or other companies. A current list of IBM trademarks is available on the web at Copyright and trademark information. - Page 81 Um dieses sicherzustellen, sind die Geräte wie in den Handbüchern beschrieben zu installieren und zu betreiben. Des Weiteren dürfen auch nur von der IBM empfohlene Kabel angeschlossen werden. IBM übernimmt keine Verantwortung für die Einhaltung der Schutzanforderungen, wenn das Produkt ohne Zustimmung von IBM verändert bzw.
- Page 82 This statement applies to products greater than 20 A, single phase. This statement applies to products greater than 20 A per phase, three-phase. Japan Voluntary Control Council for Interference (VCCI) Notice Korea Notice 68 Power Systems: Installing the 7316-TF4 18.5-Inch and 7316-TF5 17.3-Inch Flat Panel Rack-Mounted Monitor and Keyboard...
- Page 83 Properly shielded and grounded cables and connectors must be used in order to meet FCC emission limits. Proper cables and connectors are available from IBM-authorized dealers. IBM is not responsible for any radio or television interference caused by using other than recommended cables and connectors or by unauthorized changes or modifications to this equipment.
-
Page 84: Class B Notices
Um dieses sicherzustellen, sind die Geräte wie in den Handbüchern beschrieben zu installieren und zu betreiben. Des Weiteren dürfen auch nur von der IBM empfohlene Kabel angeschlossen werden. IBM übernimmt keine Verantwortung für die Einhaltung der Schutzanforderungen, wenn das Produkt ohne Zustimmung von IBM verändert bzw. - Page 85 Tel: +49 (0) 800 225 5426 email: HalloIBM@de.ibm.com Generelle Informationen: Das Gerät erfüllt die Schutzanforderungen nach EN 55024 und EN 55032 Klasse B Japan Electronics and Information Technology Industries Association (JEITA) Notice This statement applies to products less than or equal to 20 A per phase.
-
Page 86: Terms And Conditions
Permissions for the use of these publications are granted subject to the following terms and conditions. Applicability: These terms and conditions are in addition to any terms of use for the IBM website. Personal Use: You may reproduce these publications for your personal, noncommercial use provided that all proprietary notices are preserved. - Page 87 IBM reserves the right to withdraw the permissions granted herein whenever, in its discretion, the use of the publications is detrimental to its interest or, as determined by IBM, the above instructions are not being properly followed.
- Page 88 74 Power Systems: Installing the 7316-TF4 18.5-Inch and 7316-TF5 17.3-Inch Flat Panel Rack-Mounted Monitor and Keyboard...
- Page 90 IBM®...
Need help?
Do you have a question about the 7316-TF5 and is the answer not in the manual?
Questions and answers