Advertisement
Available languages
Available languages
Quick Links
SAFETY RECALL
CHECK YOUR TWO STAGE COMPACT
SNOW THROWER TO SEE IF IT IS RECALLED...
Over inflating the tire with excessive pressure (well above 20 PSI) may
cause the plastic wheel rims to explode posing a risk of serious injury.
8 AM and 5 PM EST Monday through Friday.
IMPORTANT!
If you have already received and installed the Recall Kit which includes two
Pressure Relief Valves, two Warning labels, and installation instructions (Form # 769-02127,
769-02722 or 769-02723), please disregard this notice.
In cooperation with the U.S. Consumer Product Safety Commission
31A-3BAD762 and 31AS3DDE729
Sold between July 2004 and March 2006
________________________________
Do not inflate tires!
CALL
Customer Service toll free between
1-888-848-6038
Yard Machine Models Affected
31A-3AAD700, 31A-3BAD700,
31A-3BAD729, 31A-3BAD752,
Troy-Bilt Models Affected
31AS3BB2766
Craftsman Models Affected
247.88255 (31A-3BDE799)
Sold between July 2004 and March 2006
247.88700 (31AS3AAD799)
Sold between July 2005 and March 2006
Form No. 769-04961
Advertisement

Related Manuals for Craftsman 247.88255


Summary of Contents for Craftsman 247.88255
- Page 1 31A-3BAD762 and 31AS3DDE729 Troy-Bilt Models Affected 31AS3BB2766 Sold between July 2004 and March 2006 ________________________________ Craftsman Models Affected 247.88255 (31A-3BDE799) Sold between July 2004 and March 2006 247.88700 (31AS3AAD799) Sold between July 2005 and March 2006 Over inflating the tire with excessive pressure (well above 20 PSI) may cause the plastic wheel rims to explode posing a risk of serious injury.
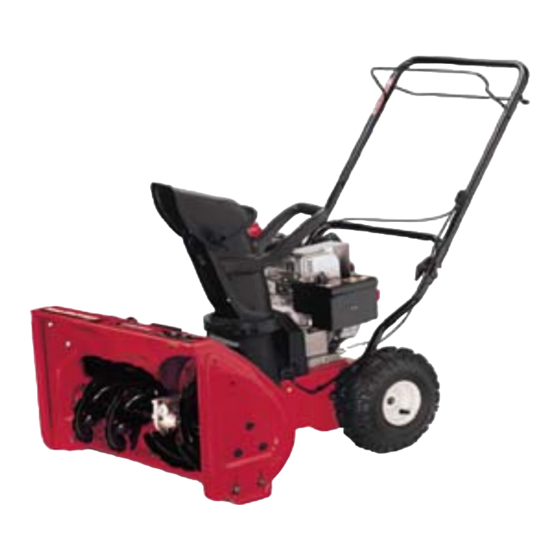
- Page 2 Operator’s Manual ® 5.5 Horse Power 24” 4-CYCLE 3-SPEED SNOW THROWER Model No. 247.88255 • SAFETY • ASSEMBLY • OPERATION CAUTION: Before using • MAINTENANCE this product, read this • PARTS LIST manual and follow all • ESPANOL safety rules and operating instructions.
-
Page 3: Table Of Contents
For two years from the date of purchase, when this Craftsman Snow Thrower is maintained, lubricated and tuned up according to the instructions in the owner’s manual, Sears will repair, free of charge, any defect in material and workmanship. If this Craftsman snow thrower is used for commercial or rental purposes, this warranty applies for only 30 days from the date of purchase. -
Page 4: Safety Labels
SAFETY LABELS ������ ������ �� ���� ���� ���� �������� �������� ��� ������ ������� ���� �������� �� ����� ��� �������� ����� ��� ����� ��� ��������� ���� �� ������ �� ��������� ������ ��������� ������ ������� ���� ������� �� ��� ������ ������ ������� ����� ��� ������... - Page 5 SAFE OPERATION PRACTICES WARNING: Engine Exhaust, some of its constituents, and certain vehicle components contain or emit chemicals known to State of California to cause cancer and birth defects or other reproductive harm. DANGER: This machine was built to be operated according to the rules for safe operation in this manual. As with any type of power equipment, carelessness or error on the part of the operator can result in serious injury.
- Page 6 SAFE OPERATION PRACTICES Operation Maintenance & Storage 1. Do not put hands or feet near rotating parts, in the auger/impeller housing 1. Never tamper with safety devices. Check their proper operation regularly. or chute assembly. Contact with the rotating parts can amputate hands Refer to the maintenance and adjustment sections of this manual.
- Page 7 ASSEMBLY IMPORTANT: This unit is shipped with the engine full of oil. After assembly, see page 10 for fuel and oil details. Removing From Carton 1. Cut the corners of the carton and lay the sides flat on the ground. Remove all packing inserts.
- Page 8 ASSEMBLY WARNING: Maximum tire pressure under any circumstance is 24 psi. Equal tire pressure should be maintained at all times. Excessive pressure (over 30 psi) when seating beads may cause tire/rim assembly to burst with force sufficient to cause serious injury. Skid Shoe High Position Middle Position...
-
Page 9: Know Your Snow Thrower
Know Your Snow Thrower ����� ������� ����� ������� ����� ������� ���� ��������� ����� �������� ��� ����� ����� ����� �������� ��������� ���� ����� ������ ����� ���� ����� ����� ����� ���� ���� Figure 6 WARNING: Be familiar with all the controls on the snow thrower and their proper operation. Know how to stop the machine and disengage them quickly. - Page 10 Know Your Snow Thrower Clean Out Tool Gasoline Cap Muffler Spark Oil Fill The clean out tool is provided to unclog the discharge opening. Do not Plug unclog discharge chute while engine is running. WARNING: Before unclogging, shut off engine and Carburetor remain behind handles until all moving parts have Cover...
-
Page 11: Operation
Operation Before Starting Engine 6. Push primer button while covering the vent hole. Remove your finger from the primer between primes. Do not prime if temperature Engine Oil is above 50º F; prime two times between 50º F and 15º F; and The engine is shipped with oil in it. - Page 12 Operation 6. As the snow thrower starts to move, maintain a firm hold on the 4. If for some reason, you have to operate the snow thrower on gravel, handle, and guide the snow thrower along the path to be cleared. keep the skid shoe in the highest position for maximum clearance between the ground and the shave plate.
-
Page 13: Maintenance And Service
Maintenance & Service General Recommendations Shear Pin 1. Always observe safety rules when performing any maintenance. Cotter Pin 2. The warranty on this snow thrower does not cover items that have Skid Shoe been subjected to operator abuse or negligence. To receive full value from the warranty, operator must maintain the snow thrower as instructed in this manual. - Page 14 Maintenance & Service WARNING: Perform belt maintenance outdoors as Auger Cable some gas may possibly leak from the carburetor even Adjustment though you placed a sheet of plastic underneath the Bracket gas cap to prevent the gas cap from leaking. Adjusting The Auger Cable Periodic adjustment to the auger control cable may be required due to normal stretch and wear on the belt.
- Page 15 Maintenance & Service Drive Belt � NOTE: To replace the Drive Belt, you must first follow Auger Belt instructions. Replace the drive belt before reassembling the new auger belt. 1. Remove hairpin clip and pivot rod from unit. See Figure 15. 2.
- Page 16 Maintenance & Service Check Spark Plug � � Clean spark plug and reset the electrode gap to 0.030” at least once a season or every 100 hours of operation; replace every 200 hours of operation. 1. Clean area around the spark plug base. 2.
-
Page 17: Off Season Storage & Troubleshooting
Off-Season Storage WARNING: Do not drain carburetor if using fuel stabi- If the snow thrower will not be used for 30 days or longer, or if it is the lizer. Never use engine or carburetor cleaning products end of the snow season when the last possibility of snow is gone, the equipment needs to be stored properly. - Page 18 Troubleshooting Engine fails to start 1. Fuel tank empty, or stale fuel 1. Fill tank with clean fresh gasoline. 2. Blocked fuel line 2. Clean fuel line 3. Key not fully plugged into unit 3. Make sure key is fully inserted into unit 4.
- Page 19 Snow Thrower Parts List...
- Page 20 Snow Thrower Parts List PART DESCRIPTION Qty. PART DESCRIPTION Qty. NUMBER NUMBER 684-04037 Chute Assembly 731-04218B Impeller 710-04071 Carriage Bolt 5/16-18 x 1.0” 732-0611 Extension Spring 710-0451 Carriage Bolt 5/16-18 736-0174 Wave Washer 712-3068 Flange Lock Nut, 5/16-18 738-0281 Shoulder Screw 3/8-16 720-0284 Nut Knob 5/16-18 741-0245...
-
Page 21: Parts List
Parts List... - Page 22 Parts List PART DESCRIPTION Qty. PART DESCRIPTION Qty. NUMBER NUMBER 710-0449 Carriage Screw 5/16-18 x 2.25” 710-0696 Hex Bolt 3/8-24 x 0.875” 710-0106 Hex Screw 1/4-20 x 1.25” 710-1245B Lock Bolt 5/16-24 x 0.875” 710-1260A Screw, 5/16-18 x .75” 731-05364 Belt Cover 712-04064 Flange Lock Nut 1/4-20...
- Page 23 Snow Thrower Parts List - Engine Components...
- Page 24 Snow Thrower Parts List - Engine Components PART DESCRIPTION Qty. PART DESCRIPTION Qty. NUMBER NUMBER 36469A Cylinder (Incl. 2,20,72 & 125) 610961 Flywheel Key 26727 Dowel Pin 611195 Flywheel 30969 Extension Cap (1/4-18 NPT) 650815 Belleville Washer 28277 Washer 650816 Flywheel Nut 31334 Governor Rod...
- Page 25 Snow Thrower Parts List - Engine Components (Continued from previous page) PART DESCRIPTION Qty. PART DESCRIPTION Qty. NUMBER NUMBER 650664 Screw, 1/4-20 x 1-19/32” 35072 Carburetor Cover 33673A *Intake Pipe Gasket 650257 Screw, 8-32 x 5/16” 36701 Compression Release Weight 36247 Fuel Tank Bracket 36702...
- Page 26 Snow Thrower Parts List - Engine Components PART DESCRIPTION Qty. NUMBER 640084B Carburetor (Incl. 184 of Engine Parts List) 631615 Throttle Shaft & Lever Assembly 631767 Throttle Return Spring 640070 Throttle Shutter 650506 Shutter Screw † 632108 Choke Shaft & Lever Assembly 631890 Choke Shutter 630735...
- Page 27 NOTES: Use this page to make notes and write down important information.
-
Page 28: Español
Manual del operador ® 5.5 caballos de fuerza MÁQUINA QUITANIEVE DE 24”, 4 CICLOS Y 3 VELOCIDADES Número de modelo 247.88255 • SEGURIDAD • MONTAJE PRECAUCIÓN: antes de • OPERACIÓN utilizar este producto, lea • MANTENIMIENTO este manual y siga todas •... - Page 29 Sears reparará sin cargo cualquier defecto de materiales o mano de obra. Si esta máquina quitanieve Craftsman se utiliza para propósitos comerciales o de alquiler, esta garantía se aplica sólo durante 30 días a partir de la fecha de compra.
- Page 30 ETIQUETAS DE SEGURIDAD ������ ������ �� ���� ���� ���� �������� �������� ��� ������ ������� ���� �������� �� ����� ��� �������� ����� ��� ����� ��� ��������� ���� �� ������ �� ��������� ������ ��������� ������ ������� ���� ������� �� ��� ������ ������ ������� ����� ��� ������...
- Page 31 PRÁCTICAS DE OPERACIÓN SEGURAS DVERTENCIA: el escape del motor de este producto, algunos de sus componentes y algunos compo- nentes del vehículo contienen o emiten productos químicos que el estado de California considera que pueden producir cáncer, defectos de nacimiento u otros problemas reproductivos. PELIGRO: : esta máquina está...
- Page 32 PRÁCTICAS DE OPERACIÓN SEGURAS Operación Mantenimiento y almacenamiento 1. Nunca manipule los dispositivos de seguridad de manera imprudente. 1. No ponga las manos o los pies cerca de las piezas rotatorias, en la caja Controle periódicamente que funcionen de forma adecuada. Remítase a de la barrena / motor o en el montaje del canal de descarga.
- Page 33 MONTAJE IMPORTANTE: esta unidad se envía con el motor lleno de aceite. Después del montaje, consulte la página 10 para los detalles del combustible y el aceite. Extracción de la unidad de la caja 1. Corte las esquinas de la caja de cartón y extiéndala en el piso Quite todos los insertos de empaque.
- Page 34 MONTAJE NOTA: no se recomienda operar esta máquina quitanieve sobre grava, ya que es posible que la misma tome la grava suelta y la barrena la expulse, lo cual podría causar lesiones personales o dañar la máquina quitanieve. Si desde operar la unidad sobre grava, mantenga la zapata antideslizante en la posición más alta para lograr una separación máxima.
- Page 35 Conozca su máquina quitanieve ������ ��� ������� ���������� �� �� ������� ������� �� ������� �� �� ������������ ��������� �� ��������� ���� �� �� �������� ����� �������� ������� ��� ����� ����������� �� ������ ��� ����� ��������� ������� ��� ����� ����� �� ������� �������...
- Page 36 Conozca su máquina quitanieve Herramienta de limp Tapa de la gasolina Silenciador Bujía de La herramienta de limpieza se adjunta para destapar la abertura de descarga. Llenado de encendido No destape el canal de descarga mientras el motor está en marcha. ADVERTENCIA: antes de destaparlo, apague el motor y permanezca detrás de las manijas hasta que todas Cubierta del...
- Page 37 Operación Antes de encender el motor 6. Presione el botón del cebador mientras cubre el agujero de ventilación. Quite su dedo del cebador entre un cebado y otro. No Aceite del motor cebe si la temperatura supera los 50°F; cebe dos veces entre 50°F y 15°F;...
- Page 38 Operación 6. A medida que la máquina quitanieve comienza a moverse, 4. Si por algún motivo tiene que usar la máquina quitanieve sobre sostenga firmemente la manija y guíe la máquina a lo largo del grava, mantenga la zapata antideslizante en la posición más camino que desea limpiar.
- Page 39 Mantenimiento y servicio Recomendaciones generales Pasador de cuchilla 1. Respete siempre las reglas de seguridad cuando realice tareas de Pasador de chaveta mantenimiento. Zapata antideslizante 2. La garantía de esta máquina quitanieve no cubre elementos que han estado sujetos al mal uso o negligencia del operador. Para recibir el reembolso total de la garantía, el operador deberá...
- Page 40 Mantenimiento y servicio 2. Drene la gasolina del tanque de combustible por debajo de ½ Ménsula de tanque o haga funcionar la máquina con menos de medio tanque, ajuste del cable o coloque un trozo de plástico debajo del tapón de llenado del de la barrena combustible para evitar una pérdida de gasolina.
- Page 41 Mantenimiento y servicio NOTA: si no reemplaza la correa de la transmisión, proceda al paso 5 en la sección “Correa de la transmisión”. � Correa de la transmisión NOTA: para reemplazar la correa de la transmisión, primero deben seguirse las instrucciones de la correa de la barrena. Reemplace la correa de la transmisión antes de volver a ensamblar la nueva correa de la barrena.
- Page 42 Mantenimiento y servicio NOTA: aunque los aceites de viscosidad múltiple (5W30, 10W30 etc.) me- � joran el encendido cuando el clima es frío, los mismos también aumentan � el consumo de aceite cuando se usan a más de 32ºF. Compruebe el nivel de aceite de la máquina quitanieve con mayor frecuencia para evitar que el motor resulte dañado por operar con un nivel de aceite bajo.
- Page 43 Almacenamiento fuera de temporada ADVERTENCIA: no drene el carburador si está utili- Si no se va a utiliza el equipo durante 30 días o más, o si es el final zando un estabilizador de combustible. En el depósito de la temporada de nieve y ya no existe posibilidad de que nieve, de combustible no use nunca productos de limpieza es necesario almacenar el equipo de manera adecuada.
- Page 44 Solución de problemas El motor no arranca 1. El tanque de combustible está 1. Llene el tanque con gasolina limpia. vacío o el combustible es viejo 2. Limpie la línea del combustible 2. La línea del combustible está 3. Inserte la llave y póngala en la bloqueada posición ON (encendido) 3.
- Page 45 Get it fixed, at your home or ours! Your Home For repair – in your home – of all major brand appliances, lawn and garden equipment, or heating and cooling systems, no matter who made it, no matter who sold it! For the replacement parts, accessories and owner’s manuals that you need to do-it-yourself.
Need help?
Do you have a question about the 247.88255 and is the answer not in the manual?
Questions and answers