
Related Manuals for Be Cool BC18KL2101F


Summary of Contents for Be Cool BC18KL2101F
- Page 1 BEDIENUNGSANLEITUNG Mobiles Klimagerät BC18KL2101F HERZLICHEN GLÜCKWUNSCH! VIELEN DANK, DASS SIE SICH FÜR EIN PRODUKT VON BE COOL ENTSCHIEDEN HABEN.
-
Page 2: Table Of Contents
10 – 12 Tipps zur Richtigen Anwendung Reinigungshinweise 14 – 15 Tätigkeiten zu Saisonbeginn/-ende Behebung von Problemen Technische Informationen Garantie Nur für BE COOL-SERVICE CENTER 35 – 40 Anweisungen zur Reparatur von Geräten, die R290 enthalten Seite 2 von 40... -
Page 3: Deutsch
LESEN SIE BITTE DIE BEDIENUNGSANLEITUNG SORGFÄLTIG DURCH BEVOR SIE MIT MONTAGE, INSTALLATION, BEDIENUNG ODER WARTUNG BEGINNEN. SCHÜTZEN SIE SICH SELBST UND ANDERE, INDEM SIE DIE SICHERHEITSHINWEISE BEFOLGEN. DIE NICHTBEACHTUNG VON ANWEISUNGEN KÖNNTE ZU PERSONEN UND/ODER SACHSCHÄDEN UND/ODER ZUM VERLUST DES GARANTIEANSPRUCHS FÜHREN! WICHTIGE INFORMATIONEN ZUR SICHERHEIT, STANDORT UND ZUM ELEKTRISCHEN ANSCHLUSS. - Page 4 Benutzen Sie das Klimagerät nicht in der Nähe von Wasser oder starker Feuchtigkeit, z.B. im feuchten Keller, neben Schwimmbecken, Badewanne oder Dusche. Achten Sie darauf, dass kein Wasser in das Gerät eindringt. Stellen Sie keine schweren oder heißen Gegenstände auf das Gerät und decken Sie das Gerät nie ab.
-
Page 5: Recycling, Entsorgung, Konformitätserklärung
Die Personen, die an einem Kühlkreis arbeiten bzw. Eingriffe vornehmen, müssen im Besitz einer von einer bevollmächtigten Behörde ausgestellten gültigen Bescheinigung sein, welche ihre Sachkenntnis hinsichtlich des Umgangs mit Kältemitteln durch eine von den Industrieverbänden anerkannte Bewertungsspezifikation bescheinigt. Die Reparatureingriffe müssen entsprechend der Anleitungen der Herstellerfirma des Gerätes durchgeführt werden. -
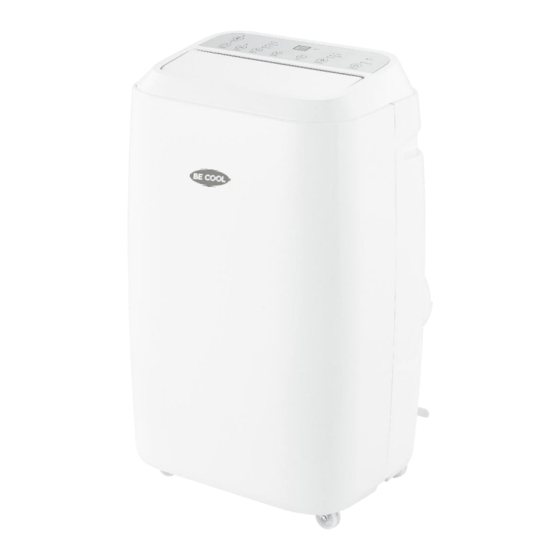
Page 6: Beschreibung Des Geräts Und Lieferumfang
BESCHREIBUNG DES GERÄTES und LIEFERUMFANG VORDERSEITE-Ansicht 1. Bedienfeld 2. Laufrollen SEITLICHE-Ansicht 3. Tragegriff 4. Luftauslassgitter RÜCKSEITE-Ansicht 5. Lufteinlassgitter 6. Kondenswasserauslass 7. Netzkabel 8. Öffnung für den Abluftschlauch 9. Abluftschlauch 10. Fernbedienung 11. Adapter Abluftschlauchverjüngung 12. Adapter Abluftschlauchverjüngung Fenster 13. Fenster-Kit Seite 6 von 40... -
Page 7: Inbetriebnahme
INBETRIEBNAHME VORBEREITUNG ZUR VERWENDUNG WICHTIG Lassen Sie das Gerät mindestens 2 Stunden aufrecht stehen, bevor Sie es das erste Mal in Betrieb nehmen und vergewissern Sie sich, dass der Kondenswasserauslass gut verschlossen ist. Stellen Sie das Gerät bei einer richtig geerdeten Steckdose auf einen ebenen Untergrund ... - Page 8 4. Installation mithilfe des Fensterkits Legen Sie die Fensterhalterung auf den Fensterrahmen, schieben Sie diese über die ganze Fensterbreite heraus, sichern Sie diese mit einem Stift und schieben das Fenster auf die Halterung. Schieben Sie die Abluftschlauchverjüngung in den Ausschnitt ein.
-
Page 9: Bedienfeld Und Fernbedienung
BEDIENFELD und FERNBEDIENUNG BEDIENFELD 1. Beschreibung des Bedienfelds 1. SLEEP Taste + Kontrollleuchte 7. TIMER Taste + Kontrollleuchte 2. Kontrollleuchten Betriebsarten 8. MODE-Taste Betriebsart einstellen 3. Display 9. Taste Temperatur SENKEN − 4. Kontrollleuchten Gebläsestufe 10. Taste Temperatur ERHÖHEN + 5. -
Page 10: Funktionen Einstellen
2. Beschreibung der Fernbedienung SPEED Gebläsestufe einstellen TEMP + Taste Temperatur ERHÖHEN+ MODE Betriebsart einstellen SLEEP Schlaffunktion TEMP - Taste Temperatur SENKEN− TIMER Timer aktivieren/deaktivieren SWING Oszillation aktivieren/deaktivieren POWER Ein/Ausschalten FUNKTIONEN EINSTELLEN Sie können alle Funktionen direkt am Gerät als auch mithilfe der Fernbedienung einstellen. - Page 11 Sobald Sie die Gebläsestufe einstellen, leuchtet die jeweilige Kontrollleuchte auf. HINWEIS Im Sommer wird empfohlen eine Raumtemperatur zwischen 24° und 27° einzustellen Es wird auf jeden Fall davon abgeraten, eine Temperatur auszuwählen, die weit unter der Außentemperatur liegt. Entfeuchtungs-Modus Optimal zur Reduzierung der Feuchtigkeit im Raum (z.B.: im Frühling und Herbst, für feuchte Räume, während Regenperioden usw.).
- Page 12 TIMER Mit dieser Funktion können Sie das Gerät zeitgesteuert ein und -ausschalten. 1. Programmiertes Einschalten • Drücken Sie, während das Gerät ausgeschalten ist, auf die „Timer“-Taste. • Benutzen Sie anschließend die Tasten + und −, um die Vorlaufzeit (Zeitraum von 1-24 Stunden) einzustellen die Kontrollleuchte für den Timer leuchtet auf.
-
Page 13: Tipps Zur Richtigen Anwendung
TIPPS ZUR RICHTIGEN ANWENDUNG Finden Sie hier einige Hinweise, um die optimale Leistung des Klimagerätes zu erzielen: Fenster und Türen in dem zu klimatisierenden Raum schließen. Ausgenommen bei permanenter Installation des Geräts ist die Tür ein wenig offen zu halten (Spalt 1cm) einen guten... -
Page 14: Reinigungshinweise
REINIGUNGSHINWEISE Bevor Sie das Gerät reinigen, schalten Sie es mit der ON/OFF Taste des Bedienfeldes oder der Fernbedienung aus. Warten Sie einige Minuten und ziehen Sie dann stets den Stecker, um das Gerät vom elektrischen Netz zu trennen. REINIGEN DES GEHÄUSES Reinigen Sie das Gerät mit einem mäßig feuchten Tuch und wischen Sie es anschließend mit einem trockenen Tuch ab. - Page 15 WASSERTANK ENTLEEREN Das Klimagerät hat einen Wasserstand-Sicherheitsschalter, der den Wasserstand regelt. Sobald der Wasserstand eine gewisse Höhe erreicht, leuchtet die Wasserfüllstandanzeige auf (Kontrollleuchte W.F auf dem Bedienfeld). Um den Kondenswasserbehälter zu entleeren, befolgen Sie folgende Schritte: Ziehen Sie den Netzstecker aus der Steckdose. Stellen Sie ein Auffanggefäß...
-
Page 16: Tätigkeiten Zu Saisonbeginn/-Ende
TÄTIGKEITEN ZU SAISONBEGINN/- ENDE KONTROLLEN ZU SAISONBEGINN Überprüfen Sie, ob das Stromversorgungskabel und die Steckdose in Ordnung sind und ob die Erdung funktionsfähig ist. Versichern Sie sich, dass der Stöpsel sorgfältig im Kondenswasserauslass angebracht ist und die Filter eingesetzt sind. ... -
Page 17: Behebung Von Problemen
BEHEBUNG DER PROBLEME Bevor Sie sich mit unserer Kundenhotline/ Servicestelle in Verbindung setzen, prüfen Sie bitte, ob sich der Fehler anhand der untenstehenden Hinweise beheben lässt. PROBLEM MÖGLICHE URSACHE LÖSUNG Stromausfall Wiederherstellung Stromversorgung abwarten. Das Gerät ist nicht an der Gerät Stromversorgung Stromversorgung... -
Page 18: Technische Informationen
Technische Informationen Artikelnummer BC18KL2101F Eingangsspannung 220-240V~ Frequenz 50Hz Stromstärke 8.6A Max. Stromstärke 9.3A Leistungsaufnahme (Kühlen) 1923W Max. Leistungsaufnahme 2000W Kühlleistung 5.0KW / 18.000BTU/h Energieeffezienz EER Kältemittel/Füllung R290/300g Geräuschpegel (Schalldruck) 65dB(A) Spritzwasserschutzklasse IPX0 Luftumwälzung m³/h Max. zulässiger Druck 3.2Mpa Gewicht 34kg Schuss Home Electronic GmbH Kontaktadressen für weitere Informationen... -
Page 19: Garantie
Mit diesem Qualitätsprodukt von BE COOL haben Sie eine Entscheidung für Innovation, Langlebigkeit und Zuverlässigkeit getroffen. Für dieses BE COOL Gerät gewähren wir eine Garantiezeit von 2 Jahren ab Kaufdatum gültig in Österreich! Sollten in diesem Zeitraum wider Erwarten dennoch Servicearbeiten an Ihrem Gerät notwendig sein, garantieren wir Ihnen hiermit eine kostenlose Reparatur (Ersatzteile und Arbeitszeit) oder (nach Ermessen der Firma Schuss) das Produkt auszutauschen. -
Page 20: English
Tips for correct use Maintence and cleaning 30 – 31 Tasks at beginning and end of the season Troubleshooting Technical Informations Warranty ONLY FOR BE COOL-SERVICE CENTER 35 – 40 Instructions for repairing devices that contain R290 Seite 20 von 40... -
Page 21: Important Informations On Safety, Location And Electrical Connection
PLEASE READ THE INSTRUCTION MANUAL CAREFULLY BEFORE STARTING ASSEMBLY, INSTALLATION, OPERATION OR MAINTENANCE. PROTECT YOURSELF AND OTHERS BY FOLLOWING THE SAFETY INSTRUCTIONS. FAILURE TO COMPLY WITH INSTRUCTIONS COULD RESULT IN PERSONS AND / OR PROPERTY DAMAGES AND / OR LOSS OF THE WARRANTY CLAIM! IMPORTANT INFORMATION SAFETY,... -
Page 22: Recycling, Disposal And Declaration Of Confirmity
34. The air conditioner should be transported in an upright position or slightly sideways position. Empty the internal condensate tank first. Wait at least one hour after transporting the device before turning on the device. 35. Always contact authorized service centers for repairs to the device, power plug, or cable. 36. -
Page 23: Technical Description And Delivery Content
TECHNICAL DESCRIPTION and DELIVERY CONTENT FRONT SIDE 1. Control panel 2. Castors SEITLICHE-Ansicht 3. Handle 4. Air Outlet BACK SIDE 5. Air Inlet 6. Condensation water drain 7. Power supply cable 8. Opening for exhaust hose 9. Exhaust hose 10. Remote Control 11. -
Page 24: Startup
STARTUP PREPARING FOR USE IMPORTANT! Leave the device in an upright position for at least 2 hours before starting it up for the first time and make sure the condensation water outlet is well sealed. Place the device on a level surface close to a window and a grounded outlet. ... - Page 25 3. Installation of the hose If you want to use the window mount (15), pull it out along the entire length/height of the window and fasten it with a bolt or screw and slide the window onto the mount. Now insert the adapter into the opening.
-
Page 26: Operating Panel And Remote Control
OPERATING PANEL and REMOTE CONTROL 1. Description of the control panel 1. SLEEP Button + Indicator Light 7. TIMER Button + Indicator light 2. Indicator Lights for MODE 8. MODE Button 3. Display 9. DECREASE− 4. Indicator Lights for SPEED 10. -
Page 27: Setting Functions
2. Description of the control panel and the remote control SPEED Set the Speed TEMP + Increase+ MODE Set the Mode SLEEP Sleep-Mode TEMP - Decrease− TIMER Timer SWING Oscillation POWER ON/OFF SETTING FUNCTIONS You can set all functions directly on the device or using the remote control. - Page 28 NOTE In the summer we recommend setting a room temperature between 24 and 27 degrees Celsius. Generally it is not recommended to set a temperature far below the outside temperature. Dehumidification mode Perfectly suited to reducing the humidity in the room (e.g. in the spring and autumn, in humid rooms, during rainy periods etc.).
-
Page 29: Tips For Correct Use
The device automatically switches off once the set time has elapsed. SWING This functions blows the air tot he left and right. This allows you to achieve a horizontal air distribution in the room First set the desired mode. ... -
Page 30: Maintence And Cleaning
MAINTENANCE AND CLEANING CLEANING THE HOUSING Switch the device off prior to cleaning, wait a few minutes and then always the plug to disconnect the device from mains. Clean the device using a slightly damp cloth, follow up with a dry cloth. ... -
Page 31: Tasks At Beginning And End Of The Season
Permanent water drain In order not to empty the tank every time manually, you can install a permanent water drain. This is especially recommended for if you intend to use the device for a long period of time. The air conditioner has two different permanent condensation water outlets for two different Mode. -
Page 32: Troubleshooting
TROUBLESHOOTING Before contacting our customer hotline / service line check whether you can rectify the fault using the information below. PROBLEM POSSIBLE CAUSE SOLUTION Power outage Wait for power to come back on. The device is not connected to a Connect the device to a power power supply. -
Page 33: Technical Informations
Technical information Item nr. BC18KL2101F Input Voltage 220-240V~ Frequency 50Hz Rated Current 8.6A Max. Current 9.3A Power consumpition cooling 1923W Max. Input 2000W Cooling Capacity 5.0KW / 18.000 BTU/h EER Energy Efficiency Refrigerant/capacity R290/300g Noise level (sound power level) 65dB(A) -
Page 34: Warranty
By purchasing a BE COOL quality product you have acquired an innovative, long lasting and reliable item. For this BE COOL device we grant a warranty of 2 years from the date of purchase, valid in Austria only. In the unlikely event that service work is required on your device in this period we warrant free repair (spare parts and labour) or (subject to Schuss’s decision) to replace the product. -
Page 35: Nur Für Be Cool-Service Center Anweisungen Zur Reparatur Von Geräten, Die R290 Enthalten
öffnen dies führt zum sofortigen Verlust des Garantieanspruchs. IMPORTANT! These instructions are only for the BE COOL-Service center! A Service or repairing of the device must only be performed by a qualified technician who is allowed to handle the R290 refrigerant. - Page 36 1.6 No ignition sources No person carrying out work in relation to a refrigeration system which involves exposing any pipe work that contains or has contained flammable refrigerant shall use any sources of ignition in such a manner that it may lead to the risk of fire or explosion. All possible ignition sources, including e- cigarette smoking, should be kept sufficiently far away from the site of installation, repairing, removing and disposal, during which flammable refrigerant can possibly be released to the surrounding space.
- Page 37 Intrinsically safe components are the only types that can be worked on while live in the presence of a flammable atmosphere. The test apparatus shall be at the correct rating. Replace components only with parts specified by the manufacturer. Other parts may result in the ignition of refrigerant in the atmosphere from a leak.
- Page 38 9 DECOMMISSIONING Before carrying out this procedure, it is essential that the technician is completely familiar with the equipment and all its detail. It is recommended good practice that all refrigerants are recovered safely. Prior to the task being carried out, an oil and refrigerant sample shall be taken in case analysis is required prior to re-use of reclaimed refrigerant.
- Page 39 Competence of service personnel General Special training additional to usual refrigerating equipment repair procedures is required when equipment with flammable refrigerants is affected. In many countries, this training is carried out by national training organizations that are accredited to teach the relevant national competency standards that may be set in legislation. The achieved competence should be documented by a certificate.
-
Page 40: Seite 2 Von
Evacuate again. Remove parts to be replaced by cutting, not by flame. Purge the braze point with nitrogen during the brazing procedure. Carry out a leak test before charging with refrigerant. Reassemble sealed enclosures accurately. If seals are worn, replace them. ...
Need help?
Do you have a question about the BC18KL2101F and is the answer not in the manual?
Questions and answers