Table of Contents
Advertisement
Quick Links
Advertisement
Table of Contents

Related Manuals for extronics iTAG X30


Summary of Contents for extronics iTAG X30
- Page 1 Operating Manual iTAG X30...
- Page 2 (See DDM for the latest Version) For warranty information, refer to Terms and Conditions at http://www.extronics.com ©2021 Extronics Limited. This document is Copyright Extronics limited. Extronics reserve the right to change this manual and its contents without notice, the latest version applies.
-
Page 3: Table Of Contents
3.13 Integrated access control ................9 3.14 Rugged performance.................. 9 iTAG X30 Usage Instructions ................10 Before using the iTAG X30 ................10 Configuring the iTAG X30 ................10 4.2.1 To detect iTAG X30 ................10 4.2.2 Detected iTAG X30 list ................10 4.2.3... - Page 4 4.10 Cleaning and maintenance ............... 22 4.10.1 Assembly and disassembly ............... 23 4.10.2 Aggressive substances ..............23 4.11 Exposure to external stresses ..............23 Variants ......................24 EU Declaration of Conformity ................25 Manufacturer ..................... 28 Radio Equipment – FCC and ISED Warning Statement ........29...
-
Page 5: Introduction
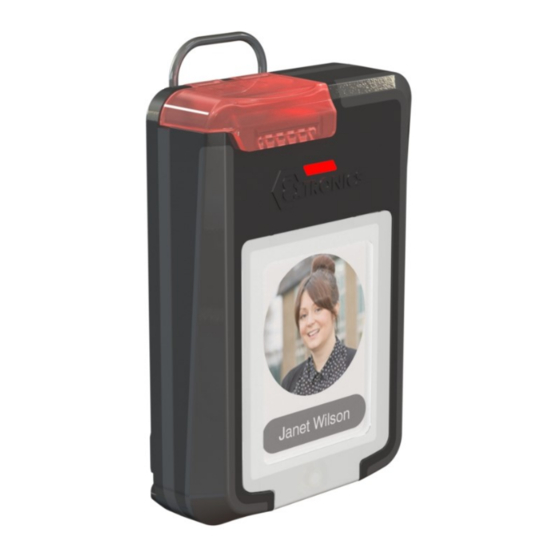
Introduction The iTAG X30 worker location tag with hybrid technology, allows for the accurate location of workers in hazardous and non-hazardous areas. The iTAG X30 provides audible, visual and tactile alerts and works with Stanley MobileView software to provide real-time alerting and reporting for worker location solutions. -
Page 6: Safety Information
2.1 Special conditions for safe use – ATEX IECEx • iTAG X30 must only be charged in a safe area. • iTAG X30 must only be charged from a supply meeting the following requirements: o A SELV (<15W) or PELV system, or... -
Page 7: Marking Information
2.3 Marking information 2.3.1 iTAG X30AI Where: • YYYY is the Notified Body for production • XXXXXX is the serial number • ZZZZ is a code to identify model variants Exact layout of markings may differ from that shown. -
Page 8: Itag X30 Features
X30 Features 3.1 Emergency call button The iTAG X30 features a call button which can be activated in the case of an emergency, which triggers an event in MobileView to show the location of the worker in need of assistance. -
Page 9: Battery And Battery Life
3.9 Battery and battery life The iTAG X30 has a long lasting rechargeable lithium ion battery. 3.10 Mounting The iTAG X30 comes complete with a stainless steel buckle clip which can clip to PPE or be used with a lanyard. 3.11 Simple configuration The iTAG X30 firmware contains predefined configurations, which can be activated quickly and easily using the TED and Tag Manager BD (TMBD). -
Page 10: Itag X30 Usage Instructions
Detected iTAG X30s are listed in the Detected Tags window, Figure 2. The detected tag count is displayed at the bottom of the window. An image of the iTAG X30 is displayed when placing the mouse over the detected tag. -
Page 11: Activating The Itag X30
1. To Activate the iTAG X30(s) Confirm the iTAG X30 is detected. From the Detected Tags list, right click on the iTAG X30 and select Activate. The tag colour indicator changes to green (Activated Tag), Figure 3. The iTAG X30’s LED will flash green to indicate communication. -
Page 12: How To Configure
3. Click Finish, Figure 5. 4.2.4 How to configure The iTAG X30 can be configured using the TMBD application. The TMBD application allows you to configure the following tag parameters (if not already factory set) according to the site’s infrastructure and use case. More information can be found in the Tag Manager BD User Guide. -
Page 13: Applying The Transmission Channels
The Data Frame Format specifies the format of the tag location messages sent to destination address. The data frame format configured in the tags should match the data frame format of the access points. iTAG X30 tags support CCX, IBSS and WDS data frame formats and combinations. -
Page 14: Available Configurations
Figure 8. 4.2.7 Available configurations The iTAG X30 firmware contains predefined configurations. These configurations define the tag type and beacon rate behaviour. Each configuration has a unique ID number called a “Static Configuration” which cannot be edited. Only one configuration can be selected and used per iTAG X30. -
Page 15: Applying The Wireless Settings
10. This is the address which is used by the tag to obtain firmware OTA updates and needs to match the settings in the Extronics Location Selector (ELS). If needed, click on the plus button to add another server IP. - Page 16 WPA2-PSK: Key Figure 11. To complete the configuration click Apply, Figure 12. Figure 12.
-
Page 17: Led And Audio Indications
The Applying Configuration window opens, Figure 13. Figure 13. Click Finish. 4.3 LED and audio indications The iTAG X30 has multi-colour LEDs on the top and front. Indications are shown in the following table: Indication LED colour Sound Vibrate position... -
Page 18: Wearing The Tag
4.4 Wearing the tag The iTAG X30 includes a versatile buckle clip, Figure 14. Ensure the iTAG X30 is worn in an upright position. For best results wear the tag as high up your body as possible. Figure 14. The iTAG X30 can be: ➢... -
Page 19: Charging The Battery
• Motion. • Indoor/Outdoor applications. • Time to receive firm GPS co-ordinates. The firmware endeavours to optimise battery life, using various techniques – motion detection for example. If the iTAG X30 is being worn in a vehicle motion will be detected. -
Page 20: Over The Air (Ota) Update
3. Once a faster beep is heard the button can be released – after approximately ten seconds. 4. The top LED will flash red and front LEDs flash as the iTAG X30 starts to download the new firmware. This can take over 15 seconds depending on network speed. -
Page 21: Inserting The Access Control / Photo Id Card
Access control cards with built in DESFire EV1 technology are specifically designed to fit inside the iTAG X30. The pop out card design enables cards to be printed on a standard ID card printer, such as Matica and Magicard printers. -
Page 22: Transport
Figure 20. Tighten the captive screw - Do not over-tighten. 4.8 Transport All iTAG X30 must be transported and stored such that they are not subjected to any excessive mechanical or temperature stresses. 4.9 Authorised persons Only persons trained for the purpose are authorised to handle the iTAG X30. They... -
Page 23: Assembly And Disassembly
4.10.1 Assembly and disassembly The iTAG X30 is provided ready assembled and must not be disassembled by the user. 4.10.2 Aggressive substances Some cleaning materials include aggressive ingredients that can affect the iTAG X30’s materials. We recommend that you do not use compounds containing: •... -
Page 24: Variants
X124873 iTAG X30 Protective cover for call button Pack of 50 X124874 PVC Kiss Cut Blank Photo ID Card for iTAG X30 Pack of 10 X124876 PVC Kiss Cut Blank Photo ID Card for iTAG X30 Pack of 50 X124875... -
Page 25: Eu Declaration Of Conformity
EU Declaration of Conformity... -
Page 28: Manufacturer
Manufacturer The iTAG X30 is manufactured by: Extronics Ltd, 1 Dalton Way, Midpoint 18, Middlewich Cheshire CW10 0HU Tel. +44(0)845 2775000 Fax. +44(0)845 2774000 E-mail: info@extronics.com Web: www.extronics.com... -
Page 29: Radio Equipment - Fcc And Ised Warning Statement
Radio Equipment – FCC and ISED Warning Statement FCC & ISED Warning statement: This device complies with Industry Canada’s licence-exempt RSSs and Part 15 of the FCC Rules. • Operation is subject to the following two conditions: o This device may not cause interference; and o This device must accept any interference, including interference that may cause undesired operation of the device.
Need help?
Do you have a question about the iTAG X30 and is the answer not in the manual?
Questions and answers