
Related Manuals for Harvia QR70


Summary of Contents for Harvia QR70
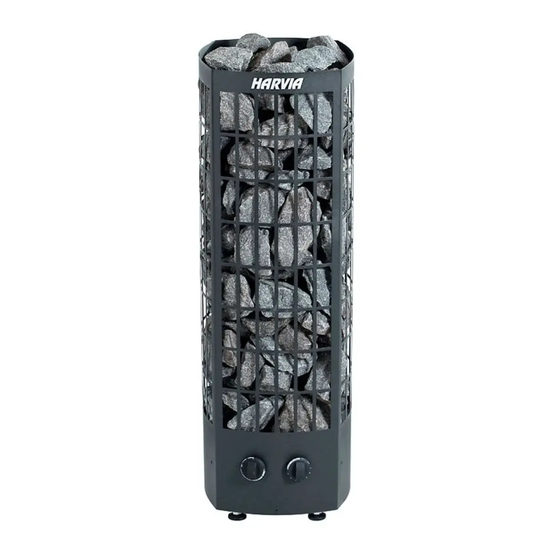
- Page 1 QR70, QR90 Instructions for Installation and Use of Electric Sauna Heater Gebrauchs- und Montageanleitung des Elektrosaunaofens 11112011...
-
Page 2: Table Of Contents
These instructions for installation and use are Diese Montage- und Gebrauchsanleitung richtet intended for the owner or the person in charge of sich an den Besitzer der Sauna oder an die für die the sauna, as well as for the electrician in charge Pflege der Sauna verantwortliche Person, sowie an of the electrical installation of the heater. -
Page 3: Instructions For Use
1. InSTRUCTIOnS FOR USE 1. BEDIEnUnGSAnLEITUnG 1.1. Piling of the Sauna Stones 1.1. Aufschichten der Saunaofensteine The piling of the sauna stones has a great effect Die Schichtung der Saunaofensteine hat große Aus- on both the safety and the heating capability of the wirkungen sowohl auf die Sicherheit als auch auf heater. -
Page 4: Maintenance
Gegenstände auf dem Ofen oder or inside the given safety distance. 1.6. in der unmittelbarer nähe des Ofens liegen. 1.6. Heater models QR70 and QR90 are equipped Die Ofenmodelle QR70 und QR90 sind mit • •... -
Page 5: Heater On
1.3.1. Heater On 1.3.1. Ofen ein Turn the timer switch to the ”on” section Stellen Sie den Schalter der Zeitschaltuhr (section A in figure 2, 0–4 hours). The in den Abschnitt ”ein” (Abschnitt A in heater starts heating immediately. Abb. 2, 0–4 Stunden). Der Ofen beginnt sofort zu heizen. -
Page 6: Instructions For Bathing
The water to be thrown on the heated stones ser auf die Badenden spritzen könnte. Achten Sie should meet the requirements of clean household auch darauf, daß Sie kein Wasser auf die Steine gie- ßen, wenn sich jemand in deren nähe befindet. Der water (table 1). -
Page 7: Troubleshooting
the platform and floors may be slippery. dem Einfluß von narkotika (Alkohol, Medika- never go to a hot sauna if you have taken menten, Drogen usw.) stehen. • alcohol, strong medicines or narcotics. Schlafen Sie nie in einer erhitzten Sauna. •... - Page 8 Check that no heating elements can be seen der Steine mit der Zeit und falsche Steinsorten • behind the stones. If heating elements can be können den Luftstrom durch den Ofen behin- seen, rearrange the stones so that the heating dern, was zu einer Überhitzung der umliegenden elements are covered completely ( 1.1.).
-
Page 9: Sauna Room
2. SAUnA ROOM 2. SAUnAkABInE 2.1. Sauna Room Structure 2.1. Struktur der Saunakabine Figure 4. Abb. 4. A. Insulation wool, thickness 50–100 mm. The A. Isolierwolle, Stärke 50–100 mm. Die Saunaka- sauna room must be insulated carefully so that bine muss sorgfältig isoliert werden, damit der the heater output can be kept moderately low. -
Page 10: Sauna Room Ventilation
2.2. Sauna Room Ventilation 2.2. Belüftung der Saunakabine The air in the sauna room should change six times Die Saunaluft sollte sechsmal pro Stunde ausge- per hour. Figure 5 illustrates different sauna room tauscht werden. Abb. 5 zeigt verschiedene Optio- ventilation options. -
Page 11: Instructions For Installation
Abbildung 7: B Height/Höhe 930 mm min. max. min. max. Weight/Gewicht 10 kg m³ m³ mm² mm² QR70 1900 5 x 1,5 3 x 10 3 x 6 1 x 35 >100 QR90 1900 5 x 2,5 3 x 16... -
Page 12: Electrical Connections
Gummikabel a rubber cable with the same cross-section der gleichen Stärke weiter zur Reihenklemme area as that of the connecting cable. des Saunaofens geleitet. QR70 QR90 PC70 400 V/ 415 V L1 L2... -
Page 13: Electric Heater Insulation Resistance
2. Place the heater and adjust the heater vertically 3. Bringen Sie den Ofen mit Befestigungssätzen (2 straight using the adjustable legs. Stück) an der Saunakonstruktion an. 3.3. 3. a QR90 QR70 QR90 QR70 3. b QR90 QR70 Figure 8. -
Page 14: Resetting The Overheat Protector
3.5. Zurückstellen des Überhitzungsschutzes 3. Use fixing kits (2 pcs) to fix the heater to sau- na’s structures. Wenn die Temperatur in der Saunakabine gefährlich stark ansteigt, unterbricht der Überhitzungsschutz 3.5. Resetting the Overheat Protector die Stromzufuhr zum Ofen permanent. Der Überhit- If the temperature of the sauna room becomes zungsschutz kann nach Abkühlen des Ofens zurück- dangerously high, the overheat protector will... -
Page 15: Spare Parts
4. VARAOSAT 4. RESERVDELAR 4. SPARE PARTS 4. ERSATZTEILE 4. ÇÀÏÀÑÍÛÅ ×ÀÑÒÈ 4. VARUOSAD QR70 ZRH-720 (2260 W) x 3 QR90 ZSE-259 (3000 W) x 3 QR70, QR90 QR70, QR90 ZST-220 ZSK-520 QR70, QR90 ZSK-510 QR70, QR90 ZST-230 QR90 QR70, QR90...
Need help?
Do you have a question about the QR70 and is the answer not in the manual?
Questions and answers