
Subscribe to Our Youtube Channel
Related Manuals for Delta Controls HTP


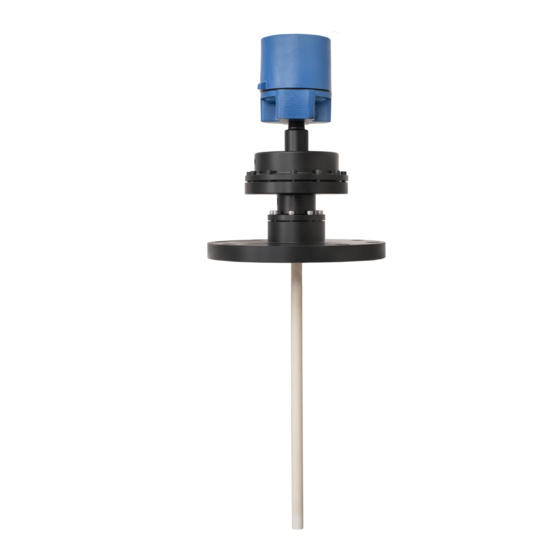
Summary of Contents for Delta Controls HTP
- Page 1 HTP Model Installation, Operation and Maintenance Manual Doc No.: 00-HTP03 Revision: Rev P...
-
Page 2: Table Of Contents
Table of Contents Shipping Preparation, Storage & Handling 4 Transport ............................. 4 Storage ..............................4 Handling............................... 4 Pre-Installation Preparation Survey the Installation .......................... 4 Inspect the Thermocouple and Accessories ..................5 Inspect the Nozzle ..........................6 Resolving Dimensional Problems......................7 Installing the Thermocouple Vertical Installation .......................... - Page 3 Components of the HTP/HTX Claus Thermal Reactor Thermocouple System Referenced in this Manual The following listed components are required for proper installation of the HTP/HTX. Failure to utilize these components will reduce the life of the HTP/HTX and cause possible failure.
-
Page 4: Shipping Preparation, Storage & Handling
Shipping Preparation, Storage & Handling Transport Care should be used in carrying, moving, and shipping the HTP/HTX thermocouple. A significant portion of the HTP/HTX is constructed of ceramic. Ceramics are very brittle at ambient temperature and can be damaged by mechanical shock. -
Page 5: Inspect The Thermocouple And Accessories
“loose”. If loose, the thermocouple is broken and must be repaired prior to installation. The shipping pipe and the custom built protective shipping carton are reusable and may be saved for reshipment or storage of the HTP/HTX assembly. g. If any parts appear to be damaged, contact Delta Controls immediately. Page 5... -
Page 6: Inspect The Nozzle
Inspect the Nozzle Because the “as-built” dimensions of the refractory and nozzle can (and often do) differ from the design specifications, it is important to verify these dimensions before installing the thermocouple. Installing a thermocouple that is not properly sized for the nozzle and refractory can result in breakage or inaccurate measurements. -
Page 7: Resolving Dimensional Problems
HRW Refractory Well to extend approximately 1 inch (2.5 cm) past the refractory hot face. If these conditions are not met, the result may be inaccurate measurement and/or breakage due to mechanical interference or thermal shock. Contact Delta Controls arrange... - Page 8 In general, this gap will not close up at operating temperatures. The thermocouple must be re-sized to account for the gap. Contact Delta Controls to arrange for a thermocouple that is correctly sized for the installation.
-
Page 9: Installing The Thermocouple
Installing the Thermocouple Vertical Installation (For non-vertical installations do steps 1-5, proceed to page 14.) Carefully set HRW Refractory Well down onto the hole in Double-check for proper clearance prior to thermocouple the refractory. The collar of the HRW should rest flat insertion by measuring from the bottom of the refractory well up against the refractory surface and the tip should extend to the flange face. - Page 10 . Place approximately 8 – 10 each of the soft compressible Place the two soft compressible collar rings from the HNP nozzle rings, with the ¾” (19 mm) center hole, in the bottom of Nozzle Insulation Kit, having an I.D. of 2.75” (70 mm), the nozzle.
- Page 11 Have an assistant lift the thermocouple and turn it to a vertical Note that the thermocouple is heavy position. The installer then grasps the unit by the top housing, and the ceramic element well may be permitting the unit to hang vertically plumb. With no assistance, center the element well over the center hole in the top insulating easily broken.
- Page 12 11. Install instrument conduit, wiring and purge gas tubing as described below. After installation and before reactor startup, perform the Purge / Element Well Integrity Test on page 17. This will verify that the element well was not broken during installation, and that there are no problems with the purge connections.
-
Page 13: Non-Vertical Installation
Non-Vertical Installation In non-vertical installations, insertion of the thermocouple unit can be difficult. The installer must attempt to support the full weight of the thermocouple unit while fully inserting it into the centerline of the nozzle insulating materials at the appropriate angle without allowing the weight of the unit to impart side-loads on the element protective well. -
Page 14: Non-Vertical Installation - Using The Hmb Mounting Bars
Non-Vertical Installation - Using the HMB Mounting Bars 1. Install the HRW refractory well and nozzle insulation rings as described in steps 1-5 beginning on page 9. 3. Place the threaded end of the mounting bar into a 2. Insert an R-Clip into the appropriate hole near the vessel nozzle flange bolt hole as shown. -
Page 15: Wiring
Wiring • The conduit connecting to the terminal enclosure should be equipped with a union and a flexible conduit for ease of maintenance and to reduce strain on the terminal enclosure. • Ensure that the insulation on thermocouple extension lead wire is rated for 400°F (200°C) continuous service. •... -
Page 16: Purge Gas Connection
Purge Gas Connection The use of nitrogen as a purge gas is strongly recommended. The Delta Controls Model HFS Purge Control Station provides a convenient and effective means to properly control the purge gas pressure and flow rate. Consult Document http://claustemp.com/00-hfs01.pdf... -
Page 17: Purge/Element Well Integrity Test
Flow Indicator Needle Flow Control Valve Pressure Regulator Adjustment Purge Pressure Indicator MODEL HFS PURGE GAS PANEL (front view) TO VENT THERMOCOUPLE MODEL HFS PURGE GAS PANEL (rear view) FRESH PURGE SPENT PURGE GAS PURGE SUPPLY Claus Thermal Reaction Furnace Purge/Element Well Integrity Test The following procedure should be performed after thermocouple installation to identify installation problems, and to verify that the thermal well was not broken during installation. -
Page 18: Technical Operation And Maintenance
Such breakage is sometimes cause by shifting of the refractory due to thermal expansion. When properly installed, the thermal well can withstand some shifting of the refractory, but large shifts can cause failures. Troubleshooting For diagnostic procedures, see Delta Controls document AN-HTP39, available at www.claustemp.com/ Specifications... - Page 19 Maximum Terminal Enclosure Temperature 383ºF (195ºC) T/C types: B,S,R Materials: Flange material: SA-516-70 Carbon Steel Trim/Bolting/Seats: Stainless Steel Protective well: Blended alumina, ceramic Purge Requirements: dry nitrogen, 0.4scfh * type ‘B’ thermocouple. Max operating temperature is limited by the thermocouple melting point. Model Numbering System Page 19...
-
Page 20: Dimensions
Dimensions Model HTP Thermocouple Model HTX Thermocouple Page 20... - Page 21 585 Fortson Street Shreveport, LA 71107 USA Ph: +1(318) 424-8471 Fax: +1(318) 425-2421 E-mail: sales@deltacnt.com Web: www.claustemp.com Page 21...
Need help?
Do you have a question about the HTP and is the answer not in the manual?
Questions and answers