Table of Contents
Advertisement
Quick Links
Owner's Guide
Version 7.5
Models:
Serial No.
Thank you for purchasing this Hitachi product.
Please read these instructions carefully.
For additional assistance please call Toll Free 800.HITACHI (800.448.2244)
or visit our website at www.hitachi.us/tv.
Keep this Guide for future reference.
Record the model name and serial number of your LCD Television for future reference.
This information is located on the back of the television.
50R8
50" Class (49.50" Diag.)
65R8
65" Class (64.53" Diag.)
CONGRATULATIONS
Illustrations in this guide are provided for reference only and
may di er from actual product appearance. Product design
and speci cation may be changed without notice.
Advertisement
Table of Contents

Related Manuals for Hitachi Roku TV 50R8


Summary of Contents for Hitachi Roku TV 50R8
- Page 1 CONGRATULATIONS Thank you for purchasing this Hitachi product. Please read these instructions carefully. For additional assistance please call Toll Free 800.HITACHI (800.448.2244) or visit our website at www.hitachi.us/tv. Keep this Guide for future reference. Record the model name and serial number of your LCD Television for future reference.
- Page 2 U.S. and international copyright and/or other intellectual property laws. Reproduction or transmission of the materials, in whole or in part, in any manner, electronic, print, or otherwise, without the prior written consent of Hitachi America, Ltd. and Roku, Inc. is a violation of the rights of Hitachi America, Ltd. and Roku, Inc. under the aforementioned laws.
-
Page 3: Table Of Contents
Table of Contents IMPORTANT SAFETY INSTRUCTIONS ..................vi Child Safety Notice ........................xi SAFETY PRECAUTIONS ......................xii Welcome ............................. 1 The new standard in Smart TVs ............................1 Get the most out of your new TV ............................ 1 Connections and setup ......................3 Set up your new TV ................................. - Page 4 Adjusting TV settings ......................37 Settings menu ................................37 Options menu ................................37 Options menu settings ................................38 Accessibility ................................... 39 Accessibility mene settings ..............................39 Advanced picture settings ............................. 40 Advanced picture settings menu options ..........................40 Expert Picture Settings ................................41 Changing privacy settings ..............................
- Page 5 Getting system updates ..............................64 Checking for updates on a connected TV..........................64 Getting updates on a non-connected TV ..........................64 Other devices ........................... 66 Screen Mirroring your phone or tablet.......................... 66 Getting and using the Roku mobile app ........................66 Private Listening on the Roku mobile app ...........................
-
Page 6: Important Safety Instructions
IMPORTANT SAFETY INSTRUCTIONS The lightning flash with arrowhead symbol, within an equilateral triangle is intended to alert the user to the presence of uninsulated dangerous voltage within the product's enclosure that may be of sufficient magnitude CAUTION: to constitute a risk of electric shock. TO REDUCE THE RISK OF ELEC- TRIC SHOCK, DO NOT REMOVE COVER (OR BACK). - Page 7 - Not placing the television set on tall furniture (for example, cupboards or bookcases) without anchoring both the furniture and the television set to a suitable support. - Not placing the television set on cloth or other materials that may be located between the television set and supporting furniture.
- Page 8 Read these instructions. Keep these instructions. Heed all warnings. Follow all instructions. Do not use this apparatus near water. Clean only with dry cloth. Do not block any ventilation openings. Install in accordance with the manufacturer’s instructions. Do not install near any heat sources such as radiators, heat registers, stoves, or other apparatus (including amplifiers) that produce heat.
- Page 9 This reminder is provided to call the cable TV system installer’s attention to Article 820-40 of the NEC that provides guidelines for proper grounding and, in particular, specifies that the cable ground shall be connected to the grounding system of the building, as close to the point of cable entry as practical. Sudden high volume sound may cause hearing or speaker damage.
- Page 10 Adjust only those controls that are covered in the instructions, as improper changes or modifications not expressly approved by Hitachi could void the user’s warranty. LEAD NOTICE This product contains lead. Dispose of this product in accordance with applicable environmental laws. For product recycling and disposal information, contact your local government agency or www.eRecycle.org (in California), the...
-
Page 11: Child Safety Notice
Child Safety Notice... -
Page 12: Safety Precautions
If the unit is placed on a cabinet smaller than the length of the unit, it could result in instability and the unit may tumble over, making a risk of personal, possibly fatal injury. Also, this would seriously damage the product. Accordingly, Hitachi accepts no responsibility or liability for any injuries or property damage resulting from the improper installation. -
Page 13: Welcome
Welcome Congratulations on the purchase of your new Hitachi Roku TV! Discover the joy of endless entertainment. After it’s set up, you’ll be able to access a world of streaming content channels that may include Netflix, YouTube, Crackle, CNET and literally thousands more. - Page 14 5. Pause live TV • Pause, resume, fast forward, and rewind TV shows. Simply connect your own USB drive with 16GB or bigger capcity to the TV and pause live TV for up to 90 minutes. Note: Live TV Pause is available on digital TV shows received on the TV’s antenna input only, and only when the TV is linked to a valid Roku account.
-
Page 15: Connections And Setup
Connections and setup Set up your new TV Remove your TV from the box Be careful, it’s heavy! To mount on a wall Before wall mounting, please carefully check the location of the TV’s mounting-holes. Follow the instructions that come with the wall mount. Contact the retailer where you purchased the TV for advice, and have the equipment professionally installed. -
Page 16: What's In The Box
What’s in the box HITACHI Roku TV Hitachi Roku TV TV stand Power cord Hi! Let’s get started. 4 Screws 2 x AAA batteries for remote Quick Start Guide TV remote... -
Page 17: Connect Your Tv
Connect your TV Connecting an antenna, cable, or satellite box Antenna connections If you are using an indoor or outdoor antenna, follow the instructions below that correspond to your antenna system. If you are using a Cable TV service, see Cable TV connections. Combination VHF/UHF Antenna (Single 75 ohm cable) 75 ohm Coaxial... -
Page 18: Connecting A Device With A Composite Av Video Cable
VIDEO Tip: If you are using an antenna with a 300 ohm twin-lead cable, you need to use a 300-75 ohm adapter (not provided) to adapt the cable to a connection that is compatible with the TV’s antenna input. Tip: If you receive your TV stations through a set top box from a cable or satellite TV provider, connect it to the TV using the best connection method available. -
Page 19: Connecting A Device With An Hdmi Cable
VIDEO Connecting a device with an HDMI cable If possible, connect your devices using HDMI cables (not provided). They help to provide the best video quality and also carry audio signals, so that only one cable is needed. For better picture quality, we recommend that you use cables desig- nated as High Speed HDMI cables. -
Page 20: Connecting An Av Receiver Or Digital Sound Bar
Connecting an AV receiver or digital sound bar You can enjoy Dolby Audio multichannel sound from your TV if you connect a digital amplifier or sound bar (not provid- ™ ed) in either of two ways: • Digital optical audio out (S/PDIF) – Connect a TOSLINK optical cable (not provided) from the TV to the Optical input on your receiver or sound bar. -
Page 21: Remote Control Batteries
Remote control batteries Open the back of your Roku TV remote control and insert the included batteries, observing the proper orientation as indicated in the battery compartment. Reattach the back cover. “Watching broadcast TV channels” on page explains how to use the remote control in each of the TV’s operating modes. -
Page 22: Roku Tv Remote Control
CHANNEL SHORTCUT BUTTONS Hitachi Roku TV IR remote control Getting around You’ve already done a bit of navigating with the remote control when you completed the Guided Setup and when you set up Antenna TV. This section explains how to use the remote control for everyday TV use. - Page 23 HOME Button Function Description • LEFT/RIGHT/UP/DOWN moves the highlight in the corresponding direction. VOLUME UP POWER • OK selects the highlighted option. While watching TV: RIGHT VOLUME DOWN BACK HOME While watching TV: OPTIONS MUTE • UP/DOWN changes channel. VOLUME UP • LEFT displays your channel list.
-
Page 24: Panel Buttons
Panel buttons The controls on the TV enable you to perform simple functions, but are not a substitute for the remote control. Your TV has seven buttons on the side. From top to bottom, they perform the following functions: • Channel +: Moves the highlighted item up in the current menu. • Channel –: Moves the highlighted item down in the current menu. -
Page 25: Guided Setup
2. The power-on screen appears and the status light blinks slowly for a few more seconds. The power-on screen displays the Hitachi Roku TV logo while the TV starts up. 3. After a few seconds, Guided Setup starts: Tip: On TVs sold in the United States, if you are blind or visually impaired, you can activate the Audio Guide, a text-to-speech screen reader to help you navigate the TV’s menus and commands. -
Page 26: Setting Up Your Tv
For more information on using the Audio Guide and adjusting its settings, see Configure accessibility on page 4. Press the DOWN button on the remote control to highlight your preferred language. Setting up your TV With the first Guided Setup screen on your TV, follow these steps to set it up: 1. - Page 27 • Connect to the Internet later – If you’re unable to connect to the Internet, that’s OK. You can skip this step and use the TV to watch broadcasts, play games, and watch DVDs. If you want to connect later, it’s easy. We’ll show you how in “Benefits of connecting”...
- Page 28 This Owner’s Guide describes version 7.5. To determine your current Roku TV software version, go to Settings > System > About after you complete Guided Setup. You can download an updated Owner’s Guide that matches your Roku TV software version from the Hitachi Roku TV web site at:...
- Page 29 After the TV restarts, it displays the Activation screen: Note: A paid subscription or other payments may be required for some channels. Channel availability is sub- ject to change and varies by country. Not all content is available in countries or regions where Roku products are sold.
- Page 30 11. Press the OK or RIGHT arrow to proceed: 12. Connect all the devices you plan to use with your TV, turn them all on, and then select Everything is plugged in and turned on. The TV now takes you step by step through each of its inputs and asks what kind of device you have connected.
- Page 31 13. Press the UP or DOWN arrows to highlight the label you want to associate with the input, and then press OK to move on to the next input. You’re done with Guided Setup. Note: Some Roku TVs, depending on where you live and other factors, show you an introductory video filled with some great hints and tips.
-
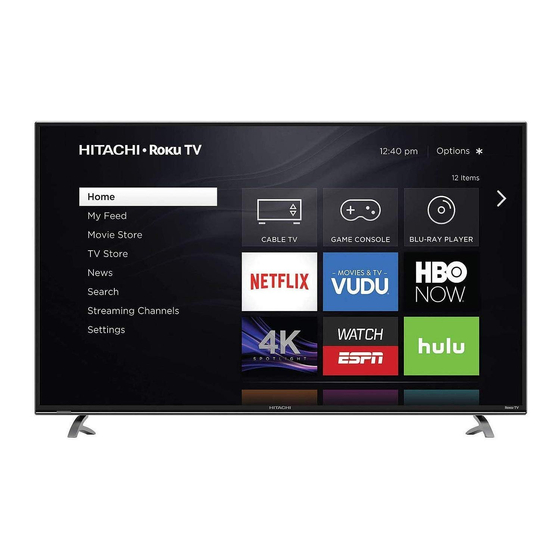
Page 32: Connected Home Screen
Connected Home screen Here is a typical Home screen from a Roku TV that’s connected to the Internet and linked to a Roku account. Highlighted item - Hint - Press RIGHT to Press for options Home menu TV inputs see another screen Press OK to select when available... -
Page 33: Non-Connected Home Screen
Non-connected Home screen Here is a typical Home screen from a Roku TV that is not connected to the Internet. Highlighted item - Hint - Press RIGHT to Press for options Home menu TV inputs Press OK to select see another screen when available Streaming channels... -
Page 34: Benefits Of Connecting
Benefits of connecting Connecting brings out your TV’s full potential! Make any night a movie night Thousands of movies to choose from, across all major streaming movie channels like Netflix, Cineplex Store, Crackle, and more . You’ll never run out of something new to watch. Get in the groove Stream endless hours of music from free and subscription-based channels like Spotify and VEVO. -
Page 35: What Is Streaming
What is streaming? Streaming is viewing or listening to video or audio content that is sent over the Internet, or located on a network-con- nected media server or on a USB device plugged into the TV’s USB port. With streaming, you can buy or rent most programs on demand, when it’s convenient for you. When streaming, you can play, pause, rewind, and fast forward whatever you are watching. -
Page 36: But What If I Didn't Connect My Tv
But what if I didn’t connect my TV? What if you went through Guided Setup and chose Connect to the Internet later? No worries. Your Roku TV makes it easy to connect whenever you want. As you move around the Home screen, you’ll see several places where you can start the connection process. -
Page 37: Setting Up Antenna Tv
Setting up Antenna TV Despite all of the entertainment possibilities of your Roku TV, you may also want to watch broadcast TV. You can watch broadcast TV in much the same way you watch other entertainment choices. You select a tile—the Antenna TV tile— from the Home screen. - Page 38 4. If prompted, select your time zone. You’ll only need to do this if the TV can’t figure out your time zone from your Internet connection. Why does the TV need my time zone? The TV needs to know your time zone so that it can correctly display time information about the program you are...
- Page 39 6. Wait while your TV scans for broadcast (antenna TV) stations… … and then cable TV channels. Scanning for channels can take several minutes. Tip: Cable TV channels are channels from a cable TV provider that you can receive by connecting their cable directly to your TV (unscrambled NTSC, ATSC, and QAM channels, if you’re the kind of person who is inter- ested in the details).
- Page 40 8. If you connected your TV to the Internet, you have the option of setting up Live TV Pause. “Pausing Live TV“ on page explains how to set up and use this feature. If you don’t want to set up Live TV Pause, or if this option is not available to you, select Done to start watching Live.
-
Page 41: Using Your Tv
Using your TV This section provides information on using the day-to-day features of your TV. Status light Your TV has a single status light on the front panel. It goes on and off and blinks in different ways depending on the status of the TV, as shown in the following table: TV condition Status indicator... -
Page 42: Viewing Program Information
• Press the UP arrow to change to the next higher channel. • Press the DOWN arrow to change to the next lower channel. • Press the LEFT arrow to display the channel list, and then press the UP and DOWN arrows to move the highlight through the list one channel at a time. -
Page 43: Adjusting Settings
• Program description. If the entire description does not fit, press OK to expand the size of the banner and see the entire description. Tip: : If you’ve set up Live TV Pause, and you’re watching broadcast TV, you’ll also see a progress bar showing the current playback position within the rolling 90-minute pause time. -
Page 44: Using Live Tv Pause
After starting Live TV Pause setup in any of these ways, the TV prompts you through the steps needed to enable this fea- ture. Setup takes only a few moments. Note: Use of a USB hub is not supported. Using Live TV Pause Your TV automatically detects when you connect a new device to an HDMI input and turn on its power. -
Page 45: Notes About Live Tv Pause
Notes about Live TV Pause • You can use Live TV Pause only with digital broadcast and cable channels received through the TV’s Antenna input (ATSC and Clear QAM channels). • Changing channels, erases and restarts the Live TV Pause buffer. • Returning to the Home screen, selecting another input, or turning off the TV erases and resets the Live TV Pause buffer. -
Page 46: Auto Player Launch
Auto player launch If your TV is connected to a Roku account, you can set it to automatically open the Roku Media Player when you connect a USB drive with a recognizable file system (such as FAT16/32, NTFS, HFS+ or EXT2/3). To configure this setting, from the Home screen, navigate to Settings >... -
Page 47: Using Your Tv In A Hotel Or Dorm Room
Using your TV in a hotel or dorm room Hotels, school dorms, conference facilities, and similar locations with public wireless Internet access often require you to interact with a web page to authenticate your access. These restricted public networks are commonly known as captive portal networks. - Page 48 4. Use a phone, tablet, or wireless-enabled computer to detect wireless networks. In most cases, you can simply open the device’s Wi-Fi Settings or Network Settings screen to start scanning. Note: The phone, tablet, or computer must be on the same wireless network to which you are connecting the 5.
-
Page 49: Adjusting Tv Settings
Adjusting TV settings You can adjust most picture and sound settings while you are watching a program by pressing to display the Options menu. If you don’t find what you need, there are additional picture and sound settings in the Settings menu. In most cases, the changes you make apply only to the input you are using. -
Page 50: Options Menu Settings
To adjust the settings on the Options menu, press the UP or DOWN arrow to highlight a setting, and then press the LEFT or RIGHT arrow to change the setting. You’ll notice the changes you make right away in picture appearance or audio quality. -
Page 51: Accessibility
Accessibility The settings on the Accessibility menu enable you to change the TV’s accessibility settings without leaving the program you are watching. These settings are also available on the Home screen under Settings > Accessibility. Models sold in US only: To enable the Audio Guide, press the button on the remote control four times in rapid succes- sion. -
Page 52: Advanced Picture Settings
Advanced picture settings The Advanced picture settings menu for each TV input provides settings for fine tuning the appearance of the picture. All of the settings in this menu apply only to the currently-selected input. To use the Advanced picture settings menu, first press to display the Options menu. Then select Advanced picture settings. -
Page 53: Expert Picture Settings
• Tint – Adjusts the color balance from green to red to obtain accurate colors in the picture. • Color temperature – Adjusts the overall colors in the picture from Normal to slightly more bluish (Cool) to slight- ly more reddish (Warm). • Game mode –... -
Page 54: Changing Privacy Settings
Changing privacy settings By default, when connected to the Internet and activated with your Roku account, the TV uses an advertising identifier to track your usage behavior. You can change the privacy settings on your TV in two ways: resetting the advertising identifier and limiting ad tracking. -
Page 55: My Feed
My Feed Use My Feed to find out when you can watch movies coming soon, and to get updates on movies, TV shows, and actors that you are following. Movies Coming Soon My Feed gives you updates on your list of movies that are coming soon to theaters. With My Feed, you’ll know when your favorite movie is ready to stream, the channels it is on, and how much it will cost. -
Page 56: Searching For Something To Watch
Searching for something to watch Searching for movies and shows across multiple streaming channels is one of the unique features of your Hitachi Roku TV. Within a single search operation, you can search by: • Movie name • TV show name • Actor or director name... -
Page 57: I Found A Show, Now What
I found a show, now what? Now that you’ve highlighted the show, movie, actor, game, or streaming channel you were looking for, press the RIGHT arrow. If your search result was an actor, director, or other item that does not represent a single item of content, you’ll see an- other list to narrow down your search. -
Page 58: Using The Roku Channel Store
Using the Roku Channel Store The Streaming Channels menu option takes you to the Roku Channel store, where you can add new paid and free streaming channels to your TV. Tips: • The Streaming Channels menu option is available only if your TV is connected to the Internet. • You also can search for streaming channels by using the Search option, as explained in “Searching for something to... -
Page 59: Customizing Your Tv
Customizing your TV There are several things you can do to personalize your TV. Rearrange tiles Whenever you add a TV input tile, it’s added at the top of your Home screen. Whenever you add a new streaming chan- nel from the Roku Channel Store, it’s added at the bottom of your Home screen. You can easily rearrange the order of the tiles on the Home screen to suit your viewing preferences. -
Page 60: Edit Broadcast Tv Channel Lineup
Edit broadcast TV channel lineup When you set up the TV tuner as described in “Setting up Antenna TV” on page 25, the TV adds all the channels with good signals that it could detect in your area. It’s likely that you now have more channels than you want in your channel list. -
Page 61: Change Themes
Note: You also can remove the Antenna TV tile if you never use the TV tuner. But be aware that removing the Anten- na TV tile also deletes the broadcast TV channel list. You’ll have to set up the TV tuner again next time you want to view broadcast TV. -
Page 62: Auto Power Savings
Auto power savings To help you save energy, your TV can automatically turn itself off after a period of inactivity or a period during which no signal has been detected. It is factory-configured to do both of these things, but you can change these settings if needed. To configure automatic power off, from the Home screen menu navigate to Settings >... -
Page 63: Captions Style
• When mute – Captions appear only when the TV is muted. Tip: Themes are available only when your TV is connected to the Internet. Some themes require payment. • You can change the captions mode while watching a program. To do so, press to display the Options menu, and then select Closed Captioning. -
Page 64: Audio Guide Settings
Audio Guide settings On TVs sold in the United States, the Audio Guide settings help users who are blind or visually impaired to configure the text-to-speech reader, enabling them to operate their TV more easily. The Audio Guide uses voice prompts that speak volume and channel changes, menu options, and setting changes. -
Page 65: Blocking Movie Store, Tv Store, And News
Blocking Movie Store, TV Store, and News One of the parental control options is to completely hide the entertainment options that are available directly on the Home screen menu. To hide Home screen entertainment options: From the Home screen menu, navigate to Settings > Parental controls, and then enter your parental control PIN. In the Parental controls screen, highlight Home screen and then select or clear either of these options: • Hide “Movie Store and TV Store”... - Page 66 Similarly, within the main group, content types can be individually blocked. For example, you can block just coarse lan- guage in shows with a TV-PG rating. If you do, then the TV also blocks shows with coarse language in the higher ratings (TV-14 and TV-MA).
- Page 67 New Region Rating Tables can have independent rating levels, or rating levels that interact in the same ways as the built- in US TV and MPAA Movie ratings. Tip: If your TV downloads a new Region Rating Table, you’ll have to experiment with its settings to understand how to use it.
-
Page 68: What Happens When A Tv Show Is Blocked
Blocking unrated programs Some broadcast TV shows and movies are assigned a rating of “Unrated”. Whether or not such programs contain content that is objectionable to you cannot be determined. However, you can choose to block such programs. To block all unrated broadcasts: 1. -
Page 69: Changing The Parental Control Pin
2. Use the arrow buttons to enter your parental control PIN code, and then press OK to select Unblock everything. After unblocking shows that have been blocked, all blocking is disabled for two hours or until you turn off the TV. Changing the parental control PIN To change your parental control PIN: 1. -
Page 70: More Settings
More settings This section describes the features and settings of the TV that were not covered in the other parts of this guide. Changing network settings If needed, you can change your network settings at any time. For example, if you change the name of your wireless network (its SSID) or its password, you will need to change your TV’s settings so that it can continue to connect. -
Page 71: Scanning For Broadcast Tv Channels Again
Scanning for broadcast TV channels again There will be times when you need to create a new channel list. For example, you: • Change cable providers • Reorient your TV antenna • Move to a different city with different channels Whenever you need to update your TV channel list, you can repeat the channel scan. -
Page 72: Changing The Audio Mode
Changing the audio mode The TV has two audio modes, accessed by navigating in the Home screen menu to Settings >Audio > Audio mode: • Stereo – Use this setting for internal speakers, headphones, and external stereo amplifiers connected through HDMI ARC, SPDIF optical, or headphone jack. - Page 73 Discovering connected CEC devices To discover CEC devices: 1. Make sure that your CEC-compatible components are connected to the TV with a suitable High Speed HDMI Cable that supports HDMI ARC and CEC control. 2. Turn on each component and make sure all components are CEC enabled. Tip: Some manufacturers have their own branded names for CEC functionality, so you might need to read the product documentation to correctly identify the CEC features of the device.
-
Page 74: Restarting The Tv
Enabling system standby The system standby feature causes other components to power off when you power off your TV. Depending on the CEC System Standby implementation, it also might enable connected components to power off your TV when you power off the component. -
Page 75: What If I Can't Access The Factory Reset Option
What if I can’t access the Factory Reset option? It is possible that your TV might get into a state where you cannot access the various menus, including the menu option that lets you perform a factory reset operation. If that happens, you can force the TV to reset by following these steps: 1. -
Page 76: Getting System Updates
If your TV is not connected to the Internet, you can still get updates by using a USB flash drive. You can download an updated Owner’s Guide that matches your Roku TV software version from the Hitachi America, Ltd. web site at: www.hitachi.us/tv... - Page 77 1. On an Internet-connected computer, go to the web site displayed on the System update screen. 2. On the USB Update web page, select the correct brand and USB flash drive model, and then click Next. Any normal USB flash drive will 3.
-
Page 78: Other Devices
Other devices Screen Mirroring your phone or tablet Your TV has a feature called screen mirroring that lets you mirror your compatible smartphone or tablet on your TV. Share videos, photos, web pages, and more from compatible devices This screen mirroring feature is in a ‘beta’ period, which lets you try it out and allows Roku to learn what needs to be improved—so don’t be surprised if it doesn’t work perfectly. -
Page 79: Faq
For the latest answers to Frequently Asked Questions, visit the Hitachi America, Ltd. TV support website (www.hitachi.us/tv) and the Support section of the Roku website (www.roku.com). - Page 80 “Roku Channel Store,” a storefront of applications provided by Roku via your device’s on-screen menu. After your Roku Account is created, you can link your Hitachi Roku TV to your account. By using the Hitacih Roku TV, you agree to the following disclaimer. For the avoidance of doubt, the content disclaimer set forth herein shall refer to all content and channels accessible and available on the Hitachi Roku TV, including those available via the Roku®...
- Page 81 Permitted Use and Restrictions The Television and the Software are for personal, non-commercial use only. Copying or redistribution of any Content delivered via the Television is strictly prohibited and we may prevent or restrict you from copying or re-distributing any elements of the Software or Content using digital rights management or other technologies. The Television and the Software are for use only in those countries where the manufacturer of your Television has authorized its sale.
- Page 82 Export Controls You agree not to download any Content or Software, nor otherwise export or re-export any Television or the Software into (or to a national or resident of) Cuba, Iraq, Libya, North Korea, Iran, Syria or any other country as to which the United States or your country has embargoed goods, or to anyone on the U.S. Treasury Depart- ment’s List of Specially Designated Nationals or the U.S.
- Page 83 Contact Information If you wish to contact Roku, please send your correspondence by mail to Roku, Inc. 150 Winchester Circle Los Gatos, CA 95032, USA or by email to customerservice@roku.com. Last Updated: April 21, 2016...
- Page 84 ® Roku and the Roku logo are registered trademarks of Roku, Inc. in the United States and other countries. Hitachi Hitachi is a trademark or registered trademark of Hitachi, Ltd. All other trademarks are the property of their respective owners.
-
Page 85: Specifications
Specifications Model 50R8 65R8 Panel size 50” class 49.50” diagonal (1257.31mm) 65” class 64.53” diagonal (1638.96mm) Display method Transmission TFT color LCD panel Number of Pixels 3840(H) × 2160(V) Broadcasting US system M system ATSC standard (8VSB), QAM Receiving VHF 2-13 •... -
Page 86: Service & Warranty
HITACHI AMERICA, LTD., DIGITAL MEDIA DIVISION HITACHI has made every effort to assure you enjoy trouble free operation from your Hitachi product. Should you require service assistance with OPERATIONAL, HOOK UP, TECHNICAL ASSISTANCE OR WARRANTY SERVICE SUPPORT, please contact one of our knowledgeable Customer Service Advocates at 800.HITACHI (800.448.2244). - Page 87 If the Product is found to be defective, Hitachi will repair or replace (at Hitachi’s option) defective parts at no charge, subject to the conditions of this Limited Warranty.
- Page 88 Memo ................................................................................................................................................................................................................................................................................................................................................................................................................................................................................................................................................................................................................................................................................................................................................................................................................................................................................................................................................................................................................................................................................................................................................................................................................................................................................................................................
Need help?
Do you have a question about the Roku TV 50R8 and is the answer not in the manual?
Questions and answers