Advertisement
Quick Links
OPERATING AND MAINTENANCE
ELECTRIC HOT WATER
HIGH PRESSURE
CLEANER
MODEL NO:
SLD08 (13-180H)
SLD09 (10-120H)
MADE IN AUSTRALIA
BY
SPITWATER AUSTRALIA PTY LTD
953 METRY STREET
NORTH ALBURY NSW 2640
AUSTRALIA
WARNING: Read and understand this instruction manual before operating this
unit and retain for future reference.
Failure to follow operating, safety and maintenance instructions outlined in this
manual releases the manufacturer from any responsibility for any accidents or
damage incurred and may render any warranty void.
ORIGINAL INSTRUCTIONS
MANUAL
1
Advertisement

Related Manuals for Spitwater SLD08


Summary of Contents for Spitwater SLD08
- Page 1 HIGH PRESSURE CLEANER MODEL NO: SLD08 (13-180H) SLD09 (10-120H) MADE IN AUSTRALIA SPITWATER AUSTRALIA PTY LTD 953 METRY STREET NORTH ALBURY NSW 2640 AUSTRALIA WARNING: Read and understand this instruction manual before operating this unit and retain for future reference.
- Page 2 SPARE PARTS, ACCESSORIES AND AFTER SALES SERVICE Spitwater has an extensive range of spare parts and accessories to suit all your cleaning needs. For spare parts, accessories and service please contact 1800 SPITWATER (1800 774 892) and to view Spitwater's extensive range of high pressure cleaners online visit www.spitwater.com.au...
- Page 3 TECHNICAL DATA MODEL 13-180H 10-120H PRODUCT SLD08 SLD09 #N/A UNIT PERFORMANCE FLOW RATE PRESSURE PRESSURE #N/A NOZZLE #N/A OUTLET WATER TEMP MAX #N/A °C WATER INLET PRESSURE MAX #N/A TEMP MAX #N/A °C ELECTRICAL VOLTAGE PHASE FREQUENCY #N/A #N/A PLUG...
- Page 4 DESCRIPTION OF SYMBOLS The following symbols are used throughout this instruction booklet in order to mark important paragraphs or sections that require particular attention. Their meaning is listed next to them for your attention. The following symbols are used on the unit in order to warn user of potential injury if not cautious. Their meaning is listed next to them for your attention.
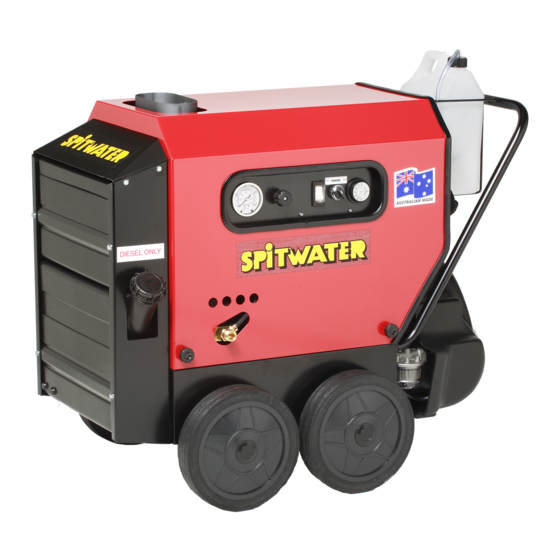
- Page 5 SAFETY LABELS, UNIT COMPONENTS FEATURES & CONTROLS Always pay attention to the safety instructions provided on each label. Do not alter or remove safety labels CHEMICAL TANK POWER PLUG UNIT ON / OFF PRESSURE BURNER SWITCH GAUGE SWITCH DUAL LANCE TEMPERATURE CHEMICAL FLOW...
- Page 6 GENERAL SAFETY PRECAUTIONS 1. OBSERVE SAFETY INSTRUCTIONS Make sure you have read and understood the whole instruction manual before installing, operating or carrying out any maintenance on this unit. Warnings and serial label on the unit provide important directions and information on the safe use of the unit.
- Page 7 4. EXTENSION CORD If using an extension cord make sure it is according to cross section / maximum length requirements as shown to the right. Inadequate extension cords can be dangerous. If an extension cord is used, it shall be suitable for outdoor use, and the connection has to be kept dry and off ground.
- Page 8 Refuel in a well ventilated and open area. When fuel and/or lubricants are spilled clean immediately. DO NOT mix fuel. Incorrect fuels shall not be used as they may prove hazardous. Use only clean and approved fuel, store in appropriate containers and dispensers 9.
- Page 9 OPERATIONAL SAFETY PRECAUTIONS All health and safety regulations applicable to general safe work practices, as well as safe operation of equipment, as well as any specific standard for safe operation of high pressure cleaners according to local regulations must be followed. When operating this unit, 1.
- Page 10 Never exceed the maximum working temperature and pressure as indicated on the unit data plate and in this manual. Only use this unit with cleaning chemicals recommended by Spitwater. The use of other cleaning agents or chemicals may adversely affect the safety of the unit. ...
- Page 11 4. When not in use the unit must be stored in a dry building where there is no possibility for the temperature to be at or below 0°C. If necessary to store the unit at or below 0°C contact your authorized Spitwater service agent for advice.
- Page 12 If any 6. Replace the red oil travel plug fitted on the pump with the yellow dipstick supplied in the problem is found, contact your Spitwater agent immediately. accessories bag. 3. Identify the unit from the information on the serial label affixed to the unit.
- Page 13 8. NOZZLE ASSEMBLY Connect the high pressure nozzle (smaller hole) and the low pressure nozzle (larger hole) to the lance. Do not over tighten and make sure that the nozzle positions do not interchange during assembly. Add nozzle shield after nozzle assembly. Refer diagram below. 9.
- Page 14 Contact your Spitwater agent for advice and /or supply. Make sure the water supply temperature and pressure meet the values specified in the technical data, then turn the water supply on. Visually check for leaks and contact your Spitwater service agent if found. ...
- Page 15 12. Remove the DIESEL tank cap and fill the diesel tank with clean filtered diesel. ONLY USE CLEAN DIESEL IN THIS UNIT, as using any other fuel will create a risk of explosion and damage to the unit.
- Page 16 CHECK LIST” in the SERVICE / CARE section as a guide. If the unit is damaged or faulty in anyways, DO NOT use it and immediately contact your authorized Spitwater service agent for advice. 3. Check that the pressure indicated on the...
- Page 17 HOT WATER MODE 1. If hot water is required, turn the burner switch clockwise to ON position. PRESSURE ADJUSTMENT HIGH / LOW To activate high pressure turn the lance handle clockwise and pull the trigger and to activate low pressure turn the lane handle anti-clockwise. 2.
- Page 18 4. Never allow sprayed detergent to dry on the USING CLEANING AGENT cleaning surface, as this may damage the 1. Fill the detergent tank with cleaning solution. Only surface. use a cleaning detergent approved by the manufacturer and do not use under any TO STOP circumstance acid or corrosive products (contact an 1.
- Page 19 2. Carry out all regular maintenance and Spitwater recommends that all maintenance is inspections as listed in this manual using carried out by an authorized Spitwater service original Spitwater parts where required. agent using original Spitwater spare parts. 3. Always make sure before carrying out any...
- Page 20 ● Clear fumes = ideal condition to run the unit. Assess any undue noise levels from the motor. STOP operting the unit, Unit is fit, proceed task Contact Spitwater service agent immediately Contact Spitwater service Do It Yourself, agent / Qualified person for...
- Page 21 USAGE VS SERVICE FREQUENCY Time interval for checks and replacement listed above are for units subjected to normal operating conditions. Should the unit be subjected to abnormal conditions (e.g. heavy use, dirty water, extreme temperatures or conditions etc.) times should be reduced accordingly. TABLE-A: Usage vs Service Frequency...
- Page 22 OIL CHECK POINTS 1. Remove the fastening knobs at five places. PUMP OIL CHECK 3. Ensure the unit is on a flat surface. 4. Check the oil level in the pump using the dipstick or the sight glass on the back / side of the pump.
- Page 23 TROUBLESHOOTING GUIDE If the fault cannot be identified or corrected using the below list (or remedy suggests contacting Spitwater service agent) stop using the unit immediately and contact your authorized Spitwater service agent to rectify. TROUBLESHOOTING GUIDE FAULT CAUSE REMEDY...
Need help?
Do you have a question about the SLD08 and is the answer not in the manual?
Questions and answers