Table of Contents
Advertisement
Year of Manufacture:
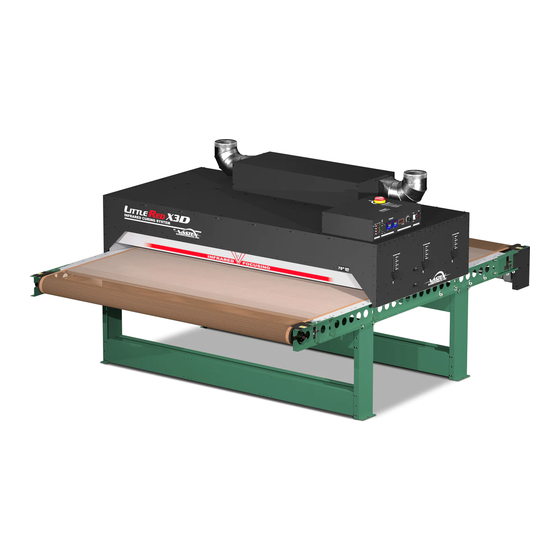
LittleRed-X Series Dryers
Assembly, Operating, and Maintenance Instructions
LittleRed-X Series Dryers (X1/X1D/X2/X2D/X3/X3D)
Contents
Electrical Drawing #:
Serial Number:
VTX
(Please log your machine's serial number and date of purchase for future reference.)
Page#
2-3
4-7
6
8
9
10
11-12
13
14
15
16-17
18
19
20
Rev:______
/
/
Date:____
____
______
Original Instructions
Vastex International, Inc.
Bethlehem, Pa. 18015-1982 USA
Phone# 610 625-2702 Fax# 610 625-2775
Web Site www.vastex.com
Authorized Representative in Europe:
Certification Experts BV
Nieuwstad 100 1381 CE Weesp,
The Netherlands
Tel : + 31 (0) 294 - 48 33 55
Fax : + 31 (0) 294 - 41 46 87
Vastex E-mail assistance
Purchasing & Product Info:
sales@vastex.com
Electrical Support:
stech@vastex.com
Tech Support, Mechanical Setup, and Operation:
techsupport@vastex.com
Doc. # 01-28-001M
Advertisement
Table of Contents

Related Manuals for VASTEX LittleRed-X Series


Summary of Contents for VASTEX LittleRed-X Series
-
Page 1: Table Of Contents
Year of Manufacture: Doc. # 01-28-001M Original Instructions LittleRed-X Series Dryers Assembly, Operating, and Maintenance Instructions LittleRed-X Series Dryers (X1/X1D/X2/X2D/X3/X3D) Contents Page# Introduction / Safety Assembly Electrical Hookup Component Identification Controls Vastex International, Inc. 7 Emery St ... -
Page 2: Introduction / Safety
Your Vastex Infrared Dryer has been Factory tested and burned in for a period of 2-8 hours. All components are tested to be sure they work correctly when the Dryer leaves our factory. - Page 3 Your Vastex Infrared Dryer has high temperature heaters. There is an inherent danger when dealing with a heat source of this degree. These heaters are often run at temperatures near 1,000° F(538° C). Any body part or item that comes in direct contact with the heaters will be damaged.
-
Page 4: Assembly
Assembly Tools Needed: (2) 9/16” open end wrenches, (1) 7/16” open end wrench or socket, (1) 1/4” nut driver OR flat blade screw driver 10-32 Serrated Nut 1a) For X1-30 and X1D only, the legs must be assembled. Using (20) 10-32 Bolts and (20) 10-32 Serrated nuts, assemble each leg set as shown on right. - Page 5 Assembly (cont’d) 2) The belt needs to be installed as shown in 2a) For LittleReds the diagram. To connect your belt, align equipped with a drop the Alligator Lace and install the pin. down motor and rear idler, route the belt above rear idler.
-
Page 6: Electrical Hookup
If your machine has a plug installed from the factory, under no circumstances may anyone other than a Vastex Employee modify the line cord or plug. Plug this into the correct wall socket with dedicated breaker and appropriate sized wire. No extension cords may be used. - Page 7 Assembly (cont’d) Aligner bolt Belt Tracking Belt aligner pulley (Move in small increments while belt is moving. Do not leave conveyor running unattended.) If the belt is slipping, add belt tension by raising equally both sides of aligner roller. 1”-2” of belt sag at the bottom side is desirable.
-
Page 8: Component Identification
LittleReds come standard with an aligner roller. Pulley The pulleys at either end of the conveyor are made by VASTEX of 4 ½ inch tubing with ¾ inch center shaft. They are mounted on self aligning flange bearing blocks for precision rolling. -
Page 9: Controls
Controls (LittleRed X1/X2/X3) DC Volt Meter: Belt Speed Control: An AC-DC Control Output Light: Digital Volt Meter displays, in converter, mounted to the face of the This light should cycle on & off volts, the amount of power going control panel, allows the operator to with the controller, indicating to the belt motor. -
Page 10: Controls / Zone Information
Controls between all LittleRed-X Models are similar. Refer to previous page for all unlisted controls. Controls (LittleRed-X1D-30/X2D/X3D) MAIN Temp Control: BOOST Zone Temp Control: Controls Temperature of Controls Temperature of Boost MAIN heat zone. Zone. Must be set to the same temperature OR HIGHER than the MAIN Temperature control. -
Page 11: Operation
Dryer Operation Control System Summary: The control system in your dryer is called a “closed loop system”. The system includes a Digital Controller mounted to the control panel, a Sensor mounted in a shield under the heater, a relay and an Infrared Heater. The digital controller is set to the desired temperature and the Sensor measures the temperature at the face of the heater. - Page 12 Dryer Operation Cont’d Volts vs Time in Heat Listed Time Through Chamber is for reference only. Test the Time Through Chamber before using machine. Use a small metal object placed on the edge of the belt and time how long it takes to travel from the front of the chamber to the rear. LittleReds are available in many different configurations.
-
Page 13: Exhaust
Powered Exhaust All LittleRed Models manufactured after 5/1/2020 come standard with a top mounted exhaust system. Recommended cleaning intervals are for high use scenarios. Monthly Cleaning Monthly Cleaning (20 production days) Exhaust Disconnect ducting from machine Remove (12) Sheet metal screws from top of ex- haust box and clean next to and around fan. -
Page 14: Maintenance
Maintenance Caution! Power must be turned off at the external disconnect, or the machine unplugged, before entering any part of this machine. The red Power Light labeled “Power” must be off!! A qualified electrician should perform any internal testing requiring power on! Electrical Electrical connections will loosen in time from heating and cooling. -
Page 15: Troubleshooting
3) After releasing the button, the work FILE will be displayed. Press the scroll button one time and the word will disappear. Celsius / The temperature controller on your Vastex Infrared dryer is normally set to Fahrenheit as a default. Follow the procedure below to Fahrenheit switch the controller from Fahrenheit to Celsius. -
Page 16: Speed Adjustments
Speed Adjustments (X1/X2/X3) Caution! Power must be turned off at the external disconnect, or the machine unplugged, before entering any part of this machine. The red Power Light labeled “Power” must be off!! A qualified electrician should perform any internal testing requiring power on! Belt Speed Min/Max Adjustment for dryers with KB control. - Page 17 Speed Adjustments X2D/X3D NOTE: When an adjustment is made to the MAXIMUM speed of the conveyor; whether higher or lower; there is a direct impact on the MINIMUM speed which must also be adjusted. To change the maximum speed of the conveyor for dryers equipped with KBIC control. 1) Rotate the BELT CONTROL knob to the maximum setting.
-
Page 18: Conveyor Details
Conveyor Length and Leg Placement Doc# 01-28-003B 1206.5 Dimension Format 47.5 [MM] LittleRed X1-30 Inch 15.9 15.9 " " " 1663.7 65 " LittleRed X1-54 LittleRed X2-30 LittleRed X2-54 374.7 374.7 609.6 " 24" " 2222.5 " LittleRed X3D-30 LittleRed X3D-54 476.3 374.7 1066.8... -
Page 19: Ducting Information
Exhaust Ducting LittleRed Dryers should be connected to a ducting system with a flexible section to allow for cleaning of the exhaust and upper chamber. A 10% reduction of airflow is permitted due to customer added ducting. Exhaust Fan Nominal CFM: X1D-18/X1-30: 177CFM 4”... -
Page 20: Warranty / Terms & Conditions
The defective part or parts will be repaired or replaced at the discretion of Vastex International, Inc. If the equipment in question is less than one (1) year old, it will be shipped to the customer at no charge, with an RGA issued by Vastex for the defective part. The defective part must be shipped back to Vastex freight prepaid within 30 days or the account will be billed.
Need help?
Do you have a question about the LittleRed-X Series and is the answer not in the manual?
Questions and answers