Advertisement
20____
Year of Manufacture:
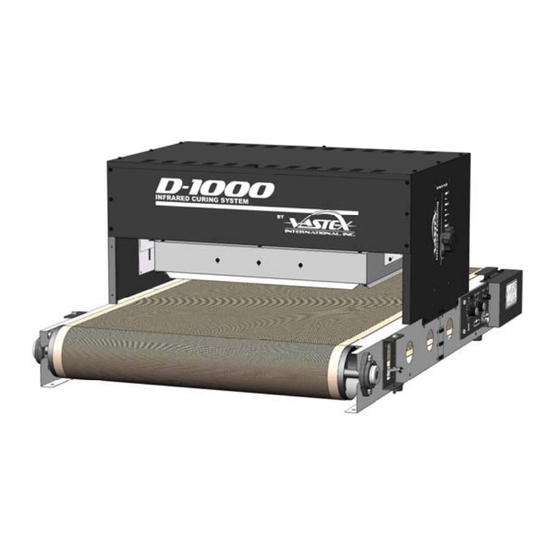
D-100 and D-1000 Series Dryer
Contents
Safety Information
General Information
Chain Drive Adjustment
10" Extension
Electrical Drawing #:
Serial Number:
VTX
(Please log your machine's serial number and date of purchase for future reference.)
Assembly and Operating Instructions
Page#
2
3
4-5
6
7-10
11
12
13
14
15
Rev:______
/
/
Date:____
____
______
Vastex International, Inc.
7 Emery Street
Bethlehem, PA 18015-1982 USA
Phone# 610 625-2702 Fax# 610 625-2775
Web Site www.vastex.com
Authorized Representative in Europe:
Certification Experts BV
Nieuwstad 100 1381 CE Weesp,
The Netherlands
Tel : + 31 (0) 294 - 48 33 55
Fax : + 31 (0) 294 - 41 46 87
Vastex E-mail assistance
Purchasing, product and printing Info:
sales@vastex.com
Electrical Support:
stech@vastex.com
Tech Support, Mechanical Setup, and Operation:
techsupport@vastex.com
Doc. # 01-23-001E
Advertisement

Subscribe to Our Youtube Channel
Related Manuals for VASTEX D-100


Summary of Contents for VASTEX D-100
-
Page 1: Table Of Contents
20____ Doc. # 01-23-001E Year of Manufacture: D-100 and D-1000 Series Dryer Assembly and Operating Instructions Contents Page# Safety Information General Information Vastex International, Inc. 7 Emery Street Package Contents Bethlehem, PA 18015-1982 USA Phone# 610 625-2702 Fax# 610 625-2775 Component Identification Web Site www.vastex.com... - Page 2 Congratulations, you have chosen a VASTEX conveyor curing system. VASTEX has been designing and building dryers since 1960 and has the knowledge and expertise to supply a quality dryer and help you keep it running for years to come. VASTEX has innovated many of the features found in conveyor ovens today from control methods, modular features, air movements and belt tracking.
- Page 3 D-100: Assembled — 89 lbs (40.4 kg); 46” x 24” x 24” (119 x 61 x 61 cm) Boxes: #1 – 57 lbs (25.9 kg); #2 – 14 lbs (6.4 kg); #3 – 18 lbs (8.2 kg); Boxes on skid: 115 lbs (52.2 kg)
-
Page 4: Package Contents
Package Contents D-100 only 3 Separate Cartons Carton #1 Conveyor Components Conveyor Assembly 1) Chain Guard Conveyor Belt 1) Hardware package with: 6 screws and 2 belt guards. Carton #2 Carton #3 Chamber Components 16 x 16 Infrared Heater Side Panel... - Page 5 Package Contents D-1000 only 3 Separate Cartons Carton #1 Front Conveyor Components Carton #2 Rear Conveyor Components Rear conveyor with Drive motor, controls and Front conveyor with belt rear pulley aligner and front pulley. Additional items above: 1) Belt, 1) Chain guard, and 1) Hardware package with: 18 screws and 2 belt guards.
-
Page 6: Component Identification
Pulley The pulleys at either end of the conveyor are made by VASTEX of 4 ½ inch tubing with ¾ inch center shaft. They are mounted on self aligning flange bearing blocks for precision rolling. - Page 7 Assembly D1000 conveyor only The D1000 conveyor comes in two sections. Slide them together while interlocking the joiner plates and insert six (6) screws on each side as shown below. Inner and outer joiner plates go Install 6 screws on each side. together as shown above.
-
Page 8: Assembly
Assembly Tools Required: 1A) Install knob and bolt through Note: A 1/4” and 7/16” Flat Plate Wrench is supplied. pointer and spacer outside of Or use both side panels. Connect to 1/4” Nut Driver (recommended) or 1/4” Socket and Ratchet (6.5mm) weldnut and hexnut on other 7/16”... - Page 9 Assembly Cont. Connecting Chamber To Conveyor Printed Side Heater Mounting screws Heater and mounting pins installed, (2 each side) wires toward the back. Position chamber onto conveyor. Front Corner alignment tabs on chamber slide into cutouts in conveyor. Note Back heater wires are towards back of conveyor.
- Page 10 Assembly Heater Wire Connections Heater Wires (tan wires) have push on connectors. Attach either wire onto either open terminal (indicated on the left) on the heat control. It does not matter which wire to which terminal. Align the connector with the tab on the heat control and push firmly until fully seated.
- Page 11 Assembly Belt Tracking Perform after assembly is complete and dryer is on a flat surface. Maintain belt as close to centered as possible on both rollers. Do Not leave conveyor unattended during tracking process. Left Side Belt Tracking 1) While conveyor is running at full speed, observe Adjuster Bolts position on both rollers.
-
Page 12: Electrical Requirements/Controls
Requires dedicated 15 amp circuit with a NEW commercial duty 5-15R receptacle. D-1000 / 120Volts, 16.5Amps, 2.05KW Requires dedicated 20 amp circuit with a NEW commercial duty 5-20R receptacle. D-100-240 / 240Volts, 6.3 Amps, 1.63KW D-1000-240 / 240Volts, 8.6 Amps, 2.05KW Requires good quality 6-15R receptacle. (Some international plugs available) -
Page 13: Operation
Dryer Operation Startup Procedure Be sure the breaker and dryer controls are switched off. Plug the dryer into a properly Plug in Dryer: rated outlet and turn the breaker on. Check belt path: Remove any objects from the conveyor and belt. Turn on Conveyor Set belt speed with the Belt Speed Control on the conveyor, near the motor. - Page 14 For Vastex drives, the total movement in the slack span of the chain (up and down total movement) should be .25 to .38 inch.
-
Page 15: Warranty
The defective part or parts will be repaired or replaced at the discretion of Vastex International, Inc. If the equipment in question is less than one (1) year old, it will be shipped to the customer at no charge, with an RGA issued by Vastex for the defective part. The defective part must be shipped back to Vastex freight prepaid within 30 days or the account will be billed.
Need help?
Do you have a question about the D-100 and is the answer not in the manual?
Questions and answers