
Related Manuals for Makita GHU01


Summary of Contents for Makita GHU01
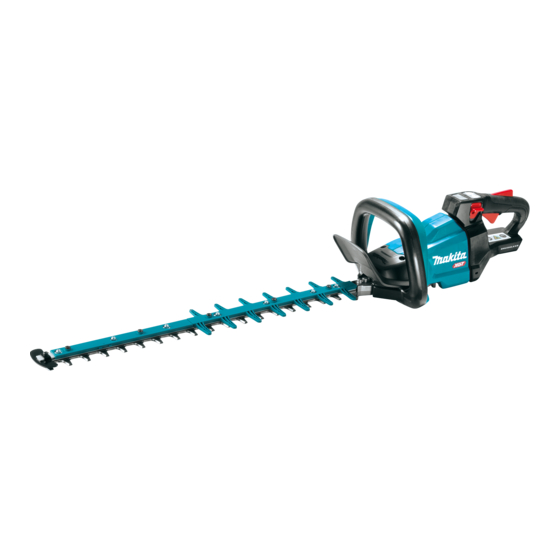
- Page 1 INSTRUCTION MANUAL MANUAL DE INSTRUCCIONES Cordless Hedge Trimmer Cortasetos Inalámbrico GHU01 GHU02 GHU03 IMPORTANT: Read Before Using. IMPORTANTE: Lea antes de usar.
-
Page 2: Specifications
ENGLISH (Original instructions) SPECIFICATIONS Model: GHU01 GHU02 GHU03 Blade length 600 mm (23-5/8") 750 mm (29-1/2") Strokes per minute 2,000 / 3,000 / 2,000 / 3,600 / 5,000 /min 4,000 /min Overall length 1,123 mm (44-1/4") 1,120 mm (44") 1,262 mm (49-3/4") Rated voltage D.C. - Page 3 If operating a power tool in a damp location is Disconnect the plug from the power source unavoidable, use a ground fault circuit inter- and/or remove the battery pack, if detachable, rupter (GFCI) protected supply. Use of a GFCI from the power tool before making any adjust- ments, changing accessories, or storing power reduces the risk of electric shock.
-
Page 4: Additional Safety Instructions
Additional Safety Instructions Follow all charging instructions and do not charge the battery pack or tool outside the Preparation temperature range specified in the instruc- tions. Charging improperly or at temperatures Check the hedges and bushes for foreign outside the specified range may damage the objects, such as wire fences or hidden wiring battery and increase the risk of fire. - Page 5 10. Avoid dangerous environment. Don't use the Clean the tool and especially the shear blades tool in damp or wet locations or expose it to after use, and before putting the tool into stor- rain. Water entering the tool will increase the age for extended periods.
- Page 6 Do not touch the terminals with any con- ductive material. CAUTION: Only use genuine Makita batteries. Avoid storing battery cartridge in a con- Use of non-genuine Makita batteries, or batteries that tainer with other metal objects such as have been altered, may result in the battery bursting nails, coins, etc. causing fires, personal injury and damage. It will...
-
Page 7: Functional Description
Indicating the remaining battery FUNCTIONAL capacity DESCRIPTION Press the check button on the battery cartridge to indi- cate the remaining battery capacity. The indicator lamps CAUTION: Always be sure that the tool is light up for a few seconds. switched off and the battery cartridge is removed before adjusting or checking function on the tool. Installing or removing battery cartridge CAUTION: Always switch off the tool before... -
Page 8: Overload Protection
Tool / battery protection system NOTICE: If the tool stops due to a cause not described above, refer to the section for troubleshooting. The tool is equipped with a tool/battery protection system. This system automatically cuts off power to Angle setting of the handle the motor to extend tool and battery life. The tool will automatically stop during operation if the tool is placed under one of the following conditions: CAUTION: Always make sure that the handle is locked in the desired position before operation. - Page 9 2,000 /min switch is turned on. To prevent the switch trigger from being accidentally pulled, a lock-off lever is provided. To start the tool, depress the lock-off lever, and then press the switch lever and pull the switch trigger. Release the switch For GHU01 trigger to stop. Indicator Mode Stroke speed High 4,000 /min...
-
Page 10: Electronic Function
Electric brake This tool is equipped with an electric brake. If the tool consistently fails to quickly stop the shear blades after releasing the switch trigger, have the tool serviced at Makita Authorized Service Center. • Accidental re-start preventive function Even if you install the battery cartridge while pull- ► 1 . Cover 2. Plate ing the switch trigger, the tool does not start. - Page 11 Remove the rod and the bearing. Align the protrusions on the shear blades vertically at the same position. ► 1 . Rod 2. Bearing ► 1 . Protrusion NOTE: The rod may remain on the cover. Attach the felt pad to the shear blades. Remove 2 bolts, the felt pad and the sleeves, and then remove the shear blades.
- Page 12 10. Insert the protrusion on the shear blades to the 12. Attach the bearing and the rod. small hole on the rod, then align the position of the felt pad with the holes on the tool, and then attach new sleeves.
- Page 13 Install the shear blades again. NOTICE: If the parts other than the shear blades such as the rods are worn out, ask Makita Authorized Service Centers for parts replacement or repairs. Installing or removing the chip...
-
Page 14: Operation
Hold the tool with both hands, press the switch lever OPERATION and pull the switch trigger while pressing the lock-off lever, and then move it forward. WARNING: Keep hands away from shear blades. CAUTION: Avoid operating the tool in very hot weather as much as practicable. When operat- ing the tool, be careful of your physical condition. -
Page 15: Cleaning The Tool
MAINTENANCE CAUTION: Always be sure that the tool is switched off and the battery cartridge is removed before attempting to perform inspection or maintenance. To maintain product SAFETY and RELIABILITY, repairs, any other maintenance or adjustment should be performed by Makita Authorized or Factory Service Centers, always using Makita replacement parts. 15 ENGLISH... - Page 16 Set the angle of a file to 45° (for GHU02/GHU03) Storage or 50° (for GHU01), and grind the upper blade from 3 directions with the file. The hook hole in the tool bottom is convenient for hang- ing the tool from a nail or screw on the wall. Attach the blade cover to the shear blades so that the blades are not exposed.
-
Page 17: Grease Lubrication
► 1 . Grease vessel 2. Hole ► 1 . Bolt Apply the grease to the tool (Approximately 5 g (0.2 oz) as a guide). Remove the grease vessel. Tighten the bolt. TROUBLESHOOTING Before asking for repairs, conduct your own inspection first. If you find a problem that is not explained in the manual, do not attempt to dismantle the tool. Instead, ask Makita Authorized Service Centers, always using Makita replace- ment parts for repairs. State of abnormality Probable cause (malfunction) Remedy Motor does not run. Battery cartridge is not installed. Install the battery cartridge. -
Page 18: Optional Accessories
OPTIONAL ACCESSORIES CAUTION: These accessories or attachments are recommended for use with your Makita tool specified in this manual. The use of any other accessories or attachments might present a risk of injury to persons. Only use accessory or attachment for its stated purpose. If you need any assistance for more details regard- ing these accessories, ask your local Makita Service Center. • Shear blade assembly • Shear blade cover •... -
Page 19: Especificaciones
ESPAÑOL (Instrucciones originales) ESPECIFICACIONES Modelo: GHU01 GHU02 GHU03 Longitud de la cuchilla 600 mm (23-5/8″) 750 mm (29-1/2″) Carreras por minuto 2 000 cpm / 3 000 cpm / 2 000 cpm / 3 600 cpm / 5 000 cpm 4 000 cpm Longitud total 1 123 mm (44-1/4″) - Page 20 Seguridad eléctrica Impida el encendido accidental. Asegúrese de que el interruptor esté en la posición de Las clavijas de conexión de las herramientas apagado antes de conectar a la alimentación eléctricas deberán encajar perfectamente en la eléctrica y/o de colocar el cartucho de batería, toma de corriente.
- Page 21 Guarde la herramienta eléctrica que no use No utilice una herramienta ni una batería que fuera del alcance de los niños y no permita estén dañadas o hayan sido modificadas. Las que las personas que no están familiarizadas baterías dañadas o modificadas podrían oca- con ella o con las instrucciones la operen. Las sionar una situación inesperada provocando un herramientas eléctricas son peligrosas en manos incendio, explosión o riesgo de lesiones.
- Page 22 Sujete el cortasetos por las superficies de asi- PELIGRO: Mantenga las manos alejadas de la miento aisladas solamente, ya que la cuchilla cuchilla. El contacto con la cuchilla podría oca- podría entrar en contacto con cableado oculto. sionar lesiones personales graves. Las cuchillas que entren en contacto con un cable Asegúrese de pisar firmemente antes de con corriente podrán hacer que la corriente circule comenzar la operación.
- Page 23 No abra ni mutile la(s) batería(s). El electrolito Al lavar la herramienta, no permita que el agua liberado es una sustancia corrosiva y puede que entre en el mecanismo eléctrico, como la bate- ría, el motor y los terminales. cause daños a la piel y los ojos. Pueden ser tóxi- cos si se llegan a tragar. Realice las inspecciones y labores de manteni- No cargue la batería bajo la lluvia ni en lugares miento en un sitio protegido de la lluvia.
- Page 24 12. Utilice las baterías únicamente con los pro- Instrucciones importantes de ductos especificados por Makita. Instalar las seguridad para el cartucho de baterías en productos que no cumplan con los batería requisitos podría ocasionar un incendio, un calen- tamiento excesivo, una explosión o una fuga de electrolito. Antes de utilizar el cartucho de batería, lea 13.
-
Page 25: Descripción Del Funcionamiento
DESCRIPCIÓN DEL PRECAUCIÓN: Introduzca siempre com- pletamente el cartucho de batería hasta que FUNCIONAMIENTO el indicador rojo no pueda verse. Si no, podría accidentalmente salirse de la herramienta y caer al suelo causando una lesión a usted o alguien a su PRECAUCIÓN: Asegúrese siempre de que la alrededor. herramienta esté apagada y el cartucho de batería PRECAUCIÓN: No instale el cartucho de haya sido extraído antes de realizar cualquier... -
Page 26: Protección Contra Sobrecarga
Protección contra el Sistema de protección para la sobrecalentamiento de la herramienta/batería herramienta o la batería La herramienta está equipada con un sistema de Si la herramienta o el cartucho de batería se sobreca- protección para la herramienta/batería. Este sistema lientan, la herramienta se detendrá automáticamente. corta automáticamente la alimentación al motor para Cuando la herramienta se sobrecalienta, la luz indi- prolongar la vida de la herramienta y la batería. La cadora de precaución se ilumina en rojo. Cuando el herramienta se detendrá... -
Page 27: Ajuste De Velocidad
Para evitar que el gatillo interruptor sea jalado accidental- Accionamiento del interruptor de encendido mente, se proporciona una palanca de desbloqueo. Para arrancar la herramienta, presione la palanca de desbloqueo, y ADVERTENCIA: Por su seguridad, esta luego presione la palanca del interruptor y jale el gatillo inte- rruptor. Suelte el gatillo interruptor para parar la herramienta. herramienta está equipada con una palanca de desbloqueo para evitar que la herramienta se ponga en marcha accidentalmente. -
Page 28: Montaje
Para el GHU01 NOTA: Si las ramas o residuos enredados no pueden ser retirados, suelte y jale el gatillo interruptor hasta Indicador Modo Velocidad de que sean retirados. carrera NOTA: Si pulsa el botón de inversión mientras las Alto 4 000 cpm cuchillas de cizalla están moviéndose, la herramienta se detendrá y se preparará para el movimiento... - Page 29 Extraiga la barra y el rodamiento. Instalación o extracción de las cuchillas de cizalla PRECAUCIÓN: Coloque la cubierta de las cuchillas antes de extraer o instalar las cuchillas de cizalla. Usted puede instalar en su herramienta cuchillas de cizalla de 600 mm (23-5/8″) o 750 mm (29-1/2″). Coloque la herramienta de cabeza y luego retire los 6 pernos. ► 1 . Barra 2. Rodamiento NOTA: La barra puede permanecer en la cubierta.
- Page 30 Ajuste la manivela de manera que los 2 orificios 10. Inserte la protuberancia en las cuchillas de cizalla queden alineados en la línea de alineación. en el orificio pequeño de la barra, luego alinee la posi- ción de la almohadilla de fieltro con los orificios en la herramienta, y después coloque los manguitos nuevos. ► 1 . Orificio 2. Línea de alineación Alinee las protuberancias en las cuchillas de cizalla verticalmente en la misma posición. ► 1 . Protuberancia 2. Orificio pequeño 3. Manguito 4. Almohadilla de fieltro AVISO: ► 1 . Protuberancia Aplique una pequeña cantidad de grasa a la periferia interior del orificio de la barra.
- Page 31 AVISO: Si aparte de las cuchillas de cizalla otras piezas, tales como las barras, muestran signos de desgaste, solicite su reparación o reemplazo a los centros de servicio autorizados Makita. Instalación o extracción del colector de residuos Accesorio opcional PRECAUCIÓN: Siempre utilice guantes ► 1 .
-
Page 32: Operación
Alinee los orificios del colector de residuos con AVISO: Nunca intente extraer el colector de los tornillos de las cuchillas de cizalla, y luego fije el residuos aplicando una fuerza excesiva con sus colector de residuos a las cuchillas de cizalla de forma ganchos asegurados a las cuchillas de cizalla. segura. OPERACIÓN ADVERTENCIA: Mantenga las manos aleja- das de las cuchillas de cizalla. -
Page 33: Mantenimiento
Asegúrese siempre de que la herramienta esté apagada y el cartucho de batería extraído antes de intentar realizar una inspección o mantenimiento. Para mantener la SEGURIDAD y FIABILIDAD del producto, las reparaciones, y cualquier otra tarea de mantenimiento o ajuste deberán ser realizadas en centros de servicio autorizados o de fábrica Makita, empleando siempre repuestos Makita. 33 ESPAÑOL... -
Page 34: Limpieza De La Herramienta
Limpieza de la herramienta Almacenamiento Quite el polvo de la herramienta con un paño seco o El orificio para el gancho en la parte inferior de la humedezca un paño en agua y jabón y exprímalo para herramienta resulta útil para colgar la herramienta en la limpiarla. pared usando un clavo o tornillo. Coloque la cubierta de las cuchillas de cizalla de AVISO: Nunca use gasolina, bencina, diluyente manera que las cuchillas no queden expuestas. (tíner), alcohol o sustancias similares. - Page 35 Intervalo de lubricación: Cada 50 horas de operación Retire el perno del orificio para su lubricación. ► 1 . Tornillo 2. Receptáculo de ramas Ajuste el ángulo de una lima a 45° (para el GHU02/GHU03) o a 50° (para el GHU01), y afile la cuchilla superior en 3 direcciones con la lima. ► 1 . Perno Retire la tapa del recipiente para grasa. Alinee la salida del recipiente para grasa con el orificio en la cubierta, y luego oprima la salida del recipiente para grasa sobre el orificio.
-
Page 36: Resolución De Problemas
Antes de solicitar alguna reparación, primero realice una inspección por su cuenta. Si detecta algún problema que no esté explicado en el manual, no intente desensamblar la herramienta. En vez de esto, solicite la reparación a un centro de servicio autorizado de Makita, usando siempre piezas de repuesto Makita. Estado de la anomalía Causa probable (avería) - Page 40 Makita Corporation 3-11-8, Sumiyoshi-cho, 885875A943 Anjo, Aichi 446-8502 Japan GHU01-1 EN, ESMX 20210125 www.makita.com...
Need help?
Do you have a question about the GHU01 and is the answer not in the manual?
Questions and answers