
Related Manuals for Makita RBC252


Summary of Contents for Makita RBC252
- Page 1 Brush Cutter RBC252 String Trimmer RBC253 INSTRUCTION MANUAL R B C 2 5 2 uies for operation instrucirons carefully Read z-irld...
- Page 2 Thank you very much for purchasing your MAKITA STRING T R I M M E R and very confident recommending our extensive development and substantial knowledge Please read and understand BRUSH CUTTER In order to take advantage of its outstaridincj mrfor;?-l-ince Proper >afety precautions must be observed Like all power quiprnent...
- Page 3 Make periodic inspections to assure safe and efficient operation, your machine, please contact your nearest Makita Factory Service Center or authorized dealer. Keep the machine well away from Warning: The cutter area...
-
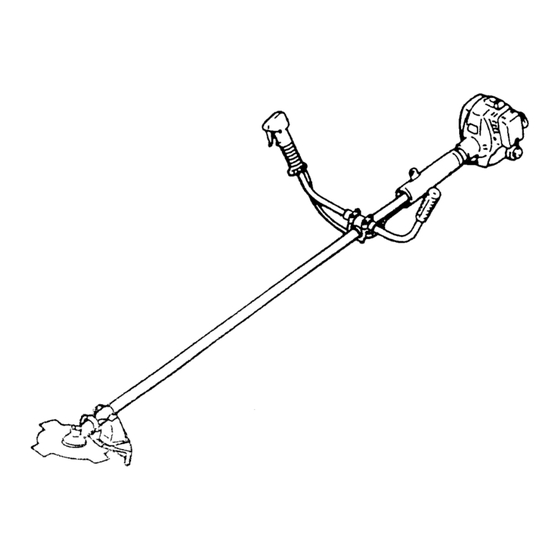
Page 4: Equipment Description
EQUIPMENT DESCRIPTION ” RBC252 RBC253 ITEM DESCRIPTION FuelTank Recoil Starter Cleaner ___ __ T S T O P Switch Spark Plug , - - ---- l e r - - M u f f Holder Case T<TaT&ip ITEM NO. DESCRIPTION Hanger . - Page 5 ASSEMBLY INSTRUCTIONS FOR STRING T R I M M E R (Model RBC253) Mounting t h e handle (Fig. 1 ) Attach handle to t h e Install the handle joint Insert the installation bolt M6x45 through the holes in the handle a n d attach t h e flange nut M 6 Adjust the handle the desired position a n d tighten the installation bolt...
- Page 6 TProttle wire io throttle lever STEP Mounting the handle and connecting the throttle klatch the protrusions on the handle joint socket head bolts M 5 evenly to secure the handle (Fig 5,6) Connect the throttle wires and firmly close the cable joint (as shown in 3 steps in Fig Note Squeeze the throttle lever to make sure that the throttle wire moves smoothly 3 Connect the switch cords the two cords from the engine by inserting one...
- Page 7 ASSEMBLY INSTRUCTIONS FOR B R U S H CUTTER (ModelRBC252) Mounting t h e protector (Fig. 11) Install the clamp on the drive shaft so that projection the clamp inserted into the case opening between the gear shaft. 2. Attach the protector with installation bolts M6x20.
- Page 8 Inspect the fuel tank and with clean, fresh f i l l tool Use the following mixed Gasoline Genuine Makita Two-cycle Gasoline Other manufacturer's Two-cycle engine oil ____- FOR CALIFORNIA REGULATION: THIS EQUIPMENT IS CERTIFIED TO OPERATE ON GASOLINE WHEN MIXING GASOLINE WITH TWO-CYCLE ETHANOL OR METHANOL (TYPES OF ALCOHOL).
- Page 9 REFUELING Use Oil-gasoline mixture for fuel as noted Mixture" on previous page Always s h u t the engine allow it to cool before refuel- ing. Thoroughly clean the area around the fuel filter cap, to pre- from vent getting into the fuel tank. dirt Unscrew the fuel cap and the tank...
-
Page 10: Engine Starting A N D Stopping Procedures
ENGINE STARTING A N D STOPPING PROCEDURES Starting w h e n t h e e n g i n e is cold following procedure when the engine is cold has beer, stopped for longer than minutes. oeen added to !he engine. switch S!ide stop... - Page 11 CORRECT HANDLING OF THE MACHINE Attachment, adjustment a n d d e t a c h m e n t Attachment Place the strap hook into the hanger which Adjustment the strap length so that the nylon cutting head Adjust Detachment (NORMAL) Remove strap hook from the hanger.
- Page 12 Idle ad!ilsiing Fig 24 H E A D B R U S H CUTTER RBC252 Protecroi cutter blade blade P i l t a i i , j r not permitted.
-
Page 13: Maintenance
MAINTENANCE DAlLY CHECK-UP AND (0024' 0 0 2 8 " ) Before operation, pay particular attention to the tightness of the nylon cutting head. Re-tighten the , ~ y I c : ~ cutting head necessary (every Check for clogged cooling air passage and cylinder fins. Clean them Clean the air cleaner every hours or daily. - Page 14 STORAGE When storing the for a icng time drain the fuel from the fuel tank and machine Drain all fuel from the fuel tank Gently push on the primer pump repeatedly the primer Properly dispose o f the fuel in accordance p u m p aluy Remove the spark...
- Page 15 This is particularly the case when attempting cut within a blade segment between Never apply t h e brush cutter within a segment between 12 and o'clock. apply t - Never trees, etc., having a diameter...
-
Page 16: Cutting Tools
Kickback Prevention To avoid kickbacks, observe the following: Easy cutting almost no kickback is possible with in a blade segment between 8 and Operation within a blade segment between presents severe hazards, especially when using metal cutting tools. Cutting operations within a blade segment betweep o'clock, and between train&... - Page 17 INSTRUCTIONS FOR (BUMP & FEED BF4) Safety Instructions Read this section carefully and thoroughly before use Check the nylon cutting head carefully before each use you notice any o f following, replace the worn or damaged parts new ones immediately (Fig with Dents appear on the knob head The housing (cover)
- Page 18 Replacing t h e nylon cord (Bump & Feed BF4) P r e s s the homing latches inward to lift off the cover; then remove spool (Fig. t h e the new nylon cord through t h e hole in the center 2.
-
Page 19: Manufacturer's Warranty Coverage
U.S.A., Inc. dards. Makita equipment engine for the periods o f time listed below provided there has been no abuse. neglect or i/71proppr maintenance o f your utility and/or la-wn ana garden equipment engine. -
Page 20: Warranty Period
(a) Fuel Hoses Sealing Gaskets determined by authorized warranty station that other the failure o f a warranted emission-related part during the warranty period, Makita U S A , Inc will repair and/or replace necessary components t h e LllMlTED WARRANTY... - Page 21 WHAT IS NOT COVERED U N D E R THIS WARRANTY ivarrai?ty does not cover any emission-relatea part <>vITich m?l:i.J!i Tills modifications such as changing. c;ns and/or an engine is being serviced under warranty. V!hc?ii warranty stations shall not be liable for any loss of ;f.ji'S !inle si inconvenience ,';*...
- Page 22 North (916) 333 Littlefieid A v ? S S a n Francisc? 2;. '?@%I (4151 875-10132 aLtiic;r!zer: ?r-ifJ approwcl by Makita emission-related i , < ~ : ~ : s ' . v c i m n t y Sill1 L I P I : ~ ~ in;::?sr'?te location where...
Need help?
Do you have a question about the RBC252 and is the answer not in the manual?
Questions and answers