Table of Contents
Advertisement
Quick Links
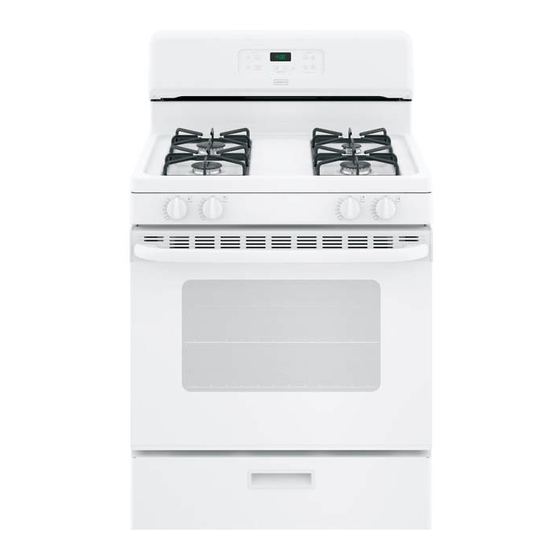
Single Oven Gas Ranges
Models: XGBS400 /XGB635
Contents
Safety Information. . . . . . . . . . . . . . . . .3
Using the Range
In Case of a Power Failure . . . . . . . . .8
Surface Burners . . . . . . . . . . . . . . . . . .8
Griddle (on some models) . . . . . . . . .10
Oven Controls . . . . . . . . . . . . . . . . . .12
Oven Air Vents. . . . . . . . . . . . . . . . . .13
Special Features . . . . . . . . . . . . . . . .14
Sabbath Mode . . . . . . . . . . . . . . . . . .15
Cooking Modes . . . . . . . . . . . . . . . . .16
Cookware Guidelines . . . . . . . . . . . . .16
Aluminum Foil and Oven Liners. . . . .16
Oven Racks . . . . . . . . . . . . . . . . . . . .17
Broil Drawer (on some models) . . . . .17
Cooking Guide . . . . . . . . . . . . . . . . . .18
Write the model and serial numbers here:
Model # _______________________________
Serial # _______________________________
You can find the rating label on the front behind
the range drawer.
49-2000228 Rev. 0 08-18 GEA
Care And Cleaning
Oven. . . . . . . . . . . . . . . . . . . . . . . . . .19
Cooktop . . . . . . . . . . . . . . . . . . . . . . .20
Door and Drawer . . . . . . . . . . . . . . . .23
Oven Light . . . . . . . . . . . . . . . . . . . . .24
Oven Door . . . . . . . . . . . . . . . . . . . . .25
Troubleshooting Tips . . . . . . . . . . . . .26
Limited Warranty . . . . . . . . . . . . . . . . .30
Accessories . . . . . . . . . . . . . . . . . . . . .31
Consumer Support . . . . . . . . . . . . . . .32
Owner's Manual
Español
Para consultar una version
en español de este manual
de instrucciones,visite sitio
de internet crosley.com.
Advertisement
Table of Contents

Related Manuals for Crosley XGBS400


Summary of Contents for Crosley XGBS400
-
Page 1: Table Of Contents
Single Oven Gas Ranges Owner’s Manual Models: XGBS400 /XGB635 Contents Safety Information....3 Care And Cleaning Oven......19 Using the Range Cooktop . - Page 2 America's iconic brand, backed by America's best appliance warranty! 10 Year Limited Warranty FREE on all Crosley Appliances! MANUFACTURER'S CROSLEY'S EXTENDED APPLIANCE COMPONENT LIMITED WARRANTY LIMITED WARRANTY Refrigerator or Compressor 1 Year Freezer Gearcase/ Top-Load Washer 1 Year Transmission Front-Load...
-
Page 3: Safety Information
IMPORTANT SAFETY INFORMATION READ ALL INSTRUCTIONS BEFORE USING THE APPLIANCE Read all safety instructions before using the product. Failure to follow these instructions may result WARNING in fire, electrical shock, serious injury or death. WARNING If the information in this manual is not followed exactly, a fire or explosion may result, causing property damage, personal injury or death. - Page 4 IMPORTANT SAFETY INFORMATION READ ALL INSTRUCTIONS BEFORE USING THE APPLIANCE WARNING GENERAL SAFETY INSTRUCTIONS ■ Do not leave children alone or unattended in an area where an appliance is in use. They should WARNING NEVER use this appliance never be allowed to climb, sit or stand on any part as a space heater to heat or warm the room.
- Page 5 IMPORTANT SAFETY INFORMATION READ ALL INSTRUCTIONS BEFORE USING THE APPLIANCE KEEP FLAMMABLE MATERIALS AWAY FROM THE RANGE WARNING Failure to do so may result in fire or personal injury. ■ Do not store or use flammable materials in an oven ■...
- Page 6 IMPORTANT SAFETY INFORMATION READ ALL INSTRUCTIONS BEFORE USING THE APPLIANCE WARNING OVEN SAFETY INSTRUCTIONS ■ Never place cooking utensils, pizza or baking stones, or any type of foil or liner on the oven floor. These WARNING NEVER cover any slots, items can trap heat or melt, resulting in damage to holes, or passages in the oven bottom or the product and risk of shock, smoke or fire.
- Page 7 IMPORTANT SAFETY INFORMATION READ ALL INSTRUCTIONS BEFORE USING THE APPLIANCE WARNING BROIL COMPARTMENT SAFETY INSTRUCTIONS ■ Do not leave paper products, plastics, canned food, ■ Use care when opening the compartment. Open or combustible materials in the compartment. They the compartment a crack, and let hot air or steam may ignite.
-
Page 8: In Case Of A Power Failure
In Case of a Power Failure In the event of a power failure, the oven is inoperable the surface burner cap, then slowly turn the knob to the and no attempt should be made to operate it. However, LITE position. Once lit, surface burners will continue to the surface burners may be lit with a match. - Page 9 Surface Burners (Cont.) Top-of-Range Cookware Aluminum: Medium-weight cookware is recommended Enamelware: Under some conditions, the enamel because it heats quickly and evenly. Most foods brown of some cookware may melt. Follow the cookware evenly in an aluminum skillet. Use saucepans with tight- manufacturer’s recommendations for cooking methods.
-
Page 10: Griddle (On Some Models)
Griddle (on some models) WARNING Fire Hazard ■ Use care when cooking greasy foods. Spilled grease may result in fire. ■ Never place any items on the griddle when it is not in use. Heat from surrounding burners can heat the griddle and may result in fire. - Page 11 Griddle (on some models) (Cont.) Using Your Nonstick Aluminum Griddle (on some models) Your griddle provides an extra-large cooking surface for Nonstick Aluminum Griddle meats, pancakes, and other foods usually prepared in Type of Food Cook Setting a skillet. Before first use, rinse with hot water and dry Bacon thoroughly.
-
Page 12: Oven Controls
Oven Controls Non Convection Convection 49-2000228 Rev. 0... -
Page 13: Oven Air Vents
Oven Controls (Cont.) 1. Convection Bake (on some models): 8. Timer: Works as a countdown timer. Press the Convection cooking uses increased air circulation Timer pad and the + and - pads to program the to improve performance when baking on multiple time in hours and minutes. -
Page 14: Special Features
Special Features There are several different special features on your range. To change the settings of these special features: ■ Press the Bake and Broil pads at the same time and hold for three seconds. ■ “SF” will appear in the display. ■... -
Page 15: Sabbath Mode
Sabbath Mode The Sabbath mode feature complies with standards set forth by Star K. Only continuous baking or timed baking is allowed in the Sabbath mode. All tones are disabled in the Sabbath mode; however the oven light is not disabled, so the light should be removed to ensure it does not come on when the door is opened. -
Page 16: Cooking Modes
Cooking Modes Your new oven has a variety of cooking modes to help you get the best results. These modes are described below. Refer to the Cooking Guide section for recommendations for specific foods. Remember, your new oven may perform differently than the oven it is replacing. -
Page 17: Oven Racks
Oven Racks Rack Positions Your oven has six rack positions in the main oven. Recommended rack positions for various types of foods are provided in the Cooking Guide. Adjusting the rack position is one way to impact cooking results. For example, if you would prefer darker tops on cakes, muffins or cookies, try moving food one rack position higher. -
Page 18: Cooking Guide
Cooking Guide RECOMMENDED RECOMMENDED FOOD TYPE MODE(S) RACK POSITION(S) ADDITIONAL SUGGESTIONS Baked Goods Layer cakes, sheet cakes, bundt cakes, muffins, quick Bake 4 or 5 Use shiny cookware. breads, biscuits, scones on a Single Rack Layer cakes* on Multiple Bake Ensure adequate airflow 3 and 5 Racks... -
Page 19: Oven
Oven Be sure all controls are off and all surfaces are cool before cleaning any part of the oven. Oven Interior The interior of your new oven can be cleaned manually Do not open the door during the 30 minute Steam Clean or by using the Steam Clean or Self Clean modes cycle as it will reduce the cleaning performance. -
Page 20: Cooktop
Cooktop Control Panel and Knobs Wipe the control panel after each use of the oven with To inquire about purchasing cleaning products including a damp cloth. For cleaning, use mild soap and water or stainless steel appliance cleaner or polish, read the a 50/50 solution of vinegar and water. - Page 21 Cooktop (Cont.) Cleaning the Surface Burners (Cont.) Cleaning the Burner Caps CAUTION Do not operate the cooktop without Wash burner caps in hot, soapy water and rinse with all burner parts and grates in place. clean water. You may scour with a plastic scouring pad Any spill on or around an electrode must be carefully to remove burned-on food particles.
- Page 22 Cooktop (Cont.) Burner Grates Manual Cleaning To self clean your grates on the oven bottom: Grates should be washed in hot, soapy water and 1. Remove all oven racks. rinsed with clean water or in the dishwasher. To soften 2. Gently place one grate on the center of the oven burned-on food, place grates in a solution containing bottom with the grate oriented in the upright position.
-
Page 23: Door And Drawer
Door and Drawer Cleaning the Oven Door Cleaning the Door Interior Stainless Steel Surfaces (on some models) Do not allow excess water to run into any holes or slots Do not use a steel wool pad; it will scratch the surface. in the door. -
Page 24: Oven Light
Oven Light SHOCK OR BURN HAZARD: Before replacing oven light bulb, disconnect the electrical power to the WARNING range at the main fuse or circuit breaker panel. Failure to do so may result in electric shock or burn. BURN HAZARD: The glass cover and bulb should be removed when cool. Touching hot glass with CAUTION bare hands or a damp cloth can cause burns. -
Page 25: Oven Door
Oven Door The door is very heavy. Be careful when removing and lifting the door. Do not lift the door by the handle. If improperly removed, oven door hinges may suddenly close and can cause personal injury to WARNING appendages near the hinge. Follow instructions below to avoid a risk of injury when removing and re-installing the oven door. -
Page 26: Troubleshooting Tips
Troubleshooting Tips ... Before you call for service Save time and money! Review the charts on the following pages first and you may not need to call for service. Problem Possible Cause What To Do My new oven doesn't Your new oven has a different cooking system For the first few uses, follow your recipe times cook like my old one. - Page 27 Troubleshooting Tips ... Before you call for service Problem Possible Cause What To Do Oven light does not Light bulb is loose or defective. Tighten or replace bulb. See the Maintenance section for work instructions on how to replace the bulb. Oven will not self-clean The temperature is too high to set a Allow the oven to cool.
- Page 28 Troubleshooting Tips ... Before you call for service Problem Possible Cause What To Do Top burners do not Improper burner assembly. Make sure the burner caps are seated correctly. See the Care and burn evenly Cleaning section. Burner slots on the side of the Remove the burners for cleaning.
- Page 29 Notes 49-2000228 Rev. 0...
-
Page 30: Limited Warranty
® Extended Warranty In addition to the warranty shown above, ask your dealer or visit us at Crosley.com/warranty regarding the Crosley 10-Year Extended Limited Warranty that comes to you at no extra charge. This warranty will cover your product after the initial manufacturer’s warranty expires up through 10 years. -
Page 31: Accessories
Accessories Looking For Something More? GE Appliances offers a variety of accessories to improve your cooking and maintenance experiences! Refer to the Consumer Support page for phone numbers and website information. The following products and more are available: Accessories Nickel Flat Rack Reinforced Nickel Flat Rack Self Clean Flat Rack Nickel Extension Rack... -
Page 32: Consumer Support
Consumer Support Crosley Website Have a question or need assistance with your appliance? Try the Crosley Website 24 hours a day, any day of the year at Crosley.com. You can also shop for more great Crosley products on our website.
Need help?
Do you have a question about the XGBS400 and is the answer not in the manual?
Questions and answers