Crosley XB258 Owner's Manual

Crosley XB258 Owner's Manual

Electric free-standing ranges
Hide thumbs Also See for XB258:

Advertisement

Quick Links

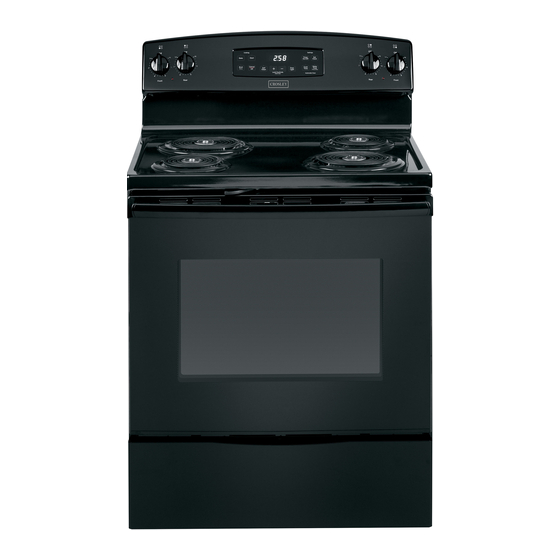
Electric Free-Standing Ranges
Model: XBS360/XB258/XB625
Contents
Safety Information . . . . . . . . . . . . . . . . .3
Using The Range
Surface Units . . . . . . . . . . . . . . . . . . . .8
Oven Controls . . . . . . . . . . . . . . . . . .12
Special Features . . . . . . . . . . . . . . . .14
Sabbath Mode - OU (Orthodox Union)
and CRC (Central Rabbinical
Congress) . . . . . . . . . . . . . . . . . . . . . .15
Oven Racks . . . . . . . . . . . . . . . . . . . .16
Cookware . . . . . . . . . . . . . . . . . . . . . .16
Cooking Modes . . . . . . . . . . . . . . . . .17
Cooking Guide . . . . . . . . . . . . . . . . . .18
Care And Cleaning
Oven Light . . . . . . . . . . . . . . . . . . . . .25
Oven Door . . . . . . . . . . . . . . . . . . . . .26
Storage Drawer . . . . . . . . . . . . . . . . .26
Write the model and serial numbers here:
Model # _______________________________
Serial # _______________________________
You can find the rating label on the front behind the
range drawer .
49-2001020 Rev . 1 12-21 GEA
Troubleshooting Tips . . . . . . . . . . . . .27
Limited Warranty . . . . . . . . . . . . . . . . .32
Accessories . . . . . . . . . . . . . . . . . . . . .33
Consumer Support . . . . . . . . . . . . . . .34
Owner's Manual
Español
Para consultar una version
en español de este manual
de instrucciones,visite sitio
de internet crosley.com .

Advertisement

Table of Contents
loading

Summary of Contents for Crosley XB258

  • Page 1: Table Of Contents

    Serial # _______________________________ You can find the rating label on the front behind the range drawer . Español Para consultar una version en español de este manual de instrucciones,visite sitio de internet crosley.com . 49-2001020 Rev . 1 12-21 GEA...
  • Page 2 America's iconic brand, backed by America's best appliance warranty! 10 Year Limited Warranty FREE on all Crosley Appliances! MANUFACTURER'S CROSLEY'S EXTENDED APPLIANCE COMPONENT LIMITED WARRANTY LIMITED WARRANTY Refrigerator or Compressor 1 Year Freezer Gearcase/ Top-Load Washer 1 Year Transmission Front-Load...
  • Page 3: Safety Information

    IMPORTANT SAFETY INFORMATION READ ALL INSTRUCTIONS BEFORE USING THE APPLIANCE Read all safety instructions before using the product . Failure to follow these instructions may result WARNING in fire, electrical shock, serious injury or death . ANTI-TIP DEVICE WARNING To reduce the risk of tipping the range, the range must be secured by a properly Tip-Over Hazard installed anti-tip bracket .
  • Page 4 IMPORTANT SAFETY INFORMATION READ ALL INSTRUCTIONS BEFORE USING THE APPLIANCE WARNING GENERAL SAFETY INSTRUCTIONS (Cont.) ■ Do not touch the surface units, the heating elements ■ Do not use any type of foil or liner to cover the or the interior surface of the oven . These surfaces oven bottom or anywhere in the oven, except as may be hot enough to burn even though they are described in this manual .
  • Page 5 IMPORTANT SAFETY INFORMATION READ ALL INSTRUCTIONS BEFORE USING THE APPLIANCE WARNING COOKTOP SAFETY INSTRUCTIONS ■ Never leave the surface units unattended with the ■ Only certain types of glass, glass/ceramic, cooktop ON above a Lo setting . Boilovers cause earthenware or other glazed containers are suitable smoking and greasy spillovers that may catch on fire . for cooktop service;...
  • Page 6 IMPORTANT SAFETY INFORMATION READ ALL INSTRUCTIONS BEFORE USING THE APPLIANCE WARNING RADIANT COOKTOP SAFETY INSTRUCTIONS ■ Use care when touching the cooktop. The glass ■ Use ceramic cooktop cleaner and non-scratch surface of the cooktop will retain heat after the cleaning pad to clean the cooktop . Wait until the controls have been turned off . cooktop cools and the indicator light goes out before cleaning .
  • Page 7 IMPORTANT SAFETY INFORMATION READ ALL INSTRUCTIONS BEFORE USING THE APPLIANCE WARNING SELF-CLEANING OVEN SAFETY INSTRUCTIONS The self-cleaning feature operates the oven at temperatures high enough to burn away food soils in the oven . Follow these instructions for safe operation . ■ Do not touch oven surfaces during self-clean ■ If the self-cleaning mode malfunctions, turn the operation .
  • Page 8: Surface Units

    Surface Units FIRE HAZARD: Never leave the range unattended with the cooktop ON above a Lo setting . Keep WARNING flammable items away from the cooktop . Turn off all controls when done cooking . Failure to follow these instructions can result in fire, serious injury or death . Throughout this manual, features and appearance may vary from your model .
  • Page 9 Surface Units (Cont.) Radiant Glass Cooktop The radiant cooktop features heating units beneath a smooth glass surface . NOTE: A slight odor is normal when a new cooktop is used for the first time . It is caused by the heating of new parts and insulating materials and will disappear in a short time .
  • Page 10 Surface Units (Cont.) Cookware for Radiant Glass Cooktops The following information will help you choose cookware which will give good performance on glass cooktops . NOTE: Follow all cookware manufacturer’s recommendations when using any type of cookware on the ceramic cooktop . Recommended Avoid/Not Recommended Stainless Steel...
  • Page 11 Surface Units (Cont.) More about Cookware ■ Place only dry pans on the surface elements. Do not place lids on the surface elements, particularly wet lids . Wet pans and lids may stick to smooth surface when cool . ■ Do not use woks that have support rings. This type of Check pans for flat bottoms by wok will not heat on the cooktop . using a straight edge .
  • Page 12: Oven Controls

    Oven Controls Throughout this manual, features and appearance may vary from your model. 1. Traditional Cooking Modes: 8. Delay Time: Your oven has Delays when the oven will turn on . the following traditional cooking modes: Bake and Use this to set a time when you want the oven to start . Broil Hi/Lo .
  • Page 13 Oven Controls (Cont.) Oven Temperature Knob (on some models) OVEN TEMP Turn the OVEN TEMP knob to the setting you want . ■ P reheat the oven for 10 minutes for baking. ■ F or models that do not have the self clean feature the oven heating light comes on when the burner is on . It will cycle on and off during cooking .
  • Page 14: Special Features

    Special Features There are several different special features on your range . To change the settings of these special features, press the Bake and Broil pads at the same time and hold for three seconds . (SF) will appear in the display . Select the feature you want to change .
  • Page 15: Congress)

    Sabbath Mode - OU (Orthodox Union) and CRC (Central Rabbinical Congress) This range offers an OU and CRC Sabbath mode that Menu Options Schedule Details complies with standards set forth by Orthodox Union, the SAb (default) 24 hr + 1 hr Sabbath Warm Central Rabbinical Congress, and Halacha Tech, and is 100% certified to the highest halacha standards .
  • Page 16: Oven Racks

    Oven Racks Recommended rack positions for various types of foods are provided in the Cooking Guide . Adjusting rack position is one way to impact cooking results . For example, if you would prefer darker tops on cakes, muffins, or cookies, try moving food one rack position higher .
  • Page 17: Cooking Modes

    Cooking Modes Your new oven has a variety of cooking modes to help you get the best results . These modes are described below . Refer to the Cooking Guide section for recommendations for specific foods . Remember, your new oven may perform differently than the oven it is replacing .
  • Page 18: Cooking Guide

    Cooking Guide RECOMMENDED RECOMMENDED FOOD TYPE MODE(S) RACK POSITION(S) ADDITIONAL SUGGESTIONS Baked Goods Layer Cakes, sheet cakes, bundt cakes, muffins, quick breads on Bake Use shiny cookware . a Single Rack Ensure adequate airflow Layer cakes* on Multiple Racks Bake 2 and 4 (see illustration below) .
  • Page 19: Cleaning The Range - Exterior

    Cleaning the Range – Exterior WARNING Be sure all controls are off and all surfaces are cool before cleaning any part of the range . Tip-Over Hazard If your range is removed for cleaning, servicing or any reason, be sure the anti- WARNING A child or adult can tip the range and be killed.
  • Page 20 Cleaning the Range – Exterior (Cont.) Porcelain Enamel Cooktop The porcelain enamel finish is sturdy but breakable if For other spills such as fat spatterings, wash with soap misused . This finish is acid-resistant . However, any and water or cleansing powders after the surface has acidic foods spilled (such as fruit juices, tomato or cooled .
  • Page 21 Cleaning the Range – Exterior (Cont.) Drip Pans Remove the surface units . Then lift out the drip pans . NOTE: If your cooktop is equipped with shiny, silver- colored drip pans, do not clean them in the self-cleaning For best results, clean the drip pans by hand . Place oven .
  • Page 22: Cleaning The Range - Interior

    Cleaning The Oven - Interior The interior of your new oven can be cleaned manually or by using Self Clean . Spillage of marinades, fruit juices, tomato sauces and basting liquids containing acids may cause discoloration and should be wiped up immediately . Let hot surfaces cool, then clean and rinse . Manual Cleaning Do not use oven cleaners (unless certified for self- soap and water or vinegar and water solution .
  • Page 23: Cleaning The Glass Cooktop

    Cleaning the Glass Cooktop Normal Daily Use Cleaning ONLY use ceramic cooktop cleaner on the glass NOTE: It is very important that you DO NOT heat the cooktop . Other creams may not be as effective . cooktop until it has been cleaned thoroughly . To maintain and protect the surface of your glass cooktop, follow these steps: 1 .
  • Page 24 Cleaning the Glass Cooktop (Cont.) Metal Marks and Scratches 1 . Be careful not to slide pots and pans across your This should be removed immediately before heating cooktop . It will leave metal markings on the cooktop again or the discoloration may be permanent . surface .
  • Page 25: Oven Light

    Oven Light SHOCK OR BURN HAZARD: Before replacing oven light bulb, disconnect the electrical power to the WARNING range at the main fuse or circuit breaker panel . Failure to do so may result in electric shock or burn . BURN HAZARD: The glass cover and bulb should be removed when cool .
  • Page 26: Oven Door

    Oven Door The door is very heavy . Be careful when removing and lifting the door . Do not lift door by the handle . If improperly removed, oven door hinges may suddenly open and can cause personal injury to WARNING appendages near the hinge .
  • Page 27: Troubleshooting Tips

    Troubleshooting Tips ... Before you call for service Save time and money! Review the charts on the following pages first and you may not need to call for service . Check out self-help videos and FAQ at GEAppliances.com/support. Problem Possible Cause What To Do Surface units will not Improper cookware being used .
  • Page 28 Troubleshooting Tips ... Before you call for service Problem Possible Cause What To Do Food does not Oven controls improperly set . See the Cooking Modes section . bake properly Rack position is incorrect or rack is not level . See the Cooking Modes section and Cooking Guide .
  • Page 29 Troubleshooting Tips ... Before you call for service Problem Possible Cause What To Do Oven light does not work Light bulb is loose or defective . Tighten or replace bulb . Pad operating light is broken . Call for service . Oven will not self-clean The temperature is too high to set a Allow the oven to cool and reset the controls .
  • Page 30 Troubleshooting Tips ... Before you call for service Problem Possible Cause What To Do Sometimes the oven Cookware or food in oven . The cookware or food in the oven will cause the takes longer to preheat oven to take longer to preheat . Remove items to to the same temperature reduce preheat time .
  • Page 31 Notes 49-2001020 Rev. 1...
  • Page 32: Limited Warranty

    Your appliance is covered by a limited warranty, as listed below, by GE Appliances . All warranty service is provided by our GE Appliances Factory Service Centers, or an authorized service technician . To schedule service, call Crosley at 800 .544 .4780 . Please have your serial number and your model number available when calling for service .
  • Page 33: Accessories

    Accessories Looking For Something More? GE Appliances offers a variety of accessories to improve your cooking and maintenance experiences! Refer to the Consumer Support page for phone numbers and website information . The following products and more are available: Accessories Small Broiler Pan (8 ¾”...
  • Page 34: Consumer Support

    Consumer Support Crosley Website Have a question or need assistance with your appliance? Try the Crosley Website 24 hours a day, any day of the year at Crosley.com . You can also shop for more great Crosley products on our website.

Table of Contents